版权声明:本文为博主原创文章,未经博主允许不得转载。 https://blog.csdn.net/qq_25582683/article/details/82895537
Springboot admin 很好的提供了对Springboot的监控,但是不建议直接将admin整合到已有的项目中。于是我另起一个项目,考虑到不能让所有人都能看到这些数据了,于是引入了spring security。
本次使用的是spring-boot-admin-server:2.0.3
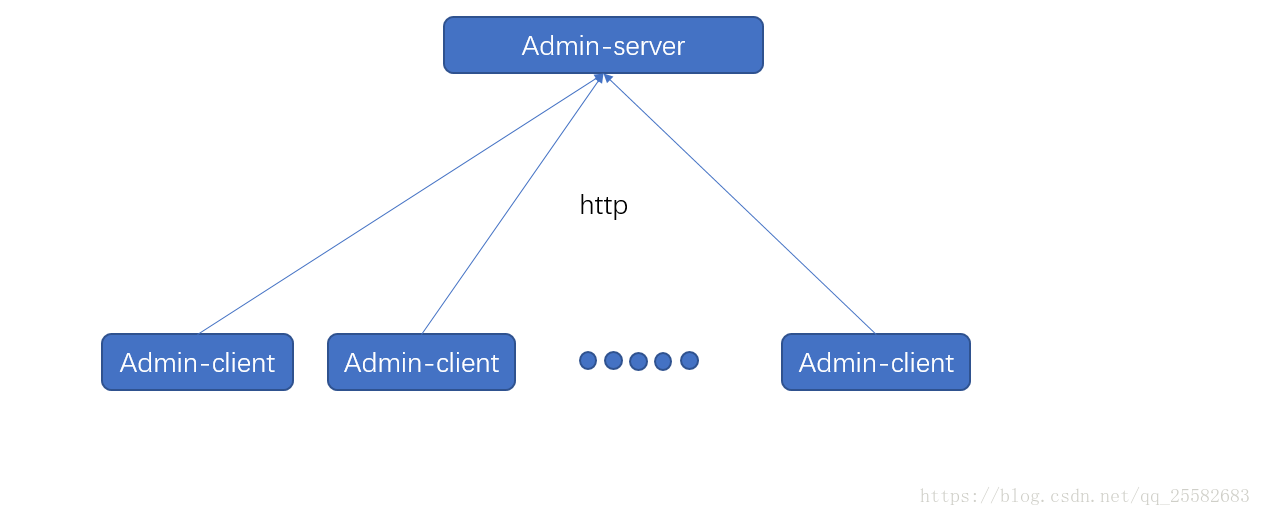
server 和 clent 的关系,client通过http注册到server中,当然也可以使用服务注册发现Spring Cloud(Eureka、Consul等等)注册到admin server中进行展示
一、springboot admin 服务端
创建一个Springboot工程
添加依赖,
<properties>
        ...
	<spring-boot-admin.version>2.0.3</spring-boot-admin.version>
</properties>
<!-- https://mvnrepository.com/artifact/de.codecentric/spring-boot-admin-server -->
<dependency>
	<groupId>de.codecentric</groupId>
	<artifactId>spring-boot-admin-server</artifactId>
	<version>${spring-boot-admin.version}</version>
</dependency>
<!-- https://mvnrepository.com/artifact/de.codecentric/spring-boot-admin-server-ui -->
<dependency>
	<groupId>de.codecentric</groupId>
	<artifactId>spring-boot-admin-server-ui</artifactId>
	<version>${spring-boot-admin.version}</version>
</dependency>
<!-- security 权限 -->
<dependency>
	<groupId>org.springframework.boot</groupId>
	<artifactId>spring-boot-starter-security</artifactId>
</dependency>
在启动器里开启amdinserver
package com.example.admin;

import de.codecentric.boot.admin.server.config.EnableAdminServer;
import org.springframework.boot.SpringApplication;
import org.springframework.boot.autoconfigure.SpringBootApplication;

@SpringBootApplication
@EnableAdminServer
public class AdminApplication {

	public static void main(String[] args) {
		SpringApplication.run(AdminApplication.class, args);
	}
}
- @EnableAdminServer 开启adminserver
添加权限(参考文档:http://codecentric.github.io/spring-boot-admin/2.0.3/#securing-spring-boot-admin)
@Configuration
public class SecuritySecureConfig extends WebSecurityConfigurerAdapter {
    private final String adminContextPath;

    public SecuritySecureConfig(AdminServerProperties adminServerProperties) {
        this.adminContextPath = adminServerProperties.getContextPath();
    }

    @Override
    protected void configure(HttpSecurity http) throws Exception {
        // @formatter:off
        SavedRequestAwareAuthenticationSuccessHandler successHandler = new SavedRequestAwareAuthenticationSuccessHandler();
        successHandler.setTargetUrlParameter("redirectTo");
        successHandler.setDefaultTargetUrl(adminContextPath + "/monitor");

        http.authorizeRequests()
                .antMatchers(adminContextPath + "/assets/**").permitAll()
                .antMatchers(adminContextPath + "/login").permitAll()
                .anyRequest().authenticated()
                .and()
                .formLogin().loginPage(adminContextPath + "/login").successHandler(successHandler).and()
                .logout().logoutUrl(adminContextPath + "/logout").and()
                .httpBasic().and()
                .csrf()
                .csrfTokenRepository(CookieCsrfTokenRepository.withHttpOnlyFalse())
                .ignoringAntMatchers(
                        adminContextPath + "/instances",
                        adminContextPath + "/actuator/**"
                );
        // @formatter:on
    }
}
配置application.yml
server:
  port: 8500

spring:
  boot:
    admin:
      context-path: monitor # 项目名称,当然也可以不填啦
创建默认用户,这里只是简单的新增了一个root用户,其他操作建议去spring.io官网查看具体的文档
@EnableWebSecurity
public class WebSecurityConfig implements WebMvcConfigurer {

    @Bean
    public UserDetailsService userDetailsService() throws Exception {
        InMemoryUserDetailsManager manager = new InMemoryUserDetailsManager();
        manager.createUser(User.withDefaultPasswordEncoder().username("root").password("root").roles("administrator").build());
        return manager;
    }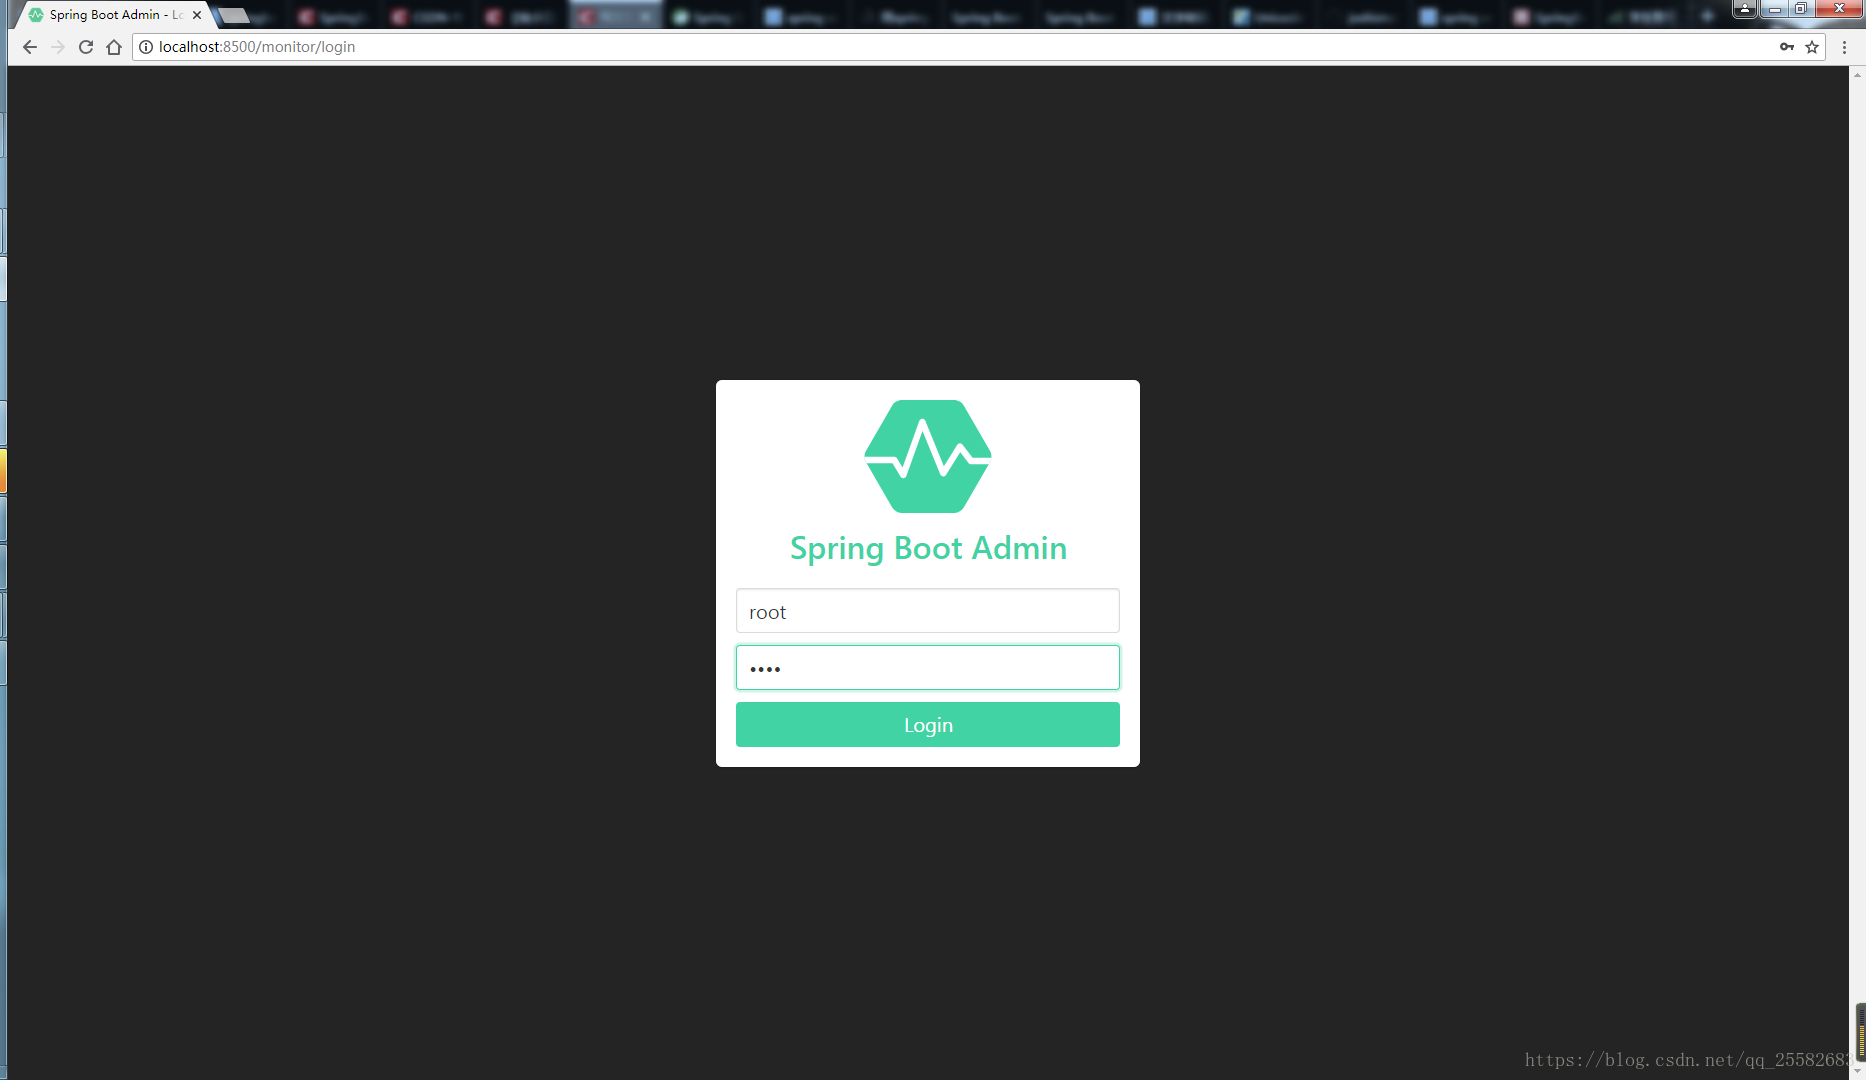
}启动访问(http://localhost:8500/monitor )
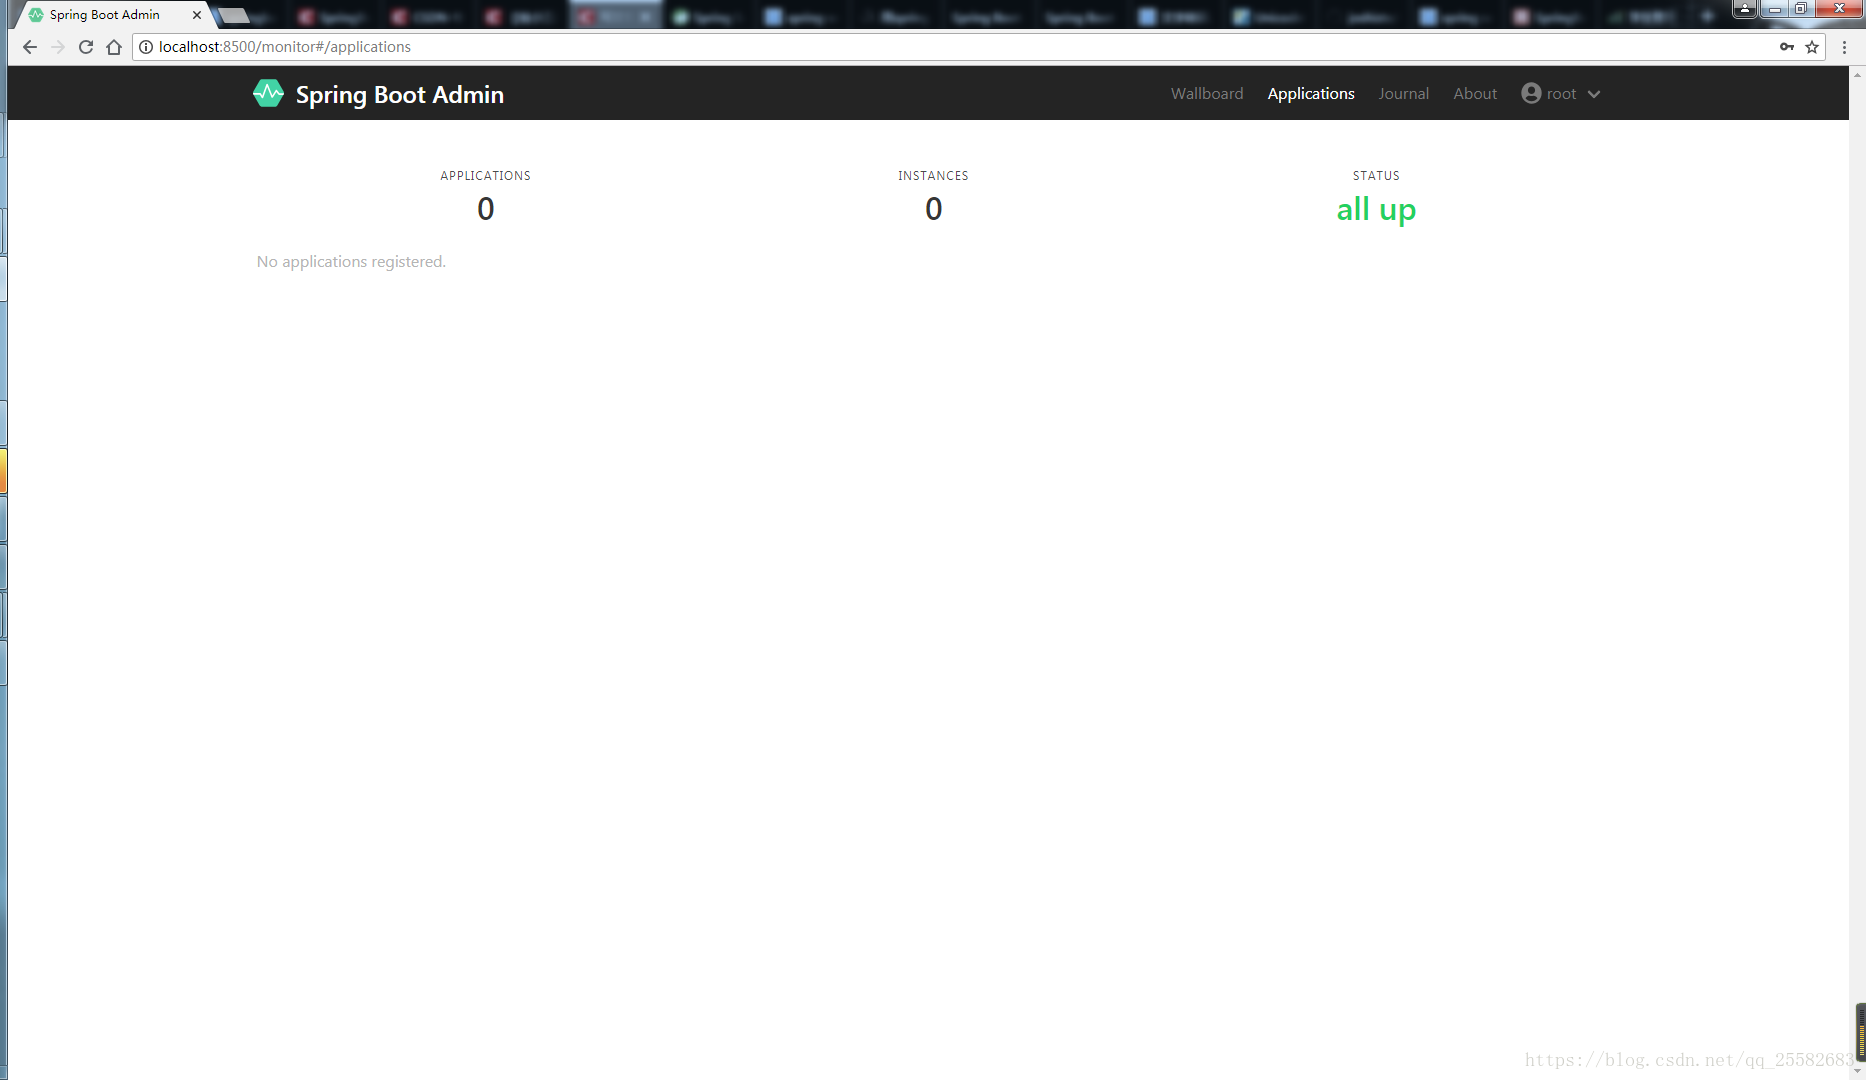
成功访问,但是还没有client注册进来,接着开整client
二、springboot admin 客户端(client)
引入依赖
<!-- https://mvnrepository.com/artifact/de.codecentric/spring-boot-admin-starter-client -->
<dependency>
	<groupId>de.codecentric</groupId>
	<artifactId>spring-boot-admin-starter-client</artifactId>
	<version>2.0.3</version>
</dependency>
配置文件application.yml
server:
port: 8501
servlet:
context-path: /clent1
spring:
boot:
admin:
client:
url: http://localhost:8500/monitor # server服务端的地址
username: root
password: root
instance:
service-base-url: http://localhost:8501 # 本项目的地址
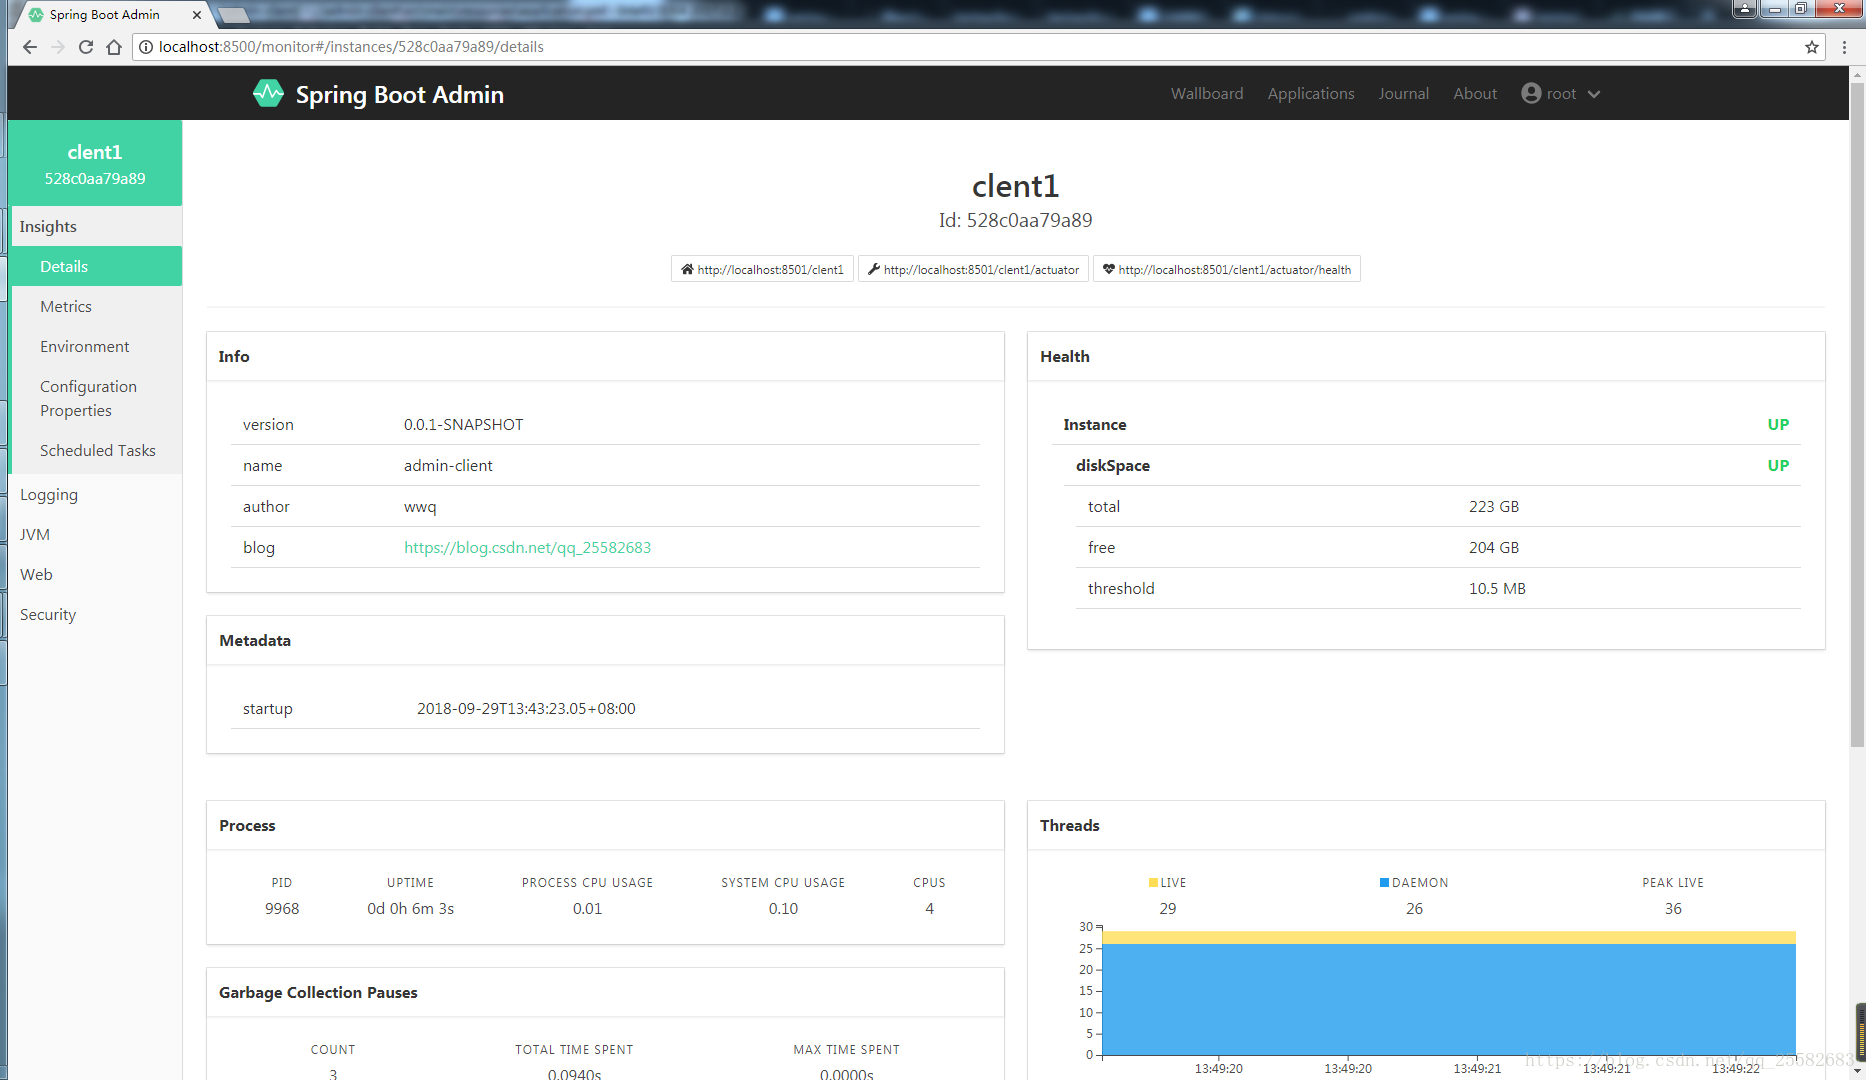
name: clent1
management:
endpoints:
web:
exposure:
include: "*"
endpoint:
health:
show-details: ALWAYS
info:
version: @project.version@
name: @project.artifactId@
author: wwq
blog: https://blog.csdn.net/qq_25582683启动client
结束,最后附上demo:demo