版权声明:本文为博主原创文章,遵循 CC 4.0 BY-SA 版权协议,转载请附上原文出处链接和本声明。
scrapy的安装
不得姐网站
直接用命令
pip install scrapy
网络可能较慢,等等就好
另外windows环境下你还需要安装win32
我之前就是因为没有安装这个库,白忙活了一天,一直都是报错状态
pip install pypiwin32
scrapy的使用
cd到卓面或者其他看的到的文件夹
一行一行输入命令即可
1、scrapy startproject qsbk

2、scrapy genspider bdj_spider budejie.com

3、scrapy crawl bdj_spider

解释
1、scrapy startproject 项目名

2、scrapy genspider 爬虫名 网址(不加www)

3、爬虫名
修改爬虫里面的parse函数,改为自己想要的效果即可
以上为例
bdj_spider.py是最重要的文件,在里面修改parse即可获得自己想要的
这是获取百思不得姐第一页用户名的代码
# -*- coding: utf-8 -*-
import scrapy
from scrapy.http.response.html import HtmlResponse
from scrapy.selector.unified import SelectorList

class BdjSpiderSpider(scrapy.Spider):
    name = 'bdj_spider'
    allowed_domains = ['budejie.com']
    start_urls = ['http://budejie.com/']

    def parse(self, response):

        print('='*100)
        print('='*100)
        print('='*100)
        words = response.xpath("//div[@class='j-list-user']/div")
        for word in words:
            author=word.xpath(".//a/text()").get()
            print(author)
        print('='*100)
        print('='*100)
        print('='*100)
        print('='*100)
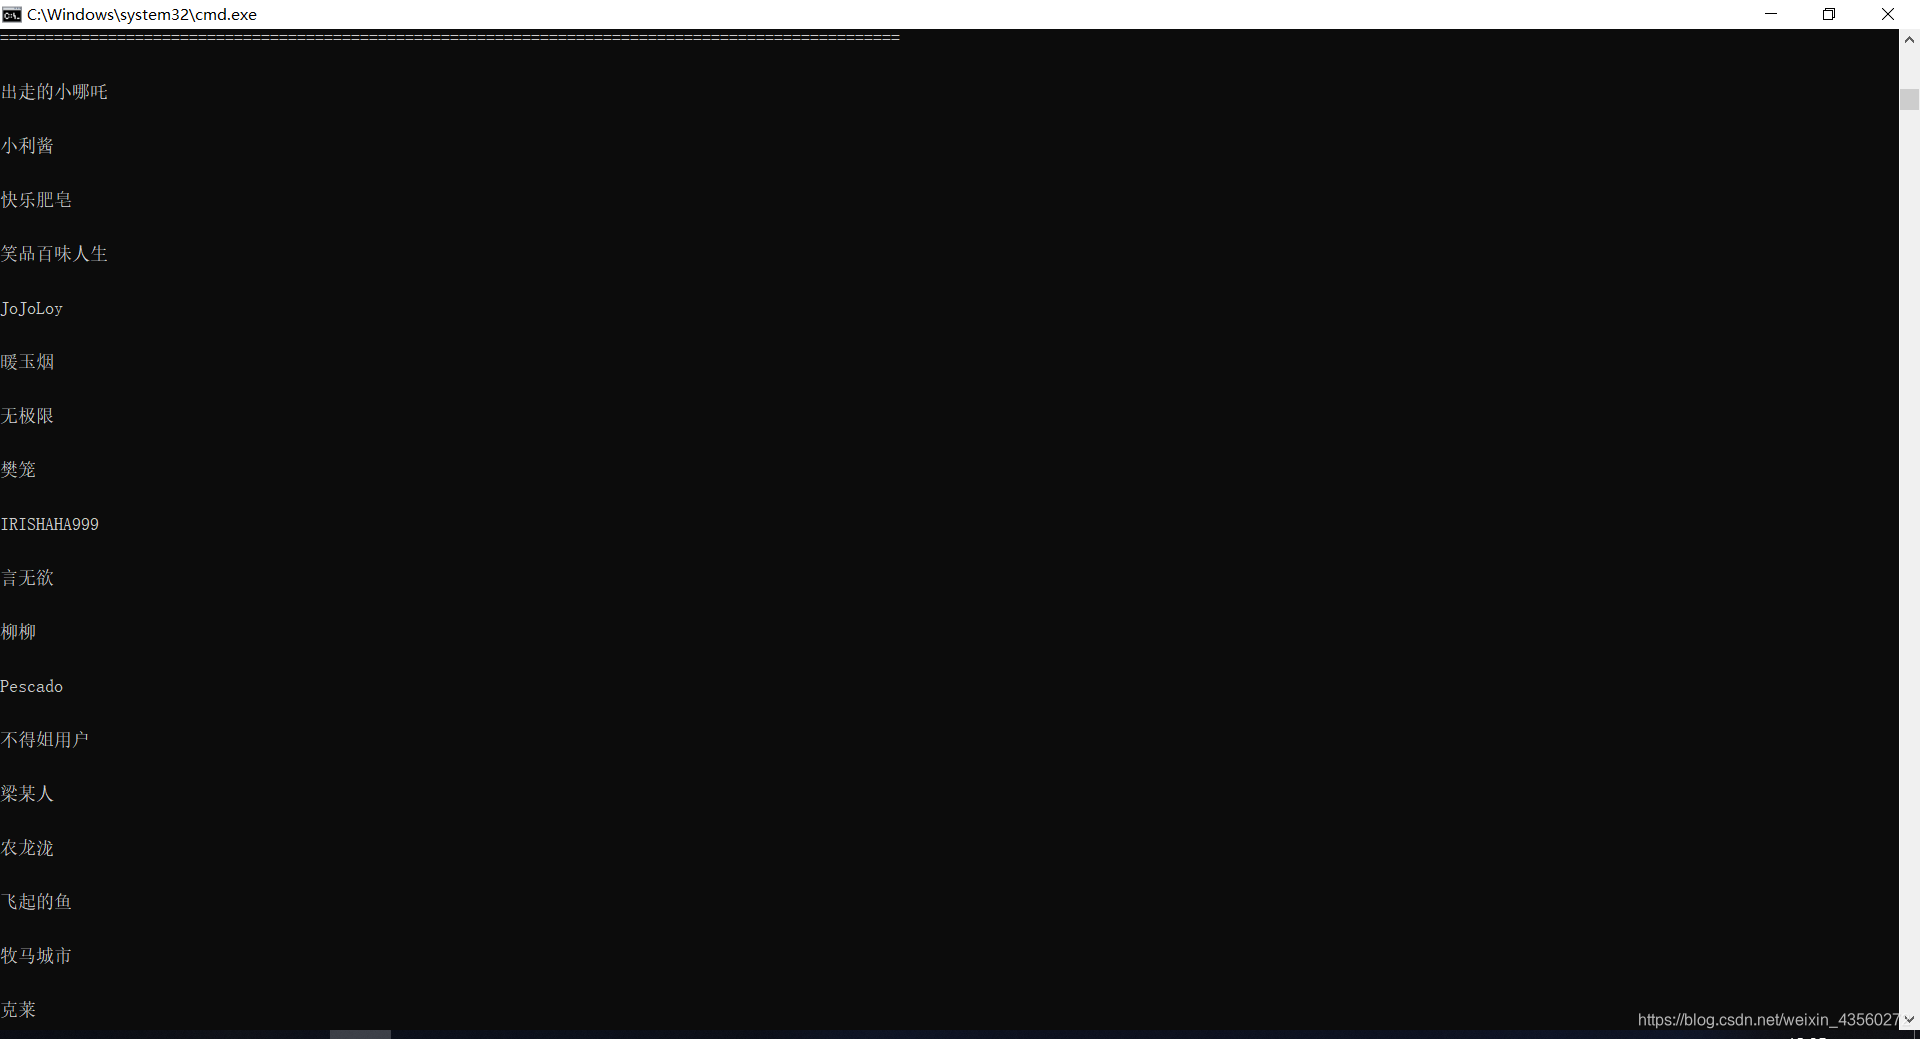
加等号的目的是更容易看出筛选的内容

进阶
将爬取的文件存储在文件夹里
我遇到个巨大的坑。浪费我好长时间,都怪自己当时教程没看明白,反反复复的找错
需要在上文修改的文件
1、
bdj_spider.py
# -*- coding: utf-8 -*-
import scrapy
from scrapy.http.response.html import HtmlResponse
from scrapy.selector.unified import SelectorList

class BdjSpiderSpider(scrapy.Spider):
    name = 'bdj_spider'
    allowed_domains = ['budejie.com']
    start_urls = ['http://budejie.com/']

    def parse(self, response):

        print('='*100)
        print('='*100)
        print('='*100)
        words = response.xpath("//div[@class='j-r-list-c']/div")
        for word in words:
            author=word.xpath(".//a/text()").get()
            author="".join(author).strip()

            duanzi = {"author":author}
            print(duanzi)

            yield duanzi
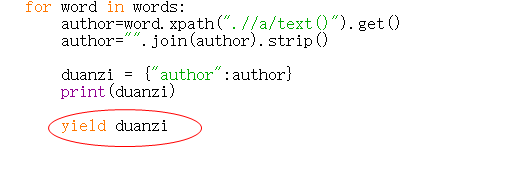
切记这个yield后面必须有返回的值还必须有缩进一定要是for下面的,否则下面的process_item函数根本不会调用
setting里面改了也没有用
2、
pipelines.py
# -*- coding: utf-8 -*-

# Define your item pipelines here
#
# Don't forget to add your pipeline to the ITEM_PIPELINES setting
# See: https://docs.scrapy.org/en/latest/topics/item-pipeline.html
import json

class BdjPipeline(object):
    def __init__(self):
        self.fp = open("duanzi.json","w",encoding='utf-8')
        self.fp.write("Hello")


    def open_spider(self,spider):
        print('爬虫开始了哈哈哈哈。。。。。')

    def process_item(self,item,spider):
        item_json = json.dumps(item,ensure_ascii=False)
        print("###"*100)
        print(item_json)
        self.fp.write(item_json+'\n')
        return item

    def close_spider(self,spider):
        self.fp.close()
        print('爬虫结束了哈哈哈哈。。。。。')
3、
settings.py
把这个解开注释即可,或者复制以下代码覆盖文件
# -*- coding: utf-8 -*-
# Scrapy settings for bdj project
#
# For simplicity, this file contains only settings considered important or
# commonly used. You can find more settings consulting the documentation:
#
# https://docs.scrapy.org/en/latest/topics/settings.html
# https://docs.scrapy.org/en/latest/topics/downloader-middleware.html
# https://docs.scrapy.org/en/latest/topics/spider-middleware.html
BOT_NAME = 'bdj'
SPIDER_MODULES = ['bdj.spiders']
NEWSPIDER_MODULE = 'bdj.spiders'
# Crawl responsibly by identifying yourself (and your website) on the user-agent
#USER_AGENT = 'bdj (+http://www.yourdomain.com)'
# Obey robots.txt rules
ROBOTSTXT_OBEY = False
# Configure maximum concurrent requests performed by Scrapy (default: 16)
#CONCURRENT_REQUESTS = 32
# Configure a delay for requests for the same website (default: 0)
# See https://docs.scrapy.org/en/latest/topics/settings.html#download-delay
# See also autothrottle settings and docs
#DOWNLOAD_DELAY = 3
# The download delay setting will honor only one of:
#CONCURRENT_REQUESTS_PER_DOMAIN = 16
#CONCURRENT_REQUESTS_PER_IP = 16
# Disable cookies (enabled by default)
#COOKIES_ENABLED = False
# Disable Telnet Console (enabled by default)
#TELNETCONSOLE_ENABLED = False
# Override the default request headers:
#DEFAULT_REQUEST_HEADERS = {
# 'Accept': 'text/html,application/xhtml+xml,application/xml;q=0.9,*/*;q=0.8',
# 'Accept-Language': 'en',
#}
# Enable or disable spider middlewares
# See https://docs.scrapy.org/en/latest/topics/spider-middleware.html
#SPIDER_MIDDLEWARES = {
# 'bdj.middlewares.BdjSpiderMiddleware': 543,
#}
# Enable or disable downloader middlewares
# See https://docs.scrapy.org/en/latest/topics/downloader-middleware.html
#DOWNLOADER_MIDDLEWARES = {
# 'bdj.middlewares.BdjDownloaderMiddleware': 543,
#}
# Enable or disable extensions
# See https://docs.scrapy.org/en/latest/topics/extensions.html
#EXTENSIONS = {
# 'scrapy.extensions.telnet.TelnetConsole': None,
#}
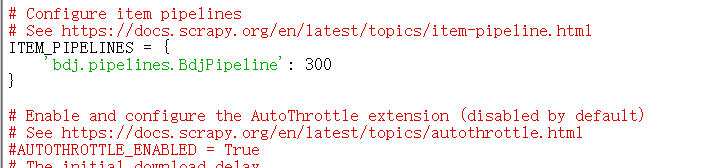
# Configure item pipelines
# See https://docs.scrapy.org/en/latest/topics/item-pipeline.html
ITEM_PIPELINES = {
'bdj.pipelines.BdjPipeline': 300
}
# Enable and configure the AutoThrottle extension (disabled by default)
# See https://docs.scrapy.org/en/latest/topics/autothrottle.html
#AUTOTHROTTLE_ENABLED = True
# The initial download delay
#AUTOTHROTTLE_START_DELAY = 5
# The maximum download delay to be set in case of high latencies
#AUTOTHROTTLE_MAX_DELAY = 60
# The average number of requests Scrapy should be sending in parallel to
# each remote server
#AUTOTHROTTLE_TARGET_CONCURRENCY = 1.0
# Enable showing throttling stats for every response received:
#AUTOTHROTTLE_DEBUG = False
# Enable and configure HTTP caching (disabled by default)
# See https://docs.scrapy.org/en/latest/topics/downloader-middleware.html#httpcache-middleware-settings
#HTTPCACHE_ENABLED = True
#HTTPCACHE_EXPIRATION_SECS = 0
#HTTPCACHE_DIR = 'httpcache'
#HTTPCACHE_IGNORE_HTTP_CODES = []
#HTTPCACHE_STORAGE = 'scrapy.extensions.httpcache.FilesystemCacheStorage'
那么看看爬到的数据吧
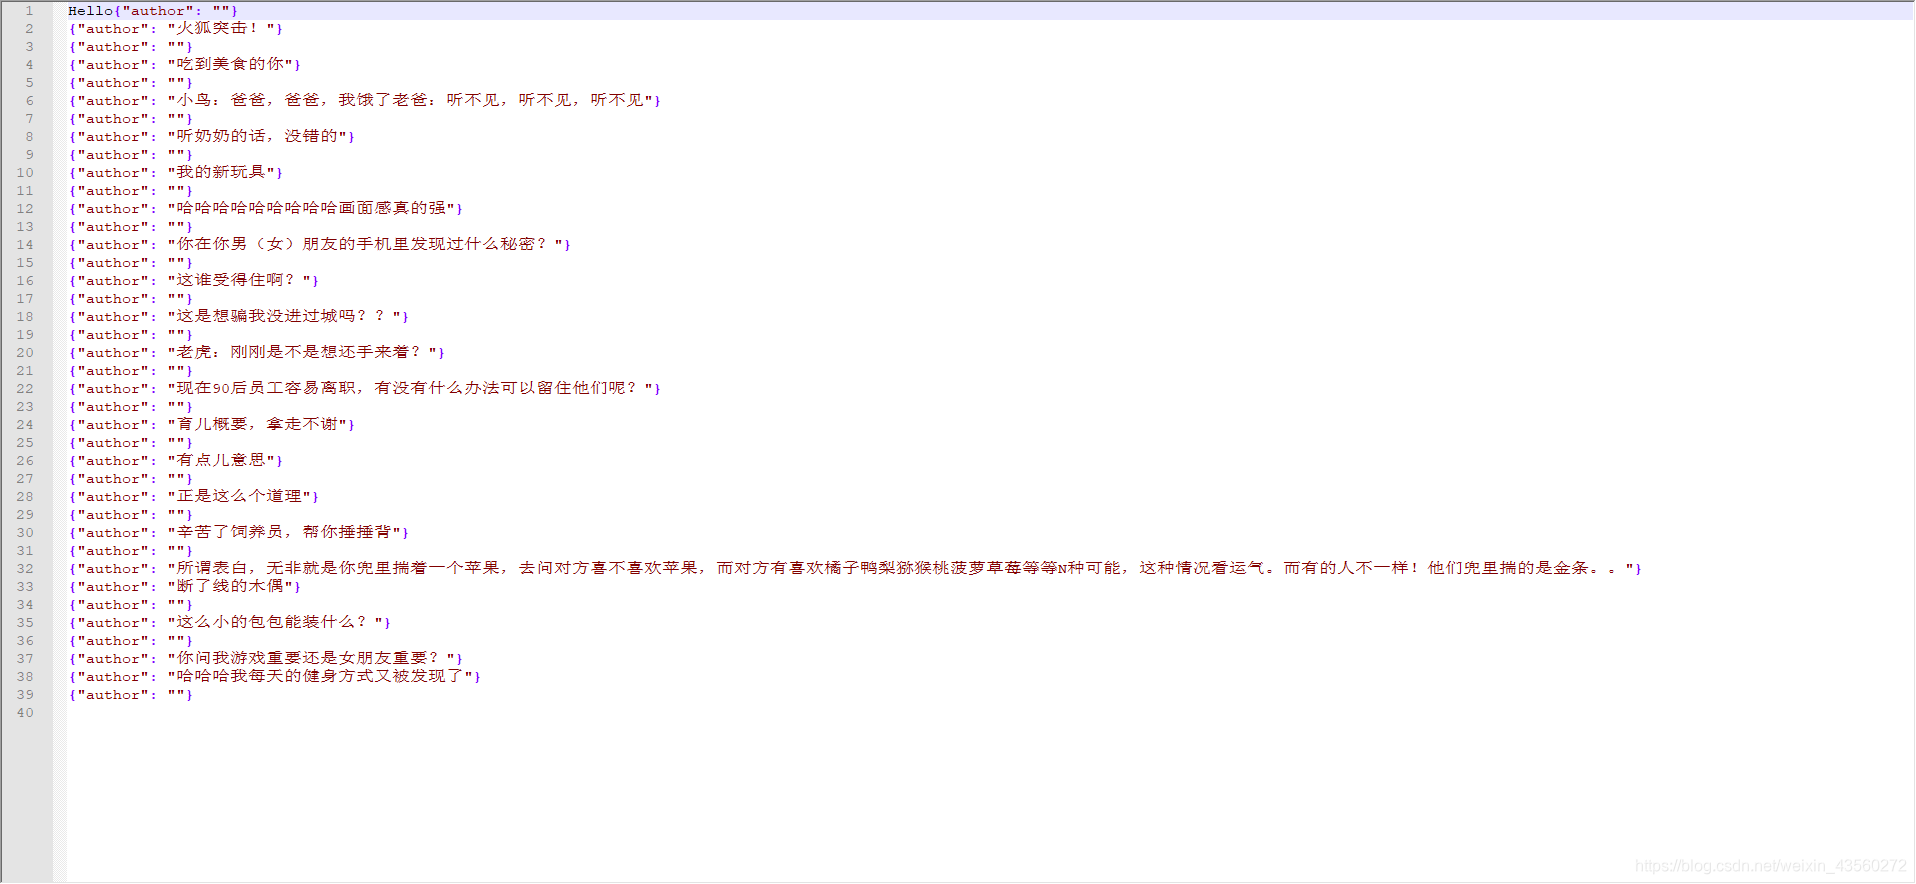
成功