一、了解EasyUI与BootStrap、LayUI的区别
1.EasyUI和LayUI对比
easyui是功能强大但是有很多的组件使用功能是十分强大的,而layui是2016年才出来的前端框架,现在才更新到2.x版本还有很多的功能没有完善,也还存在一些不稳定的情况,但是layui界面简约美观,而且容易上手而且有很多组件在layui的社区里都可以找到
2.LayUI与BootStrap对比
layui是国人开发的一套框架,2016年出来的,现在已更新到2.X版本了。比较新,轻量级,样式简单好看。
bootstrap 相对来说是比较成熟的一个框架,现在已经更新到4.X版本。是一个很成熟的框架,这个大部分人一般都用过。
LayUI其实更偏向与后端开发人员使用,在服务端页面上有非常好的效果
做后台框架。
BootStrap 在前端响应式方面做得很好,PC端和移动端表现都不错。
做网站不错。
那么我们这里为什么要讲EasyUI的用法呢?
原因有三
1.easyui功能相对强大,几乎可以满足你开发中所有的需求
2.easyui发展比较成熟比较稳定,适合在学习中来用
3.easyui是免费的
接下来看几个EasyUI的案例~
二、layout布局
1.创建布局
(1) 通过标签创建布局
为<div/>标签增加名为'easyui-layout'的类ID。
- <div id="cc" class="easyui-layout" style="width:600px;height:400px;">
- <div data-options="region:'north',title:'North Title',split:true" style="height:100px;"></div>
- <div data-options="region:'south',title:'South Title',split:true" style="height:100px;"></div>
- <div data-options="region:'east',iconCls:'icon-reload',title:'East',split:true" style="width:100px;"></div>
- <div data-options="region:'west',title:'West',split:true" style="width:100px;"></div>
- <div data-options="region:'center',title:'center title'" style="padding:5px;background:#eee;"></div>
- </div>
(2) 使用完整页面创建布局
- <body class="easyui-layout">
- <div data-options="region:'north',title:'North Title',split:true" style="height:100px;"></div>
- <div data-options="region:'south',title:'South Title',split:true" style="height:100px;"></div>
- <div data-options="region:'east',iconCls:'icon-reload',title:'East',split:true" style="width:100px;"></div>
- <div data-options="region:'west',title:'West',split:true" style="width:100px;"></div>
- <div data-options="region:'center',title:'center title'" style="padding:5px;background:#eee;"></div>
- </body>
(3) 创建嵌套布局
注意:嵌套在内部的布局面板的左侧(西面)面板是折叠的。
- <body class="easyui-layout">
- <div data-options="region:'north'" style="height:100px"></div>
- <div data-options="region:'center'">
- <div class="easyui-layout" data-options="fit:true">
- <div data-options="region:'west',collapsed:true" style="width:180px"></div>
- <div data-options="region:'center'"></div>
- </div>
- </div>
- </body>
(4)通过ajax读取内容
布局是以面板为基础创建的。所有的布局面板都支持异步加载URL内容。使用异步加载技术,用户可以使自己的布局页面显示的内容更多更快。
- <body class="easyui-layout">
- <div data-options="region:'west',href:'west_content.php'" style="width:180px" ></div>
- <div data-options="region:'center',href:'center_content.php'" ></div>
- </body>
三、树形组件

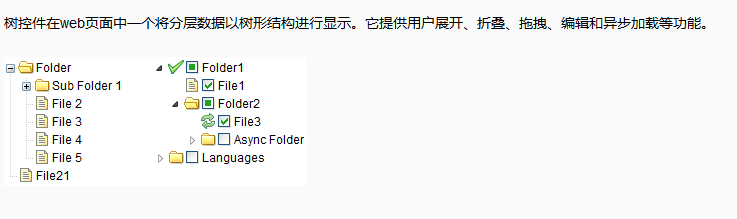
树控件可以定义在一个空<ul>元素中并使用Javascript加载数据。
- <ul id="tt"></ul>
- $('#tt').tree({
- url:'tree_data.json'
- });
但是自定义表格的数据不符合easyUI属性展示的数据格式,需要转换成easyUI所能识别的格式
所以接下来的方法就至关重要了
- /**
- *
- * @param map : req.getParameterMap
- *
- * @param pageBean 分页
- *
- * @return
- * @throws SQLException
- * @throws IllegalAccessException
- * @throws InstantiationException
- */
- public List<TreeNode> list(Map<String, String[]> map, PageBean pageBean)
- throws InstantiationException, IllegalAccessException, SQLException {
- List<Map<String, Object>> listMenu= this.listMenu(map, pageBean);
- List<TreeNode> treeNodeList=new ArrayList<>();
- menuList2TreeNodeList(listMenu, treeNodeList);
- return treeNodeList;
- }
- /**
- * 查询menu表 的数据
- *
- * @param map
- * @param pageBean
- * @return
- * @throws SQLException
- * @throws IllegalAccessException
- * @throws InstantiationException
- */
- public List<Map<String, Object>> listMenu(Map<String, String[]> map, PageBean pageBean)
- throws InstantiationException, IllegalAccessException, SQLException {
- String sql = "select * from t_easyui_menu where true ";
- String id = JsonUtils.getParamVal(map, "id");
- if (StringUtils.isNotBlank(id)) {
- sql = sql + " and parentid=" + id;
- } else {
- sql = sql + " and parentid=-1";
- }
- return super.executeQuery(sql, pageBean);
- }
- /**
- * {menuid:1}
- * ->{id:1}
- * menu表的数据不符合easyUI属性展示的数据格式
- * 需要转换成easyUI所能识别的格式
- * @param map
- * @param treeNode
- * @throws SQLException
- * @throws IllegalAccessException
- * @throws InstantiationException
- */
- public void menu2TreeNode(Map<String, Object> map,TreeNode treeNode)
- throws InstantiationException, IllegalAccessException, SQLException {
- treeNode.setId(map.get("Menuid").toString());
- treeNode.setText(map.get("Menuname").toString());
- treeNode.setAttributes(map);
- Map<String, String[]> jspMap=new HashMap<>();
- //当前节点的id
- jspMap.put("id", new String [] {treeNode.getId()});
- List<Map<String, Object>> listMenu= this.listMenu(jspMap, null);
- List<TreeNode> treeNodeList=new ArrayList<>();
- menuList2TreeNodeList(listMenu, treeNodeList);
- treeNode.setChildren(treeNodeList);
- }
- /**
- *
- * @param mapList
- * @param treeNodeList
- * @throws SQLException
- * @throws IllegalAccessException
- * @throws InstantiationException
- */
- public void menuList2TreeNodeList(List<Map<String, Object>> mapList,List<TreeNode> treeNodeList)
- throws InstantiationException, IllegalAccessException, SQLException {
- TreeNode treeNode=null;
- for (Map<String, Object> map : mapList) {
- treeNode=new TreeNode();
- menu2TreeNode(map, treeNode);
- treeNodeList.add(treeNode);
- }
- }
接下来要写的就是web层
- /**
- *
- * @param req
- * @param resp
- * @return
- * @throws Exception
- */
- public String treeMenu(HttpServletRequest req,HttpServletResponse resp) throws Exception {
- List<TreeNode> list= this.menuDao.list(req.getParameterMap(), null);
- ObjectMapper om=new ObjectMapper();
- //将list集合转换成json串
- String jsonStr= om.writeValueAsString(list);
- //把json串写到jsp页面里面去
- ResponseUtil.write(resp, jsonStr);
- return "index";
- }
四、选项卡tabs
创建面板
1. 通过标签创建选项卡
通过标签可以更容易的创建选项卡,我们不需要写任何Javascript代码。只需要给<div/>标签添加一个类ID'easyui-tabs'。每个选项卡面板都通过子<div/>标签进行创建,用法和panel(面板)相同。
- <div id="tt" class="easyui-tabs" style="width:500px;height:250px;">
- <div title="Tab1" style="padding:20px;display:none;">
- tab1
- </div>
- <div title="Tab2" data-options="closable:true" style="overflow:auto;padding:20px;display:none;">
- tab2
- </div>
- <div title="Tab3" data-options="iconCls:'icon-reload',closable:true" style="padding:20px;display:none;">
- tab3
- </div>
- </div>
2. 通过Javascript创建选项卡
下面的代码演示如何使用Javascript创建选项卡,当该选项卡被选择时将会触发'onSelect'事件。
- $('#tt').tabs({
- border:false,
- onSelect:function(title){
- alert(title+' is selected');
- }
- });
添加新的选项卡面板
添加一个新的包含小工具菜单的选项卡面板,小工具菜单图标(8x8)被放置在关闭按钮之前。
- // add a new tab panel
- $('#tt').tabs('add',{
- title:'New Tab',
- content:'Tab Body',
- closable:true,
- tools:[{
- iconCls:'icon-mini-refresh',
- handler:function(){
- alert('refresh');
- }
- }]
- });
获取选择的选项卡
- // get the selected tab panel and its tab object
- var pp = $('#tt').tabs('getSelected');
- var tab = pp.panel('options').tab; // the corresponding tab object