Vue CLI
Vue CLI 是一个基于 Vue.js 进行快速开发的完整系统
# 全局安装脚手架
cnpm install -g @vue/cli
# 快速创建一个项目
vue create todos
# 打开项目
cd todos
# 运行项目
cnpm run serve --open
VueX
Vuex 是一个专为 Vue.js 应用程序开发的状态管理模式。它采用集中式存储管理应用的所有组件的状态,并以相应的规则保证状态以一种可预测的方式发生变化。每一个 Vuex 应用的核心就是 store(仓库)
- 驱动应用的数据源
  state: {
    todos:[
      {id:1,skill:'学习vue',bool:true},
      {id:2,skill:'学习react',bool:true},
      {id:3,skill:'学习angular',bool:false}
    ]
  },
- mutation 都有一个字符串的 事件类型 (type) 和 一个 回调函数 (handler)。可以直接使用state状态,受 state 作为第一个参数
  mutations: {
    del(state,id){
      console.log(state.todos.filter(item=>item.id!==id))
    }
  },
 created(){
     this.$store.commit("del",1)
  }
- action:Action 提交的是 mutation,而不是直接变更状态。Action 可以包含任意异步操作。
  actions: {
    del(context,id) {
      context.commit("del",id);
    },
  },
  created(){
    this.$store.dispatch("del",1);
  }
- getters:就像计算属性一样,getter 的返回值会根据它的依赖被缓存起来,且只有当它的依赖值发生了改变才会被重新计算。
  getters:{
    getid(state){
      return '1111'
    }
  }
  <div id="app">
      {{this.$store.getters.getid}}
  </div>
- module将store分割成模块
const moduleA = {
  state: { ... },
  mutations: { ... },
  actions: { ... },
  getters: { ... }
}

const moduleB = {
  state: { ... },
  mutations: { ... },
  actions: { ... }
}

const store = new Vuex.Store({
  modules: {
    a: moduleA,
    b: moduleB
  }
})

store.state.a // -> moduleA 的状态
store.state.b // -> moduleB 的状态
实现todos
使用模板
- 下载模板文件
git clone https://github.com/tastejs/todomvc-app-template.git --depth 1
- 将index.html的代码抽离出来放在我们Vue的组件里面(App.vue)
		<section class="todoapp">
			<header class="header">
				<h1>todos</h1>
				<input class="new-todo" placeholder="What needs to be done?" autofocus>
			</header>
			<!-- This section should be hidden by default and shown when there are todos -->
			<section class="main">
				<input id="toggle-all" class="toggle-all" type="checkbox">
				<label for="toggle-all">Mark all as complete</label>
				<ul class="todo-list">
					<!-- These are here just to show the structure of the list items -->
					<!-- List items should get the class `editing` when editing and `completed` when marked as completed -->
					<li class="completed">
						<div class="view">
							<input class="toggle" type="checkbox" checked>
							<label>Taste JavaScript</label>
							<button class="destroy"></button>
						</div>
						<input class="edit" value="Create a TodoMVC template">
					</li>
					<li>
						<div class="view">
							<input class="toggle" type="checkbox">
							<label>Buy a unicorn</label>
							<button class="destroy"></button>
						</div>
						<input class="edit" value="Rule the web">
					</li>
				</ul>
			</section>
			<!-- This footer should hidden by default and shown when there are todos -->
			<footer class="footer">
				<!-- This should be `0 items left` by default -->
				<span class="todo-count"><strong>0</strong> item left</span>
				<!-- Remove this if you don't implement routing -->
				<ul class="filters">
					<li>
						<a class="selected" href="#/">All</a>
					</li>
					<li>
						<a href="#/active">Active</a>
					</li>
					<li>
						<a href="#/completed">Completed</a>
					</li>
				</ul>
				<!-- Hidden if no completed items are left ↓ -->
				<button class="clear-completed">Clear completed</button>
			</footer>
		</section>
		<footer class="info">
			<p>Double-click to edit a todo</p>
			<!-- Remove the below line ↓ -->
			<p>Template by <a href="http://sindresorhus.com">Sindre Sorhus</a></p>
			<!-- Change this out with your name and url ↓ -->
			<p>Created by <a href="http://todomvc.com">you</a></p>
			<p>Part of <a href="http://todomvc.com">TodoMVC</a></p>
		</footer>
- 我们看到模板文件有两个包,不是LV包,也不是肉包…是CSS包
		<link rel="stylesheet" href="node_modules/todomvc-common/base.css">
		<link rel="stylesheet" href="node_modules/todomvc-app-css/index.css">
- 我们下载并引入
cnpm i todomvc-common todomvc-app-css -S
- 在App.vue引入包
<script>
import 'todomvc-common/base.css'
import 'todomvc-app-css/index.css'
export default {

}
</script>
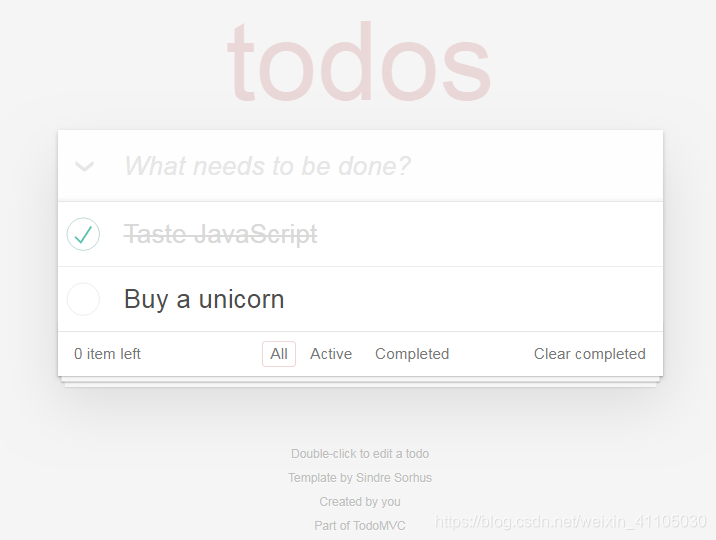
- 效果图
- 各个类代表的状态
editing:该类是编辑状态
completed:该类是已完成状态
没有添加:正常状态,未完成
添加数据到页面中
- 准备模拟数据,将数据添加到页面中,使用
v-for;使用v-model实现数据的双向绑定
...
					<li v-for="todo in todos" :key="todo.id" :class="{'completed':todo.bool}">
						<div class="view">
							<input class="toggle" type="checkbox" v-model="todo.bool">
							<label>{{todo.skill}}</label>
							<button class="destroy"></button>
						</div>
						<input class="edit" value="Create a TodoMVC template">
					</li>
...
export default {
  data(){
    return {
      todos:[
        {id:1,skill:'学习vue',bool:true},
        {id:2,skill:'学习react',bool:true},
        {id:3,skill:'学习angular',bool:false}
      ],
    }
  },
}
- 实现添加功能(在文本框输入,按回车添加数据)
...
		<h1>todos</h1>
		<input
        class="new-todo"
        v-model="addMsg"
        placeholder="What needs to be done?"
        autofocus
        @keyup.enter="add"
        >
...
 data(){
    return {
      addMsg:'',
 }
methods:{
    add(){
      let id = this.todos.length?this.todos[this.todos.length-1].id + 1:1
      this.todos.push({
        id,
        skill:this.addMsg,
        bool:false
      })
    }
},
编辑操作(双击每条信息todo,进行编辑)
- 双击todo时,给该条数据添加类
editing,使得其进入编辑状态,并聚焦focus - 编辑完成使用enter,改变该条数据
- 使用esc退出编辑
- 失去焦点时退出编辑
blur
					<li
           v-for="(todo,i) in todos"
            :key="todo.id"
            :class="{'completed':todo.bool,'editing':todo==myTodo}">
						<div class="view">
							<input class="toggle" type="checkbox" v-model="todo.bool">
							<label
               @dblclick="myTodo=todo"
               >{{todo.skill}}</label>
							<button class="destroy"></button>
						</div>
						<input
             @keyup.enter="edit(i)"
             @keyup.esc="myTodo = {}"
             @blur="myTodo = {}"
             class="edit"
             v-bind:value="todo.skill"
             ref="editInp"
             v-focus
             >
					</li>
  methods:{
    add(){
      let id = this.todos.length?this.todos[this.todos.length-1].id + 1:1
      this.todos.push({
        id,
        skill:this.addMsg,
        bool:false
      })
      // 添加后清空
      this.addMsg = ''
    },
    edit(index){
      // 让todos改为我们更改后的数据
      this.todos[index].skill = this.$refs.editInp[index].value
      // 退出编辑状态
      this.myTodo = {}
    }
  },
  // 自定义一个聚焦的指令,这样不用再去写这些指令了
  directives:{
    focus:function(el,binding){
        el.focus()
    }
  },
删除(点击叉号时删除该条数据)
- 绑定一个点击事件
- 使用filter对todos进行操作
<button class="destroy" @click="del"></button>
显示未完成的数量
- 计算出剩余未完成的数量
- 使用computed侦听属性,当
checkbox变换时,进行侦听
  computed:{
    numLeft:function(){
      return this.todos.filter(t=>!t.bool).length
    }
  }
- 渲染到界面上
<span class="todo-count"><strong>{{numLeft}}</strong> item left</span>
不同按钮渲染不同数据
- 当点击按钮时,路由切换(改变路由)
				<ul class="filters">
					<li>
						<router-link class="selected" to="/">All</router-link>
					</li>
					<li>
						<router-link to="/active">Active</router-link>
					</li>
					<li>
						<router-link to="/completed">Completed</router-link>
					</li>
				</ul>
- 点击
All显示全部,点击Active显示已经完成的,Completed显示未完成的 - 如果绑定点击事件会比较麻烦,使用
watch监听则刚进来时获取不到任何东西,所以只能使用计算属性(侦听的是自己的数据)
  computed:{
    "filterTodos":function(){
      let path = this.$route.path
      if(path==='/'){
        return this.todos
      }else if(path==='/completed'){
        return this.todos.filter(t=>t.bool)
      }else{
        return this.todos.filter(t=>!t.bool)
      }
    }
  }
- 将for循环todos改为
v-for="(todo,i) in filterTodos"
- 点击样式选中(给路由文件)
export default new Router({
  mode: 'history',
  base: process.env.BASE_URL,
  routes: [

  ],
  linkExactActiveClass:'selected'
})
数据持久化
- 我们将
todos数据存储在本地;可以通过监听todos来存储数据(如果我们操作一步存储一步会比较麻烦),只要有数据变化存储即可
  watch:{
    // 数组的深拷贝
    todos:{
      handler(newVal,oldVal){
        localStorage.setItem('todos',JSON.stringify(newVal))
      },
      deep:true
    },
  },
- 有了真实数据,我们则需要获取本地存储的数据
data{
    return {
      todos:JSON.parse(localStorage.getItem('todos')||'[]'),
    }
}
使用Vuex
如果不是大型单页应用,使用 Vuex 可能是繁琐冗余的。如果您的应用够简单,您最好不要使用 Vuex。这里我们是用来学习,所以使用一下vuex试试
- 只写添加功能,其它都差不过
<template>
  <div id="app">
    		<section class="todoapp">
			<header class="header">
				<h1>todos</h1>
				<input
        class="new-todo"
        placeholder="What needs to be done?"
        autofocus
        @keyup.enter="add"
        v-model="newMsg"
        >
			</header>
			<section class="main">
				<input id="toggle-all" class="toggle-all" type="checkbox">
				<label for="toggle-all">Mark all as complete</label>
				<ul class="todo-list">
					<!-- These are here just to show the structure of the list items -->
					<!-- List items should get the class `editing` when editing and `completed` when marked as completed -->
					<li class="completed" v-for="todo in this.$store.getters.todosList" :key="todo.id">
						<div class="view">
							<input class="toggle" type="checkbox" v-model="todo.bool">
							<label>{{todo.skill}}</label>
							<button class="destroy"></button>
						</div>
						<input class="edit" v:bind:value="todo.skill">
					</li>
				</ul>
			</section>
			<footer class="footer">
				<span class="todo-count"><strong>0</strong> item left</span>
				<ul class="filters">
					<li>
						<a class="selected" href="#/">All</a>
					</li>
					<li>
						<a href="#/active">Active</a>
					</li>
					<li>
						<a href="#/completed">Completed</a>
					</li>
				</ul>
				<!-- Hidden if no completed items are left ↓ -->
				<button class="clear-completed">Clear completed</button>
			</footer>
		</section>
  </div>
</template>
<script>
import 'todomvc-common/base.css'
import 'todomvc-app-css/index.css'
export default {
  data(){
    return {
      newMsg:''
    }
  },
  methods:{
    // 按下enter添加一条数据
    add(){
      if(!this.newMsg.length){
        return
      }
      // 获取所有的id
      let idArr = this.$store.getters.todosId
      // 给一个要添加的id
      let id = idArr.length?idArr[idArr.length-1]+1:1
      this.$store.commit('add',{id,skill:this.newMsg,bool:false})
      // 清空输入框
      this.newMsg = ''
    }
  }
}
</script>

<style lang="less">

</style>
vuex
import Vue from 'vue'
import Vuex from 'vuex'

Vue.use(Vuex)
let todos = JSON.parse(localStorage.getItem('todos') || '[]')
export default new Vuex.Store({
  state: {
    todos
  },
  mutations: {
    // 调用该方法即可增加一条数据操作
    // 1. 第一个参数是state,第二个参数是传入过来的数据data
    // 2. 组件对其进行调用`this.$store.commit("add",data)`
    add(state,data){
      state.todos.push(data)
      localStorage.setItem('todos',JSON.stringify(state.todos))
    }


  },
  actions: {

  },
  getters:{
    todosList(state){
      return state.todos
    },
    todosId(state){
      return state.todos.map((item)=>{
        return item.id
      })
    }
  }
})