版权声明:如您需要转载该文章,请注明原文网址 https://blog.csdn.net/camel84/article/details/89819387
前言
在上一篇文章中,配置了最简单的身份认证,访问的登录页面是Spring Security默认提供。本往本篇我们来创建一个我们自己的用户登录页面。
自定义登录页面
首先,我们需要准备好自定义页面,这里我们使用Thymeleaf来做吧。
引用Thymeleaf
<dependency>
    <groupId>org.springframework.boot</groupId>
    <artifactId>spring-boot-starter-thymeleaf</artifactId>
</dependency>
创建Controller
@RestController
@RequestMapping("/")
public class HomeController {
    @GetMapping(value = {"/", "/home"})
    public ModelAndView home() {
        return new ModelAndView("home");
    }

    @GetMapping(value = "/hello")
    public ModelAndView hello() {
        return new ModelAndView("hello");
    }

    @GetMapping(value = "/login")
    public ModelAndView login() {
        return new ModelAndView("login");
    }

    @RequestMapping({ "/user", "/me" })
    public Map<String, String> user(Principal principal) {
        Map<String, String> map = new LinkedHashMap<>();
        map.put("name", principal.getName());
        return map;
    }
}
创建对应的三个页面
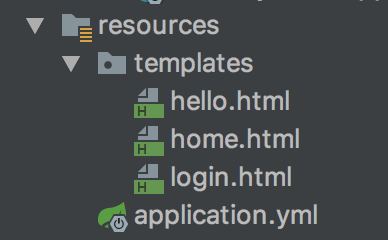
login页面
<!DOCTYPE html>
<html lang="en" xmlns:th="http://www.w3.org/1999/xhtml">
<head>
    <meta charset="UTF-8">
    <title>spring security</title>
</head>
<body>
<div th:if="${param.error}">
    用户名或者密码错误!
</div>
<div th:if="${param.logout}">
    您已经退出登录!
</div>
<form th:action="@{/login}" method="post">
    <div><label> 用户名:<input type="text" name="username"/> </label></div>
    <div><label> 密码:<input type="password" name="password"/> </label></div>
    <div><input type="submit" value="登录"/></div>
</form>
</body>
</html>
home页面
<!DOCTYPE html>
<html lang="en" xmlns:th="http://www.w3.org/1999/xhtml">
<head>
    <meta charset="UTF-8">
    <title>spring security</title>
</head>
<body>
<h1>首页</h1>

<p>点击 <a th:href="@{/hello}">这里</a> 跳转到【Hello】页面</p>
</body>
</html>
hello页面
<!DOCTYPE html>
<html lang="en" xmlns:th="http://www.w3.org/1999/xhtml">
<head>
    <meta charset="UTF-8">
    <title>spring security</title>
</head>
<body>
<h1 th:inline="text">您好![[${#httpServletRequest.remoteUser}]]!</h1>
<form th:action="@{/logout}" method="post">
    <input type="submit" value="退出"/>
</form>
</body>
</html>
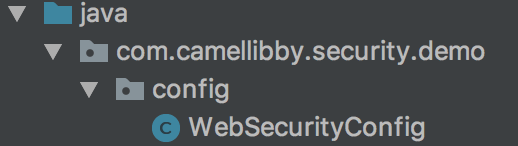
添加相关配置
上一篇我们使用了application.yml来配置用户名和密码。这次,我们添加一个WebSecurityConfig的类,来配置自定义页面。
@EnableWebSecurity
public class WebSecurityConfig extends WebSecurityConfigurerAdapter {
    @Override
    protected void configure(HttpSecurity http) throws Exception {
        http.authorizeRequests()
                // 指定home页面可以匿名访问
                .antMatchers("/", "/home").permitAll()
                // 其它所有页面需要身份认证
                .anyRequest().authenticated()
                .and()
                // 采用httpBasic方式登录,也就是弹出一个用户名和密码的对话框
                //.httpBasic()
                // 采用form提交方式登录
                .formLogin()
                .loginPage("/login")
                .permitAll()
                .and()
                .logout()
                .permitAll();
    }
}
通过重写config方法,我们就可以对登录页面的权限进行自定义配置。上面的注释很清楚的解释了,这里只是一下httpBasic和formLogin。httpBasic就无需写登录页面了,而formLogin就需要我们准备好登录页面。除了以上两种登录方式,Spring Security还提供了OAuth2、OpenID、CAS、LDAP的方式,不过需要引用额外的jar包,这些不在本篇详细阐述了。
另外,除了上面配置选项外,还可以配置loginUrl、logoutUrl、login提交url、提交成功或者失败跳转的url……
测试
访问http://127.0.0.1:8080/login
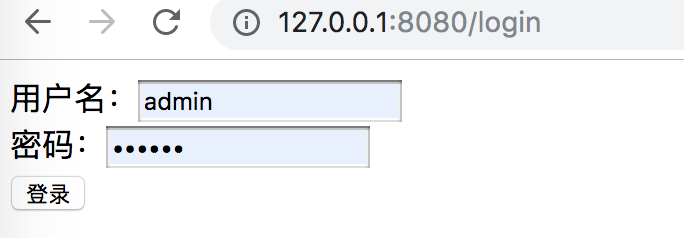
这里来到了我们自定义的登录页面