一、 SpringMVC
1.MVC介绍
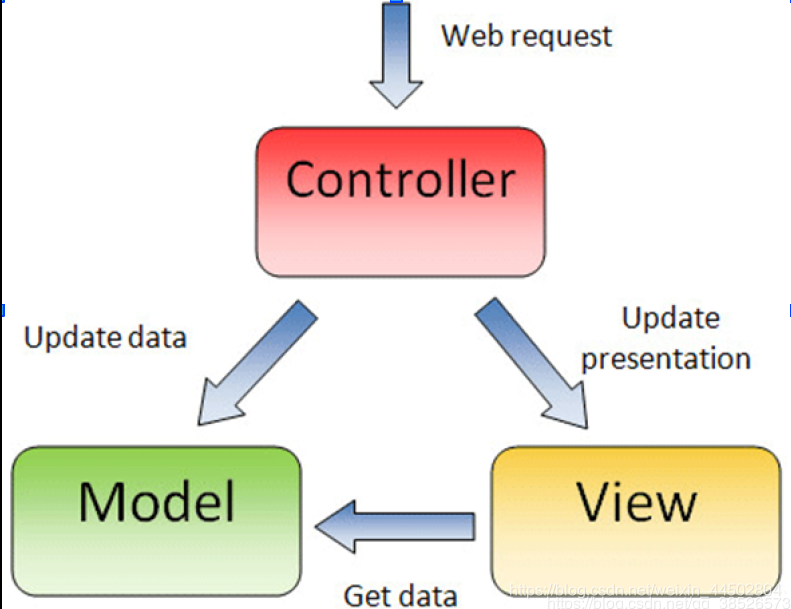
模式-视图-控制器
MVC是一个众所周知的以设计界面应用程序为基础的设计模式。它主要通过分离模型、视图以及控制器在应用程序中的角色将业务逻辑从界面中解耦。通常,模型负责封装应用程序数据在视图层展示。视图仅仅只是展示这些数据,不包含任何业务逻辑。控制器负责接收来自用户的请求,并调用后台服务(manager或者dao)来处理业务逻辑。处理后,后台业务层可能会返回了一些数据在视图层展示。控制器收集这些数据及准备模型在视图层展示。 MVC模式的核心思想是将业务逻辑从界面中分离出来,允许它们单独改变而不会相互影响。
2.SpringMVC介绍
介绍:
1.Spring Web MVC 是一种基于Java实现了Web MVC设计模式的请求驱动类型的轻量级Web框架
2.使用了MVC架构模式的思想,将Web层职责解耦
3.基于请求驱动指的就是使用请求响应请求-响应模型
4.框架的目的就是帮助我们简化开发
Spring Web MVC也是要简化我们日常Web开发的
优点
1.性能比struts2好
2.简单、便捷、易学
3.和spring无缝衔接【IOC,AOP】
4.使用约定优于配置
5.支持Restful
6.异常处理,国际化,数据验证,类型转换等
7.使用的人多,使用的公司多
第一种方式:配置文件的方式:
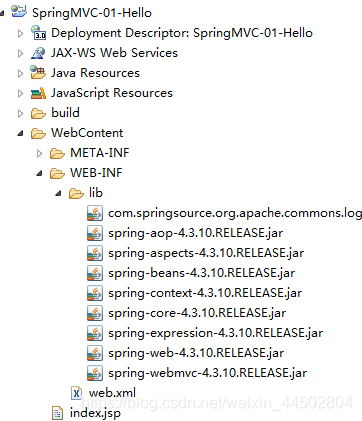
1.创建项目 导入需要的jar包:
2.创建配置文件 设置处理器与映射器
<?xml version="1.0" encoding="UTF-8"?>
<beans xmlns="http://www.springframework.org/schema/beans"
	xmlns:xsi="http://www.w3.org/2001/XMLSchema-instance"
	xsi:schemaLocation="http://www.springframework.org/schema/beans
 http://www.springframework.org/schema/beans/spring-beans.xsd">

	<!-- 指定处理器映射器 -->
	<bean class="org.springframework.web.servlet.handler.BeanNameUrlHandlerMapping"></bean>
	<!-- 指定处理器适配器 -->
	<bean class="org.springframework.web.servlet.mvc.SimpleControllerHandlerAdapter"></bean>
	<!-- 注册自定义的控制器 -->
	<bean class="com.sxt.controller.HelloController" name="/hello"/>
</beans>
3.配置前端控制器
<?xml version="1.0" encoding="UTF-8"?>
<web-app xmlns:xsi="http://www.w3.org/2001/XMLSchema-instance" xmlns="http://java.sun.com/xml/ns/javaee" xsi:schemaLocation="http://java.sun.com/xml/ns/javaee http://java.sun.com/xml/ns/javaee/web-app_3_0.xsd" id="WebApp_ID" version="3.0">
  <display-name>SpringMVC-01-Hello</display-name>
  <welcome-file-list>
    <welcome-file>index.html</welcome-file>
    <welcome-file>index.htm</welcome-file>
    <welcome-file>index.jsp</welcome-file>
    <welcome-file>default.html</welcome-file>
    <welcome-file>default.htm</welcome-file>
    <welcome-file>default.jsp</welcome-file>
  </welcome-file-list>
 	<!-- 配置SpringMVC的前端控制器 中央控制器 -->
 	 <servlet>
  		<servlet-name>SpringMVC</servlet-name>
  		<servlet-class>org.springframework.web.servlet.DispatcherServlet</servlet-class>
  		<init-param>
  			<param-name>contextConfigLocation</param-name>
  			<param-value>classpath:springmvc.xml</param-value>
  		</init-param>
  		<load-on-startup>2</load-on-startup>
 	 </servlet>
	 <!-- 配置SpringMVC的映射地址 -->
 	 <servlet-mapping>
  		<servlet-name>SpringMVC</servlet-name>
  		<url-pattern>/</url-pattern>
	 </servlet-mapping>
</web-app>
4.创建自定义的Controller
package com.sxt.controller;

import javax.servlet.http.HttpServletRequest;
import javax.servlet.http.HttpServletResponse;

import org.springframework.web.servlet.ModelAndView;
import org.springframework.web.servlet.mvc.Controller;

/**
 * 自定义的控制器
 * 	具体处理用户请求的
 * @author IF
 *
 */
public class HelloController implements Controller{

	@Override
	public ModelAndView handleRequest(HttpServletRequest arg0, HttpServletResponse arg1) throws Exception {
		System.out.println("--执行了--");
		ModelAndView mav=new ModelAndView();
		mav.setViewName("/index.jsp");
		return mav;
	}

}
5.jsp页面
<%@ page language="java" contentType="text/html; charset=utf-8"
pageEncoding="utf-8"%>
<!DOCTYPE html PUBLIC "-//W3C//DTD HTML 4.01 Transitional//EN" "http://www.w3.org/TR/html4/loose.dtd">
<html>
<head>
<meta http-equiv="Content-Type" content="text/html; charset=utf-8">
<title>Insert title here</title>
</head>
<body>
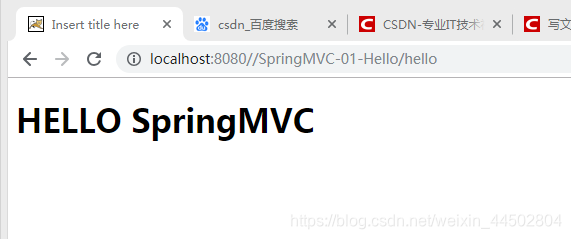
<h1>HELLO SpringMVC</h1>
</body>
</html>
6.实现
第二种实现方式:注解的方式
只有控制层加了注解以及配置文件有不同
控制层:
package com.sxt.controller;

import org.springframework.stereotype.Controller;
import org.springframework.web.bind.annotation.RequestMapping;
import org.springframework.web.servlet.ModelAndView;

/**
 * 基于注解的自定义的Controller
 * @author IF
 *
 */
@Controller
// http://.../projectName/hello
@RequestMapping("/hello")
public class HelloController {

	/**
	 *  http://.../projectName/hello/h1
	 * @return
	 */
	@RequestMapping("/h1")
	public ModelAndView hello1(){
		System.out.println("-----hello1---");
		ModelAndView m = new ModelAndView();
		m.setViewName("/index.jsp");
		return m;
	}

	/**
	 *  http://.../projectName/hello/h2
	 * @return
	 */
	@RequestMapping("/h2")
	public ModelAndView hello2(){
		System.out.println("-----hello2---");
		ModelAndView m = new ModelAndView();
		m.setViewName("/index.jsp");
		return m;
	}
}
配置文件:
<?xml version="1.0" encoding="UTF-8"?>
<beans xmlns="http://www.springframework.org/schema/beans"
	xmlns:xsi="http://www.w3.org/2001/XMLSchema-instance"
	xmlns:context="http://www.springframework.org/schema/context"
	xmlns:mvc="http://www.springframework.org/schema/mvc"
	xsi:schemaLocation="http://www.springframework.org/schema/mvc http://www.springframework.org/schema/mvc/spring-mvc-4.3.xsd
		http://www.springframework.org/schema/beans http://www.springframework.org/schema/beans/spring-beans.xsd
		http://www.springframework.org/schema/context http://www.springframework.org/schema/context/spring-context-4.3.xsd">

	<!-- 开启扫描 -->
	<context:component-scan base-package="com.sxt.controller"/>

	<!-- 开启SpringMVC注解的方式 -->
	<mvc:annotation-driven></mvc:annotation-driven>
</beans>
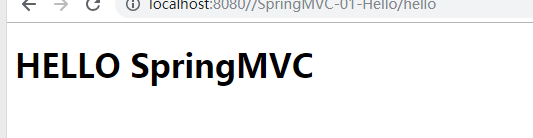
实现: