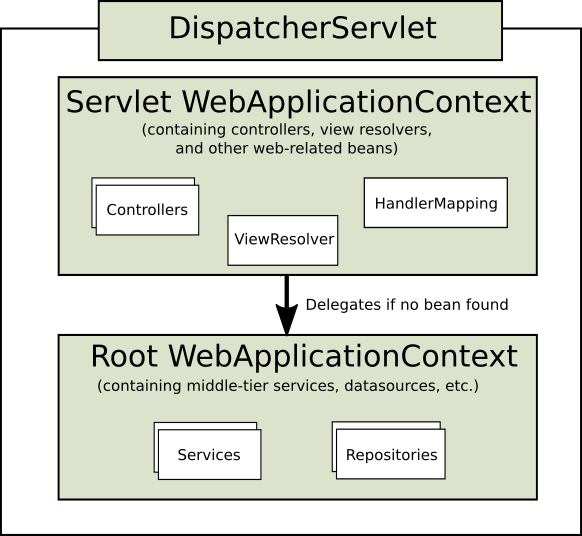
1.以前搭建Spring MVC 框架一般都使用配置文件的方式进行,相对比较繁琐。spring 提供了使用注解方式搭建Spring MVC 框架的方式,方便简洁。使用Spring IOC 作为根容器管理service、dao、datasource,使用spring MVC 容器作为子容器管理controller、视图解析器
spring 官方文档中有相关示例
public class MyWebAppInitializer extends AbstractAnnotationConfigDispatcherServletInitializer {

    @Override
    protected Class<?>[] getRootConfigClasses() {
        return new Class<?>[] { RootConfig.class };
    }

    @Override
    protected Class<?>[] getServletConfigClasses() {
        return new Class<?>[] { App1Config.class };
    }

    @Override
    protected String[] getServletMappings() {
        return new String[] { "/app1/*" };
    }
}
使用继承 AbstractAnnotationConfigDispatcherServletInitializer 的方式创建启动类,其中 getRootConfigClasses 指定父容器的配置类,相当于在web.xml 配置文件中配置监听器加载spring的配置文件,getServletConfigClasses指定spring MVC 的配置文件,相当于在web.xml配置DispatcherServlet,getServletMappings 执行拦截路径。
2.首先创建一个Maven 工程,packaging 为war类型,并在插件中指定忽略web.xml,否则会报错
<build>
      <plugins>
          <plugin>
              <groupId>org.apache.maven.plugins</groupId>
              <artifactId>maven-war-plugin</artifactId>
              <version>3.1.0</version>
              <configuration>
                  <failOnMissingWebXml>false</failOnMissingWebXml>
              </configuration>
          </plugin>
      </plugins>
  </build>
3.创建spring IOC 的配置类,管理除了Controller 以外的组件
package com.spring.config;

import org.springframework.context.annotation.ComponentScan;
import org.springframework.context.annotation.FilterType;
import org.springframework.context.annotation.ComponentScan.Filter;
import org.springframework.stereotype.Controller;


/**
 * spring 配置文件,构建父容器,扫描service、dao 等,但是controller交给spring mvc 来管理
 * @author Administrator
 *
 */
@ComponentScan(value="com.spring",excludeFilters= {
        @Filter(type=FilterType.ANNOTATION,classes= {Controller.class})
})
public class SpringContextConfig {

}
4.创建Spring MVC 配置类,管理Controller,注意此时需要关闭compentscan 默认的扫描规则,否则会扫描到所有的组件。这样这个容器的就形成了一种互补关系。
@ComponentScan(value = "com.spring",includeFilters= {
        @Filter(type = FilterType.ANNOTATION,classes= {Controller.class})
},useDefaultFilters=false)
public class AppConfig extends WebMvcConfigurerAdapter{

}
5.创建初始化类,指定两个容器的配置类,并指定拦截路径
package com.spring;

import org.springframework.web.servlet.support.AbstractAnnotationConfigDispatcherServletInitializer;

import com.spring.config.AppConfig;
import com.spring.config.SpringContextConfig;

public class MyWebAppInitializer extends AbstractAnnotationConfigDispatcherServletInitializer {

    //获取父容器的配置文件(spring IOC ,类似于spring 配置文件)
    @Override
    protected Class<?>[] getRootConfigClasses() {
        // TODO Auto-generated method stub
        return new Class<?>[] {SpringContextConfig.class};
    }

    //获取父容器的配置文件(springMVC IOC ,类似于spring MVC  配置文件,获取DispatcherServlet)
    @Override
    protected Class<?>[] getServletConfigClasses() {
        // TODO Auto-generated method stub
        return new Class<?>[] {AppConfig.class};
    }

    //获取DispatcherServlet 的映射路径
    @Override
    protected String[] getServletMappings() {
        // TODO Auto-generated method stub
        return new String[]{"/"};
    }

}
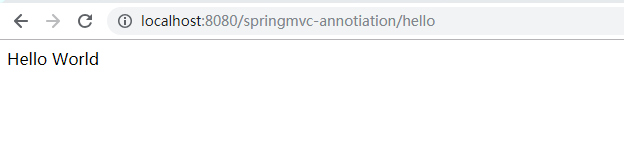
6.编写测试controller ,services,启动并测试
package com.spring.controller;

import org.springframework.beans.factory.annotation.Autowired;
import org.springframework.stereotype.Controller;
import org.springframework.web.bind.annotation.RequestMapping;
import org.springframework.web.bind.annotation.ResponseBody;

import com.spring.service.HelloService;

@Controller
public class HelloController {

    @Autowired
    HelloService helloService;


    @ResponseBody
    @RequestMapping("/hello")
    public String sayHello() {
        String sayHello = helloService.sayHello("World");
        return sayHello;
    }

}
7.之前采用配置文件的方式,我们可以需要在spring MVC 的配置文件中使用 <mvc:annotation-driven/> 去开始MVC 配置,并且配置如视图解析器,拦截器等组件,在采用注解方式后同样可以完成在配置文件中完成的东西,官方文档中给出的示例,需要我们编写一个配置类,然后开启mvc注解,实现 WebMvcConfigurer 接口,这个接口定义了一系列方法对应 在spring MVC 配置文件中配置组件的方法。
@Configuration
@EnableWebMvc
public class WebConfig implements WebMvcConfigurer {

    // Implement configuration methods...
}
8.直接在spring MVC 容器的配置类似,实现以上功能,并配视图解析器,静态资源拦截,添加拦截器等。WebMvcConfigurerAdapter 这个抽象类实现了 WebMvcConfigurer ,我们直接继承它,从而避免去挨个实现 WebMvcConfigurer 里面所有的方法
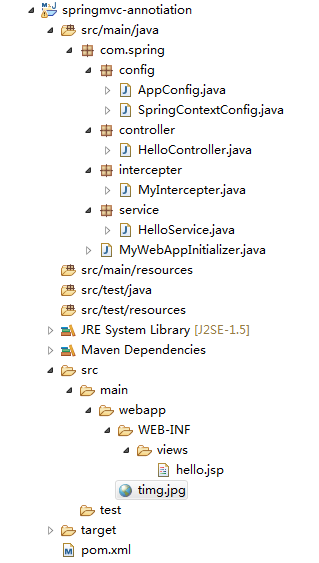
package com.spring.config;

import org.springframework.context.annotation.ComponentScan;
import org.springframework.context.annotation.ComponentScan.Filter;
import org.springframework.context.annotation.FilterType;
import org.springframework.stereotype.Controller;
import org.springframework.web.servlet.config.annotation.DefaultServletHandlerConfigurer;
import org.springframework.web.servlet.config.annotation.EnableWebMvc;
import org.springframework.web.servlet.config.annotation.InterceptorRegistry;
import org.springframework.web.servlet.config.annotation.ViewResolverRegistry;
import org.springframework.web.servlet.config.annotation.WebMvcConfigurerAdapter;

import com.spring.intercepter.MyIntercepter;

/**
 * Spring mvc 配置文件,只扫描Controller
 * @author Administrator
 *
 */
@ComponentScan(value = "com.spring",includeFilters= {
        @Filter(type = FilterType.ANNOTATION,classes= {Controller.class})
},useDefaultFilters=false)
@EnableWebMvc
public class AppConfig extends WebMvcConfigurerAdapter{
    @Override
    public void configureViewResolvers(ViewResolverRegistry registry) {
        registry.jsp("/WEB-INF/views/", ".jsp");
    }

    @Override
    public void configureDefaultServletHandling(DefaultServletHandlerConfigurer configurer) {
        configurer.enable();
    }

    @Override
    public void addInterceptors(InterceptorRegistry registry) {
        registry.addInterceptor(new  MyIntercepter()).addPathPatterns("/**");
    }
}
下面是自定义的拦截器
package com.spring.intercepter;

import javax.servlet.http.HttpServletRequest;
import javax.servlet.http.HttpServletResponse;

import org.springframework.web.servlet.HandlerInterceptor;
import org.springframework.web.servlet.ModelAndView;

public class MyIntercepter implements HandlerInterceptor{

    public boolean preHandle(HttpServletRequest request, HttpServletResponse response, Object handler)
            throws Exception {
        System.out.println("----------目标方法执行前-------------");
        return true;
    }

    public void postHandle(HttpServletRequest request, HttpServletResponse response, Object handler,
            ModelAndView modelAndView) throws Exception {
        System.out.println("----------目标方法执行后-------------");

    }

    public void afterCompletion(HttpServletRequest request, HttpServletResponse response, Object handler, Exception ex)
            throws Exception {
        System.out.println("----------页面响应前-------------");

    }

}
测试controller 如下:
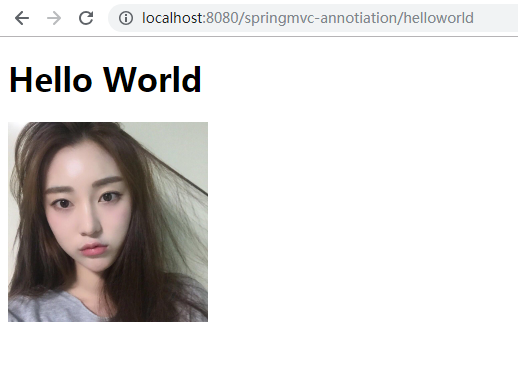
package com.spring.controller;

import org.springframework.beans.factory.annotation.Autowired;
import org.springframework.stereotype.Controller;
import org.springframework.web.bind.annotation.RequestMapping;
import org.springframework.web.bind.annotation.ResponseBody;

import com.spring.service.HelloService;

@Controller
public class HelloController {

    @Autowired
    HelloService helloService;


    @ResponseBody
    @RequestMapping("/hello")
    public String sayHello() {
        String sayHello = helloService.sayHello("World");
        return sayHello;
    }


    @RequestMapping("/helloworld")
    public String helloWorld() {
        return "hello";
    }
}
测试结果如下,成功跳转到jsp,并且显示了图片,拦截器也做了相应的输出

至此基本完成Spring MVC 注解版搭建,其余的功能组件可以在通过编写配置类的方式进行注册。