一、图像旋转
1、图像旋转函数原型
CV_EXPORTS_W void rotate(InputArray src, OutputArray dst, int rotateCode);
其中第一,二个参数是输入和输出的图像;
第三个参数为旋转的方法,有默认的宏
ROTATE_90_CLOCKWISE = 0, //!<Rotate 90 degrees clockwise
ROTATE_180 = 1, //!<Rotate 180 degrees clockwise
ROTATE_90_COUNTERCLOCKWISE = 2, //!<Rotate 270 degrees clockwise
2、OpenCV提供了warpAffine函数实现图片仿射变换功能,我们可以利用这个函数实现图像旋转
函数原型为
CV_EXPORTS_W void warpAffine(
InputArray src,
OutputArray dst,
InputArray M,
Size dsize,
int flags=INTER_LINEAR,
int borderMode=BORDER_CONSTANT,
const Scalar& borderValue=Scalar());
其中第一,二个参数是输入和输出的图像;
第三个参数仿射变换矩阵;
第四个参数为变换后的图像尺寸;
第五个参数为差值方法,参数的默认值为int flags=INTER_LINEAR双线性插值。
其他的插值方法和其对应的参数:
INTER_NEAREST=CV_INTER_NN, //!< 最邻近插值
INTER_LINEAR=CV_INTER_LINEAR, //!< 双线性插值
INTER_CUBIC=CV_INTER_CUBIC, //!<双三次插值
INTER_AREA=CV_INTER_AREA, //!< 基于面积插值
INTER_LANCZOS4=CV_INTER_LANCZOS4, //!< 8邻域兰索斯插值
第六个参数为边界处理方法,参数的默认值为int borderMode=BORDER_CONSTANT
第七个参数为边界颜色。
那么实现旋转操作的重点就在于输入合适的仿射变换矩阵-M。
OpenCV提供了getRotationMatrix2D函数计算旋转加缩放的仿射矩阵,其函数原型为:
CV_EXPORTS_W Mat getRotationMatrix2D(
Point2f center,
double angle,
double scale );
参数很简单明了,不需要缩放时只需把第三个参数设为1。
角度为负,顺时针;角度为正,逆时针。
该函数的返回值是一个Mat类型的矩阵。
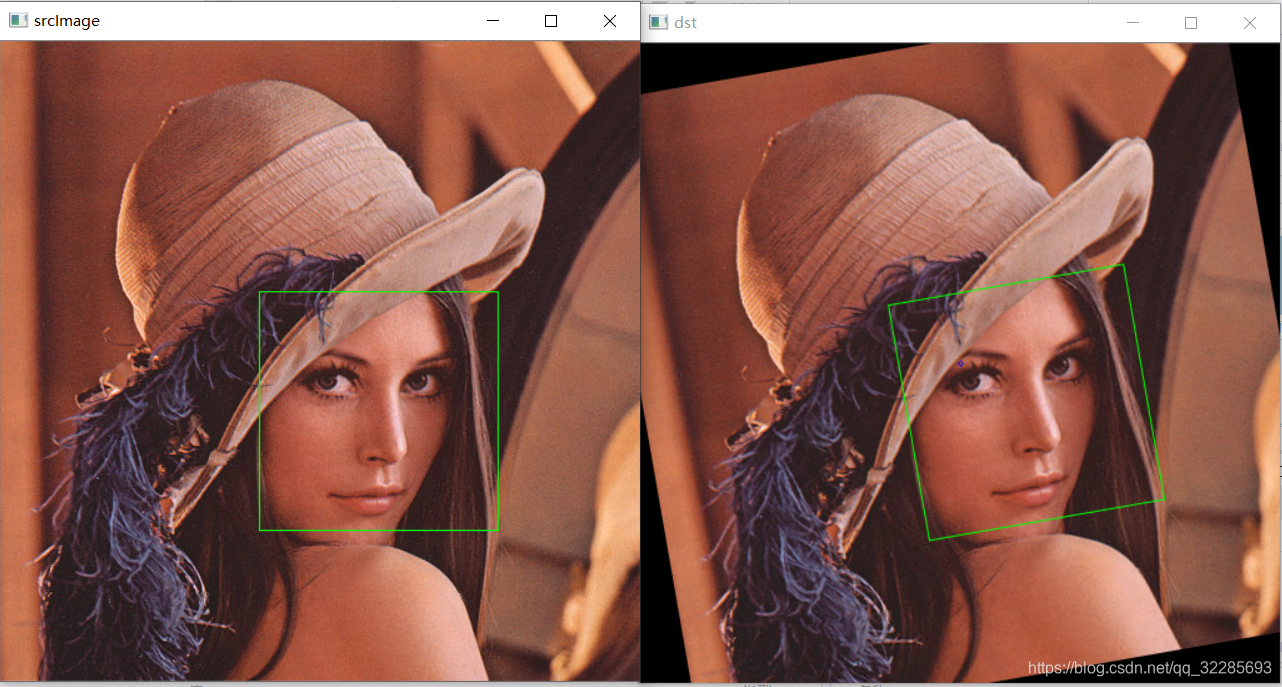
实例
#include <opencv2/opencv.hpp>
#include <iostream>

using namespace cv;

// 图像旋转
///@ angle 要旋转的角度
void Rotate(const Mat &srcImage, Mat &destImage, double angle)
{
	Point2f center(srcImage.cols / 2, srcImage.rows / 2);//中心
	Mat M = getRotationMatrix2D(center, angle, 1);//计算旋转的仿射变换矩阵
	warpAffine(srcImage, destImage, M, Size(srcImage.cols, srcImage.rows));//仿射变换
	circle(destImage, center, 2, Scalar(255, 0, 0));
}

int main()
{
	//读入图像,并判断图像是否读入正确
	cv::Mat srcImage = imread("3.png");
	if (!srcImage.data)
		return -1;
	imshow("srcImage", srcImage);
	//将图片按比例缩放至宽为250像素的大小
	Mat destImage;
	double angle = 9.9;//角度
	Rotate(srcImage, destImage, angle);
	imshow("dst", destImage);
    waitKey(0);
	return 0;
}
二、图像镜像
图像镜像函数原型
CV_EXPORTS_W void flip(InputArray src, OutputArray dst, int flipCode);
其中第一,二个参数是输入和输出的图像;
第三个参数为旋转的方法,有默认的宏
flipCode为0时表示上下镜像
flipCode为1时表示左右镜像
flipCode为-1时表示上下左右镜像
三、尺寸调整
CV_EXPORTS_W void resize( InputArray src, OutputArray dst,
Size dsize, double fx = 0, double fy = 0,
int interpolation = INTER_LINEAR );
其中第一,二个参数是输入和输出的图像;
第三个参数为调整之后的图像尺寸;
第四个参数fx为x方向的缩放因子,若fx为0,fx = dsize.width/src.cols;
第五个参数fy为y方向的缩放因子,若fy为1,fy = dsize.height/src.rows;
第六个参数interpolation:这个是指定插值的方式,图像缩放之后,肯定像素要进行重新计算的,就靠这个参数来指定重新计算像素的方式,有以下几种:
INTER_NEAREST - 最邻近插值
INTER_LINEAR - 双线性插值,如果最后一个参数你不指定,默认使用这种方法
INTER_AREA - resampling using pixel area relation. It may be a preferred method for image decimation, as it gives moire’-free results. But when the image is zoomed, it is similar to the INTER_NEAREST method.
INTER_CUBIC - 4x4像素邻域内的双立方插值
INTER_LANCZOS4 - 8x8像素邻域内的Lanczos插值
实例
#include <opencv2/opencv.hpp>
#include <iostream>

using namespace cv;

// 图像按比例缩放
///@ width 输入要缩放图像的宽度
void Resize(const Mat &srcImage, Mat &destImage, int width)
{
	int ncols = width;
	int nrows = srcImage.rows*width / srcImage.cols;
	resize(srcImage, destImage, cv::Size(nrows, ncols));
}

int main()
{
	//读入图像,并判断图像是否读入正确
	cv::Mat srcImage = imread("3.png");
	if (!srcImage.data)
		return -1;
	imshow("srcImage", srcImage);

	//将图片按比例缩放至宽为250像素的大小
	Mat destImage;
	double angle = 9.9;//角度
	Resize(srcImage, destImage, 400);
	imshow("dst", destImage);

	waitKey(0);
	return 0;
}