近期一直跟基友们一起夯实加固数据结构方面的知识,这周轮到了队列,这个数据结构在平时开发中用到的真不少,我能想到的就有 Java 中四种线程池的实现方式、Volley 和 Okhttp 中对于多个请求的处理方式都用到了队列这种数据结构。
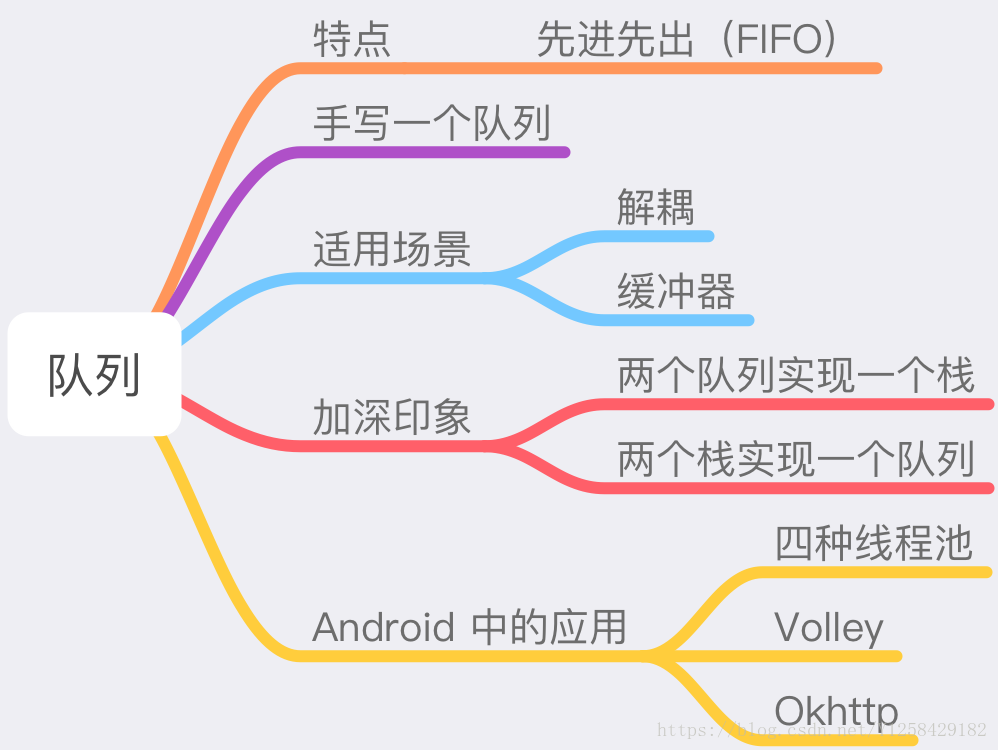
文章结构图
概念
特点
队列这种数据结构的特点是先进先出的原则,也就是我们平时说的 FIFO 。
适用场景
解耦方面,如果我们做系统的如何耦合性比较高的时候,如果两个模块之间的关联性很强,这时候可以考虑用队列来实现解耦的作用,在这方便做的比较好的便是 EventBus 这个框架,他利用的队列来实现解耦的作用。
缓冲方面,我们比较好理解,类似于我们去医院排队挂号一样,让我们想象一下,如果没有挂号的话,只有等到医生看完这个病人后才能挂下一个号,这个就形象的说明了队列对缓存的应用,类比于我们Android 中的网络请求,如果一个页面同一时间发送三四个网络请求,我们应该怎么处理这四个请求,一下全部发送出去吗?还是放到某个队列里实现缓冲的机制。
实践
这里我们代码分别实现三个效果:
- 代码实现一个队列
- 用两个队列实现一个栈
- 用两个栈实现一个队列
一个就是自己用数组实现一个队列,因为大部分的高级数据结构都能用数组实现,这样可以加深我们队这种数据结构的深刻体会。
代码实现一个队列
public class MyQueue {
    private int head = 0;
    private int tail = 0;
    private Object[] queue;

    public MyQueue(int capcity) {
        this.queue = new Object[capcity];
    }


    /**
     * 入队
     *
     * @param item
     * @return false 已满
     */
    public boolean put(Object item) {
        //表示队列已满
        if (head == (tail + 1) % queue.length) {
            return false;
        }
        //赋值
        queue[tail] = item;
        //tail +1
        tail = (tail + 1) % queue.length;
        return true;
    }

    /**
     * 获取队列头,不出队
     *
     * @return
     */
    public Object peek() {
        if (head == tail) {
            //说明队列为空
            return null;
        }
        return queue[head];
    }

    /**
     * 出队,并获取值,移动head 位置
     *
     * @return
     */
    public Object poll() {
        if (head == tail) {
            //说明队列为空
            return null;
        }
        //首先保存值
        Object item = queue[head];
        //清空坐标下的值
        queue[head] = null;
        // head +1
        head = (head + 1) % queue.length;
        return item;
    }

    /**
     * 查看对列是已满
     *
     * @return
     */
    public boolean isFull() {
        return head == (tail + 1) % queue.length;
    }

    /**
     * 判断队列是否为空
     *
     * @return
     */
    public boolean isEmpty() {
        return head == tail;
    }

    /**
     * 获取队列的长度
     *
     * @return
     */
    public int size() {
        if (tail >= head) {
            return tail - head;
        } else {
            return tail + queue.length - head;
        }
    }
}
用两个队列实现一个栈
/**
 * @author yangzhe
 * @funtion 队列实现栈
 * @date 2018/4/29
 */
public class MyQueue2Stack {

    public MyQueue queue1;
    public MyQueue queue2;
    public int max;


    public MyQueue2Stack() {
        queue1 = new MyQueue();
        queue2 = new MyQueue();
    }


    public void push(int x) {
        if (queue1.isEmpty()) {
            queue2.put(x);
        } else if (queue2.isEmpty()) {
            queue1.put(x);
        }
    }

    public int pop() {
        if (size() == 0) {
            throw new IndexOutOfBoundsException("栈空了");
        } else {
            if (queue2.isEmpty()) {
                while (queue1.size() > 1) {
                    queue2.put(queue1.poll());
                }
                return queue1.poll();
            } else {
                while (queue2.size() > 1) {
                    queue1.put(queue2.poll());
                }
                return queue2.poll();
            }
        }
    }


    public int size() {
        return queue1.size() + queue2.size();
    }
}
用两个栈实现一个队列
public class MyStack2Queue {
    private Stack stack1;
    private Stack stack2;
    private int maxLength;

    public MyStack2Queue(int capcity) {
        this.maxLength = capcity;
        stack1 = new Stack(capcity);
        stack2 = new Stack(capcity);
    }

    /**
     * 入队
     *
     * @param item
     * @return
     */
    public boolean put(int item) {
        //判断 栈 1是否已经满 或者 总容量已经满
        if (stack1.isFull() || maxLength == size()) {
            return false;
        }

        stack1.push(item);
        return true;
    }

    /**
     * 出队
     *
     * @return
     */
    public int poll() {

        if (!stack2.isEmpty()) {
            return stack2.pop();
        } else {
            while (!stack1.isEmpty()) {
                stack2.push(stack1.pop());
            }
            return stack2.pop();
        }
    }

    public int size() {
        return stack1.size() + stack2.size();
    }
}
Android 中的队列
四种线程池的队列应用
在 Java 中本身有四种线程池的默认实现思路,实现缓冲作用的效果。这四种线程池分别为:
- newCachedThreadPool
- newFixedThreadPool
- newScheduledThreadPool
- newSingleThreadExecutor
newCachedThreadPool创建一个可缓存线程池,如果线程池长度超过处理需要,可灵活回收空闲线程,若无可回收,则新建线程。
newFixedThreadPool 创建一个定长线程池,可控制线程最大并发数,超出的线程会在队列中等待。
newScheduledThreadPool 创建一个定长线程池,支持定时及周期性任务执行。
newSingleThreadExecutor 创建一个单线程化的线程池,它只会用唯一的工作线程来执行任务,保证所有任务按照指定顺序(FIFO, LIFO, 优先级)执行。
四种线程池的实现,本身有自己的特点,这里就不一一赘述了,有需要理解的可以搜索一下的他们的默认实现,我在这里就点到为止,抛砖引玉。
Volley的队列实现
Volley 里边处理网络请求的时候,为了达到缓冲效果用到了队列这种数据结构,我截取一段代码,具体可以查看 Volley 源码分析。
public <T> Request<T> add(Request<T> request) {
        //把这个请求和当前队列发生关系
        request.setRequestQueue(this);
        synchronized (mCurrentRequests) {
            mCurrentRequests.add(request);
        }

        // 按照顺序添加到队列
        request.setSequence(getSequenceNumber());
        request.addMarker("add-to-queue");
        //如果这个请求不能进行缓存则将其直接添加到网络请求队列,request.shouldCache()
        //这个一般都是返回true,所以一般会走这个方法,可以直接跳过这个方法
        if (!request.shouldCache()) {
            mNetworkQueue.add(request);
            return request;
        }

        //如果有同样的请求真正进行中,则保持多线程同步
        synchronized (mWaitingRequests) {
            String cacheKey = request.getCacheKey();
            //如果是同样的请求,包含cacheKey则添加到
            if (mWaitingRequests.containsKey(cacheKey)) {
                Queue<Request<?>> stagedRequests = mWaitingRequests.get(cacheKey);
                if (stagedRequests == null) {
                    stagedRequests = new LinkedList<Request<?>>();
                }
                stagedRequests.add(request);
                mWaitingRequests.put(cacheKey, stagedRequests);
                ...
            } else {
                //添加一个cacheKey 表明当前请求正在进行中
                mWaitingRequests.put(cacheKey, null);
                mCacheQueue.add(request);
            }
            return request;
        }
    }
Volley 里边有维护着 mCacheQueue 与 mNetworkQueue 两个队列,从名字上就知道他们的意思,我这里就介绍到这里。
Okhttp的队列实现
okhttp 中也是为了实现缓冲作用,我们都知道okhttp 有同步和异步请求两种,内部的请求也是对应维护这对应的两个请求队列,代码如下
 // 异步准备执行的队列
  private final Deque<AsyncCall> readyAsyncCalls = new ArrayDeque<>();
  //异步正在执行的队列
  private final Deque<AsyncCall> runningAsyncCalls = new ArrayDeque<>();
  //同步正在执行队列
  private final Deque<RealCall> runningSyncCalls = new ArrayDeque<>();
并且里边运用了上边我们提到的线程池来实现对多线程的处理,代码如下:
  public synchronized ExecutorService executorService() {
    if (executorService == null) {
      executorService = new ThreadPoolExecutor(0, Integer.MAX_VALUE, 60, TimeUnit.SECONDS,
          new SynchronousQueue<Runnable>(), Util.threadFactory("OkHttp Dispatcher", false));
    }
    return executorService;
  }
EventBus 实现了解耦的作用
EventBus源码分析,刚开始不理解EventBus 的解耦的作用,但是忘记了 EventBus 本身就是解耦的作用,类似于广播接收者 BroadCast Reciver ,订阅者和发送者之间的关系,这样就可以不用笨重的 Listener 来实现。
EventBus 里边主要有三种类型的消息处理Poster,分别为 HandlerPoster 、BackgroundPoster 、 AsyncPoster,里边都有
// EventBus 三种 Poster 都维护的队列
private final PendingPostQueue queue;
// PendingPostQueue的 链表实现
final class PendingPostQueue {
    private PendingPost head;
    private PendingPost tail;

    synchronized void enqueue(PendingPost pendingPost) {
        ...
        notifyAll();
    }

    synchronized PendingPost poll() {
        PendingPost pendingPost = head;
        if (head != null) {
            head = head.next;
            if (head == null) {
                tail = null;
            }
        }
        return pendingPost;
    }

    synchronized PendingPost poll(int maxMillisToWait) throws InterruptedException {
        if (head == null) {
            wait(maxMillisToWait);
        }
        return poll();
    }

}
总结
经过两周的准备终于写完了这篇文章,查看了自己不熟悉的 EventBus源码,为了看看他如何实现解耦的作用,也是最近没有写文章的原因,文笔确实生疏,希望大家看过之后有所收获吧!
关注博主是一种态度,评论博主是一种欣赏!!
关注微信公众号:YangZheShare
(欢迎关注,最新最实用的技术干货分享)