一、SpringBoot配置静态资源
1. 使用webjars直接导入静态资源的jar包
@Override
public void addResourceHandlers(ResourceHandlerRegistry registry) {
    if (!this.resourceProperties.isAddMappings()) {
        logger.debug("Default resource handling disabled");
        return;
    }
    Integer cachePeriod = this.resourceProperties.getCachePeriod();
    if (!registry.hasMappingForPattern("/webjars/**")) {
        customizeResourceHandlerRegistration(registry
                                             .addResourceHandler("/webjars/**")
                                             .addResourceLocations("classpath:/META-INF/resources/webjars/")
                                             .setCachePeriod(cachePeriod));
    }
    String staticPathPattern = this.mvcProperties.getStaticPathPattern();
    if (!registry.hasMappingForPattern(staticPathPattern)) {
        customizeResourceHandlerRegistration(
            registry.addResourceHandler(staticPathPattern)
            .addResourceLocations(
                this.resourceProperties.getStaticLocations())
            .setCachePeriod(cachePeriod));
    }
}

// 配置欢迎页映射
@Bean
public WelcomePageHandlerMapping welcomePageHandlerMapping(
    ApplicationContext applicationContext) {
    return new WelcomePageHandlerMapping(
        new TemplateAvailabilityProviders(applicationContext),
        applicationContext, getWelcomePage(),
        this.mvcProperties.getStaticPathPattern());
}
所有 /webjars/** 路径下的文件,都去 classpath:/META-INF/resources/webjars/ 路径下寻找资源
webjars:以 jar 的方式引入静态资源
直接引入所需要的静态文件的依赖,比如我在 pom 文件中引入 jQuery 的依赖
<!-- 引入jquery-webjar -->
<dependency>
    <groupId>org.webjars</groupId>
    <artifactId>jquery</artifactId>
    <version>3.3.1-1</version>
</dependency>
引入成功后,便会下载对应的 jar 包,

2. 访问当前项目下的任何资源
可以去以下路径去寻找资源,包括静态资源
"classpath:/META-INF/resources/"	// 类路径下的 /WEB-INF/resources 文件夹
"classpath:/resources/"				// 类路径下的 resources 文件夹
"classpath:/static/"				// 类路径下的 static 文件夹
"classpath:/public/"				// 类路径下的 public 文件夹
"/"  								// 当前项目的根路径
比如可以把静态文件放置在 SpringBoot 项目的 resources 类路径下的 static 文件夹下
http://localhost:8080/asserts/css/signin.css :访问类路径下的 asserts/css 文件夹下的 signin.css 文件
3. 欢迎页
欢迎页默认访问静态资源文件夹下的所有 index.html 页面
http://localhost:8080/ 去项目路径下找到的 index.html
二、模板引擎
Jsp、Freemarker、Thymeleaf 等等

SpringBoot 推荐使用 Thymeleaf 模板引擎,该模板引擎语法更加简单,且功能更加强大
1. 引入Thymeleaf
在 SpringBoot 的 pom 文件中引入下面的依赖
<dependency>
    <groupId>org.springframework.boot</groupId>
    <artifactId>spring-boot-starter-thymeleaf</artifactId>
</dependency>
2. Thymeleaf的HelloWorld
@ConfigurationProperties(prefix = "spring.thymeleaf")
public class ThymeleafProperties {

	private static final Charset DEFAULT_ENCODING = StandardCharsets.UTF_8;

	public static final String DEFAULT_PREFIX = "classpath:/templates/";

	public static final String DEFAULT_SUFFIX = ".html";

    ...
}
上面配置文件规定了我们需要把 xxx.html 的文件放在 classpath:/templates/ 路径下,此时后台数据便可以通过 Thymeleaf 模板引擎渲染到 xxx.html 文件中
比如我们在 Controller 层中有这么一个方法
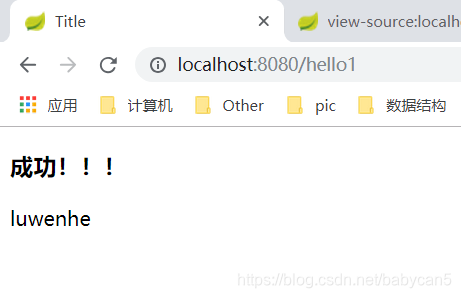
@Controller
public class HelloController {

    @RequestMapping("/hello1")
    public String success(Model model) {
        model.addAttribute("name", "luwenhe");
        return "success";
    }

}
此时当请求地址 http://localhost:8080/success,便会请求 classpath:/templates 下的 success.html 页面,如果要从后台获取参数的话,则需要引入地址
`<!DOCTYPE html>
<html lang="en" xmlns:th="http://www.thymeleaf.org">
<head>
    <meta charset="UTF-8">
    <title>Title</title>
</head>
<body>
    <h3>成功!!!</h3>

    <!-- th:text: 从后台获取键为name值,并填充div里面的值 -->
    <div th:text="${name}">
        hello world!!!
    </div>
</body>
</html>
结果为:
需要注意的是,如果要在 html 页面上使用 Thymeleaf 的语法,则需要在 标签里面导入 Thymeleaf 的名称空间
<html xmlns:th="http://www.thymeleaf.org">
3. 语法
①. th标签
| th标签 | 功能介绍 |
|---|---|
| th:insert | 代码片段包含 |
| th:foreach | 遍历元素(c:forEach) |
| th:if、th:unless、th:switch、th:case | 对变量进行条件判断(c:if) |
| th:object、th:with | 声明变量和赋值(c:set) |
| th:attr、th:attrprepend、th:attrappend | 修改任意属性 |
| th:value、th:href、th:src | 修改指定属性的默认值 |
| th:text、th:utext | 修改标签体内容,前者可以转义字符,后者不可以转义 |
| th:fragment | 声明片段 |
②. 使用表达式
2.1 简单的表达式
语法:${...}
1.该表达式用来获取变量值,使用OGNL语法
/*
* Access to properties using the point (.). Equivalent to calling property getters.
*/
${person.father.name}
/*
* Access to properties can also be made by using brackets ([]) and writing
* the name of the property as a variable or between single quotes.
*/
${person['father']['name']}
/*
* If the object is a map, both dot and bracket syntax will be equivalent to
* executing a call on its get(...) method.
*/
${countriesByCode.ES}
${personsByName['Stephen Zucchini'].age}
/*
* Indexed access to arrays or collections is also performed with brackets,
* writing the index without quotes.
*/
${personsArray[0].name}
/*
* Methods can be called, even with arguments.
*/
${person.createCompleteName()}
${person.createCompleteNameWithSeparator('-')}
可以获得对象的属性,获取Map键值对或者,获取方法等等
2.我们也可以在 ${xxx} 里面使用内置的基本对象
即在 ${xxx} 里面使用以 # 开头的对象
#ctx : the context object.
#vars: the context variables.
#locale : the context locale.
#request : (only in Web Contexts) the HttpServletRequest object.
#response : (only in Web Contexts) the HttpServletResponse object.
#session : (only in Web Contexts) the HttpSession object.
#servletContext : (only in Web Contexts) the ServletContext object.
实例
Established locale country: <span th:text="${#locale.country}">US</span>.
3.我们可以在 ${xxx} 里面使用工具对象
#execInfo : information about the template being processed.
#messages : methods for obtaining externalized messages inside variables expressions, in the same way as they would be obtained using #{…} syntax.
#uris : methods for escaping parts of URLs/URIs
#conversions : methods for executing the configured conversion service (if any).
#dates : methods for java.util.Date objects: formatting, component extraction, etc.
#calendars : analogous to #dates , but for java.util.Calendar objects.
#numbers : methods for formatting numeric objects.
#strings : methods for String objects: contains, startsWith, prepending/appending, etc.
#objects : methods for objects in general.
#bools : methods for boolean evaluation.
#arrays : methods for arrays.
#lists : methods for lists.
#sets : methods for sets.
#maps : methods for maps.
#aggregates : methods for creating aggregates on arrays or collections.
#ids : methods for dealing with id attributes that might be repeated (for example, as a result of an iteration).
语法:*{...},选择表达式,和 ${...} 在功能上是一样的,需要配合 th:object 语法进行使用
/**
 * 先使用 th:object 表达式来获取 session 的 user 对象,然后下面使用 *{...} 表达式获取 user 对象里面的各个属性
 */
<div th:object="${session.user}">
    <p>Name: <span th:text="*{firstName}">Sebastian</span></p>
    <p>Surname: <span th:text="*{lastName}">Pepper</span></p>
    <p>Nationality: <span th:text="*{nationality}">Saturn</span></p>
</div>

类似于

/**
 * 直接使用 ${...} 表达式获取 session 里面的 user 对象的 firstName 等属性
 */
<div>
    <p>Name: <span th:text="${session.user.firstName}">Sebastian</span>.</p>
    <p>Surname: <span th:text="${session.user.lastName}">Pepper</span>.</p>
    <p>Nationality: <span th:text="${session.user.nationality}">Saturn</span>.</p>
</div>
语法:#{...},获取国际化的内容
语法:@{...},定义链接的 URL 地址
<!-- Will produce 'http://localhost:8080/gtvg/order/details?orderId=3' (plus rewriting) -->
<a href="details.html"
th:href="@{http://localhost:8080/gtvg/order/details(orderId=${o.id})}">view</a>
<!-- Will produce '/gtvg/order/details?orderId=3' (plus rewriting) -->
<a href="details.html" th:href="@{/order/details(orderId=${o.id})}">view</a>
<!-- Will produce '/gtvg/order/3/details' (plus rewriting) -->
<a href="details.html" th:href="@{/order/{orderId}/details(orderId=${o.id})}">view</a>
可以使用 th:href 语法来定义一个链接的地址,地址中的参数(以前使用 ? 后面跟着的参数),如今可以使用小括号来代替
语法:~{...},片段引用的表达式
<div th:insert="~{commons :: main}">...</div>
2.2 使用字面量(Literals)
Text literals: 'one text' , 'Another one!' ,…	// 字符串
Number literals: 0 , 34 , 3.0 , 12.3 ,…			// 数字
Boolean literals: true , false					// 布尔值
Null literal: null
Literal tokens: one , sometext , main ,…
举例子:
// Text literals
<p>
Now you are looking at a <span th:text="'working web application'">template file</span>.
</p>

// Number literals
<p>The year is <span th:text="2013">1492</span>.</p>
<p>In two years, it will be <span th:text="2013 + 2">1494</span>.</p>

// Boolean literals
<div th:if="${user.isAdmin()} == false">
<div th:if="${user.isAdmin() == false}">

// The null literal
<div th:if="${variable.something} == null"> ...
2.3 使用文本(Text)
String concatenation: +							// 字符串拼接
Literal substitutions: |The name is ${name}|	// 字符串替换
举例子:
// 在文本中使用 + 符号完成字符串拼接
<span th:text="'The name of the user is ' + ${user.name}">

// 更加简洁的写法,该写法和上面的写法类似
<span th:text="|Welcome to our application, ${user.name}!|">
2.4 使用数学运算(Arithmetic)
Binary operators: + , - , * , / , %
Minus sign (unary operator): -
举例子:
<div th:with="isEven=(${productStat.count} % 2 == 0)">
or
<div th:with="isEven=${productStat.count % 2 == 0}">
2.5 使用布尔运算(Boolean)
Binary operators: and , or
Boolean negation (unary operator): ! , not
2.6 使用比较运算(Comparisons)
Comparators: > , < , >= , <= ( gt , lt , ge , le )
Equality operators: == , != ( eq , ne )
举例子:
// 可以使用运算符号来比较大小,而在 xml 中应该使用 gt、lt 等替代运算符
<div th:if="${prodStat.count} > 1">
<span th:text="'Execution mode is ' + ( (${execMode} == 'dev')? 'Development' : 'Production')">
2.7 使用条件运算(三元运算符)
If-then: (if) ? (then)
If-then-else: (if) ? (then) : (else)
Default: (value) ?: (defaultvalue)
举例子:
<tr th:class="${row.even}? 'even' : 'odd'">
...
</tr>
2.8 使用内联
语法:[[...]] 或 [(...)]
我们可以将表达式直接编写到 HTML 的文本中,如
<p>Hello, [[${session.user.name}]]!</p>
而之前,我们是将表达式直接写在标签里面的
<p>Hello, <span th:text="${session.user.name}">Sebastian</span>!</p>
使用 [[…]] 或 [(…)] 这样的表达式被称作内联表达式,在其中我们可以使用任何类型的表达式。其中 [[…]] 对应于 th:text,能够被转义(显示如
…
),而 [(…)] 对应于 th:utext,并不能转义(显示加粗后的字体)三、扩展 SpringMVC
如果需要实现以下的功能
<!-- 将 hello 请求返回到 success.html 页面 -->
<mvc:view-controller path="/hello" view-name="success"/>

<!-- 定义 SpringMVC 的拦截器 -->
<mvc:interceptors>
    <mvc:interceptor>
    	<!-- 拦截hello请求 -->
    	<mvc:mapping path="/hello"/>
        <!-- 拦截器的具体实现 -->
        <bean class="..."/>
    </mvc:interceptor>
</mvc:interceptors>
在 SpringBoot 中可以使用 @Configuration 注解编写一个配置类,该类是 WebMvcConfigurerAdapter 类型的,且不能使用 @EnableWebMVC 注解来标注该类
使用一个类来继承 WebMvcConfigurerAdapter,并且重写 addViewControllers 方法
// 使用 WebMvcConfigurerAdapter 可以来扩展 SpringMVC 的功能
@Configuration
public class MyMvcConfig extends WebMvcConfigurerAdapter {

    @Override
    public void addViewControllers(ViewControllerRegistry registry) {
        // 浏览器发送 /hello 请求到 success.html 页面
        registry.addViewController("/hello456").setViewName("success");
    }
}
四、参考
《Thymeleaf官方文档》