本章主要介绍:
1,页面模板的使用,采用官方推荐的Thymeleaf模板
2,集成mybatis开发,数据库采用mysql
开发工具:
eclipse
JDK1.8
maven
新建一个Springboot项目。
一,SpringBoot开发的web支持
SpringBoot提供了spring-boot-starter-web依赖作为作为web开发支持,spring-boot-starter-web嵌入了Tomcat和SpringMVC的依赖,而web开发的相关自动配置存储在spring-boot-autoconfigure.jar的org.springframework.boot.auotoconfigure.web下:

web依赖:
       <dependency>
            <groupId>org.springframework.boot</groupId>
            <artifactId>spring-boot-starter-web</artifactId>
        </dependency>
传统的java项目开发一般使用jsp作为view,而Springboot官方已经不推荐使用JSP来开发WEB了,而是推荐使用如下几种模板引擎来开发:
Thymeleaf(Spring官方推荐)
FreeMarker
Velocity
Groovy
Mustache
目前业界使用最广泛的还是FreeMaker和Velocity,Spring官方推荐使用Thymeleaf,
因为Thymeleaf提供了完美的Spring MVC的支持。
Thymeleaf 是Java服务端的模板引擎,与传统的JSP不同,前者可以使用浏览器直接打开,因为可以忽略掉拓展属性,相当于打开原生页面,给前端人员也带来一定的便利。如果你已经厌倦了JSP+JSTL的组合,Thymeleaf或许是个不错的选择。
Thymeleaf
Thymeleaf是一个java类库,它是一个xml/xhtml/html5的模板引擎,可以作为MVC的web应用的View层。
Thymeleaf还提供了额外的模板与SpringMVC的集成,所以我们可以使用Thymeleaf完全代替jsp;
模板的引入:
       <dependency>
            <groupId>org.springframework.boot</groupId>
            <artifactId>spring-boot-starter-thymeleaf</artifactId>
        </dependency>
web的静态资源有 js、css、图片等
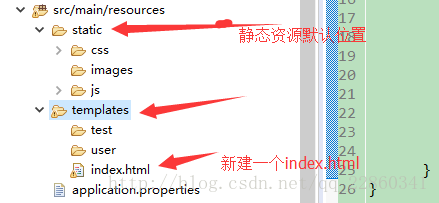
Spring Boot默认提供静态资源目录位置:
classpath:/META-INF/resources/
classpath:/resources/
classpath:/static/              默认用于存放静态资源
classpath:/public/

classpath:/templates/    默认的页面存放位置
可以在application.properties文件中修改默认配置:
#修改默认视图地址
spring.view.prefix=/WEB-INF/jsp/.....
#设定mvc视图的后缀.
spring.view.suffix=.html
本例采用默认的配置方式:
新建一个controller源码如下:
import java.util.ArrayList;
import java.util.List;
import org.springframework.stereotype.Controller;
import org.springframework.ui.Model;
import org.springframework.web.bind.annotation.RequestMapping;

@Controller
public class HelloController {

    @RequestMapping("/index")
      public String index(Model model){

          List<String> list =  new ArrayList<String>();
          list.add("test1");
          list.add("test2");
          list.add("test3");
          list.add("test4");
          model.addAttribute("name", "bobo");
          model.addAttribute("list", list);
        return "index";

      }
}
index.html:
<!DOCTYPE html>
<html lang="en">
<head>
    <meta charset="UTF-8" />
    <title>Title</title>
</head>
    <link rel="stylesheet" type="text/css" href="" />
    <script type="text/javascript" th:src="@{js/jquery-3.3.1.min.js}"></script>

<script type="text/javascript">
/*    验证引入的jquery-3.3.1.min.js是否有效 */
  $(function(){
      alert(11);
  });
</script>
<body>
     <!-- 获取一般的字符串 -->
    <h1 th:text="${name}"></h1>
    <!-- list循环取值 -->
    <ul>
        <li th:each="item: ${list}" th:text="${item}"></li>
    </ul>

</body>
</html>
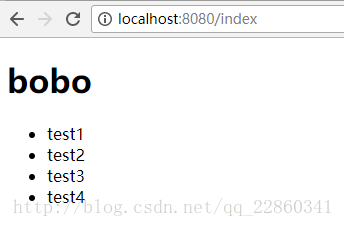
运行入口类
显示效果:
thymeleaf模板的更多取值方法可参考:
http://blog.csdn.net/qq_22860341/article/details/79229181
集成mybatis
前面介绍了thymeleaf模板引擎的使用,下面介绍从数据库中获取数据。
在原项目的基础上,在pom.xml中加入mybatis和mysql依赖支持:
pom.xml:
      <dependency>
            <groupId>org.mybatis.spring.boot</groupId>
            <artifactId>mybatis-spring-boot-starter</artifactId>
            <version>1.3.1</version>
     </dependency>
        <dependency>
            <groupId>mysql</groupId>
            <artifactId>mysql-connector-java</artifactId>
            <scope>runtime</scope>
        </dependency>
新建数据库huahua,创建一个测试表
DROP TABLE IF EXISTS `user`;
CREATE TABLE `user` (
  `userid` int(11) NOT NULL AUTO_INCREMENT,
  `account` varchar(255) DEFAULT NULL,
  `password` varchar(255) DEFAULT NULL,
  `name` varchar(255) DEFAULT NULL,
  `sex` varchar(255) DEFAULT NULL,
  `parent` varchar(255) DEFAULT NULL,
  `phone` varchar(255) DEFAULT NULL,
  `createtime` datetime DEFAULT NULL,
  `usertype` int(11) DEFAULT NULL,
  `classes` varchar(255) DEFAULT NULL,
  `address` varchar(255) DEFAULT NULL,
  PRIMARY KEY (`userid`)
) ENGINE=InnoDB AUTO_INCREMENT=3 DEFAULT CHARSET=utf8;

-- ----------------------------
-- Records of user
-- ----------------------------
INSERT INTO `user` VALUES ('1', 'admin', '1', 'bobo', '男', '123', '123456789', '2018-02-01 10:54:12', '1', '一班', '青羊区');
INSERT INTO `user` VALUES ('2', 'test', '1', '测试', '女', '3344', '18308245666', '2018-02-02 13:58:04', '2', '二班', '天府广场');
在application.properties文件中加入数据源,默认数据源:
spring.datasource.url=jdbc:mysql://localhost:3306/huahua
spring.datasource.username=root
spring.datasource.password=root
spring.datasource.driver-class-name=com.mysql.jdbc.Driver
使用mybatis generator自动生成代码.
http://blog.csdn.net/qq_22860341/article/details/72638725
自动生成文件如下:

在生成的UserMapper.java中加入@mapper注解。
//使用@Mapper注解来标识一个接口为MyBatis的接口,MyBatis会自动寻找这个接口
@Mapper
public interface UserMapper {
    int deleteByPrimaryKey(Integer userid);

    int insert(User record);

    int insertSelective(User record);

    User selectByPrimaryKey(Integer userid);

    int updateByPrimaryKeySelective(User record);

    int updateByPrimaryKey(User record);

    List<User> selectAllUser();
}
创建servie层,这和一般的web配置是一样的。
public interface UserService {

        int deleteByPrimaryKey(Integer userid);

        int insert(User record);

        int insertSelective(User record);

        User selectByPrimaryKey(Integer userid);

        int updateByPrimaryKeySelective(User record);

        int updateByPrimaryKey(User record);

        List<User> selectAllUser();

}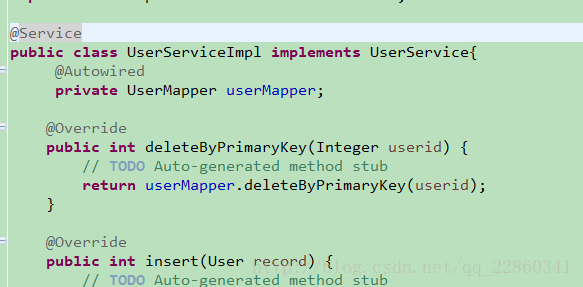
注意一定要在mapper.java中配置@mapper注解,不然不会被扫描。
最后在controller调用即可方法即可。
以上xml是配置在默认的包下,会自动配置。需要修改在application.properties中加入:
spring.mybatis.mapperLocations=classpath:mapper/*.xml //修改发布Springboot项目时,如果新建项目是war包,可以像一般的web项目一样发布。
tomcat配置
SpringBoot在加入web依赖时,为tomcat做了自动配置。
可以直接在application.properties配置:
server.port=  #配置端口,默认8080
server.session-timeout=  #session失效时间
server.context-path=/springboot  #项目访问路径
server.tomcat.uri-encoding=  #编码,默认UTF-8
server.tomcat.compression= #是否开启tomcat压缩,默认off