版权声明:@Wrial https://blog.csdn.net/qq_42605968/article/details/86731830
上一篇写的是关于AOP的注解配置,今天就讲一讲JDBC模板和事务管理,事务管理可以说是Spring的比较重要的一部分.
JDBC模板
在Spring中也用通用的一套JDBC模板,用法和前面的dbutils有的地方也很相似,下来我们就实例讲解一下
Spring内置连接池
Spring中JDBC模板的使用
1.建立数据库,数据表

2.实例化一个datasource(数据源,里边封装这数据库连接池)
  DriverManagerDataSource dataSource = new DriverManagerDataSource();
        dataSource.setDriverClassName("com.mysql.cj.jdbc.Driver");
        dataSource.setUsername("root");
        dataSource.setUrl("jdbc:mysql://localhost:3306/Spring?serverTimezone=UTC&useSSL=false&allowPublicKeyRetrieval=true");
        dataSource.setPassword("wrial.qq.com");
3.实例化一个JDBC模板,并传入datasource
JdbcTemplate jdbcTemplate = new JdbcTemplate(dataSource);
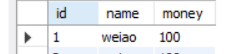
jdbcTemplate.update("insert into spring1 values (null ,?,?)","weiao",100);
框架的灵魂就是为了简化代码,这反而还更多了,于是我们可能想到用properties配置,也可以,因为前面的dbutils也是用的properties,但是结合起我们前边学的Ioc,我们也许会想出更好的解决方案,可以极大的减少代码长度.
下来我就利用Ioc和属性注入来简化这一过程(记住:一切可以new的东西都可以交给Spring管理),而且这个只能用xml,注解干不了这个事(前边讲到过).
 <bean id="dataSource" class="org.springframework.jdbc.datasource.DriverManagerDataSource">
        <property name="driverClassName" value="com.mysql.cj.jdbc.Driver"/>
        <property name="url" value="jdbc:mysql://localhost:3306//spring"/>
        <property name="username" value="root"/>
        <property name="password" value="wrial.qq.com"/>
    </bean>
    <bean id="jdbcTemplate" class="org.springframework.jdbc.core.JdbcTemplate">
        <property name="dataSource" ref="dataSource"/>
    </bean>
//测试代码
@RunWith(SpringJUnit4ClassRunner.class)
@ContextConfiguration("classpath:SpringJdbc.xml")//场景配置
public class JdbcDemoXml {
    @Resource(name = "jdbcTemplate")
    private JdbcTemplate jdbcTemplate;
    @Test
    public void test01(){
        jdbcTemplate.update("insert into spring1 values (null ,?,?)","xxx",200.0);
    }

这个测试代码是不是看起来就很简洁了,只需需要两句话就可以解决.这就算Spring管理的好处.
DBCP
需要导入的jar包

属性配置恰巧和spring自带连接池相同
<bean id="dataSource" class="org.apache.commons.dbcp.BasicDataSource">
<property name="driverClassName" value="com.mysql.cj.jdbc.Driver"/>
<property name="url" value="jdbc:mysql://localhost:3306/spring?serverTimezone=UTC&useSSL=false&allowPublicKeyRetrieval=true"/>
<property name="username" value="root"/>
<property name="password" value="wrial.qq.com"/>
</bean>
@Test
    public void test01(){
        jdbcTemplate.update("insert into spring1 values (null ,?,?)","dbcp",200.0);
    }

C3P0
需要导入的jar包

<!--c3p0连接池-->
<bean id="dataSource" class="com.mchange.v2.c3p0.ComboPooledDataSource">
<property name="driverClass" value="com.mysql.cj.jdbc.Driver"/>
<property name="jdbcUrl" value="jdbc:mysql://localhost:3306/spring?serverTimezone=UTC&useSSL=false&allowPublicKeyRetrieval=true"/>
<property name="user" value="root"/>
<property name="password" value="wrial.qq.com"/>
</bean>

但是我们前边一般给数据库单独写在一个配置文件里,因为在配置文件中配置数据库更方便而且也能和Spring划分开来,需要改数据库时就不用在杂乱的xml中去找,直接改属性文件就行,因此下边我们我采用xml引入properties配置文件
注意:配置文件里可以用特殊符号
扫描二维码关注公众号,回复:
5293557 查看本文章

jdbc.driverClass = com.mysql.cj.jdbc.Driver
jdbc.url = jdbc:mysql://localhost:3306/spring?serverTimezone=UTC&useSSL=false&allowPublicKeyRetrieval=true
jdbc.user = root
jdbc.password = wrial.qq.com
需要使用配置文件里属性必须用${}包裹起来
 <!--引入配置文件方式-->
    <context:property-placeholder location="classpath:jdbc.properties"/>
    <bean id="dataSource" class="com.mchange.v2.c3p0.ComboPooledDataSource">
        <property name="driverClass" value="${jdbc.driverClass}"/>
        <property name="jdbcUrl" value="${jdbc.url}"/>
        <property name="user" value="${jdbc.user}"/>
        <property name="password" value="${jdbc.password}"/>
    </bean>
    <bean id="jdbcTemplate" class="org.springframework.jdbc.core.JdbcTemplate">
        <property name="dataSource" ref="dataSource"/>
    </bean>

CRUD操作
package SpringUseJdbc;


import org.junit.Test;
import org.junit.runner.RunWith;
import org.springframework.jdbc.core.JdbcTemplate;
import org.springframework.jdbc.core.RowMapper;
import org.springframework.test.context.ContextConfiguration;
import org.springframework.test.context.junit4.SpringJUnit4ClassRunner;

import javax.annotation.Resource;
import java.sql.ResultSet;
import java.sql.SQLException;
import java.util.List;

@RunWith(SpringJUnit4ClassRunner.class)
@ContextConfiguration("classpath:SpringJdbc.xml")//场景配置
public class JdbcDemoXml {
    @Resource(name = "jdbcTemplate")//只能在单元测试用,如果不是单元测试就必须要打开配置
    private JdbcTemplate jdbcTemplate;
    @Test
    //添加记录
    public void test01(){
        jdbcTemplate.update("insert into spring1 values (null ,?,?)","prop",1000);
    }
    @Test
    // 修改操作
    public void demo2(){
        jdbcTemplate.update("update account set name = ? ,money = ? where id = ?", "李白",123,6);
    }

    @Test
    // 删除操作
    public void demo3(){
        jdbcTemplate.update("delete from spring1 where id = ?", 6);
    }

    @Test
    // 查询操作:
    public void demo4(){
        String name = jdbcTemplate.queryForObject("select name from spring1 where id = ?", String.class, 5);
        System.out.println(name);
    }

    @Test
    // 统计查询
    public void demo5(){
        Long count = jdbcTemplate.queryForObject("select count(*) from spring1", Long.class);
        System.out.println(count);
    }

    @Test
    // 封装到一个对象中
    public void demo6(){
        Account account = jdbcTemplate.queryForObject("select * from spring1 where id = ?", new MyRowMapper(), 5);
        System.out.println(account);
    }

    @Test
    // 查询多条记录
    public void demo7(){
        List<Account> list = jdbcTemplate.query("select * from spring1", new MyRowMapper());
        for (Account account : list) {
            System.out.println(account);
        }
    }


  /**
    * 如果需要返回以对象,就必须实现RwoMapper接口,在mapRow里进行封装
    * */
    class MyRowMapper implements RowMapper<Account> {

        @Override
        public Account mapRow(ResultSet rs, int rowNum) throws SQLException {
            Account account = new Account();
            account.setId(rs.getInt("id"));
            account.setName(rs.getString("name"));
            account.setMoney(rs.getDouble("money"));
            return account;
        }

    }
}
以上就是Spring中JDBC模板的使用,可能后边的数据库使用框架管理这个加以了解会用就ok了.
下一篇写Spring事务(重点)