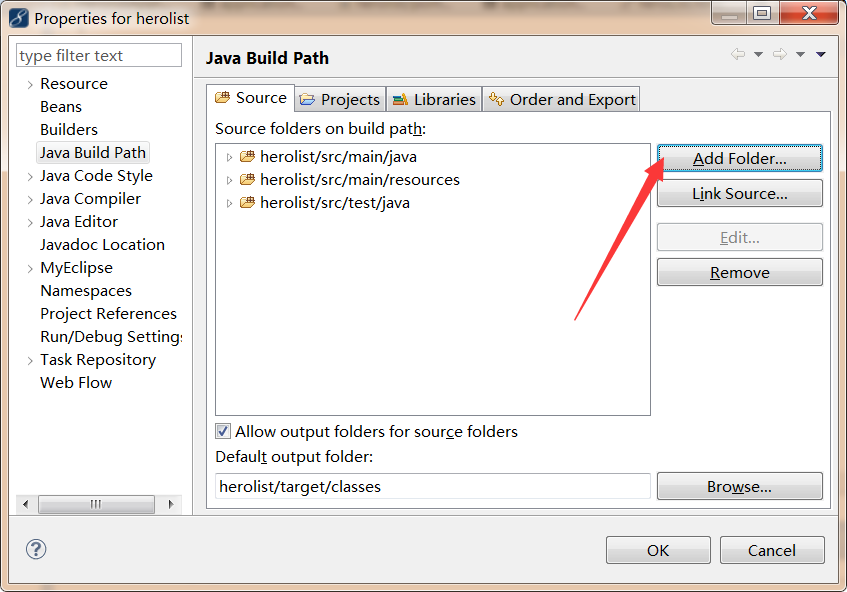
再开始第三节之前,先补充一下第二节里出现的小问题,就是springboot的application.properties,我在文件中添加了server.port=9090这个参数,但是启动项目后并未生效,检查了一下原因,是因为未读取到该文件,这里可以通过buildpath添加source文件夹解决,如下图:
好了,我们一起开始第三节:
这一节我们来扩展我们的应用程序,在pom文件中添加以下依赖:
<dependency>
<groupId>org.springframework.boot</groupId>
<artifactId>spring-boot-starter-security</artifactId>
</dependency>
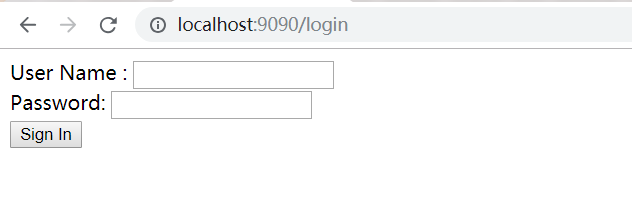
运行项目,打开之前的页面地址,发现进入了一个登录页面,如下图:

用户名为user,密码在eclipse的控制台可以看到,如下图:

输入之后登录成功,就可以正常访问页面了。
但这样肯定不能满足我们的需求,所以我们需要创建自定义的安全配置,
1、扩展WebSecurityConfigurerAdapter配置类:
package com.dota.herolist.security;
import org.springframework.beans.factory.annotation.Autowired;
import org.springframework.context.annotation.Bean;
import org.springframework.context.annotation.Configuration;
import org.springframework.security.config.annotation.web.builders.HttpSecurity;
import org.springframework.security.config.annotation.web.configuration.EnableWebSecurity;
import org.springframework.security.config.annotation.web.configuration.WebSecurityConfigurerAdapter;
import org.springframework.security.core.userdetails.User;
import org.springframework.security.core.userdetails.UserDetails;
import org.springframework.security.core.userdetails.UserDetailsService;
import org.springframework.security.core.userdetails.UsernameNotFoundException;
import org.springframework.security.crypto.bcrypt.BCryptPasswordEncoder;
import org.springframework.security.provisioning.InMemoryUserDetailsManager;
import com.dota.herolist.repository.UserRepository;
@Configuration
@EnableWebSecurity
public class SecurityConfig extends WebSecurityConfigurerAdapter{
@Autowired
private UserRepository userRepository;
@Override
protected void configure(HttpSecurity http) throws Exception{
http.authorizeRequests()
.antMatchers("/heroList/**").hasRole("player")//查看该路径必须拥有player角色
.and()
.formLogin().loginPage("/login").failureUrl("/login?error=true");
}
@Bean
@Override
public UserDetailsService userDetailsService() {
UserDetails user =
User.withDefaultPasswordEncoder()
.username("user")
.password("password")
.roles("player")
.build();
return new In MemoryUserDetailsManager(user);
}
}
2、定义User实体的JPA实体
package com.dota.herolist.entity;
import java.util.ArrayList;
import java.util.Collection;
import java.util.List;
import javax.persistence.Entity;
import javax.persistence.Id;
import org.springframework.security.core.GrantedAuthority;
import org.springframework.security.core.authority.SimpleGrantedAuthority;
import org.springframework.security.core.userdetails.UserDetails;
@Entity
public class User implements UserDetails{
private static final long serialVersionUID = 1L;
@Id
private String username;
private String password;
public User(String username,String password){
this.username = username;
this.password = password;
}
public User() {
// TODO Auto-generated constructor stub
}
public String getUsername() {
return username;
}
public void setUsername(String username) {
this.username = username;
}
public String getPassword() {
return password;
}
public void setPassword(String password) {
this.password = password;
}
@Override
public Collection<? extends GrantedAuthority> getAuthorities() {
List<SimpleGrantedAuthority> list=new ArrayList<SimpleGrantedAuthority>();
list.add(new SimpleGrantedAuthority("player"));
return list;
}
@Override
public boolean isAccountNonExpired() {
// TODO Auto-generated method stub
return true;
}
@Override
public boolean isAccountNonLocked() {
// TODO Auto-generated method stub
return true;
}
@Override
public boolean isCredentialsNonExpired() {
// TODO Auto-generated method stub
return true;
}
@Override
public boolean isEnabled() {
// TODO Auto-generated method stub
return true;
}
}
3、添加controller层:
package com.dota.herolist.controller;
import org.springframework.stereotype.Controller;
import org.springframework.ui.Model;
import org.springframework.web.bind.annotation.RequestMapping;
import org.springframework.web.bind.annotation.RequestMethod;
@Controller
@RequestMapping("/")
public class LoginController {
@RequestMapping(value="/login",method=RequestMethod.GET)
public String login(Model model){
return "login";
}
}
4、添加html页面:
<!DOCTYPE html>
<html xmlns="http://www.w3.org/1999/xhtml" xmlns:th="http://www.thymeleaf.org"
xmlns:sec="http://www.thymeleaf.org/thymeleaf-extras-springsecurity3">
<head>
<title>dota hero </title>
</head>
<body>
<div th:if="${param.error}">
Invalid username and password.
</div>
<div th:if="${param.logout}">
You have been logged out.
</div>
<form th:action="@{/login}" method="post">
<div><label> User Name : <input type="text" name="username"/> </label></div>
<div><label> Password: <input type="password" name="password"/> </label></div>
<div><input type="submit" value="Sign In"/></div>
</form>
</body>
</html>
启动项目,
输入user,password登录成功。下一章我们将展示如何连接数据库进行安全认证。