之前笔者写过一篇关于win8.1搭建tensorflow-gpu的文章,本文笔者不过多写详细细节。笔者实验室新买了几台PC,显卡是RTX2070,比较新的显卡,在装CUDA9.0的时候回报如下的警告。虽然有这个警告,可以忽略,直接安装cuda9.0是没有问题的,因为后面测试显卡的代码跑起来没有问题。
This graphics driver could not find compatible graphics hardware. You may continue installation, but you may not be able to run CUDA applications with this driver. This may occur with graphics hardware that is newer than this toolkit. In that case, it is suggested that you keep your existing driver and install the remaining portions of the CUDA Toolkit.
此图形驱动程序找不到兼容的图形硬件。 您可以继续安装,但可能无法使用此驱动程序运行CUDA应用程序。 使用比此工具包更新的图形硬件可能会发生这种情况。 在这种情况下,建议您保留现有驱动程序并安装CUDA Toolkit的其余部分。
在安装tensorflow-gpu的时候,开始笔者用离线的方式安装,很神奇的是文件都没有安装到C:\Anaconda3\envs\tensorflow-gpu目录下面,而是安装到了c:\users\robot\appdata\roaming\目录下面,然后调用tf的时候总是报找不到文件的错误。后来笔者用如下命令进行安装得以解决问题。
pip install https://files.pythonhosted.org/packages/ae/d9/60e1e73abffaeb0aaca7cc2bcfeb973ec3b314a3e46e26270966829b5207/tensorflow_gpu-1.10.0-cp36-cp36m-win_amd64.whl
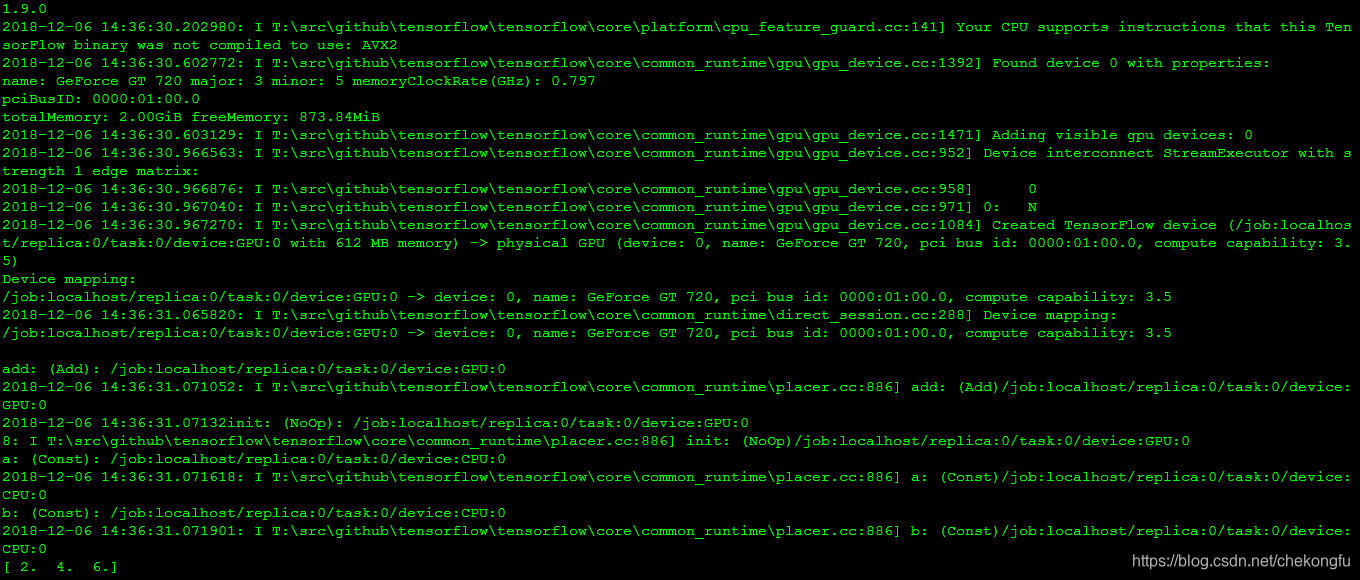
环境搭建完毕之后,用一下代码进行测试。
#coding=utf-8
import tensorflow as tf

print(tf.__version__)

with tf.device('/cpu:0'):
    a = tf.constant([1.0,2.0,3.0],shape=[3],name='a')
    b = tf.constant([1.0,2.0,3.0],shape=[3],name='b')
with tf.device('/gpu:1'):
    c = a+b

#注意:allow_soft_placement=True表明:计算设备可自行选择,如果没有这个参数,会报错。
#因为不是所有的操作都可以被放在GPU上,如果强行将无法放在GPU上的操作指定到GPU上,将会报错。
sess = tf.Session(config=tf.ConfigProto(allow_soft_placement=True,log_device_placement=True))
#sess = tf.Session(config=tf.ConfigProto(log_device_placement=True))
sess.run(tf.global_variables_initializer())
print(sess.run(c))
虽然笔者轻描淡写几行字写完了整个tensorflow-gpu环境搭建过程,笔者在安装过程中也遇到了很多坑,笔者感觉亲自动手的乐趣就是不断的遇到坑,不断填平坑的过程,最后完成目标。笔者的电脑显卡是RTX2070,搭建环境用到的软件是Win10+VS2015+CUDA9.0+nuDNN7.1+tensorflow-gpu-1.10,需要注意的是最好按照顺序安装。