树莓派3b+安装home assistant
- 安装树莓派操作系统
参考网站教程:https://blog.csdn.net/weixin_39449466/article/details/80686835
-
- 下载操作系统
官网下载RASPBIAN STRETCH WITH DESKTOP版本
地址:https://www.raspberrypi.org/downloads/raspbian/
下载后文件为:2018-10-09-raspbian-stretch.zip,大小:1.33 GB
解压后文件为:2018-10-09-raspbian-stretch.img,大小:3.85 GB
-
- 下载SD卡格式化软件
名称:SD card formatter , SD_CardFormatter0500SetupEN.exe
大小:6.67 MB
下载地址:https://www.sdcard.org/downloads/formatter_4/eula_windows/index.html
安装好后,选择sd卡后,直接点quick format就行。
-
- 下载SD卡烧录软件
名称:win32diskimager , win32diskimager-1.0.0-install.exe
大小:11.9 MB
下载地址:
https://jaist.dl.sourceforge.net/project/win32diskimager/Archive/win32diskimager-1.0.0-install.exe
安装好后,选择sd卡,选择刚刚解压的img文件,直接点写入就行。
-
- 修改配置,支持HDMI
在SD卡的根目录下,找到config.txt,打开把下面的#注释取消就行了。
# uncomment if hdmi display is not detected and composite is being output
hdmi_force_hotplug=1#
-
- 修改配置,支持SSH
打开cmd命令窗口,输入SD卡所在盘符,输入echo >ssh。
因为目前官方系统默认不开启ssh,在根目录下建立这个文件可以ssh了。
-
- 插入SD卡
将SD拔出,插入树莓派中,上电启动树莓派。
- 第一次启动配置
- 配置时区、语言、wifi等
按照图形界面的提示,把这些都配置好就行了
-
- 扩展系统空间
在ssh中输入:
sudo raspi-config
然后选择第一个ExpandFilesystem。OK
-
- 更改密码
如果之前改过密码了,那么就不用改了,没改的话,按照下面改密码。
如果刚才的设置界面没退出 选择 2 Change User Password就可以
如果刚才退出了 再次输入sudo raspi-config就行了
- 更换系统国内源
参考地址:
https://bbs.hassbian.com/forum.php?mod=viewthread&tid=4013&highlight=%E6%A0%91%E8%8E%93%E6%B4%BE%2B%E7%B3%BB%E7%BB%9F
-
- 修改树莓派Raspbian 系统源
sudo nano /etc/apt/sources.list
如下:注意要看自己的系统版本(stretch)
#deb http://raspbian.raspberrypi.org/raspbian/ stretch main contrib non-free rpi
# Uncomment line below then 'apt-get update' to enable 'apt-get source'
#deb-src http://raspbian.raspberrypi.org/raspbian/ stretch main contrib non-free rpi
#deb http://mirrors.aliyun.com/raspbian/raspbian/ stretch main contrib non-free rpi
#科大源
deb http://mirrors.ustc.edu.cn/raspbian/raspbian/ stretch main contrib non-free rpi
-
- 修改debian软件源
sudo nano /etc/apt/sources.list.d/raspi.list
如下:
#deb http://archive.raspberrypi.org/debian/ stretch main ui
# Uncomment line below then 'apt-get update' to enable 'apt-get source'
#deb-src http://archive.raspberrypi.org/debian/ stretch main ui
#deb http://mirrors.aliyun.com/debian/ stretch main ui
#科大源
deb http://mirrors.ustc.edu.cn/archive.raspberrypi.org/debian/ stretch main ui
-
- 更改pip的国内的源
我的pip配置文件在/etc/pip.conf
pi@raspberrypi:~ $ nano /etc/pip.conf
把原来的用#注释掉,然后在配置文件中写入
[global]
index-url = https://pypi.mirrors.ustc.edu.cn/simple/
[install]
trusted-host = pypi.mirrors.ustc.edu.cn
保存后,执行
sudo apt-get update
- 配置VNC
按照树莓派官网教程来做
地址:https://www.raspberrypi.org/documentation/remote-access/vnc/
-
- Enabling VNC Server(安装VNC服务端)
sudo apt-get update
sudo apt-get install realvnc-vnc-server realvnc-vnc-viewer
安装好之后,有两种开启模式,图形界面操作和命令行
-
-
- 图形界面
-
- On your Raspberry Pi, boot into the graphical desktop.
- Select Menu > Preferences > Raspberry Pi Configuration > Interfaces.
- Ensure VNC is Enabled.
- 其实这个地方也可以开启SSH服务等
-
- 命令行
-
- sudo raspi-config
- Navigate to Interfacing Options.
- Scroll down and select VNC > Yes.
- Windows端
文件:VNC-Viewer-6.18.907-Windows.exe
大小:9.53 MB
下载地址:https://www.realvnc.com/en/connect/download/viewer/
安装好之后,直接在输入框中输入树莓派的ip地址,然后根据提示输入用户名和密码就可以远程控制树莓派了。
- 安装Home Assistant
我没有用hass.io的方式来安装
参考官网教程:https://www.home-assistant.io/docs/installation/raspberry-pi/
https://www.home-assistant.io/docs/installation/hassbian/#
-
- 前置条件
You must have Python 3.5.3 or later installed (including the package python3-dev) which is the case for Raspbian Stretch.
我之前下载的系统就是官网最新的2018-10-9的Raspbian Stretch,满足了这个python版本要求,它包含了两个版本的python,2.7和3.5.3
pi@raspberrypi:~ $ python
Python 2.7.13 (default, Sep 26 2018, 18:42:22)
[GCC 6.3.0 20170516] on linux2
Type "help", "copyright", "credits" or "license" for more information.
>>>
pi@raspberrypi:~ $ python3
Python 3.5.3 (default, Sep 27 2018, 17:25:39)
[GCC 6.3.0 20170516] on linux
Type "help", "copyright", "credits" or "license" for more information.
>>>
-
- 开始安装
- Update the system.
$ sudo apt-get update
$ sudo apt-get upgrade –y
- Install the dependencies.
$ sudo apt-get install python3 python3-venv python3-pip
- 创建homeassistant用户
$ sudo useradd -rm homeassistant -G dialout,gpio
- 设置homeassistant用户密码
pi@raspberrypi:~ $ sudo passwd homeassistant
- 创建homeassistant工作目录
$ cd /srv
$ sudo mkdir homeassistant
$ sudo chown homeassistant:homeassistant homeassistant
$ sudo -u homeassistant -H –S
- 创建python3虚拟环境
$ cd /srv/homeassistant
$ python3 -m venv .
$ source bin/activate
(homeassistant) homeassistant@raspberrypi:/srv/homeassistant $ python3 -m pip install wheel
(homeassistant) homeassistant@raspberrypi:/srv/homeassistant $ pip3 install homeassistant
-
- 错误
Requirement already satisfied, skipping upgrade: MarkupSafe>=0.23 in /srv/homeassistant/lib/python3.6/site-packages (from jinja2>=2.10->homeassistant) (1.0)
Requirement already satisfied, skipping upgrade: pycparser in /srv/homeassistant/lib/python3.6/site-packages (from cffi!=1.11.3,>=1.7->cryptography==2.3.1->homeassistant) (2.19)
Building wheels for collected packages: cryptography, bcrypt, cffi
Running setup.py bdist_wheel for cryptography ... error
Complete output from command /srv/homeassistant/bin/python3 -u -c "import setuptools, tokenize;__file__='/tmp/pip-install-cl03y186/cryptography/setup.py';f=getattr(tokenize, 'open', open)(__file__);code=f.read().replace('\r\n', '\n');f.close();exec(compile(code, __file__, 'exec'))" bdist_wheel -d /tmp/pip-wheel-zady7x64 --python-tag cp36:
c/_cffi_backend.c:2:20: fatal error: Python.h: No such file or directory
compilation terminated.
Traceback (most recent call last):
File "/usr/lib/python3.6/distutils/unixccompiler.py", line 118, in _compile
extra_postargs)
File "/usr/lib/python3.6/distutils/ccompiler.py", line 909, in spawn
spawn(cmd, dry_run=self.dry_run)
File "/usr/lib/python3.6/distutils/spawn.py", line 36, in spawn
_spawn_posix(cmd, search_path, dry_run=dry_run)
File "/usr/lib/python3.6/distutils/spawn.py", line 159, in _spawn_posix
% (cmd, exit_status))
distutils.errors.DistutilsExecError: command 'arm-linux-gnueabihf-gcc' failed with exit status 1
-
-
- 解决
-
sudo apt-get install build-essential libssl-dev libffi-dev python-dev
-
- 如何启动
第一步:切换到homeassistant用户下
第二步:进入python3的虚拟环境目录
第三步:启动hass
sudo -u homeassistant -H -s
cd /srv/homeassistant
source bin/activate
(homeassistant) $ hass
-
- 设置开机启动
这里我采用了init.d (Linux)的方式来设置
官网配置地址:https://www.home-assistant.io/docs/autostart/init.d/
-
-
- 创建脚本
-
pi@raspberrypi:~ $ cd /etc/init.d/
pi@raspberrypi:/etc/init.d $ nano hass-daemon
将以下脚本全部复制到hass-daemon中
-
-
- 脚本内容
-
#!/bin/sh
### BEGIN INIT INFO
# Provides: hass
# Required-Start: $local_fs $network $named $time $syslog
# Required-Stop: $local_fs $network $named $time $syslog
# Default-Start: 2 3 4 5
# Default-Stop: 0 1 6
# Description: Home\ Assistant
### END INIT INFO
# /etc/init.d Service Script for Home Assistant
# Created with: https://gist.github.com/naholyr/4275302#file-new-service-sh
PRE_EXEC="cd /srv/homeassistant; python3 -m venv .; source bin/activate;"
# Typically /usr/bin/hass
HASS_BIN="hass"
RUN_AS="homeassistant"
PID_DIR="/var/run/hass"
PID_FILE="$PID_DIR/hass.pid"
CONFIG_DIR="/home/$RUN_AS/.homeassistant"
LOG_DIR="/var/log/homeassistant"
LOG_FILE="$LOG_DIR/home-assistant.log"
FLAGS="-v --config $CONFIG_DIR --pid-file $PID_FILE --log-file $LOG_FILE --daemon"
start() {
create_piddir
if [ -f $PID_FILE ] && kill -0 $(cat $PID_FILE) 2> /dev/null; then
echo 'Service already running' >&2
return 1
fi
echo -n 'Starting service… ' >&2
local CMD="$PRE_EXEC $HASS_BIN $FLAGS;"
su -s /bin/bash -c "$CMD" $RUN_AS
if [ $? -ne 0 ]; then
echo "Failed" >&2
else
echo 'Done' >&2
fi
}
stop() {
if [ ! -f "$PID_FILE" ] || ! kill -0 $(cat "$PID_FILE") 2> /dev/null; then
echo 'Service not running' >&2
return 1
fi
echo -n 'Stopping service… ' >&2
kill $(cat "$PID_FILE")
while ps -p $(cat "$PID_FILE") > /dev/null 2>&1; do sleep 1;done;
rm -f $PID_FILE
echo 'Done' >&2
}
install() {
echo "Installing Home Assistant Daemon (hass-daemon)"
update-rc.d hass-daemon defaults
create_piddir
mkdir -p $CONFIG_DIR
chown $RUN_AS $CONFIG_DIR
mkdir -p $LOG_DIR
chown $RUN_AS $LOG_DIR
}
uninstall() {
echo "Are you really sure you want to uninstall this service? The INIT script will"
echo -n "also be deleted! That cannot be undone. [yes|No] "
local SURE
read SURE
if [ "$SURE" = "yes" ]; then
stop
remove_piddir
echo "Notice: The config directory has not been removed"
echo $CONFIG_DIR
echo "Notice: The log directory has not been removed"
echo $LOG_DIR
update-rc.d -f hass-daemon remove
rm -fv "$0"
echo "Home Assistant Daemon has been removed. Home Assistant is still installed."
fi
}
create_piddir() {
if [ ! -d "$PID_DIR" ]; then
mkdir -p $PID_DIR
chown $RUN_AS "$PID_DIR"
fi
}
remove_piddir() {
if [ -d "$PID_DIR" ]; then
if [ -e "$PID_FILE" ]; then
rm -fv "$PID_FILE"
fi
rmdir -fv "$PID_DIR"
fi
}
case "$1" in
start)
start
;;
stop)
stop
;;
install)
install
;;
uninstall)
uninstall
;;
restart)
stop
start
;;
*)
echo "Usage: $0 {start|stop|restart|install|uninstall}"
esac
-
-
- 注册自启动服务
-
$ sudo service hass-daemon install
-
-
- 其他说明
-
- SELECT A USER.(设置运行hass的用户)
Create or pick a user that the Home Assistant daemon will run under. Update script to set RUN_AS to the username that should be used to execute hass.
- CHANGE HASS EXECUTABLE AND OTHER VARIABLES IF REQUIRED. (设置运行hass的工作目录和其他变量)
Some installation environments may require a change in the Home Assistant executable hass. Update script to set HASS_BIN to the appropriate hass executable path. Please also check the other variables for the appropriate value. In general the defaults should work
- 我不知道为什么在安装完之后,直接运行hass,web端就是不能访问hass,设置开启启动后就能访问了,奇怪。
- 重启树莓派
pi@raspberrypi:~ $ reboot
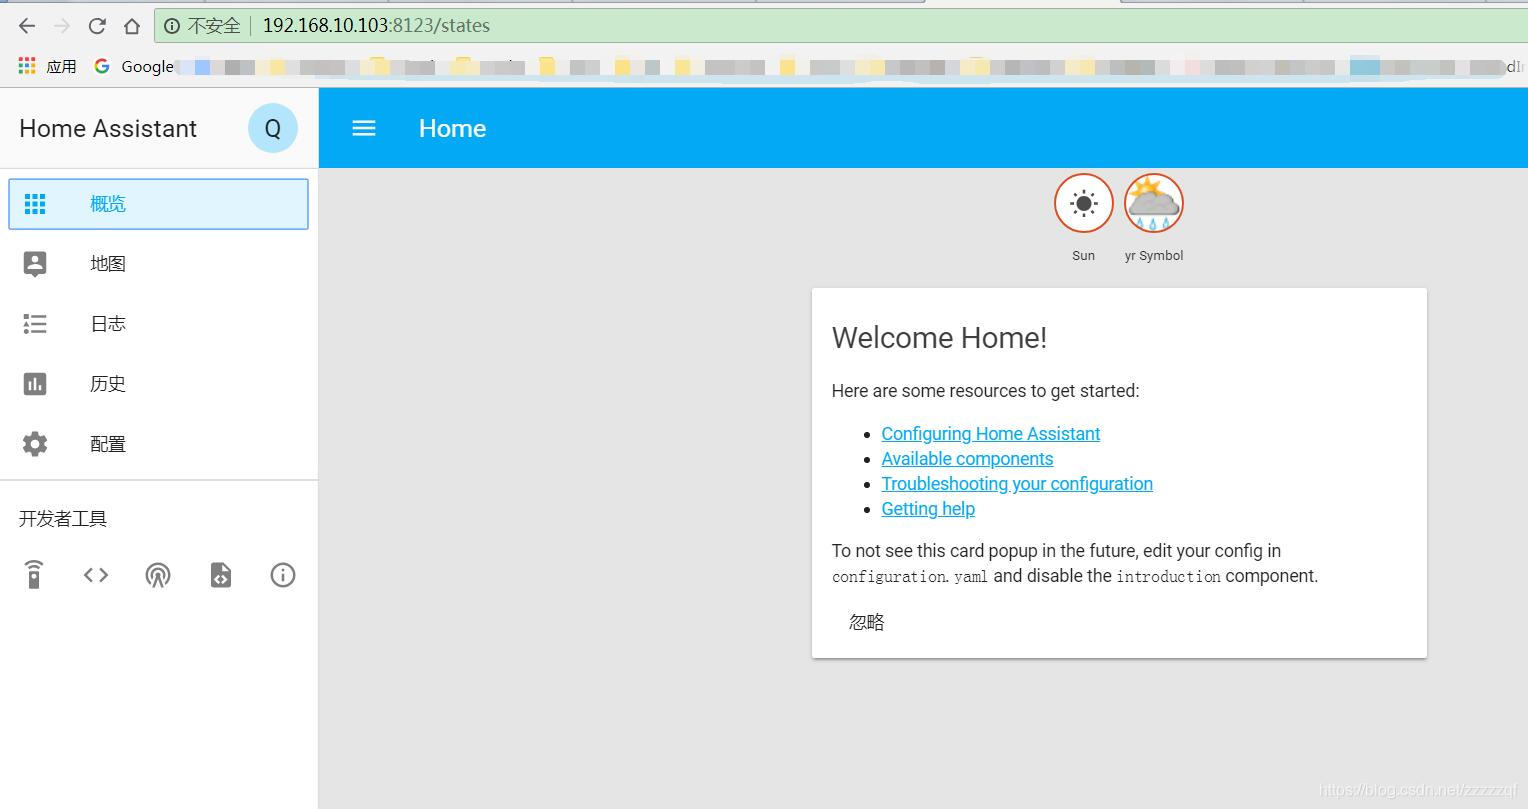
- web访问Home Assistant
在Windows上打开http://树莓派IP:8123
第一次访问的话,还需要设置用户名和密码。
- 升级Home Assistant
To update to the latest version of Home Assistant follow these simple steps:
$ sudo -u homeassistant -H -s
$ source /srv/homeassistant/bin/activate
$ pip3 install --upgrade homeassistant
- Mosquitto安装(MQTT)
- 安装&&配置mqtt
#更新下系统,更新前记得改国内源,不知怎么更换的看这贴:http://bbs.hassbian.com/thread-27-1-1.html
sudo apt-get update
sudo apt-get upgrade -y
#安装mosquitto和mosquitto-clients(后者主要用于测试,如果不想测试,可以只安装前者)
sudo apt-get install mosquitto mosquitto-clients
#更改mqtt设置
sudo nano /etc/mosquitto/conf.d/mqtt.conf
#在上面文件里加入:
allow_anonymous false
password_file /etc/mosquitto/pwfile
#设置用户和密码,这里用户为mqtt,可改为你想设的用户名,密码自设,这里都设为mqtt
sudo mosquitto_passwd -c /etc/mosquitto/pwfile mqtt
#设置开机启动,以及启动,停止,重启代码(enable为开机启动,其他你们懂的):
sudo /etc/init.d/mosquitto enable|disable|start|stop|restart|reload|
#重启系统
sudo reboot
#测试MQTT,在一个终端下发布,另个终端下接收,测试是否成功。看不懂此条者请忽略。
mosquitto_sub -d -u mqtt -P mqtt -t dev/test
mosquitto_pub -d -u mqtt -P mqtt -t dev/test -m "hello world"
-
- 配置home assistant
在configuration.yaml文件中加入
mqtt:
broker: 192.168.1.4
port: 1883
username: mqtt
password: mqtt
discovery: true
broker的ip改为自己安装mqtt机器的IP地址即可
- samba安装
#安装配置samba
sudo apt-get install samba
复制代码
#添加一个samba账户,并设置一个密码,一定要记住,以后访问时需要
sudo smbpasswd -a homeassistant
复制代码
#编辑samba配置
sudo nano /etc/samba/smb.conf
复制代码
#将以下内容加入到smb.conf的最后面
--------------------------------------
[HomeAssistant]
comment = HomeAssistant
browseable = yes
read only = no
path = /home/homeassistant/.homeassistant
valid users = homeassistant
--------------------------------------
复制代码

#重启samba服务
sudo service smbd restart
复制代码
#在windows中,网络中扫描不到的话,直接Win+R打开运行窗口,输入以下内容,注意将ip换成你安装hass主机的ip:
\\192.168.6.18\