如题:使用opencv打开摄像头或视频文件,实时显示原始视频,将视频每一帧依次做灰度转换、高斯滤波、canny边缘检测处理(原始视频和这3个中间步骤处理结果分别在一个窗口显示),最后将边缘检测结果保存为一个视频avi文件。
这里问题综合性比较大,这里进行分治。
该类问题可分为四个方面的处理:
(1)打开 视频或者是摄像头,并播放视频
(2)对视频的每一帧做处理
(3)同窗体显示四个结果
(4)保存视频文件
以下分为这三个方面进行处理:
(1)打开 视频或者摄像头,并播放视频
这个利用opencv来说算是非常简单的操作了:
步骤分为四步:(简单操作,播放效果不是最佳的,适用于入门)
a.创建摄像头/播放器
b.将视频文件赋值给播放器
c.逐帧播放
d.释放播放器和文件
这里直接给上源码(面向对象的方法):
  1 /******************************************************
  2 文件名   :main.cpp
  3 描  述   :灰度转换、高斯滤波、canny边缘检测处理视频,并存储canny边缘处理的视频
  4 语  言   :c++
  5 作  者   :重交亲爸爸
  6 修  改   :
  7 日  期   :2018-05-10
  8 说  明   :opencv的支持
  9 ******************************************************/
 10 #include <cv.h>
 11 #include <stdio.h>
 12 #include <stdarg.h>
 13 #include <time.h>
 14 #include<opencv2\highgui\highgui.hpp>
 15 #include<opencv2\imgproc\imgproc.hpp>
 16 #include<opencv2\core\core.hpp>
 17 using namespace cv;
 18 using namespace std;
 19 /******************************************************
 20 类  名   :Myclass
 21 描  述   :灰度转换、高斯滤波、canny边缘检测处理视频,并存储canny边缘处理的视频
 22 语  言   :
 23 作  者   :
 24 修  改   :
 25 日  期   :2018-05-10
 26 说  明   :
 27 ******************************************************/
 28 class MyClass
 29 {
 30 public:
 31     MyClass(char* argv);
 32     ~MyClass();
 33     void play();//播放
 34 private:
 35     CvCapture* capture;//视频播放器
 36 };
 37 /******************************************************
 38 函数名称: MyClass
 39 函数功能: 初始化
 40 传入参数:
 41 返 回 值:
 42 建立时间: 2018-05-10
 43 修改时间:
 44 建 立 人:
 45 修 改 人:
 46 其它说明:
 47 ******************************************************/
 48 MyClass::MyClass(char* argv)
 49 {
 50     //capture = cvCreateFileCapture(argv[1]);
 51     capture = cvCreateFileCapture(argv);
 52     if (!cvGetCaptureProperty(capture, CAP_PROP_FRAME_COUNT))
 53     {
 54         exit(1);
 55     }
 56 }
 57 /******************************************************
 58 函数名称: ~MyClass
 59 函数功能: 释放空间
 60 传入参数:
 61 返 回 值:
 62 建立时间: 2018-05-10
 63 修改时间:
 64 建 立 人:
 65 修 改 人:
 66 其它说明:very important
 67 ******************************************************/
 68 MyClass::~MyClass()
 69 {
 70     cvReleaseCapture(&capture);
 71     capture = NULL;
 72 }
 73 /******************************************************
 74 函数名称: play
 75 函数功能: 播放
 76 传入参数:
 77 返 回 值:
 78 建立时间: 2018-05-10
 79 修改时间:
 80 建 立 人:
 81 修 改 人:
 82 其它说明:
 83 ******************************************************/
 84 void MyClass::play(){
 85     cvNamedWindow("播放页面", 1);
 86     IplImage* frame;
 87     while (true)
 88     {
 89         frame = cvQueryFrame(capture);
 90         if (!frame)break;
 91         cvShowImage("播放页面",(frame));
 92         char c = cvWaitKey(33);
 93         if (c == 27)break;//Esc的编码为27
 94     }
 95 }
 96 int main(int argc,char** argv){
 97     //char* a = "F:\\Pictures\\fcq.avi";
 98     //char* b = "F:\\Pictures\\fcq2.avi";
 99     if (argc > 2){
100         MyClass *myclass = new MyClass(argv[1]);
101         myclass->play();
102         delete myclass;
103     }
104     else{
105         printf("无视频或者录像存储空间");
106         exit(1);
107     }
108     return 0;
109 }
使用vs2013生成解决方案后,打开window power shell进行测试。寻找到文件夹,打开相应的可执行文件
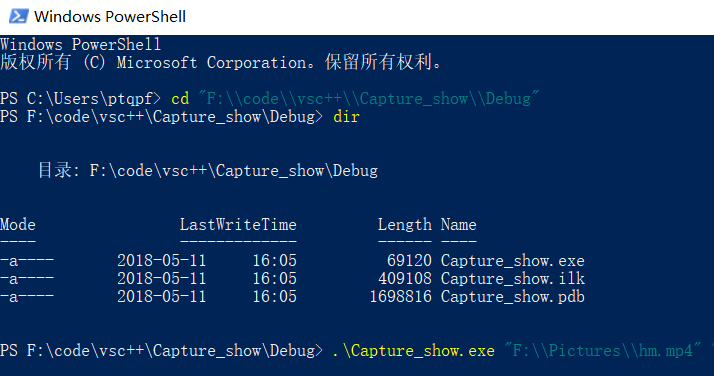
测试结果:
ok.你已经成功完成第一步了。^.^
(2)对视频的每一帧做处理
a.高斯滤波
百度百科的解释:高斯滤波是一种线性平滑滤波,适用于消除高斯噪声,广泛应用于图像处理的减噪过程。通俗的讲,高斯滤波就是对整幅图像进行加权平均的过程,每一个像素点的值,都由其本身和邻域内的其他像素值经过加权平均后得到。高斯滤波的具体操作是:用一个模板(或称卷积、掩模)扫描图像中的每一个像素,用模板确定的邻域内像素的加权平均灰度值去替代模板中心像素点的值。
这里有opencv封装好的方法可以直接操作,这里采用的是cvSmooth的方法,然后填入核函数CV_GAUSSIAN,设置图像源和转变后的接收源。
 1 /******************************************************
 2 函数名称: R_Gussian
 3 函数功能: 返回高斯滤波处理
 4 传入参数:
 5 返 回 值:
 6 建立时间: 2018-05-10
 7 修改时间:
 8 建 立 人:
 9 修 改 人:
10 其它说明:
11 ******************************************************/
12 IplImage* MyClass::R_Gussian(IplImage* frame){
13     //IplImage* edges = cvCreateImage(cvGetSize(image), IPL_DEPTH_8U, image->nChannels);
14     IplImage* edges = cvCreateImage(cvGetSize(frame), frame->depth, frame->nChannels);
15     cvSmooth(frame, edges, CV_GAUSSIAN, 7, frame->nChannels);  //  Gauss平滑滤波,核大小为7x7
16     return edges;
17 }
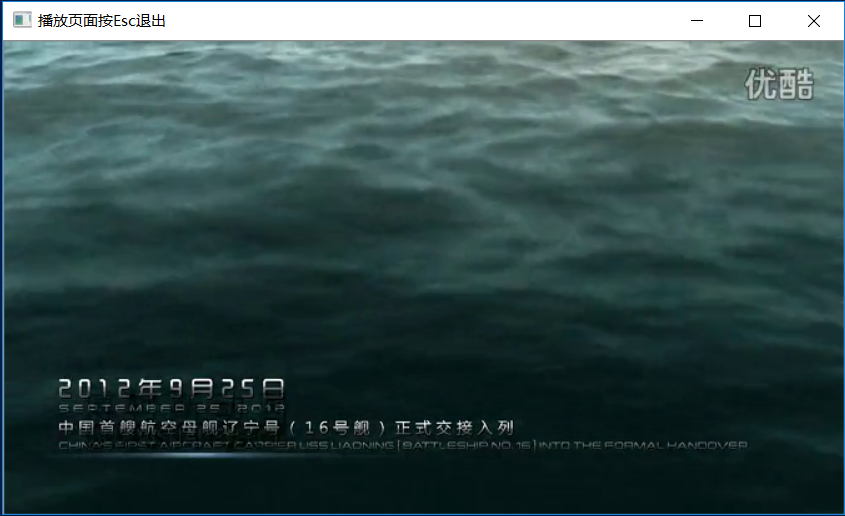
按照(1)中进行测试,结果:
看上去有点模糊了。
b.灰度变换
百度百科的解释:灰度变换是指根据某种目标条件按一定变换关系逐点改变源图像中每一个像素灰度值的方法。目的是为了改善画质,使图像的显示效果更加清晰。 图像的灰度变换处理是图像增强处理技术中的一种非常基础、直接的空间域图像处理方法,也是图像数字化软件和图像显示软件的一个重要组成部分。
同理,opencv也提供的灰度变化的函数,这里要注意的是转变的时候都是通道变成1
/******************************************************
函数名称: R_Gray
函数功能: 返回灰度处理
传入参数:
返 回 值:
建立时间: 2018-05-10
修改时间:
建 立 人:
修 改 人:
其它说明:由于需要在同一个窗体显示,需要将通道数目统一,不能使用单通道
******************************************************/
IplImage* MyClass::R_Gray(IplImage* frame){
    //IplImage* edges = cvCreateImage(cvGetSize(image), IPL_DEPTH_8U, 1);
    //IplImage *frame_gray = cvCreateImage(cvGetSize(image), frame->depth, 1);
    /*IplImage* edges = cvCreateImage(cvGetSize(imagesrc), imagesrc->depth, imagesrc->nChannels);
    cvCvtColor(frame, edges, CV_BGR2GRAY);
    return edges;*/

    IplImage *frame_gray = cvCreateImage(cvGetSize(frame), frame->depth, 1);
    IplImage *frame1 = cvCreateImage(cvGetSize(frame), frame->depth, frame->nChannels);
    cvCvtColor(frame, frame_gray, CV_RGB2GRAY);
    cvCvtColor(frame_gray, frame1, CV_GRAY2BGR);//见说明
    return frame1;
}
这里多一步的目的是为了后面多个图像显示在一块窗口上(如果不考虑同窗体显示的话就不需要统一通道数)
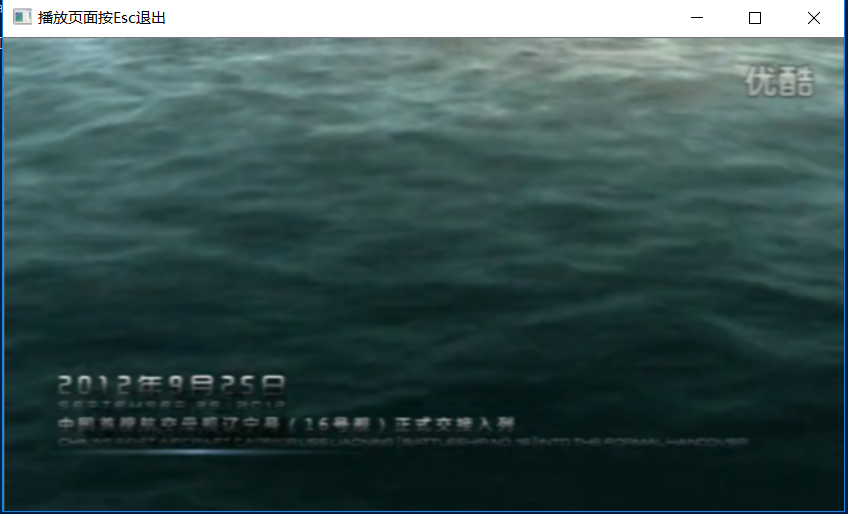
结果测试:

灰度效果显示出来了。
c.Canny边缘检测
百度百科的解释:Canny 算法使用 4 个 mask 检测水平、垂直以及对角线方向的边缘。原始图像与每个 mask 所作的卷积都存储起来。对于每个点我们都标识在这个点上的最大值以及生成的边缘的方向。
这里使用cvCanny的方法进行转变,但是这个cvCanny边缘检测还需要弄成灰度图。
 1 /******************************************************
 2 函数名称: R_Canny
 3 函数功能: 返回Canny边缘处理
 4 传入参数:
 5 返 回 值:
 6 建立时间: 2018-05-10
 7 修改时间:
 8 建 立 人:
 9 修 改 人:
10 其它说明: 由于需要在同一个窗体显示,需要将通道数目统一,不能使用单通道
11 ******************************************************/
12 IplImage* MyClass::R_Canny(IplImage* frame){
13     //IplImage* edges = cvCreateImage(cvGetSize(grayimage), IPL_DEPTH_8U, 1);
14     IplImage *frame_gray = cvCreateImage(cvGetSize(frame), frame->depth, 1);
15     IplImage *frame1 = cvCreateImage(cvGetSize(frame), frame->depth, frame->nChannels);
16     cvCanny(frame, frame_gray, 20, 75, 3);
17     cvCvtColor(frame_gray, frame1, CV_GRAY2BGR);
18     return frame1;
19 }
同样也要统一通道数。
测试结果:

这样我们三个图像处理就完成了。^.^
(3)同窗体显示四个结果
这里参考了CSDN上的一个方法https://blog.csdn.net/augusdi/article/details/9019473
作者稍作整理了下,站在巨人的肩膀上。
  1 /******************************************************
  2 函数名称: cvShowManyImages
  3 函数功能: 展示多个图片
  4 传入参数: const char* title, int nArgs
  5 返 回 值:
  6 建立时间: 2018-05-10
  7 修改时间:
  8 建 立 人: CSDN Augusdi
  9 修 改 人:
 10 其它说明:
 11 ******************************************************/
 12 void MyClass::cvShowManyImages(const char* title, int nArgs, ...){
 13     // img - Used for getting the arguments
 14     IplImage *img;
 15
 16     // DispImage - the image in which input images are to be copied
 17     IplImage *DispImage;
 18
 19     int size;
 20     int i;
 21     int m, n;
 22     int x, y;
 23
 24     // w - Maximum number of images in a row
 25     // h - Maximum number of images in a column
 26     int w, h;
 27
 28     // scale - How much we have to resize the image
 29     float scale;
 30     int max;
 31
 32     // If the number of arguments is lesser than 0 or greater than 12
 33     // return without displaying
 34     if (nArgs <= 0) {
 35         printf("Number of arguments too small....n");
 36         return;
 37     }
 38     else if (nArgs > 12) {
 39         printf("Number of arguments too large....n");
 40         return;
 41     }
 42     // Determine the size of the image,
 43     // and the number of rows/cols
 44     // from number of arguments
 45     else if (nArgs == 1) {
 46         w = h = 1;
 47         size = 300;
 48     }
 49     else if (nArgs == 2) {
 50         w = 2; h = 1;
 51         size = 300;
 52     }
 53     else if (nArgs == 3 || nArgs == 4) {
 54         w = 2; h = 2;
 55         size = 300;
 56     }
 57     else if (nArgs == 5 || nArgs == 6) {
 58         w = 3; h = 2;
 59         size = 200;
 60     }
 61     else if (nArgs == 7 || nArgs == 8) {
 62         w = 4; h = 2;
 63         size = 200;
 64     }
 65     else {
 66         w = 4; h = 3;
 67         size = 150;
 68     }
 69
 70     // Create a new 3 channel image
 71     DispImage = cvCreateImage(cvSize(100 + size*w, 60 + size*h), 8, 3);
 72
 73     // Used to get the arguments passed
 74     va_list args;
 75     va_start(args, nArgs);
 76
 77     // Loop for nArgs number of arguments
 78     for (i = 0, m = 20, n = 20; i < nArgs; i++, m += (20 + size)) {
 79
 80         // Get the Pointer to the IplImage
 81         img = va_arg(args, IplImage*);
 82
 83         // Check whether it is NULL or not
 84         // If it is NULL, release the image, and return
 85         if (img == 0) {
 86             printf("Invalid arguments");
 87             cvReleaseImage(&DispImage);
 88             return;
 89         }
 90
 91         // Find the width and height of the image
 92         x = img->width;
 93         y = img->height;
 94
 95         // Find whether height or width is greater in order to resize the image
 96         max = (x > y) ? x : y;
 97
 98         // Find the scaling factor to resize the image
 99         scale = (float)((float)max / size);
100
101         // Used to Align the images
102         if (i % w == 0 && m != 20) {
103             m = 20;
104             n += 20 + size;
105         }
106
107         // Set the image ROI to display the current image
108         cvSetImageROI(DispImage, cvRect(m, n, (int)(x / scale), (int)(y / scale)));
109
110         // Resize the input image and copy the it to the Single Big Image
111         cvResize(img, DispImage);
112
113         // Reset the ROI in order to display the next image
114         cvResetImageROI(DispImage);
115     }
116
117     // Create a new window, and show the Single Big Image
118     //cvNamedWindow( title, 1 );
119     cvShowImage(title, DispImage);
120
121     //cvDestroyWindow(title);
122
123     // End the number of arguments
124     va_end(args);
125
126     // Release the Image Memory
127     cvReleaseImage(&DispImage);
128 }
这里加入一个多视频播放处理:
/******************************************************
函数名称: Multi_play
函数功能: 播放
传入参数:
返 回 值:
建立时间: 2018-05-10
修改时间:
建 立 人:
修 改 人:
其它说明:
******************************************************/
void MyClass::Multi_play(){
    IplImage *frame;
    cvNamedWindow("播放页面按Esc退出", 1);
    cvResizeWindow("播放页面按Esc退出", 700, 660);
    while (true)
    {
        frame = cvQueryFrame(capture);
        if (!frame)break;
        IplImage* grayimage = R_Gray(frame);
        IplImage* gsimage = R_Gussian(frame);
        IplImage* cnimage = R_Canny(frame);
        //IplImage *frame_not = cvCreateImage(cvGetSize(frame), frame->depth, frame->nChannels);//负片
        //cvNot(frame, frame_not);
        //cvShowImage("播放页面按Esc退出", R_Canny(R_Gray(frame)));
        //cvWriteFrame(writer, cnimage);
        cvShowManyImages("播放页面按Esc退出", 4, frame, grayimage, gsimage, cnimage);
        char c = cvWaitKey(33);
        if (c == 27)break;

        cvReleaseImage(&grayimage);
        cvReleaseImage(&gsimage);
        cvReleaseImage(&cnimage);
        //cvReleaseImage(&frame_not);
    }
}
结果测试:
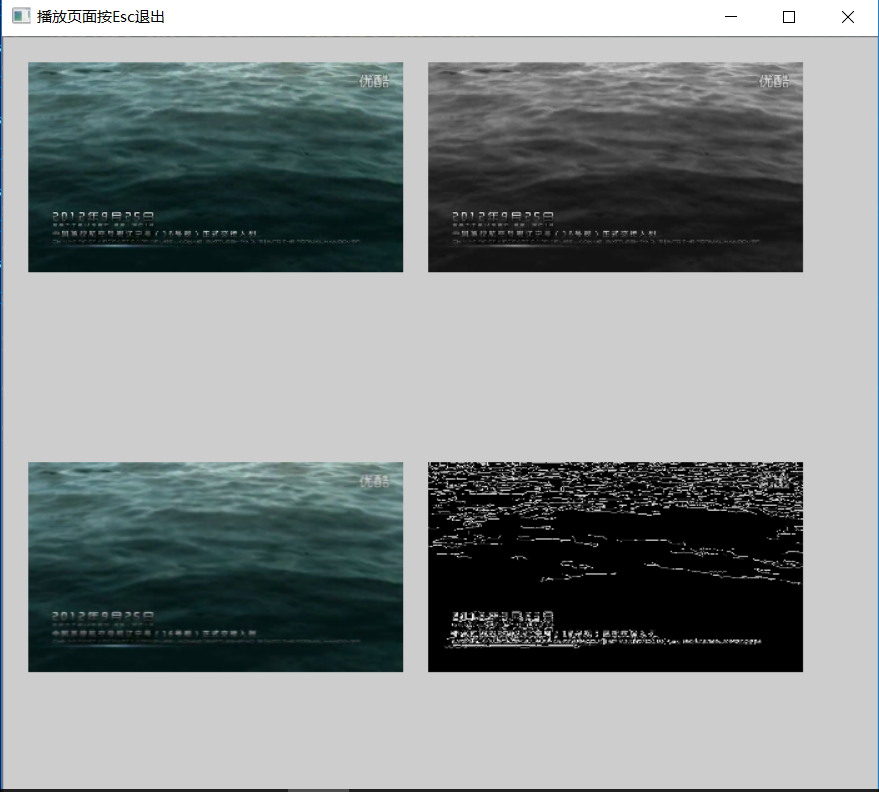
成功生成,这里注意一点就是如果放入的图片不是同一通道的话,会报错。
(4)保存视频文件
保存视频就比较简单了。
a.创建视频记录器 CvVideoWriter* writer;
b.初始化视频记录器 如初始化代码所示
c.视频记录器记录每一帧 如播放功能代码所示
d.释放视频记录器 如释放代码所示
 1 /******************************************************
 2 函数名称: MyClass
 3 函数功能: 初始化
 4 传入参数:
 5 返 回 值:
 6 建立时间: 2018-05-10
 7 修改时间:
 8 建 立 人:
 9 修 改 人:
10 其它说明:
11 ******************************************************/
12 MyClass::MyClass(char* argv,char* filepath)
13 {
14     //capture = cvCreateFileCapture(argv[1]);
15     capture = cvCreateFileCapture(argv);
16     if (!cvGetCaptureProperty(capture, CAP_PROP_FRAME_COUNT))
17     {
18         exit(1);
19     }
20     double fps = cvGetCaptureProperty(capture, CV_CAP_PROP_FPS);
21     CvSize size = cvSize(
22         (int)cvGetCaptureProperty(capture, CV_CAP_PROP_FRAME_WIDTH),
23         (int)cvGetCaptureProperty(capture, CV_CAP_PROP_FRAME_HEIGHT)
24         );
25     writer = cvCreateVideoWriter(
26         filepath,
27         CV_FOURCC('M', 'J', 'P', 'G'),
28         fps,
29         size
30         );
31 }
32 /******************************************************
33 函数名称: ~MyClass
34 函数功能: 释放空间
35 传入参数:
36 返 回 值:
37 建立时间: 2018-05-10
38 修改时间:
39 建 立 人:
40 修 改 人:
41 其它说明:
42 ******************************************************/
43 MyClass::~MyClass()
44 {
45     cvReleaseVideoWriter(&writer);
46     cvReleaseCapture(&capture);
47     writer = NULL;
48     capture = NULL;
49 }
50 /******************************************************
51 函数名称: Multi_play
52 函数功能: 播放
53 传入参数:
54 返 回 值:
55 建立时间: 2018-05-10
56 修改时间:
57 建 立 人:
58 修 改 人:
59 其它说明:
60 ******************************************************/
61 void MyClass::Multi_play(){
62     IplImage *frame;
63     cvNamedWindow("播放页面按Esc退出", 1);
64     cvResizeWindow("播放页面按Esc退出", 700, 660);
65     while (true)
66     {
67         frame = cvQueryFrame(capture);
68         if (!frame)break;
69         IplImage* grayimage = R_Gray(frame);
70         IplImage* gsimage = R_Gussian(frame);
71         IplImage* cnimage = R_Canny(frame);
72         IplImage *frame_not = cvCreateImage(cvGetSize(frame), frame->depth, frame->nChannels);
73         cvNot(frame, frame_not);
74         //cvShowImage("播放页面按Esc退出", R_Canny(R_Gray(frame)));
75         cvWriteFrame(writer, cnimage);
76         cvShowManyImages("播放页面按Esc退出", 4, frame, grayimage, gsimage, cnimage);
77         char c = cvWaitKey(33);
78         if (c == 27)break;
79
80         cvReleaseImage(&grayimage);
81         cvReleaseImage(&gsimage);
82         cvReleaseImage(&cnimage);
83         cvReleaseImage(&frame_not);
84     }
85 }
ok,在window power shell输入的时候要加上保存地址了

视频停止或者终止后,在相应文件下就生成了新文件.avi了
如需要源码请转移至码云:https://gitee.com/cjqbaba/MediaTest/tree/Capture_show进行源码克隆下载
如有问题请留言评论。转载请注明出处,谢谢。