Nginx原生限流模块:
ngx_http_limit_conn_module模块
根据前端请求域名或ip生成一个key,对于每个key对应的网络连接数进行限制。
配置如下:
http模块
server模块
#http模块内
http {
    include       mime.types;
    default_type  application/octet-stream;
    log_format main '[$time_local][$msec]$status';
    sendfile        on;
    keepalive_timeout  65;
    proxy_cache_path  /var/nginx/cache  keys_zone=one:10m  levels=1:2  inactive=6h max_size=1g;
    ###限流配置
    limit_conn_zone $binary_remote_addr zone=perip:10m;
    limit_conn_log_level info;
    limit_conn_status 503;
    include conf.d/*.conf;
}
#server模块内
server {
listen 80;
server_name _;
root /opt/openresty/nginx/html;
charset utf-8;
proxy_send_timeout 60;
proxy_read_timeout 1800s;
client_max_body_size 300M ;
proxy_set_header X-Forwarded-Host $host;
proxy_set_header X-Forwarded-Server $host;
proxy_set_header Host $host:$server_port;
proxy_set_header X-Real-IP $remote_addr;
proxy_set_header X-Forwarded-For $proxy_add_x_forwarded_for;
#---限流配置--#
location /limit {
limit_conn perip 2;
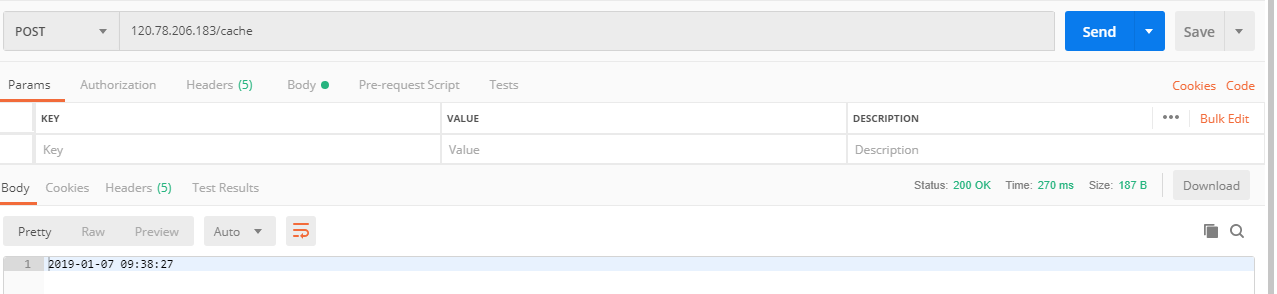
proxy_pass http://backend/cache;
}
#-----------#
error_page 404 /404.html;
location = /40x.html {
}
error_page 500 502 503 504 /50x.html;
location = /50x.html {
}
}
验证:
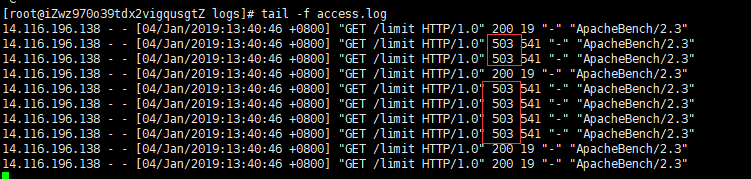
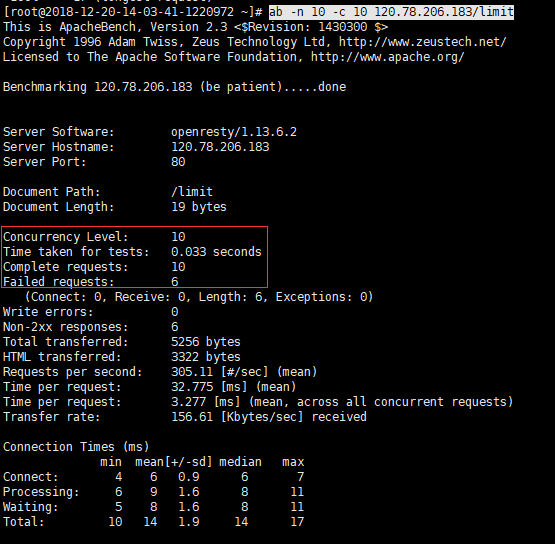
采用ab测试:ab -n 10 -c 10 120.78.206.183/limit //并发数10个 总请求数10个
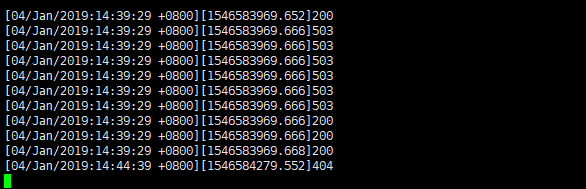
nginx:access.log日志
ab测试输出:
ngx_http_limit_req_module模块
利用漏桶算法实现。对于指定key进行限流,指定速率处理
配置
验证:
#http模块内
http {
    include       mime.types;
    default_type  application/octet-stream;
    log_format main '[$time_local][$msec]$status';
    sendfile        on;
    keepalive_timeout  65;
    proxy_cache_path  /var/nginx/cache  keys_zone=one:10m  levels=1:2  inactive=6h max_size=1g;
    ###限流配置:每s处理一个请求
    limit_req_zone $binary_remote_addr zone=req:10m rate=1r/s;
    limit_conn_log_level info;
    limit_conn_status 503;
    include conf.d/*.conf;
}
server {
	listen        80;
	server_name  _;
	root         /opt/openresty/nginx/html;
	charset utf-8;
	proxy_send_timeout 60;
	proxy_read_timeout 1800s;
	client_max_body_size 300M ;

	proxy_set_header X-Forwarded-Host $host;
	proxy_set_header X-Forwarded-Server $host;
	proxy_set_header Host $host:$server_port;
	proxy_set_header X-Real-IP $remote_addr;
	proxy_set_header X-Forwarded-For $proxy_add_x_forwarded_for;

	#zone=one :设置使用哪个配置区域来做限制,与上面limit_req_zone 里的name对应
    #burst=5:设置一个大小为5的缓冲区当有大量请求(爆发)过来时,超过了访问频次限制的请求可以先放到这个缓冲区内等待,但是这个等待区里的位置只有5个,超过的请求会直接报503的错误然后返回。
    #nodelay:
     #   如果设置,会在瞬时提供处理(burst + rate)个请求的能力,请求超过(burst + rate)的时候就会直接返回503,永远不存在请求需要等待的情况。(这里的rate的单位是:r/s)
     #   如果没有设置,则所有请求会依次等待排队

	location /limit_req {
		limit_req zone=req burst=3 nodelay;
		proxy_pass http://backend/cache;
	}

	error_page 404 /404.html;
		location = /40x.html {
	}

	error_page 500 502 503 504 /50x.html;
		location = /50x.html {
	}
}
采用ab测试:ab -n 10 -c 10 120.78.206.183/limit_req //并发数10个 总请求数10个
ab测试工具展示:

OpenResty限流模块:
lua-resty-limit-traffic:
github: https://github.com/openresty/lua-resty-limit-traffic/tree/master/lib/resty/limit
包含四个模块:
- conn:限制并发数
- count:给定时间窗口内通过固定数量的请求限制请求率
- req:请求速率限制
- traffic:可以自由组合多种限流策略
配置并发限流如下:
http {
    include       mime.types;
    default_type  application/octet-stream;
    log_format main '[$time_local][$msec]$status';
    sendfile        on;
    keepalive_timeout  65;
    lua_shared_dict my_limit_conn_store 100m;
    limit_conn_log_level info;
    limit_conn_status 503;
    include conf.d/*.conf;
}
server {
	listen        80;
	server_name  _;
	root         /opt/openresty/nginx/html;
	charset utf-8;
	proxy_send_timeout 60;
	proxy_read_timeout 1800s;
	client_max_body_size 300M ;

	proxy_set_header X-Forwarded-Host $host;
	proxy_set_header X-Forwarded-Server $host;
	proxy_set_header Host $host:$server_port;
	proxy_set_header X-Real-IP $remote_addr;
	proxy_set_header X-Forwarded-For $proxy_add_x_forwarded_for;
	#限制接口总并发数
	location /limit_lua_conn {
		access_by_lua_block {
			local limit_conn = require "resty.limit.conn"
            -- 限制一个 ip 客户端最大 1 个并发请求
            -- burst 设置为 0,如果超过最大的并发请求数,则直接返回503,
            -- 如果此处要允许突增的并发数,可以修改 burst 的值(漏桶的桶容量)
            -- 最后一个参数其实是你要预估这些并发(或者说单个请求)要处理多久,以便于对桶里面的请求应用漏桶算法
			local lim, err = limit_conn.new("my_limit_conn_store",2,1,0.5)
			if not lim then
				ngx.log(ngx.ERR,"限流:",err)
				return ngx.exit(503)
			end
			local key = ngx.var.binary_remote_addr
			local delay, err = lim:incoming(key, true)
			if not delay then
				if err == "rejected" then
					return ngx.exit(503)
				end
				ngx.log(ngx.ERR, "failed to limit req:", err)
				return ngx.exit(500)
			end
		}
		proxy_pass http://backend/cache;
	}
	#
	error_page 404 /404.html;
		location = /40x.html {
	}

	error_page 500 502 503 504 /50x.html;
		location = /50x.html {
	}
}
验证结果:
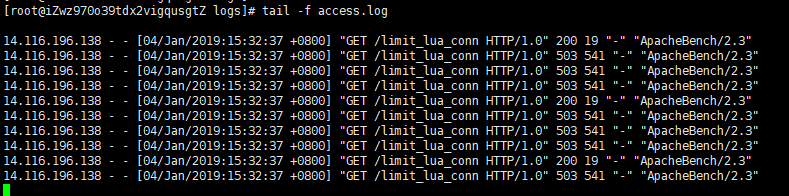
ab -n 10 -c 10 120.78.206.183/limit_lua_conn
nginx日志:
ab结果:

Nginx健康检查机制
nginx默认检查机制
测试:后端两台服务器:
max_fails:定义定义可以发生错误的最大次数
fail_timeout:nginx在fail_timeout设定的时间内与后端服务器通信失败的次数超过max_fails设定的次数,则认为这个服务器不在起作用;在接下来的 fail_timeout时间内,nginx不再将请求分发给失效的server。
fail_timeout:nginx在fail_timeout设定的时间内与后端服务器通信失败的次数超过max_fails设定的次数,则认为这个服务器不在起作用;在接下来的 fail_timeout时间内,nginx不再将请求分发给失效的server。
后端默认配置

前端请求:
请求多次,后端服务均有日志产生
120.78.206.183机器

14.116.196.138机器

停掉一台
14.116.196.138,请求正常返回:

nginx日志:

结论:
1.nginx健康检查机制为被动检查。
2.
在fail_timeout时间内,如果服务器节点在请求max_fails次数
都不返回,在这
fail_timeout
内,请求不会向这台服务器转发,fail_timeout指定的超时时间到了,再次发起请求,就按照轮转规则,该到这台服务器还是会过去,这时候再经历
fail_timeout指定时间
,请求不会到这台服务器
Nginx第三方模块健康检查模块:
主动检查:
第三方模块:
1.
nginx_upstream_check_module
主要配置:
upstream name{
       server 192.168.0.21:80;
       server 192.168.0.22:80;
       check interval=3000 rise=2 fall=5 timeout=1000;
}
#对所有节点,每个3秒检测一次,请求2次正常则标记 realserver状态为up,如果检测 5 次都失败,则标记 realserver的状态为down,超时时间为1秒
2.openresty模块:lua-resty-upstream-healthcheck
http {

    upstream backend {
        server 120.78.206.183:8080;
	    server 14.116.196.138:8002;
    }

    lua_shared_dict healthcheck 1m;
    lua_socket_log_errors off;
    init_worker_by_lua_block {
        local hc = require "resty.upstream.healthcheck"
        local ok, err = hc.spawn_checker {
            shm = "healthcheck",
            upstream = "tomcat",
            type = "http",
            #指定后端健康检查http请求接口
            http_req = "GET /nginx HTTP/1.0\r\nHost: tomcat\r\n\r\n",
            interval = 2000,
            timeout = 5000,
            fall = 3,
            rise = 2,
            #http请求接口返回200,302表示服务端正常
            valid_statuses = {200, 302},
            concurrency = 1,
        }

        if not ok then
            ngx.log(ngx.ERR, "=======> failed to spawn health checker: ", err)
            return
        end
    }

    server {
        listen      80;
        server_name localhost;

        location ^~ /cache {
		    proxy_cache one;
		    proxy_no_cache $http_soapaction;
		    proxy_cache_key $request_body;
		    proxy_cache_valid 200 302 10m;
		    proxy_cache_methods GET POST;
		    proxy_ignore_headers Cache-Control Set-Cookie;
		    proxy_set_header X-Real-IP $remote_addr;
        	proxy_set_header X-Forwarded-For $proxy_add_x_forwarded_for;
		    proxy_pass http://backend/cache;
	    }

        location /server/status {
            access_log off;
            default_type text/plain;
            content_by_lua_block {
                local hc = require "resty.upstream.healthcheck"
                ngx.say("Nginx Worker PID: ", ngx.worker.pid())
                ngx.print(hc.status_page())
            }
        }
    }
}
配置2s时间间隔探测:
access.log:
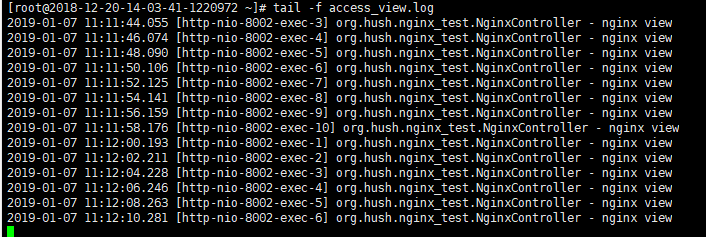
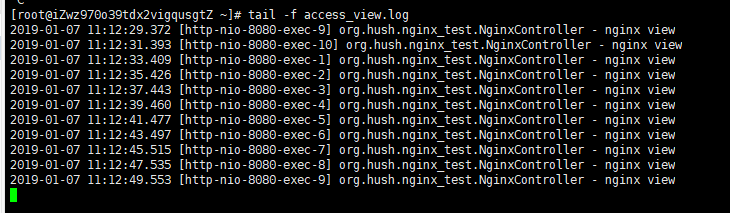
在nginx访问日志中每隔2s健康检查请求一次
kill掉任意一台后端服务:

nginx error.log日志

会持续检查指定3次:上面fall参数指定
请求nginx后端健康检查探测接口
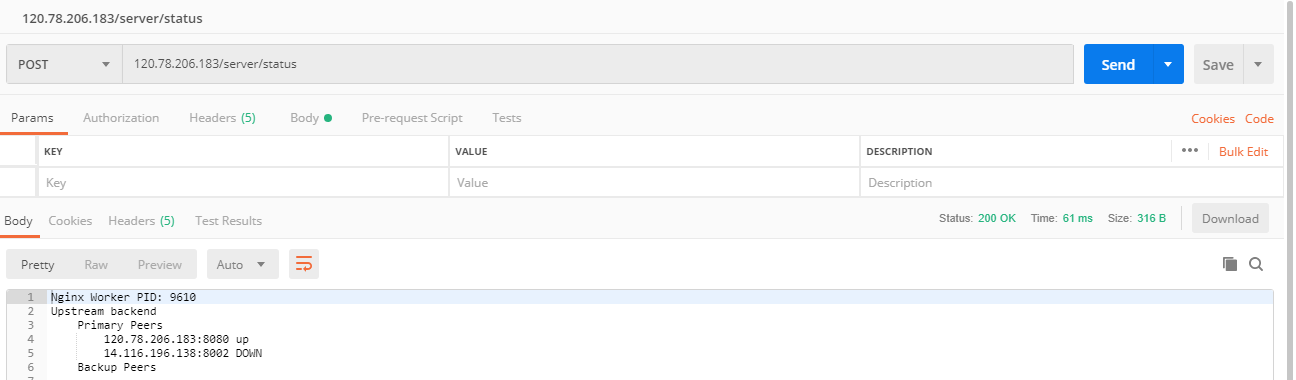
多次请求后端接口:error.log日志无变化,说明请求不会路由到down机器上
重启启动down机器,再次请求nginx探测接口

<wiz_tmp_tag id="wiz-table-range-border" contenteditable="false" style="display: none;">