版权声明:本文为博主原创文章,未经博主允许不得转载。如需开发微信小程序可加微信: 13977284413 https://blog.csdn.net/qq_35713752/article/details/86164913
一.添加页面
1.在路由配置文件添加路由

代码:
{
path: '/test',
name: 'test',
icon: 'dashboard',
routes: [{
path: '/test/page1',
name: 'page1',
component: './Test/Page1',
}],
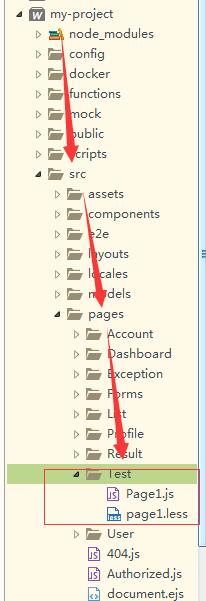
},2.根据创建的路由,打开src->pages目录。 新建文件(文件名大写,文件名和js名字要和路由的 component 匹配)和js,less。
3. 打开浏览器访问这个页面,完成

注: 这里打开是空的,不要着急。因为里面没写东西,下面写一个自己的组件然后在这个页面调用。
二.添加自己的组件
在 src/components 下新建一个以组件名命名的文件夹,注意首字母大写,命名尽量体现组件的功能,这里就叫 ImageWrapper。在此文件夹下新增 js 文件及样式文件(如果需要),命名为 index.js 和 index.less。
// index.js
import React from 'react';
import styles from './index.less';    // 按照 CSS Modules 的方式引入样式文件。

export default ({ src, desc, style }) => (
  <div style={style} className={styles.imageWrapper}>
    <img className={styles.img} src={src} alt={desc} />
    {desc && <div className={styles.desc}>{desc}</div>}
  </div>
);
// index.less
.imageWrapper {
padding: 0 20px 8px;
background: #f2f4f5;
width: 400px;
margin: 0 auto;
text-align: center;
}
.img {
vertical-align: middle;
max-width: calc(100% - 32px);
margin: 2.4em 1em;
box-shadow: 0 8px 20px rgba(143, 168, 191, 0.35);
}到这儿组件就建好了。
3.使用自己建的组件
1.在刚才创建的页面,直接使用就好,代码如下:
import React from 'react';
import ImageWrapper from '@/components/ImageWrapper';  // @ 表示相对于源文件根目录

export default () => (
  <ImageWrapper
    src="https://os.alipayobjects.com/rmsportal/mgesTPFxodmIwpi.png"
    desc="示意图"
  />
);
2.查看效果:打开浏览器。 http://localhost:8000/test/page1 (8000端口可以自由配置的)
