今天学习了如何加载数据集,以及图像的处理…
首先呢,先要确保下面的几个包正确的导入python环境

今天看到pytorch官网已经更新了1.0版本了,瞬间把之前的0.4版本的给uninstall了.
zhe 
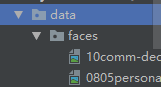
data/faces/face_landmarks.csv里面代表的是每张图像的annotation信息。ji即对应的landmarks中给出了相应图像的特征点。landmarks文件中存储的格式如下,这里对应的数据集是69张人脸图像

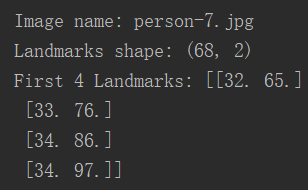
运行上段代码的结果如下:
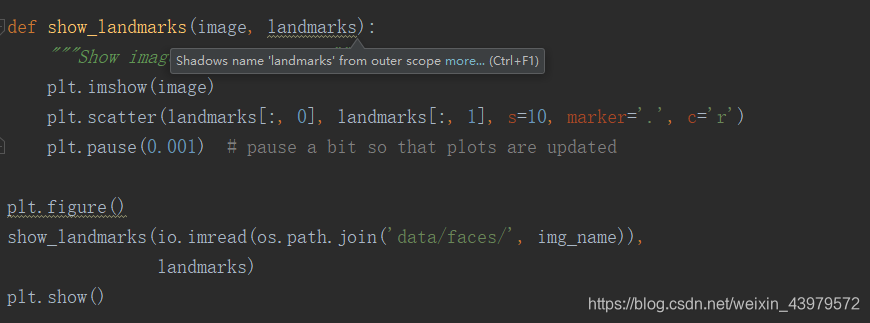
Let’s write a simple helper function to show an image and its landmarks
class FaceLandmarksDataset(Dataset):
“”“Face Landmarks dataset.”""
def __init__(self, csv_file, root_dir, transform=None):
    """
    Args:
        csv_file (string): Path to the csv file with annotations.
        root_dir (string): Directory with all the images.
        transform (callable, optional): Optional transform to be applied
            on a sample.
    """
    self.landmarks_frame = pd.read_csv(csv_file)
    self.root_dir = root_dir
    self.transform = transform

def __len__(self):
    return len(self.landmarks_frame)

def __getitem__(self, idx):
    img_name = os.path.join(self.root_dir,
                            self.landmarks_frame.iloc[idx, 0])
    image = io.imread(img_name)
    landmarks = self.landmarks_frame.iloc[idx, 1:].as_matrix()
    landmarks = landmarks.astype('float').reshape(-1, 2)
    sample = {'image': image, 'landmarks': landmarks}

    if self.transform:
        sample = self.transform(sample)

    return sample
######################################################################
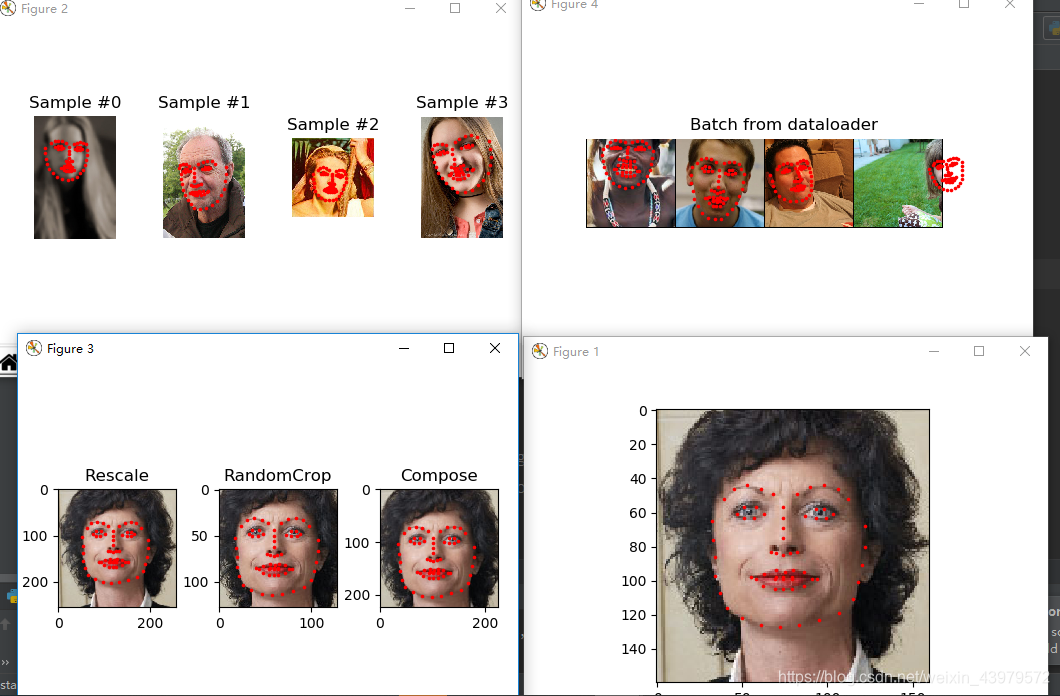
Let’s instantiate this class and iterate through the data samples. We
#will print the sizes of first 4 samples and show their landmarks.
face_dataset = FaceLandmarksDataset(csv_file=‘data/faces/face_landmarks.csv’,
root_dir=‘data/faces/’)
fig = plt.figure()
for i in range(len(face_dataset)):
sample = face_dataset[i]
print(i, sample['image'].shape, sample['landmarks'].shape)

ax = plt.subplot(1, 4, i + 1)
plt.tight_layout()
ax.set_title('Sample #{}'.format(i))
ax.axis('off')
show_landmarks(**sample)

if i == 3:
    plt.show()
    break
######################################################################
#Transforms
----------
#One issue we can see from the above is that the samples are not of the
same size. Most neural networks expect the images of a fixed size.
Therefore, we will need to write some prepocessing code.
Let’s create three transforms:
#- Rescale: to scale the image
RandomCrop: to crop from image randomly. This is data
augmentation.ToTensor: to convert the numpy images to torch images (we need to
swap axes).
#We will write them as callable classes instead of simple functions so
#that parameters of the transform need not be passed everytime it’s
called. For this, we just need to implement __call__ method and
if required, __init__ method. We can then use a transform like this:
::
 tsfm = Transform(params)
transformed_sample = tsfm(sample)
Observe below how these transforms had to be applied both on the image and
landmarks.
class Rescale(object):
“”"Rescale the image in a sample to a given size.
Args:
    output_size (tuple or int): Desired output size. If tuple, output is
        matched to output_size. If int, smaller of image edges is matched
        to output_size keeping aspect ratio the same.
"""

def __init__(self, output_size):
    assert isinstance(output_size, (int, tuple))
    self.output_size = output_size

def __call__(self, sample):
    image, landmarks = sample['image'], sample['landmarks']

    h, w = image.shape[:2]
    if isinstance(self.output_size, int):
        if h > w:
            new_h, new_w = self.output_size * h / w, self.output_size
        else:
            new_h, new_w = self.output_size, self.output_size * w / h
    else:
        new_h, new_w = self.output_size

    new_h, new_w = int(new_h), int(new_w)

    img = transform.resize(image, (new_h, new_w))

    # h and w are swapped for landmarks because for images,
    # x and y axes are axis 1 and 0 respectively
    landmarks = landmarks * [new_w / w, new_h / h]

    return {'image': img, 'landmarks': landmarks}
class RandomCrop(object):
“”"Crop randomly the image in a sample.
Args:
    output_size (tuple or int): Desired output size. If int, square crop
        is made.
"""

def __init__(self, output_size):
    assert isinstance(output_size, (int, tuple))
    if isinstance(output_size, int):
        self.output_size = (output_size, output_size)
    else:
        assert len(output_size) == 2
        self.output_size = output_size

def __call__(self, sample):
    image, landmarks = sample['image'], sample['landmarks']

    h, w = image.shape[:2]
    new_h, new_w = self.output_size

    top = np.random.randint(0, h - new_h)
    left = np.random.randint(0, w - new_w)

    image = image[top: top + new_h,
                  left: left + new_w]

    landmarks = landmarks - [left, top]

    return {'image': image, 'landmarks': landmarks}
class ToTensor(object):
“”“Convert ndarrays in sample to Tensors.”""
def __call__(self, sample):
    image, landmarks = sample['image'], sample['landmarks']

    # swap color axis because
    # numpy image: H x W x C
    # torch image: C X H X W
    image = image.transpose((2, 0, 1))
    return {'image': torch.from_numpy(image),
            'landmarks': torch.from_numpy(landmarks)}
######################################################################
Compose transforms
~~~~~~~~~~~~~~~~~~
Now, we apply the transforms on an sample.
Let’s say we want to rescale the shorter side of the image to 256 and
then randomly crop a square of size 224 from it. i.e, we want to compose
Rescale and RandomCrop transforms.
torchvision.transforms.Compose is a simple callable class which allows us
#to do this.
scale = Rescale(256)
crop = RandomCrop(128)
composed = transforms.Compose([Rescale(256),
RandomCrop(224)])
Apply each of the above transforms on sample.
fig = plt.figure()
sample = face_dataset[65]
for i, tsfrm in enumerate([scale, crop, composed]):
transformed_sample = tsfrm(sample)
ax = plt.subplot(1, 3, i + 1)
plt.tight_layout()
ax.set_title(type(tsfrm).__name__)
show_landmarks(**transformed_sample)
plt.show()
######################################################################
Iterating through the dataset
-----------------------------
Let’s put this all together to create a dataset with composed
transforms.
To summarize, every time this dataset is sampled:
- An image is read from the file on the fly
- Transforms are applied on the read image
- Since one of the transforms is random, data is augmentated on
sampling
We can iterate over the created dataset with a for i in range
loop as before.
transformed_dataset = FaceLandmarksDataset(csv_file=‘data/faces/face_landmarks.csv’,
root_dir=‘data/faces/’,
transform=transforms.Compose([
Rescale(256),
RandomCrop(224),
ToTensor()
]))
for i in range(len(transformed_dataset)):
sample = transformed_dataset[i]
print(i, sample['image'].size(), sample['landmarks'].size())

if i == 3:
    break
######################################################################
However, we are losing a lot of features by using a simple for loop to
iterate over the data. In particular, we are missing out on:
- Batching the data
- Shuffling the data
- Load the data in parallel using
multiprocessingworkers.
torch.utils.data.DataLoader is an iterator which provides all these
features. Parameters used below should be clear. One parameter of
interest is collate_fn. You can specify how exactly the samples need
to be batched using collate_fn. However, default collate should work
fine for most use cases.
dataloader = DataLoader(transformed_dataset, batch_size=4,
shuffle=True, num_workers=0)
Helper function to show a batch
def show_landmarks_batch(sample_batched):
“”“Show image with landmarks for a batch of samples.”""
images_batch, landmarks_batch =
sample_batched[‘image’], sample_batched[‘landmarks’]
batch_size = len(images_batch)
im_size = images_batch.size(2)
grid = utils.make_grid(images_batch)
plt.imshow(grid.numpy().transpose((1, 2, 0)))

for i in range(batch_size):
    plt.scatter(landmarks_batch[i, :, 0].numpy() + i * im_size,
                landmarks_batch[i, :, 1].numpy(),
                s=10, marker='.', c='r')

    plt.title('Batch from dataloader')
for i_batch, sample_batched in enumerate(dataloader):
print(i_batch, sample_batched[‘image’].size(),
sample_batched[‘landmarks’].size())
# observe 4th batch and stop.
if i_batch == 3:
    plt.figure()
    show_landmarks_batch(sample_batched)
    plt.axis('off')
    plt.ioff()
    plt.show()
    break
######################################################################
Afterword: torchvision
----------------------
In this tutorial, we have seen how to write and use datasets, transforms
#and dataloader. torchvision package provides some common datasets and
transforms. You might not even have to write custom classes. One of the
more generic datasets available in torchvision is ImageFolder.
It assumes that images are organized in the following way: ::
root/ants/xxx.png
root/ants/xxy.jpeg
root/ants/xxz.png
.
.
.
root/bees/123.jpg
root/bees/nsdf3.png
root/bees/asd932_.png
最后,看一下运行结果吧!