版权声明:技术交流群:758191639 作者支付宝18696232390喜欢的可以打钱! https://blog.csdn.net/u014131617/article/details/86473629
1.需求
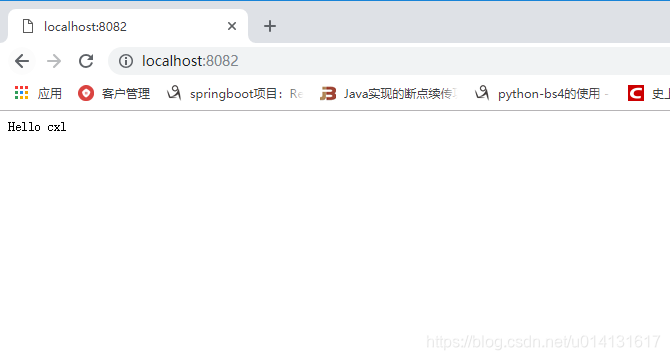
客户端发送一个请求,服务端响应hello cxl
2.创建项目
1.maven依赖
	<dependency>
			<groupId>io.netty</groupId>
			<artifactId>netty-all</artifactId>
			<version>4.1.25.Final</version>
		</dependency>
2.创建主启动类
package com.cxl.netty;

import io.netty.bootstrap.ServerBootstrap;
import io.netty.channel.ChannelFuture;
import io.netty.channel.EventLoopGroup;
import io.netty.channel.epoll.EpollEventLoopGroup;
import io.netty.channel.nio.NioEventLoopGroup;
import io.netty.channel.socket.nio.NioServerSocketChannel;

/**
 * 实现客户端发送一个请求,服务器会返回hello netty
 * @author mingliang
 *
 */
public class HelloServer {

	public static void main(String[] args) throws InterruptedException {

		//定义一对线程组
		//主线程组
		EventLoopGroup bossGroup = new NioEventLoopGroup();
		//从线程组
		EventLoopGroup workerGroup = new NioEventLoopGroup();

		try {
			//netty服务器的创建,ServerBootstrap启动类
			ServerBootstrap serverBootstrap = new ServerBootstrap();
			serverBootstrap.group(bossGroup,workerGroup) // 设置主从线程组
				.channel(NioServerSocketChannel.class) // 设置NIO的双向通道
				.childHandler(new HelloServerInitializer()); //子处理器,用于处理workgroup

			//启动server并且设置9099为启动的端口号,并且启动方式为同步
			ChannelFuture channelFuture =
					serverBootstrap.bind(8082).sync(); //绑定端口,设置同步方式
			channelFuture.channel().closeFuture().sync();
		} finally {
			bossGroup.shutdownGracefully();
			workerGroup.shutdownGracefully();
		}

	}

}
3.创建初始化类
package com.cxl.netty;

import io.netty.channel.ChannelInitializer;
import io.netty.channel.ChannelPipeline;
import io.netty.channel.socket.SocketChannel;
import io.netty.handler.codec.http.HttpServerCodec;

/**
 * 初始化器,channel注册后,会执行里面的相应的初始化方法
 * @author mingliang
 *
 */
public class HelloServerInitializer extends ChannelInitializer<SocketChannel>{

	@Override
	protected void initChannel(SocketChannel channel) throws Exception {
		//通过SocketChannel去获取对应的管道
		ChannelPipeline pipeline = channel.pipeline();
		//通过管道,添加handler
		//HttpServerCodec 是netty提供的助手类,可以理解拦截器
		//当请求到服务端我们需要做编解码,响应到客户端做编码
		pipeline.addLast("HttpServerCodec",new HttpServerCodec());

		//添加自定义的助手类,返回hello cxl
		pipeline.addLast("customHandler",new CustomHandler());

	}

}
4.创建拦截器
package com.cxl.netty;

import java.nio.charset.Charset;
import java.nio.charset.CharsetEncoder;

import io.netty.buffer.ByteBuf;
import io.netty.buffer.Unpooled;
import io.netty.channel.Channel;
import io.netty.channel.ChannelHandlerContext;
import io.netty.channel.SimpleChannelInboundHandler;
import io.netty.handler.codec.http.DefaultFullHttpResponse;
import io.netty.handler.codec.http.FullHttpResponse;
import io.netty.handler.codec.http.HttpHeaderNames;
import io.netty.handler.codec.http.HttpHeaders;
import io.netty.handler.codec.http.HttpObject;
import io.netty.handler.codec.http.HttpResponseStatus;
import io.netty.handler.codec.http.HttpStatusClass;
import io.netty.handler.codec.http.HttpVersion;
import io.netty.util.CharsetUtil;

/**
 *    自定义handler
 * @author mingliang
 *
 */
//SimpleChannelInboundHandler 相当于入站
public class CustomHandler extends SimpleChannelInboundHandler<HttpObject>{

	@Override
	protected void channelRead0(ChannelHandlerContext ctx, HttpObject msg)
			throws Exception {
		Channel channel = ctx.channel();//获取当前channel
		System.out.println(channel.remoteAddress()); //显示客户端的远程地址
		//定义发送的数据消息
		ByteBuf content = Unpooled.copiedBuffer("Hello cxl",CharsetUtil.UTF_8);
		//构建一个http响应
		FullHttpResponse response =
				new DefaultFullHttpResponse
				(HttpVersion.HTTP_1_1,
						HttpResponseStatus.OK,
						content);

		response.headers().set(HttpHeaderNames.CONTENT_TYPE,"text/plain");
		response.headers().set(HttpHeaderNames.CONTENT_LENGTH,content.readableBytes());

		//把响应刷到客户端
		ctx.writeAndFlush(response);


	}

}
3.启动main方法
页面发送请求即可

