前言:
由于微服务也是炒的越来越火 例如springboot springcloud 。springboot也可以说是微服务的入门级课程,
它把传统的springMVC spring Mybatis 继承在框架之中,可以很快完成搭建微服务项目,接下来我们就讲解
程序入门的helloworld 学习之前需要具备maven构建等知识。
1.pom文件引入基础依赖dependency
引入springboot的parent
<parent>
   <groupId>org.springframework.boot</groupId>
   <artifactId>spring-boot-starter-parent</artifactId>
   <version>2.0.1.RELEASE</version>
   <relativePath/> <!-- lookup parent from repository -->
</parent>
引入web开发需要的springboot依赖 其中包括了spring的jar包(springboot自带tomcat jackson转换包等)
<dependency>
   <groupId>org.springframework.boot</groupId>
   <artifactId>spring-boot-starter-web</artifactId>
</dependency>
引入测试springboot依赖 当然不需要也可以使用 为了方便测试引入此包
<dependency>
   <groupId>org.springframework.boot</groupId>
   <artifactId>spring-boot-starter-test</artifactId>
   <scope>test</scope>
</dependency>
2.springbootapplication来启动tomcat 运行
@SpringBootApplication
public class GirlApplication {

   public static void main(String[] args) {
      SpringApplication.run(GirlApplication.class, args);
   }
}
@SpringBootApplication所在类被注解 说明这个应用是一个springboot应用!
并且调用SpringApplication.run启动时候会去扫描此类所在包下的子包的spring注解,比如@RestController
(该注解其实是两个注解 Response + Controller 注解 一般用在类上,那么这个类下的所有方法都是返回json数据)
3.下面我们来定义Controller

4.基本路径配置
我们还可以在 application.yml 中定义启动的 端口和项目根目录名称 比如我的
server:
  port: 8082
  servlet:
    context-path: /girl
5.启动 第二步中的@SpringBootApplication注解类的main 方法 控制台会打印出springboot启动的基本信息
包括端口拦截到请求的路径等
(还可以通过mvn 命令启动,生产环境中还可以通过 java -jar 启动 可以看我的springboot启动方式文章 有详细的说明)
6.访问 http://localhost:8082/girl/helloworld
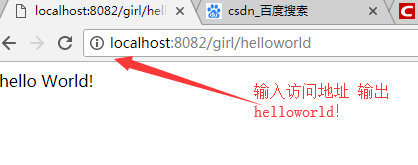
至此helloworld输出成功!
接下来讲解springboot的拦截器配置