1 ObjectAnimator 概述
前面讲解了ValueAnimator和估值器,ValueAnimator只能对数值进行计算,要实现动画需要监听动画,然后获取数值,自己操作对象。不知道大家的感觉如何,我有两个两个感觉,一是这个动画有点复杂,另一个感觉是虽然叫做属性对象,但是完全没有感受到哪里跟属性有关。本篇文章主要讲解ObjectAnimator对象,这个对象继承自ValueAnimator,可以通过改变对象的属性,实现动画,是不是感觉ObjectAnimator叫做属性对象更合适。
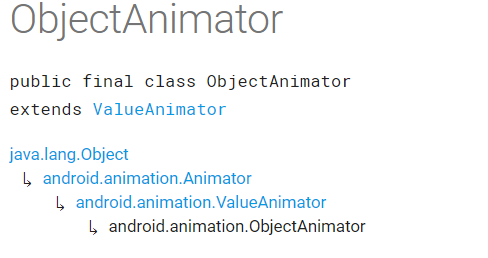
ObjectAnimator继承自ValueAnimator,也是从API11才开始提供。
ValueAnimator类提供了把动画中的属性设置给目标对象的能力,只不过需要我们设置监听自己进行设置。ObjectAnimator可以设置动画目标对象(构造函数可以直接传入),构造函数中提供了将要作用于目标对象的属性名,ObjectAnimator运行过程中会把提供的属性利用目标对象提供的set函数设置给目标对象,有时也会调用目标对象的get函数获取属性值。简单说就是ObjectAnimator通过不断控制值的变化,再不断自动赋给对象的属性(调用目标对象的setXXX函数),从而实现动画效果。
属性动画原理:
属性动画并不是真正通过改变对象的属性来实现动画,而是通过调用目标对象指定的setXxx方法,其中xxx就是指定的属性名,对象不一定有xxx这个属性,只要有setXxx这个方法就可以。ObjectAnimator动画过程中会调用SetXxx函数设置xxx的值,然后其内部会主动调用invalidate()函数进行不停地重绘,这样就实现了动画效果。
ObjectAnimator类似ValueAnimator,不但可以直接利用代码生成,也可以利用xml文件实例化,xml方式不常用。
XML定义ObjectAnimator的标签为objectAnimator,API23以后也可以使用PropertyValuesHolder,具体使用方式在讲解ValueAnimator时已经讲解,这里不再重复。
ObjectAnimator实现动画的of方法
ofArgb(Object target, String propertyName, int... values)
ofArgb(T target, Property<T, Integer> property, int... values)
ofFloat(Object target, String xPropertyName, String yPropertyName, Path path)
ofFloat(T target, Property<T, Float> property, float... values)
ofFloat(T target, Property<T, Float> xProperty, Property<T, Float> yProperty, Path path)
ofFloat(Object target, String propertyName, float... values)

ofInt(T target, Property<T, Integer> xProperty, Property<T, Integer> yProperty, Path path)
ofInt(T target, Property<T, Integer> property, int... values)
ofInt(Object target, String propertyName, int... values)
ofInt(Object target, String xPropertyName, String yPropertyName, Path path)

ofMultiFloat(Object target, String propertyName, float[][] values)
ofMultiFloat(Object target, String propertyName, Path path)
ofMultiFloat(Object target, String propertyName, TypeConverter<T, float[]> converter, TypeEvaluator<T> evaluator, T... values)
ofMultiInt(Object target, String propertyName, int[][] values)
ofMultiInt(Object target, String propertyName, Path path)
ofMultiInt(Object target, String propertyName, TypeConverter<T, int[]> converter, TypeEvaluator<T> evaluator, T... values)

ofObject(T target, Property<T, V> property, TypeEvaluator<V> evaluator, V... values)
ofObject(Object target, String propertyName, TypeConverter<PointF, ?> converter, Path path)
ofObject(T target, Property<T, V> property, TypeConverter<PointF, V> converter, Path path)
ofObject(T target, Property<T, P> property, TypeConverter<V, P> converter, TypeEvaluator<V> evaluator, V... values)
ofObject(Object target, String propertyName, TypeEvaluator evaluator, Object... values)

ofPropertyValuesHolder(Object target, PropertyValuesHolder... values)
2利用ObjectAnimator实现补间动画效果
2.1 平移动画
View有setTranslationX,setTranslationY实现坐标的改变
setTranslationX(float translationX) :以当前控件为原点,在x轴上移动
setTranslationY(float translationY) :以当前控件为原点,在Y轴上移动
ObjectAnimator实现平移:
向X轴正方向移动:
objectAnimator = ObjectAnimator.ofFloat(textView, "translationX", 100, 200, 300,400,500);
objectAnimator.setDuration(3000);
objectAnimator.setInterpolator(new LinearInterpolator());
Y轴方向移动不在演示
2.2 透明度
View有setAlpha函数控制透明度
ObjectAnimator实现透明度变化:
objectAnimator = ObjectAnimator.ofFloat(textView, "alpha", 0.1f,1.0f);
objectAnimator.setDuration(3000);
objectAnimator.setInterpolator(new LinearInterpolator());
2.3 缩放
View有setScaleX(float scaleX)和setScaleY(float scaleY)函数对View进行缩放。
ObjectAnimator实现缩放
objectAnimator = ObjectAnimator.ofFloat(textView, "scaleX", 0.1f,1.0f,2.0f,1.0f);
objectAnimator.setDuration(3000);
objectAnimator.setInterpolator(new LinearInterpolator());
2.4 旋转
View有setRotationX(float rotationX)和setRotationY(float rotationY),setRotation(rotation)函数设置旋转,
setRotationX:绕X轴旋转
setRotationY:绕Y轴旋转
setRotation: 绕中心旋转
ObjectAnimator实现旋转
objectAnimator = ObjectAnimator.ofFloat(textView, "rotation", 0,270);
objectAnimator.setDuration(3000);
objectAnimator.setInterpolator(new LinearInterpolator());
3 ObjectAnimator动画注意事项:重要
总结来自:https://developer.android.google.cn/guide/topics/graphics/prop-animation#java
动画一些特性:
- duration 动画运行时长,如果不设置默认300ms
- interpolation:设置动画运行过程中对应的动画完成状态(设置动画运行速率,类似动画设置了1000ms,可以让动画在运行到100ms时就展示动画完成时的状态)
- 动画刷新频率,默认是每10ms刷新一次,但也跟系统忙碌程度有关,如果系统资源占用严重可能时间会延长。
重要:一下内容来自androidDeveloper,非常重要请大家关注
属性动画getXxx(),setXxx()函数和属性xxx的规则说明:
-
如果ObjectAnimator想操作对象的foo属性实现动画操作,对象必须有相应的setFoo函数,
因为ObjectAnimator会自动根据foo属性对应的setFoo函数去更新属性值。所以可以推测出ObjectAnimator会自动把属性转化成对应的set函数,会强制大写第一个字母,然后反射得到set函数,进行调用,所以ObjectAnimator初始化时属性首字母大小写无所谓,关键是除了首字母其他一定要和set函数对应。 -
上面我们知道了对象setter函数的作用,那么getter函数有什么用处呢,ObjectAnimator指定values时,可以指定多个value,如果我们初始化时只指定了一个值,ObjectAnimator会把这个值作为动画结束状态的值,此时会调用getter函数作为动画初始状态的值。
-
动画目标对象getter和setter函数的参数类型和ObjectAnimator设置动画开始和结束值的类型必须相同。
-
ObjectAnimator内部会主动调用目标对象的setter方法,但是这并不会导致view的重绘,需要你在setter方法中主动调用invalidate方法或者设置动画监听函数,在onAnimationUpdate的回调中调用invalidate方法。如果你要自己定义对象的setter方法,就要主动调用invalidate方法。
4 自定义ObjectAnimator属性
上面把view已经存在的平移,旋转,缩放,透明度属性利用ObjectAnimator进行了实现,接着将演示自定义ObjectAnimator属性的操作,通过上面的分析知道ObjectAnimator重要的点是属性和设置属性的set函数,以及主动调用invalidate函数,下面会通过一个例子来实现自定义ObjectAnimator属性的过程。
自定义view
public class ViewDemo22 extends View {
    private int color = Color.GREEN;
    private int radius = 100;

    private Paint mPaint;

    public int getColor() {
        return color;
    }

    public void setColor(int color) {
        this.color = color;
        mPaint.setColor(color);
        invalidate();
    }

    public int getRadius() {
        return radius;
    }

    public void setRadius(int radius) {
        this.radius = radius;
        invalidate();
    }

    public ViewDemo22(Context context) {
        this(context,null,0);
    }

    public ViewDemo22(Context context, @Nullable AttributeSet attrs) {
        this(context, attrs,0);
    }

    public ViewDemo22(Context context, @Nullable AttributeSet attrs, int defStyleAttr) {
        super(context, attrs, defStyleAttr);
        init();
    }

    private void init() {
        mPaint = new Paint(Paint.ANTI_ALIAS_FLAG);
        mPaint.setColor(color);
        mPaint.setStrokeWidth(5);
        mPaint.setStyle(Paint.Style.STROKE);
    }

    @Override
    protected void onDraw(Canvas canvas) {
        super.onDraw(canvas);
        canvas.drawCircle(getMeasuredHeight()/2,getMeasuredHeight()/2,radius,mPaint);
    }

    @Override
    protected void onMeasure(int widthMeasureSpec, int heightMeasureSpec) {
        super.onMeasure(widthMeasureSpec, heightMeasureSpec);
        int width = MeasureSpec.getSize(widthMeasureSpec);
        int height = MeasureSpec.getSize(heightMeasureSpec);
        if (width < 200){
            width = 200;
        }

        if (height < 200){
            height = 200;
        }

        if (width < height){
            setMeasuredDimension(height,height);
        }else{
            setMeasuredDimension(width,width);
        }
    }

    @Override
    protected void onSizeChanged(int w, int h, int oldw, int oldh) {
        super.onSizeChanged(w, h, oldw, oldh);
    }
}
布局文件
<?xml version="1.0" encoding="utf-8"?>
<android.support.constraint.ConstraintLayout xmlns:android="http://schemas.android.com/apk/res/android"
    xmlns:app="http://schemas.android.com/apk/res-auto"
    xmlns:tools="http://schemas.android.com/tools"
    android:layout_width="match_parent"
    android:layout_height="match_parent"
    tools:context=".MainActivity">

<com.ldx.canvasdrawdemo.ViewDemo22
    android:id="@+id/viewdemo"
    android:layout_width="wrap_content"
    android:layout_height="wrap_content"
    app:layout_constraintLeft_toLeftOf="parent"
    app:layout_constraintRight_toRightOf="parent"
    app:layout_constraintTop_toTopOf="parent"
    app:layout_constraintBottom_toBottomOf="parent"/>

</android.support.constraint.ConstraintLayout>
setContentView(R.layout.activity_main);
viewDemo22 = findViewById(R.id.viewdemo);

ObjectAnimator objectAnimator = ObjectAnimator.ofInt(viewDemo22, "radius", 50, 300);
objectAnimator.setDuration(1000);
objectAnimator.setInterpolator(new LinearInterpolator());
objectAnimator.setRepeatCount(-1);
objectAnimator.start();
改变颜色,没有设置插值器,只是简单数据改变:
ObjectAnimator objectAnimator = ObjectAnimator.ofInt(viewDemo22, "color", Color.RED, Color.GREEN);
objectAnimator.setDuration(1000);
objectAnimator.setInterpolator(new LinearInterpolator());
objectAnimator.setRepeatCount(-1);
objectAnimator.start();