版权声明:个人原创,转载请注明出处 https://blog.csdn.net/dengshunhao/article/details/85105555
事情是这样的,之前呢,用Sprite Mask做了遮罩效果,但是,老板想要月球来回转动,就不能用图片转动,只能用UI了,那相应的,遮罩怎么办呢,老板也是神人,给我指了一条新的思路,就是将3D遮罩转化成2D遮罩,不过放在手机上卡成狗,幸好群里大佬ific指点了一下遮罩的shader,效果不错,在此将两种方法都分享出来~
一.使用RenderTexture渲染成Sprite,然后使用Sprite Mask进行遮罩
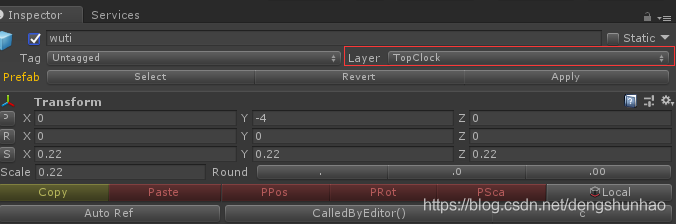
1.为要遮罩的模型单独创建layer,新建一个摄像机只看该层
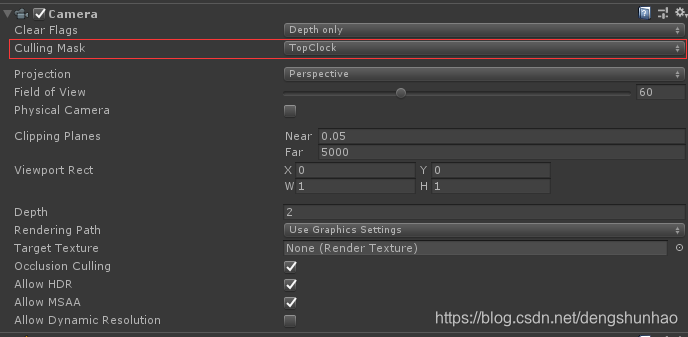
2.将摄像机的画面渲染到sprite上
public class MoonMask : MonoBehaviour {
    public Camera ModelMaskCamera;
    public Texture2D CamTexture;
    public RenderTexture renderTexture;
    public SpriteRenderer spriteRenderer;

    // Use this for initialization
    void Start () {
        //注意这里的第三个参数
        renderTexture = new RenderTexture(Screen.width, Screen.height, 24, RenderTextureFormat.ARGB32);
        ModelMaskCamera.targetTexture = renderTexture;
        ModelMaskCamera.Render();
        RenderTexture.active = renderTexture;
        spriteRenderer.transform.localPosition = new Vector3(-(float)Screen.width / 100, -(float)Screen.height/100,0);
        CamTexture = new Texture2D(Screen.width, Screen.height, TextureFormat.RGB24, false);
    }

	// Update is called once per frame
	void Update ()
    {
            getScreenTexture();
    }
    void getScreenTexture()
    {
        Rect r = new Rect(0, 0, Screen.width, Screen.height);
        RenderTexture.active = renderTexture;
        CamTexture.ReadPixels(r, 0, 0);
        CamTexture.Apply();
        Sprite sprite = Sprite.Create(CamTexture, new Rect(0, 0, Screen.width, Screen.height), Vector2.zero);
        spriteRenderer.sprite = sprite;
    }
}
这里踩了挺多坑,因为摄像机看到的只有模型时会有残影出现,所以要在后面加一层背景,当时我不能加UI,因为加UI会覆盖在模型上面,透明度又不能设置为0,设置为0了残影还是会出现,不设置为0会影响模型显示效果
好吧,加了Sprite,使它的Z轴在模型后面,扩大摄像机的far值, 使其能看到该Sprite,但是神奇的是还是覆盖在模型上面,偶然发现将RenderTexture的Depth Buffer赋值为At least 16 bit depth或者At least 24 bit depth的时候能够让sprite显示在模型后面,虽然不知道什么原理~
上面代码中的第三个参数就是设置这个的 : 传16是At least 16 bit depth,传24是At least 24 bit depth
官方API : https://docs.unity3d.com/ScriptReference/RenderTexture-depth.html
3.遮罩实现
unity内置了sprite的遮罩 :
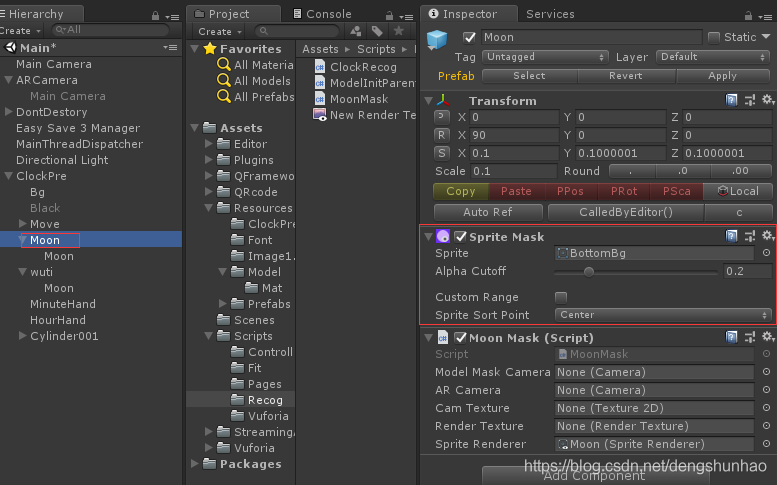
被遮罩物体上:
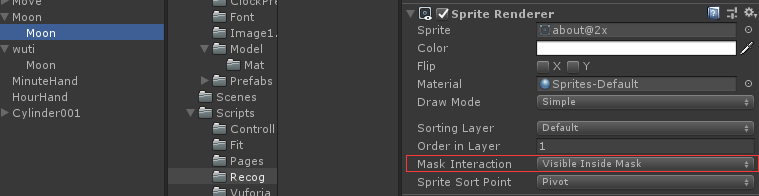
遮罩的原理 : 显示遮罩图片不透明部分与被遮罩图片的不透明部分相交部分
二.使用shader中的ColorMask属性进行遮罩
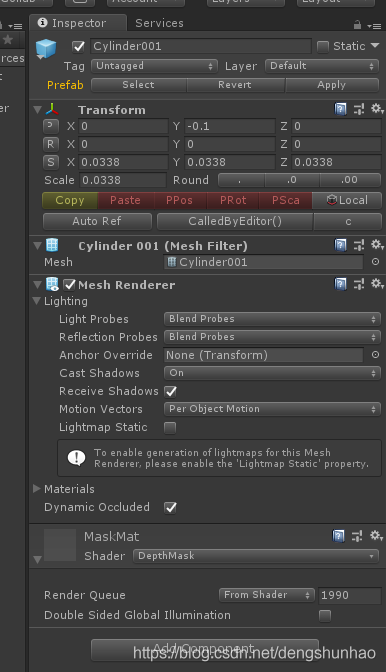
1.建立遮罩模型(比如我的需求是一块面板中间挖个洞)
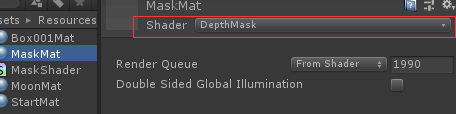
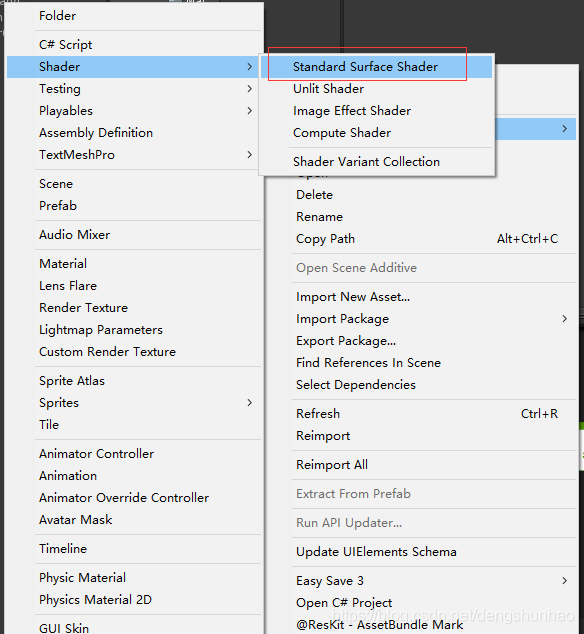
2.新建一个shader,将下面代码赋值过去
Shader "DepthMask" {

	SubShader{
		// Render the mask after regular geometry, but before masked geometry and
		// transparent things.

		Tags {"Queue" = "Geometry-10" }

		// Turn off lighting, because it's expensive and the thing is supposed to be
		// invisible anyway.

		Lighting Off

		// Draw into the depth buffer in the usual way.  This is probably the default,
		// but it doesn't hurt to be explicit.

		ZTest LEqual
		ZWrite On

		// Don't draw anything into the RGBA channels. This is an undocumented
		// argument to ColorMask which lets us avoid writing to anything except
		// the depth buffer.

		ColorMask 0

		// Do nothing specific in the pass:

		Pass {}
	}
}
3.新建一个材质,选择该shader,并拖拽到遮罩模型上