本文内容梳理:
1、tomcat端口号修改(方式两种)
2、banner改变
3、关于spring boot的返回数据解析(json数据和编码格式)
4、集成jsp或者ftl页面 (同时集成jsp和freemarker)
前期准备:
在上文基础上完善文件

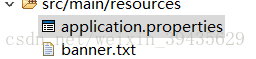
添加目录resources(注意:若前期建立的maven web项目,可省略这步)

一、tomcat启动端口号配置,可主要分为两种
1、通过修改启动类(一般不使用该方法)
SpringApplication.run(StartApplication.class, "--server.port=5000");
2、通过配置文件修改 (常使用) spring boot支持两种配置文件方式(application.properties和application.yml)
1>使用application.properties配置(注意:将方法一注释掉,否则端口号修改以方法一为主)
新建application.properties文件,添加内容
server.port=5001
2> 通过application.yml配置
新建application.yml文件(注意:该文件不可识别“tab”键,空格必须使用空格键)
server:
  port: 5002
注意:在修改端口时,是有主次之分,Java类 > application.properties >application.yml
关于spring boot的框架时,一般使用application.properties为主,application.yml为辅。本博客关于spring boot的框架的配置,会使用application.properties.(application.yml的配置文件一般在spring cloud微服务架构中使用较多)
二、banner改变
banner是什么?在我们启动类时的图标显示

1、修改banner
resources文件下添加banner.txt文件。启动类会自动去识别
eg:

2、关闭banner(一般不使用)
SpringApplication sp = new SpringApplication(StartApplication.class);
		sp.setBannerMode(Banner.Mode.OFF);
		sp.run(args);
三、关于spring boot的返回数据解析(json数据和编码格式)
1、测试关于spring boot自定义的json解析和编码格式
1>定义实体类;
private int id;
private String name;
private Date time;
备注:关于setter和getter方法自己完善
2>在StartApplication.class类中添加controller方法 (主要用来测试json和编码格式)
@RequestMapping("json")
	public TestJsonModel json() {
		TestJsonModel json = new TestJsonModel();
		json.setId(1);
		json.setName("魂牵");
		json.setTime(new Date());
		return json;
	}
@RequestMapping("teststr")
public String str(){
return "字符串编码测试!!";
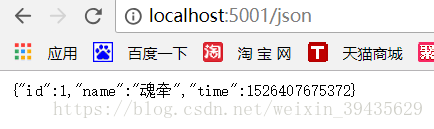
}3>启动测试
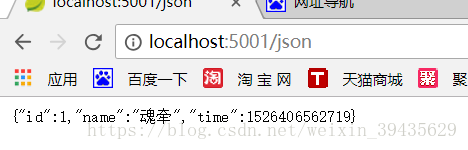
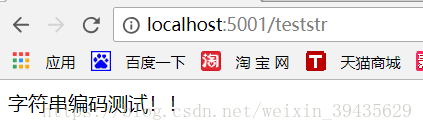

备注:不难发现,关于编码格式默认进行了UTF-8的转换,同时json也进行了默认解析
2、修改编码格式配置(反向测试)
在StartApplication.class类中添加,编码格式
	@Bean
	public StringHttpMessageConverter stringHttpMessageConverter() {
		/*编码方式修改*/
		//默认Utf-8 源码( java.nio.charset.Charset中第613行)
		//StringHttpMessageConverter converter = new StringHttpMessageConverter(Charset.forName("UTF-8"));
		//反向去测试
		StringHttpMessageConverter converter = new StringHttpMessageConverter(Charset.forName("ISO-8859-1"));
		return converter;
	}
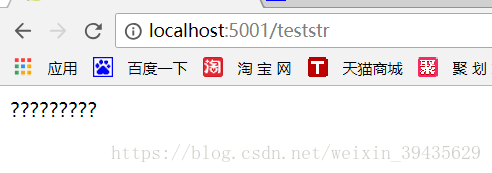
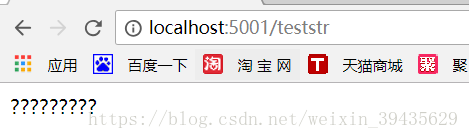
注意:json数据会默认去解析,所以当字符串在json数据内时,会进行默认编码
3、修改json默认配置(方法一)
在StartApplication.class类中添加,json格式(本人使用fastjson.jar)
1>pom.xml添加依赖
<!-- 自定义json数据解析 -->
<dependency>
       <groupId>com.alibaba</groupId>
       <artifactId>fastjson</artifactId>
       <version>1.2.47</version>
</dependency>
2>StartApplication.class引入
@Bean
	public HttpMessageConverters useConverters() {
		FastJsonHttpMessageConverter fast = new FastJsonHttpMessageConverter();
		//处理中文乱码问题(不然出现中文乱码)
        List<MediaType> fastMediaTypes = new ArrayList<MediaType>();
        fastMediaTypes.add(MediaType.APPLICATION_JSON_UTF8);
        fast.setSupportedMediaTypes(fastMediaTypes);
		HttpMessageConverters httpMessageConverters = new HttpMessageConverters(fast);
		return httpMessageConverters;
	}
测试:修改实体类
	@JSONField(serialize=false)
	private int id;
	private String name;
	@JSONField(format="yyyy-mm-dd hh:mm:ss")
	private Date time;
4、关于修改编码格式和接送解析方法二
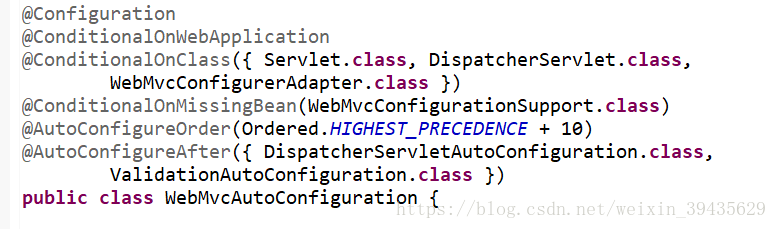
继承WebMvcConfigurationSupport 类 (或者WebMvcConfigurerAdapter类(建议使用该类)),覆写configureMessageConverters方法
主要区别:
当通过继承WebMvcConfigurationSupport 类来实现时,sping boot自动配置的mvc信息将失效导致需要重新定义许多东西(包括:页面跳转时的默认路径等)。所以建议继承WebMvcConfigurerAdapter。
源码:
内容修改和添加:

	public void configureMessageConverters(List<HttpMessageConverter<?>> converters) {
		System.out.println("=================自定义json数据解析开始====================");
		super.configureMessageConverters(converters);
		//定义FastJsonHttpMessageConverter实体类
		FastJsonHttpMessageConverter fastConverter = new FastJsonHttpMessageConverter();
		FastJsonConfig fastJsonConfig = new FastJsonConfig();
        fastJsonConfig.setFeatures(Feature.SupportArrayToBean);//这边可以自己定义
        fastConverter.setFastJsonConfig(fastJsonConfig);
        //处理中文乱码问题(不然出现中文乱码)
        List<MediaType> fastMediaTypes = new ArrayList<MediaType>();
        fastMediaTypes.add(MediaType.APPLICATION_JSON_UTF8);
        fastConverter.setSupportedMediaTypes(fastMediaTypes);
        converters.add(fastConverter);
        System.out.println("=================自定义json数据解析结束====================");
        System.out.println("=================自定义编码方式开始====================");
        //编码格式修改
        StringHttpMessageConverter converter = new StringHttpMessageConverter(Charset.forName("ISO-8859-1"));
        //StringHttpMessageConverter converter = new StringHttpMessageConverter(Charset.forName("UTF-8"));
        converters.add(converter);
        System.out.println("=================自定义编码方式结束====================");
	}
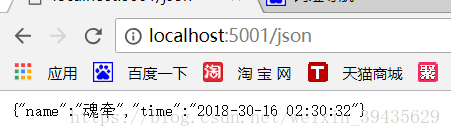
测试结果:
四、集成jsp或者ftl页面
注意:关于json和编码格式解析使用的是继承WebMvcConfigurerAdapter(否则页面跳转或是关于字符串的编码会出一定问题。)1、集成jsp页面
1>添加依赖 pom.xml中
                <!-- 添加Jsp支持jar包 -->
		<!-- servlet 依赖 -->
		 <dependency>
			<groupId>javax.servlet</groupId>
			<artifactId>javax.servlet-api</artifactId>
			<scope>provided</scope>
		</dependency>

		<!--JSTL(JSP Standard Tag Library,JSP标准标签库)是一个不断完善的开放源代码的JSP标签库,是由apache的jakarta小组来维护的。 -->
		<dependency>
			<groupId>javax.servlet</groupId>
			<artifactId>jstl</artifactId>
		</dependency>
		<dependency>
			<groupId>org.apache.tomcat.embed</groupId>
			<artifactId>tomcat-embed-jasper</artifactId>
			<scope>provided</scope>
</dependency>spring.mvc.view.prefix=/WEB-INF/jsp/
spring.mvc.view.suffix=.jsp3>建立jsp文件
按下面路径
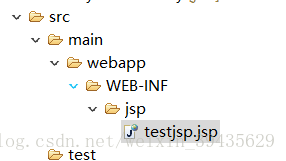
简单的jsp页面即可
<%@ page language="java" contentType="text/html;charset=UTF-8" pageEncoding="UTF-8" %>
<!DOCTYPE html>
<html lang="en">
<head>
    <title>Hello 你好</title>
</head>
<body>
    Hello 你好
</body>
</html>
6>添加controller,在启动类中:
@RequestMapping("jsp")
	public ModelAndView testJsp() {
		ModelAndView m = new ModelAndView("testjsp");
		Map<String,Object> map = m.getModel();
		TestJsonModel json = new TestJsonModel();
		json.setId(1);
		json.setName("EL表达式");
		json.setTime(new Date());
		map.put("json", json);
		map.put("str", "字符串编码测试");
		return m;
	}
5>重新启动类访问结果
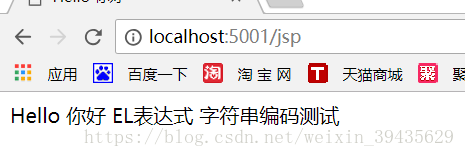
备注:关于spring boot jsp页面跳转中的乱码问题:
1>首先查看关于后台在传递字符串时到jsp页面的编码格式(可以看内容三的讲解),本文采用UTF-8。
2>关于jsp页面的编码格式,本文也是UTF-8.
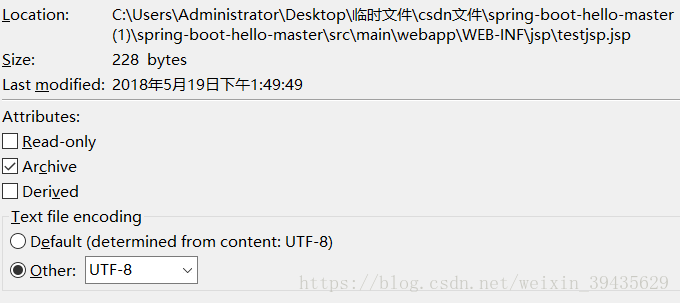
3>jsp页面的编码控制:
<%@ page language="java" contentType="text/html;charset=UTF-8" pageEncoding="UTF-8" %>关于内容的意思:contentType:服务器传到jsp页面的编码格式。
pageEncoding:jsp页面本身的编码格式。
一般:这三项控制好后,页面的乱码问题几乎均能解决。
2、集成ftl页面
1>引入pom文件
	<!-- ftl依赖文件引入 -->
		<dependency>
			<groupId>org.springframework.boot</groupId>
			<artifactId>spring-boot-starter-freemarker</artifactId>
		</dependency>
2>添加ctrl 再启动类中
	@RequestMapping("ftl")
	public ModelAndView testFtl() {
		ModelAndView m = new ModelAndView("helloFtl");
		Map<String,Object> map = m.getModel();
		TestJsonModel json = new TestJsonModel();
		json.setId(1);
		json.setName("EL表达式");
		json.setTime(new Date());
		map.put("json", json);
		map.put("str", "字符串编码测试");
		return m;
	}
2>在resources文件下添加文件夹 templates,再添加helloFtl.ftl文件,内容如下
<!DOCTYPE html>
<html xmlns="http://www.w3.org/1999/xhtml" xmlns:th="http://www.thymeleaf.org"
      xmlns:sec="http://www.thymeleaf.org/thymeleaf-extras-springsecurity3">
    <head>
        <title>Hello World!</title>
    </head>
    <body>
        <h1>Hello world!! 你好  ${str} ${json.name}</h1>
    </body>
</html>
3> 注释配置中关于jsp的配置 ,关于ftl的配置spring boot会自动加载。

4>访问结果

备注:关于ftl页面路径的配置:
1> 配置文件中修改:但父目录再resources下:
配置添加:
spring.freemarker.template-loader-path=classpath:/ftl/ #src/main/resources文件添加:
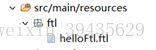
备注:为了方便测试,将页面信息中templates修改为ftl
测试结果:

2> 在启动类中,重新定义ViewResolver和FreeMarkerConfigurer
代码如下:
@Bean
    public FreeMarkerViewResolver getFmViewResolver() {
        FreeMarkerViewResolver resolver = new FreeMarkerViewResolver();
        resolver.setCache(true);
        resolver.setPrefix("");
        resolver.setSuffix(".ftl");
        resolver.setContentType("text/html; charset=UTF-8");
        return resolver;
    }

    @Bean
    public FreeMarkerConfigurer freemarkerConfig() throws IOException, TemplateException {
        FreeMarkerConfigurer configurer = new FreeMarkerConfigurer();
        //configurer.setTemplateLoaderPaths("file:绝对路径","http://www.xxx.com/");
        configurer.setTemplateLoaderPaths("file:\\C:\\Users\\Administrator\\Desktop\\临时文件\\csdn文件\\spring-boot-hello-master (1)\\spring-boot-hello-master\\src\\main\\webapp\\WEB-INF\\ftl");
        configurer.setDefaultEncoding("UTF-8");
        return configurer;
    }
注意:file仅能写绝对路径。我在WEB-INF下建立ftl文件下放置ftl文件。
测试结果:

3>同时集成jsp和freemarker
1>修改启动类中 bean的生成规则:
	@Bean
    public FreeMarkerViewResolver getFmViewResolver() {
        FreeMarkerViewResolver resolver = new FreeMarkerViewResolver();
        resolver.setCache(true);
        resolver.setPrefix("");
        resolver.setSuffix(".ftl");
        resolver.setContentType("text/html; charset=UTF-8");
        resolver.setOrder(0);
        return resolver;
    }

    @Bean
    public FreeMarkerConfigurer freemarkerConfig() throws IOException, TemplateException {
        FreeMarkerConfigurer configurer = new FreeMarkerConfigurer();
        //configurer.setTemplateLoaderPaths("file:绝对路径","http://www.xxx.com/");
        configurer.setTemplateLoaderPaths("file:\\C:\\Users\\Administrator\\Desktop\\临时文件\\csdn文件\\spring-boot-hello-master (1)\\spring-boot-hello-master\\src\\main\\webapp\\WEB-INF\\ftl");
        configurer.setDefaultEncoding("UTF-8");
        return configurer;
    }

    /*
     * jsp
     * */
    @Bean
    public ViewResolver getJspViewResolver() {
    	InternalResourceViewResolver jsp = new InternalResourceViewResolver();
        jsp.setPrefix("/WEB-INF/jsp/");
        jsp.setSuffix(".jsp");
        jsp.setOrder(1);
        return jsp;
    }
2>添加与jsp同名的ftl文件,测试谁优先(ftl优先)
启动类中:
	@RequestMapping("ftljsp")
	public ModelAndView testFtlJsp() {
		ModelAndView m = new ModelAndView("testjsp");
		Map<String,Object> map = m.getModel();
		TestJsonModel json = new TestJsonModel();
		json.setId(1);
		json.setName("EL表达式");
		json.setTime(new Date());
		map.put("json", json);
		map.put("str", "字符串编码测试");
		return m;
	}
2> 页面文件:

testjsp.ftl内容:
<!DOCTYPE html>
<html xmlns="http://www.w3.org/1999/xhtml" xmlns:th="http://www.thymeleaf.org"
      xmlns:sec="http://www.thymeleaf.org/thymeleaf-extras-springsecurity3">
    <head>
        <title>Hello World!</title>
    </head>
    <body>
        <h1>ftl中   Hello 你好  ${json.name} ${str}</h1>
    </body>
</html>
测试结果:ftl文件优先执行。


本文就到此结束:如果有问题可以留言。
github地址:https://github.com/hunqian/spring-boot-hello-more.git