tensorflow的官网上提供很详细的python教程,也确实很好用。但是,应用软件产品大多用c/c++写的。所以,大部分的应用都是用python来训练模型,得到训练好的模型后. 用c++调用tensorflow模型进行推理。通过收集资料,总结了方法.
1. 使用python训练模型,并保存模型
a.训练并保存模型
sess = tf.Session(config=config) #session
saver = tf.train.Saver()  #需要添加的代码,在初始化变量前。
sess.run(tf.initialize_all_variables())
#....训练过程....
saver.save(sess, "xxx.ckpt") #保存模型在model目录下
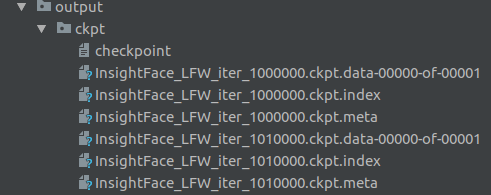
可以看到,ckpt保存路径下,有如下的内容:
- model.ckpt.data-00000-of-00001 包含所有变量的值,没有结构。
- model.ckpt.index 映射表,将data映射到meta的计算图中。
- model.ckpt.meta 包含元图,即计算图的结构,没有变量的值(基本上可以在tensorboard / graph中看到)。
b.模型整合
调用tensorflow自带的freeze_graph.py工具, 输入为格式.pb或.pbtxt的protobuf文件和.ckpt的参数文件,输出为一个新的同时包含图定义和参数的.pb文件;这个步骤的作用是把checkpoint中.ckpt文件中的参数转化为常量const operator后和之前的tensor定义绑定在一起。
得到一个可以用于推理的、包含权重的计算图结构pb文件。
python freeze_graph.py --input_checkpoint=../ckpt/InsightFace..._1000000.ckpt -- output_graph=../model/model_frozen.pb --output_node_names=output_node
现在,我们得到model_frozen.pb,这是在C++中常用的模型格式。
2.使用c++加载模型
a.头文件
如下,可以看出,必须要包含"tensorflow/core/platform/env.h"和"tensorflow/core/public/session.h"等一系列的头文件才能编译。
...
#ifndef CONVERT_FACE_H
#define CONVERT_FACE_H
#include <iostream>
#include <vector>
#include <algorithm>
#include "tensorflow/cc/client/client_session.h"
#include "tensorflow/cc/ops/standard_ops.h"
#include "tensorflow/cc/ops/image_ops.h"
#include "tensorflow/core/framework/tensor.h"
#include "tensorflow/core/platform/env.h"
#include "tensorflow/core/public/session.h"
#include <opencv2/opencv.hpp>
#include <opencv2/core/core.hpp>
#include <opencv2/highgui/highgui.hpp>
#include "common/constant.h"
#include "common/face.h"
...
b.tensorflow模型初始化
    // 建立graph
    tensorflow::GraphDef graph;
    // pb模型加载到graph里
    tensorflow::Status ret = tensorflow::ReadBinaryProto(tensorflow::Env::Default(), model_path, &graph);
    if (!ret.ok()) {
        log->error("fail to load pb model");
        return 1;
    }

    // 配置session
    tensorflow::Session *p_session;
    tensorflow::SessionOptions options;
    options.config.mutable_gpu_options()->set_allow_growth(true);
    options.config.mutable_gpu_options()->set_visible_device_list("0"); // single gpu
    NewSession(options, &p_session);

    // graph 加载到 session
    ret = p_session->Create(graph);
    if (!ret.ok()) {
        log->error("fail to load graph");
        return 1;
    }
c.模型预测(单张图片)
相较于一些例子只是对MLP进行推理,在实际应用中并不常见。这里贴出一个实际应用中常见的例子 : 预测单张图片, 对其进行分类判别 :
    // 输入图像
    cv::Mat &face_data;
    // 输入tensor NHWC
    // 并定义输入张量,包括数据类型和大小。
    tensorflow::Tensor input_tensor(tensorflow::DT_FLOAT, tensorflow::TensorShape({1, m_height, m_width, m_channel}));

    // 根据输入数据face_data的情况,进行调整
    cv::Mat input_mat = cv::Mat(m_height, m_width, CV_32FC3);
    face_data.convertTo(input_mat, CV_32FC3);

	// Mat to Tensor
	int data_size = m_height * m_width * m_channel * 1 * sizeof(float);
    std::copy_n((float*)input_mat, data_size, (input_tensor.flat<float>()).data());

    // 定义模型输入
    std::vector<std::pair<std::string, tensorflow::Tensor>> inputs = {
        	{ "input", input_tensor}
        };

    // 定义模型输出
    std::vector<tensorflow::Tensor> outputs;
    tensorflow::Status status = p_session->Run(inputs, {"output"}, {}, &outputs);  //调用模型,
    // 输出节点名为softmax,结果保存在output中。
    if (!status.ok()) {
        cout << status.ToString() << "\n";
        return 1;
    }
    std::cout << "input"  << input_tensor.DebugString() << std::endl;
    std::cout << "output" << outputs[0].DebugString() << std::endl;
3. 当模型有多个输入/输出时候的处理策略
3.1 多个输入
3.1.1 建图
多层感知机MLP模型定义如下, 其中x和y都需要输入。
with tf.Session() as sess:
    x = tf.placeholder(tf.float32, [None, 32], name="x")
    y = tf.placeholder(tf.float32, [None, 8], name="y")

    w1 = tf.Variable(tf.truncated_normal([32, 16], stddev=0.1))
    b1 = tf.Variable(tf.constant(0.0, shape=[16]))

    w2 = tf.Variable(tf.truncated_normal([16, 8], stddev=0.1))
    b2 = tf.Variable(tf.constant(0.0, shape=[8]))

    a = tf.nn.tanh(tf.nn.bias_add(tf.matmul(x, w1), b1))
    y_out = tf.nn.tanh(tf.nn.bias_add(tf.matmul(a, w2), b2), name="y_out")
    cost = tf.reduce_sum(tf.square(y-y_out), name="cost")
    optimizer = tf.train.AdamOptimizer().minimize(cost, name="train")

    init = tf.initialize_variables(tf.all_variables(), name='init_all_vars_op')
    tf.train.write_graph(sess.graph_def,
                         './',
                         'mlp.pb', as_text=False)
3.1.2 c++中加载&使用模型
下面是在C++中加载上一节定义的计算图并运行的代码,分为如下几个步骤:
- 创建Session
- 初始化计算图
- 运行
#include "tensorflow/core/public/session.h"
#include "tensorflow/core/graph/default_device.h"
using namespace tensorflow;

int main(int argc, char* argv[]) {

    std::string graph_definition = "mlp.pb";
    Session* session;
    GraphDef graph_def;
    SessionOptions opts;
    std::vector<Tensor> outputs; // Store outputs
    TF_CHECK_OK(ReadBinaryProto(Env::Default(), graph_definition, &graph_def));

    // Set GPU options
    graph::SetDefaultDevice("/gpu:0", &graph_def);
    opts.config.mutable_gpu_options()->set_per_process_gpu_memory_fraction(0.5);
    opts.config.mutable_gpu_options()->set_allow_growth(true);

    // create a new session
    TF_CHECK_OK(NewSession(opts, &session));

    // Load graph into session
    TF_CHECK_OK(session->Create(graph_def));

    // Initialize our variables
    TF_CHECK_OK(session->Run({}, {}, {"init_all_vars_op"}, nullptr));

    Tensor x(DT_FLOAT, TensorShape({100, 32}));
    Tensor y(DT_FLOAT, TensorShape({100, 8}));
    auto _XTensor = x.matrix<float>();
    auto _YTensor = y.matrix<float>();

    _XTensor.setRandom();
    _YTensor.setRandom();

    for (int i = 0; i < 10; ++i) {

        TF_CHECK_OK(session->Run({{"x", x}, {"y", y}}, {"cost"}, {}, &outputs)); // Get cost
        float cost = outputs[0].scalar<float>()(0);
        std::cout << "Cost: " <<  cost << std::endl;
        TF_CHECK_OK(session->Run({{"x", x}, {"y", y}}, {}, {"train"}, nullptr)); // Train
        outputs.clear();
    }


    session->Close();
    delete session;
    return 0;
}
ps: 下面是代码的英文说明,不难搞懂,就不翻译了。

If we examine the code we will see many similarities with running the Python code. Lines 15-17 set GPU options for the graph definition. We set the default device as “/gpu:0”, set the memory fraction as 0.5 and allow growth on the GPU memory usage. These settings are the same when initializing a session with a tf.config in python.
Lines 20 create a new session with the options we specified. Line 23 loads the graph definition into the session so we can use it. Line 26 we initialize all our variables like we would in any tensorflow session.
Lines 28-31 we initialize a tensor as our inputs and outputs. TensorFlow’s tensors are underlying Eigen tensors. Essentially, we call x.matrix() to get a pointer to Eigen’s tensor and hence the underlying data. We can similarly call x.vector, x.scalar and so on… See Eigen’s Tensor Documentation and TensorFlow’s Tensor Documentation for more details. Lines 33-34 generates some random data.
Lines 36-43 is where the real computation happens. Recall in our graph definition we explicitly named some variables and operations. Here we reference them by name as a string and providing the necessary inputs. The output is obtained by passing a vector that is populated when the graph is run (Lines 38-40). Lastly, Line 41 performs the training for the neural network. The remaining lines close the session and clean up our pointer.
可以看出,输入为session --> Run({{"x", x}, {"y", y}, ... {}}, ...),即对每个输入占位符,都要设置一个形如{"x", x}的格式。
3.2 多个输出
// 2018, Patrick Wieschollek <[email protected]>
#include <tensorflow/core/protobuf/meta_graph.pb.h>
#include <tensorflow/core/public/session.h>
#include <tensorflow/core/public/session_options.h>
#include <iostream>
#include <string>

typedef std::vector<std::pair<std::string, tensorflow::Tensor>> tensor_dict;

/**
 * @brief load a previous store model
 * @details [long description]
 *
 * in Python run:
 *
 *    saver = tf.train.Saver(tf.global_variables())
 *    saver.save(sess, './exported/my_model')
 *    tf.train.write_graph(sess.graph, '.', './exported/graph.pb, as_text=False)
 *
 * this relies on a graph which has an operation called `init` responsible to
 * initialize all variables, eg.
 *
 *    sess.run(tf.global_variables_initializer())  # somewhere in the python
 * file
 *
 * @param sess active tensorflow session
 * @param graph_fn path to graph file (eg. "./exported/graph.pb")
 * @param checkpoint_fn path to checkpoint file (eg. "./exported/my_model",
 * optional)
 * @return status of reloading
 */
tensorflow::Status LoadModel(tensorflow::Session *sess, std::string graph_fn,
                             std::string checkpoint_fn = "") {
  tensorflow::Status status;

  // Read in the protobuf graph we exported
  tensorflow::MetaGraphDef graph_def;
  status = ReadBinaryProto(tensorflow::Env::Default(), graph_fn, &graph_def);
  if (status != tensorflow::Status::OK()) return status;

  // create the graph in the current session
  status = sess->Create(graph_def.graph_def());
  if (status != tensorflow::Status::OK()) return status;

  // restore model from checkpoint, iff checkpoint is given
  if (checkpoint_fn != "") {
    const std::string restore_op_name = graph_def.saver_def().restore_op_name();
    const std::string filename_tensor_name =
        graph_def.saver_def().filename_tensor_name();

    tensorflow::Tensor filename_tensor(tensorflow::DT_STRING,
                                       tensorflow::TensorShape());
    filename_tensor.scalar<std::string>()() = checkpoint_fn;

    tensor_dict feed_dict = {{filename_tensor_name, filename_tensor}};
    status = sess->Run(feed_dict, {}, {restore_op_name}, nullptr);
    if (status != tensorflow::Status::OK()) return status;
  } else {
    // virtual Status Run(const std::vector<std::pair<string, Tensor> >& inputs,
    //                  const std::vector<string>& output_tensor_names,
    //                  const std::vector<string>& target_node_names,
    //                  std::vector<Tensor>* outputs) = 0;
    status = sess->Run({}, {}, {"init"}, nullptr);
    if (status != tensorflow::Status::OK()) return status;
  }

  return tensorflow::Status::OK();
}

int main(int argc, char const *argv[]) {
  const std::string graph_fn = "./exported/my_model.meta";
  const std::string checkpoint_fn = "./exported/my_model";

  // prepare session
  tensorflow::Session *sess;
  tensorflow::SessionOptions options;
  TF_CHECK_OK(tensorflow::NewSession(options, &sess));
  TF_CHECK_OK(LoadModel(sess, graph_fn, checkpoint_fn));

  // prepare inputs
  tensorflow::TensorShape data_shape({1, 2});
  tensorflow::Tensor data(tensorflow::DT_FLOAT, data_shape);

  // same as in python file
  auto data_ = data.flat<float>().data();
  for (int i = 0; i < 2; ++i) data_[i] = 1;

  tensor_dict feed_dict = {
      {"input", data},
  };

  std::vector<tensorflow::Tensor> outputs;
  TF_CHECK_OK(sess->Run(feed_dict, {"output", "dense/kernel:0", "dense/bias:0"},
                        {}, &outputs));

  std::cout << "input           " << data.DebugString() << std::endl;
  std::cout << "output          " << outputs[0].DebugString() << std::endl;
  std::cout << "dense/kernel:0  " << outputs[1].DebugString() << std::endl;
  std::cout << "dense/bias:0    " << outputs[2].DebugString() << std::endl;

  return 0;
}
同样地,可以看到在sess->Run(xx, {"output", "dense/kernel:0", "dense/bias:0"}, {}, &outputs)将输出的节点放在sess->Run()的第2个参数的位置,并把经过计算图计算出来的结果放在第4个参数的位置处outputs处,对应进行解析就可以了。
参考资料:
- Tensorflow C++ 编译和调用图模型 :即讲了安装tensorflow c++过程,又讲了使用过程。
- Tensorflow CPP API demo :第一个参考资料的源码,很详细。
- Loading a TensorFlow graph with the C++ API :一个非常好的加载tensorflow模型教程,常被引用。
- tensorflow c++ 加载模型 总结的很细