参考:https://github.com/nobodyiam/apollo-build-scripts
一、windows环境下apollo单机搭建
1、环境:JDK1.8,mysql 5.7.23,git-2.1.9(执行apollo的启动脚本)
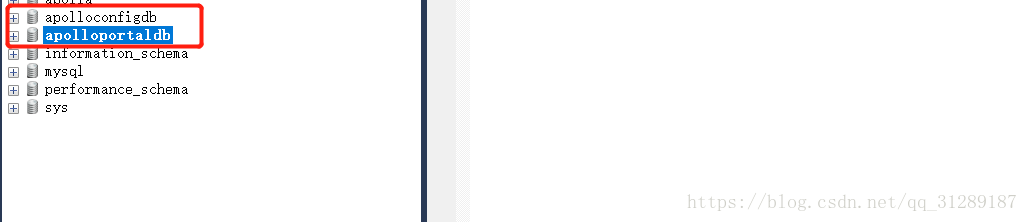
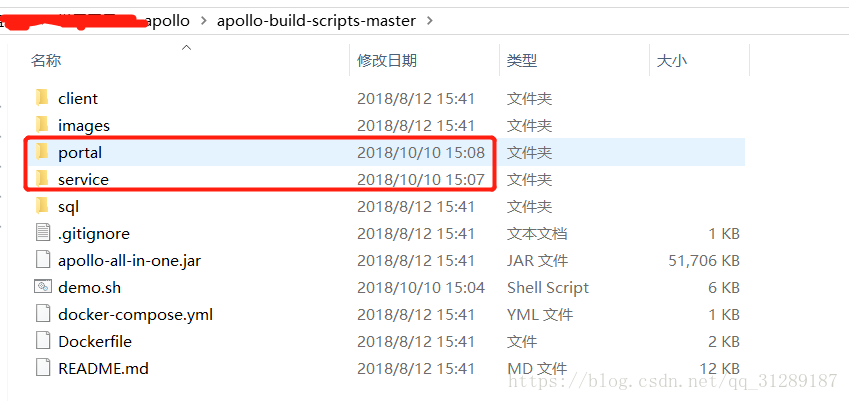
3、解压之后,将 apollo-build-scripts-master\sql下的两个sql文本导入mysql中
source apolloconfigdb.sql的目录;
source apolloportald.sql的目录;

执行成功之后可以看到,红框这两个database
4、修改demo.sh的内容
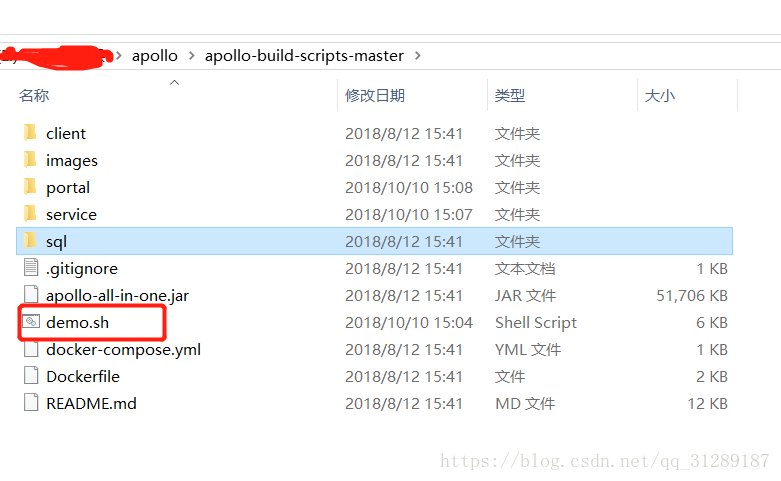
修改mysql的url,username,password

之后在git base中执行demo.sh
启动:./demo.sh start
停止:./demo.sh stop
5、成功启动apollo服务端和客户端之后,打开浏览器输入http://localhost:8070/
用户名:apollo
密码:admin

接下来就可以创建自己的项目了
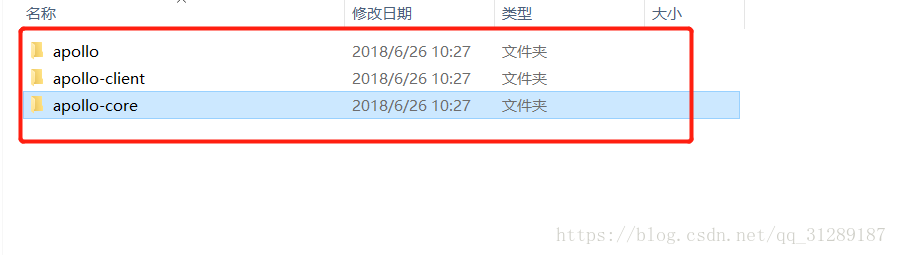
6、apollo成功启动之后,在本地仓库就可以看到下面三个jar,springboot2.0读取apollo使用的就是apollo-client
7、搭建过程可能出现很多问题,查看红框中两个文件夹下的日志
8、切记mysql服务要启动,8080、8070、8090这三个端口不要被占用,也不要随意改动这三个端口
我出现这个异常是因为把(config_server_url=http://localhost:8080)的端口改成8801了,导致registered-replicas和unavailable-replicas url的端口为8801了,启动成功了,但是配置中心页面一直提示:系统出错,请重试或联系系统负责人
| registered-replicas | http://localhost:8801/eureka/ |
| unavailable-replicas | http://localhost:8801/eureka/, |
com.ctrip.framework.apollo.common.exception.ServiceException: No available admin server. Maybe because of meta server down or all admin server down. Meta server address: http://localhost:8080
	at com.ctrip.framework.apollo.portal.component.RetryableRestTemplate.getAdminServices(RetryableRestTemplate.java:172)
	at com.ctrip.framework.apollo.portal.component.RetryableRestTemplate.execute(RetryableRestTemplate.java:90)
	at com.ctrip.framework.apollo.portal.component.RetryableRestTemplate.get(RetryableRestTemplate.java:56)
	at com.ctrip.framework.apollo.portal.api.AdminServiceAPI$HealthAPI.health(AdminServiceAPI.java:43)
	at com.ctrip.framework.apollo.portal.component.PortalSettings$HealthCheckTask.isUp(PortalSettings.java:127)
	at com.ctrip.framework.apollo.portal.component.PortalSettings$HealthCheckTask.run(PortalSettings.java:103)
	at java.util.concurrent.Executors$RunnableAdapter.call(Executors.java:511)
	at java.util.concurrent.FutureTask.runAndReset(FutureTask.java:308)
	at java.util.concurrent.ScheduledThreadPoolExecutor$ScheduledFutureTask.access$301(ScheduledThreadPoolExecutor.java:180)
	at java.util.concurrent.ScheduledThreadPoolExecutor$ScheduledFutureTask.run(ScheduledThreadPoolExecutor.java:294)
	at java.util.concurrent.ThreadPoolExecutor.runWorker(ThreadPoolExecutor.java:1149)
	at java.util.concurrent.ThreadPoolExecutor$Worker.run(ThreadPoolExecutor.java:624)
	at java.lang.Thread.run(Thread.java:748)
9、github上单机搭建文档非常给力了,出现问题,慢慢采坑!!!
二、springboot2.0项目读取apollo配置中心的配置
1、pom.xml 引入apollo-client jar包,注意这里jar包,单机搭建apollo成功之后就在自己本地库install了,要和自己的apollo版本一致
<dependency>
<groupId>com.ctrip.framework.apollo</groupId>
<artifactId>apollo-client</artifactId>
<version>0.8.0</version>
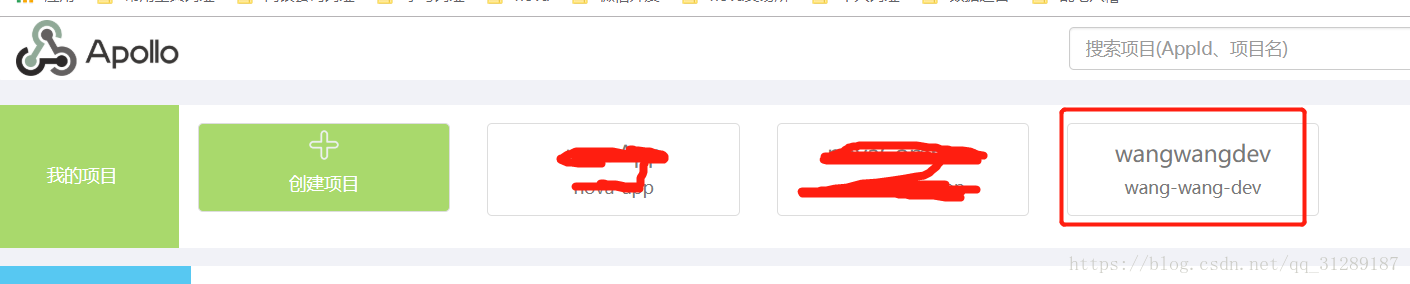
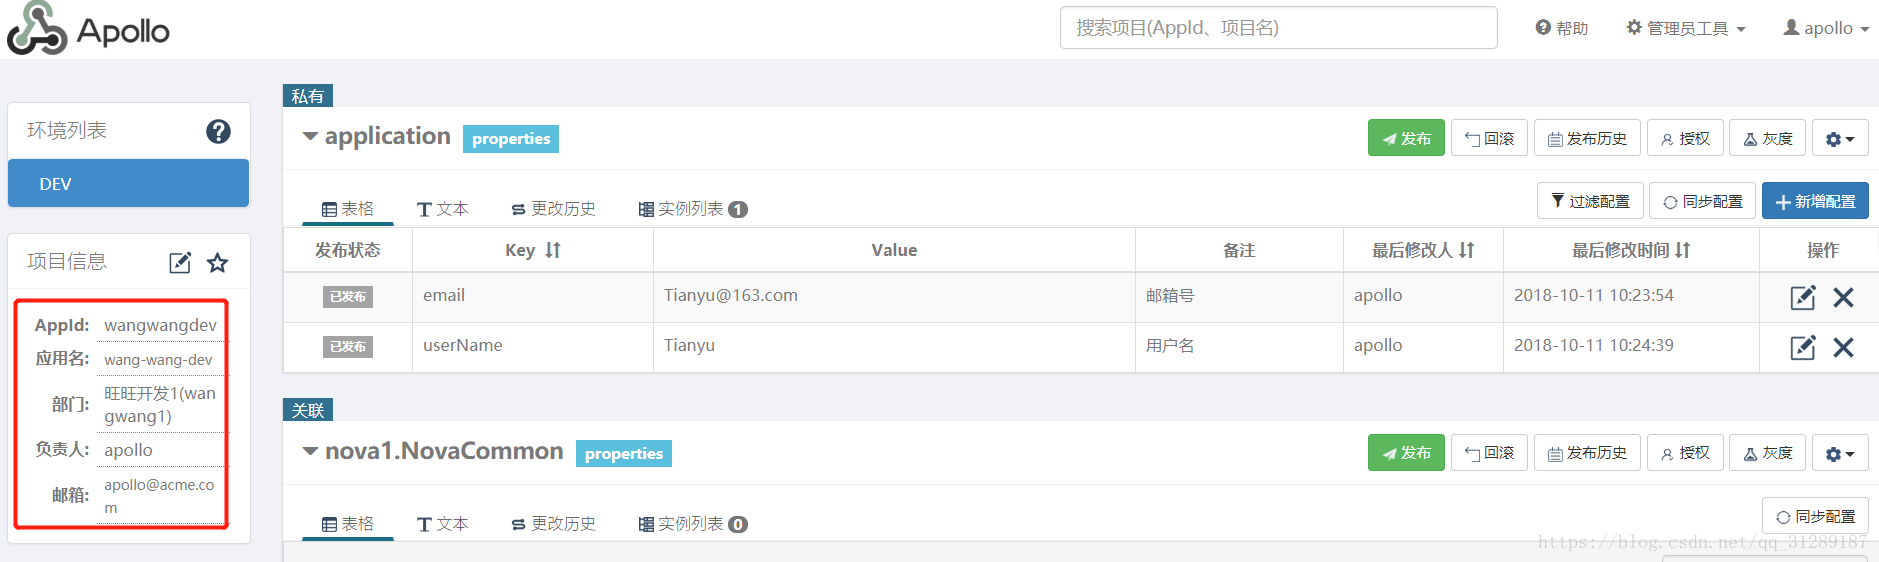
</dependency>2、这里创建了一个项目,app.id = wangwangdev,应用名随便起(还是专业一点吧),部门可以自己修改,开始只有样例1,样例2,在apolloportaldb.serverconfig,修改字段值,其它的管理员都可以修改!


3、ApollaDemoApplication
package com.dl.cn;

import com.ctrip.framework.apollo.spring.annotation.EnableApolloConfig;
import org.springframework.boot.SpringApplication;
import org.springframework.boot.autoconfigure.SpringBootApplication;


@SpringBootApplication
/**
 * 在微服务应用启动中使用apollo配置中心获取配置信息
 * */
@EnableApolloConfig
public class ApollaDemoApplication {

	static {
		System.setProperty("-Dapp.id","wangwangdev");
		System.setProperty("-Denv","dev");
		System.setProperty("-Ddev_meta","http://127.0.0.1:8080");
	}

	public static void main(String[] args) {
		SpringApplication.run(ApollaDemoApplication.class, args);
	}

}
4、ApolloDemoController
package com.dl.cn;

import com.ctrip.framework.apollo.Config;
import com.ctrip.framework.apollo.spring.annotation.ApolloConfig;
import org.springframework.web.bind.annotation.GetMapping;
import org.springframework.web.bind.annotation.RequestMapping;
import org.springframework.web.bind.annotation.RestController;

import java.util.Properties;
import java.util.Set;

/**
 * Created by Tiger 2018/10/10.
 */
@RestController
@RequestMapping("/apollo")
public class ApolloDemoController {

    /**
     * 从apollo获取配置信息
     * */
    @ApolloConfig
    private Config config;

    @GetMapping("/read_demo")
    public Properties apolloReadDemo(){
        /**
         * 得到当前app.id中的配置
         * */
        Set<String> set = config.getPropertyNames();
        for(String key : set){
            PropertiesUtils.properties.setProperty(key,config.getProperty(key,null));
        }
        for(String key : PropertiesUtils.properties.stringPropertyNames()){
            System.out.println(key+">>>"+PropertiesUtils.properties.getProperty(key));
        }
        return PropertiesUtils.properties;
    }
}
5、application.properties,把server.port 改成非8080,默认是8080
server.port=80006、PropertiesUtils
package com.dl.cn;

import com.ctrip.framework.apollo.Config;
import com.ctrip.framework.apollo.ConfigService;

import java.util.Properties;

/**
 * Created by Tiger on 2018/10/10.
 * 读取公共apollo配置
 */
public class PropertiesUtils {
    private static final String COMMON = "nova1.NovaCommon";
    public static Properties properties = new Properties();
    static {
        Config commonConfig = ConfigService.getConfig(COMMON);
        if(commonConfig != null){
            for(String key : commonConfig.getPropertyNames()){
                properties.setProperty(key,commonConfig.getProperty(key,null));
            }
        }
    }
}
7、测试结果
127.0.0.1:8000/apollo/read_demo
{
    "commonKey2": "commonValue2",
    "commonKey1": "commonValue1",
    "email": "[email protected]",
    "userName": "Tianyu",
    "commonKey3": "commonValue3"
}
2018-10-11 10:32:57.432 INFO 36468 --- [nio-8000-exec-1] o.s.web.servlet.DispatcherServlet : FrameworkServlet 'dispatcherServlet': initialization started
2018-10-11 10:32:57.455 INFO 36468 --- [nio-8000-exec-1] o.s.web.servlet.DispatcherServlet : FrameworkServlet 'dispatcherServlet': initialization completed in 23 ms
commonKey2>>>commonValue2
commonKey1>>>commonValue1
email>>>[email protected]
userName>>>Tianyu
commonKey3>>>commonValue3