Spring基于注解的方式一
Spring注解简介
之前的时候我们学习的Spring都是基于Spring配置文件的形式来编写,现在很多的情况下使用SpringBoot的时候是基于注解的形式,这里我们首先要了解的是Java中的注解是什么意思。对于注解和注释要做一定的区别。
首先我们介绍一下关于Spring的简单的注解,主要有以下的一些常用的注解
1.@Controller 控制层对象注解
2.@Service 业务逻辑层注解
3.@Repository 数据访问层注解
4.@Configuration 配置类注解
5.@ComponentScan 配置扫描类注解
6.@Filter 过滤器注解
7.@Bean 容器注解
8.@Import 导入外部类
9.@Scope 指定创建对象方式注解
10.@Conditional 按照条件创建注解
当然还有很多的很多的其他的注解,这里我们介绍的最简单的起步需要学习的注解就有这些,通过这些注解的学习我们对于很多的Spring原理级别的知识做一个了解,在我们使用Spring配置文件的时候只是对于怎么样解析配置文件来做一个了解并没有对主要的原理级别的知识做总结,现在我们就通过简单的基于Spring注解的方式来对Spring原理级别的内容做解释。
首先我们提供一段代码
/**
 * 配置类就是类似于配置文件
 */

@Configuration    //标记配置类
@ComponentScan(value = "com.example" ,includeFilters = {
//        @ComponentScan.Filter(type = FilterType.ASSIGNABLE_TYPE,classes = {PersonService.class}),
//        @ComponentScan.Filter(type = FilterType.ANNOTATION,classes = {Controller.class}),
        @ComponentScan.Filter(type = FilterType.CUSTOM,classes = MyTypeFilter.class)
},useDefaultFilters = false)
/**
 * excludeFilters Filter[] 按照规则排除一些组件
 *
 * includeFilters Filter[] 按照规则包含一些元素
 *
 * FilterType.ANNOTATION 按照注解的方式扫描
 * FilterType.ASSIGNABLE_TYPE 按照给定的类型
 * FilterType.ASPECTJ 使用ASPECTJ表达式,基本上不太常用
 * FilterType.REGEX 使用正则表达式的方式
 * FilterType.CUSTOM 使用自定义规则
 */

public class MainConfig {

    //给容器中注册一个Bean,类型为返回值的类型,ID默认使用方法名作为ID
    @Bean(value = "person01")
    public Person person(){
        return new Person("lisi",23);
    }
}
这个是一个简单的注解类,其中 @Configuration 注解标注这个类为我们提供的一个注解类而在我们使用配置文件配置的时候提供的很多的基于配置文件的东西,在基于注解配置的时候都有所体现。
<?xml version="1.0" encoding="UTF-8"?>
<beans xmlns="http://www.springframework.org/schema/beans"
       xmlns:xsi="http://www.w3.org/2001/XMLSchema-instance"
       xmlns:context="http://www.springframework.org/schema/context"
       xsi:schemaLocation="http://www.springframework.org/schema/beans http://www.springframework.org/schema/beans/spring-beans.xsd http://www.springframework.org/schema/context http://www.springframework.org/schema/context/spring-context.xsd">

    <!--只要标注了@controller @Service @ Repository@ Component-->
    <context:component-scan base-package="com.example" use-default-filters="false"></context:component-scan>
    <bean id="person" class="com.example.bean.Person" scope="" init-method="" destroy-method="" >
        <property name="name" value="nihui"></property>
        <property name="age" value="123"></property>
    </bean>
</beans>
比如所在我们配置文件中提供的 ComponentScan 这个是一个基于配置文件扫描的注解,这个注解配置我们指定的扫描的配置文件的包名,这里我们提供扫描了配置文件的中的所有包
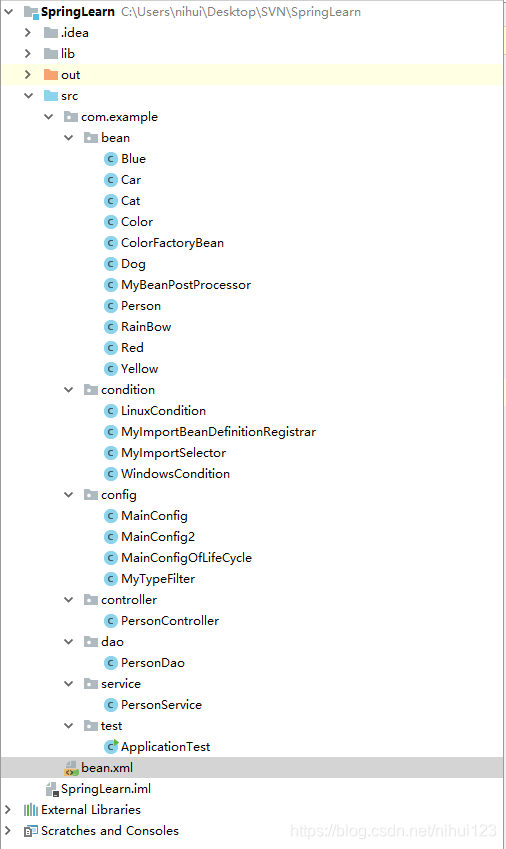
这里我们提供了项目工程目录,在这个目录中我们可以看到很多的基于配置文件的类都在其中做了体现。有我们dao层的对象,Controller层对象,Service层的对象,对应我们上面提供的注解,在我们配置类中提供包扫描的方式来将我们配置的类文件包含到容器中。这里这里我们看一下我们怎么使用这些注解配置类
 //配置文件测试
    private static void test01() {
        ApplicationContext applicationContext = new ClassPathXmlApplicationContext("bean.xml");
        Person person = (Person) applicationContext.getBean("person");
        System.out.println(person.getName() + "+++++" + person.getAge());
    }
这个是我们基于配置文件的形式来写的获取JavaBean的方法
 //配置类
    private static void test02() {
        ApplicationContext annotationConfigApplicationContext = new AnnotationConfigApplicationContext(MainConfig.class);
        Person person = annotationConfigApplicationContext.getBean(Person.class);
        System.out.println(person);
        String[] namesForType = annotationConfigApplicationContext.getBeanNamesForType(Person.class);
        for (String str:namesForType) {
            System.out.println(str);
        }
    }
这个是我们基于配置类的获取容器中的配置文件的方式,从这里我们可以看出提供不同的配置方式获取到的方式是不一样的,在我们配置文件中我们关注的重点是怎么通过配置文件将配置信息解析出来然后通过容器将这些java组件管理起来。而配置类则更多的是提供我们怎么样通过简单的代码的方式解析这些java组件。但是两者的底层实现的原理是一样的从不同的方式中实现了IOC(控制反转)和DI(依赖注入)。这个是我提供的第一次的关于Spring基于注解的方式来配置。