1.使用注解把对象装配到IOC容器中
在Java中有一个不成名的规定:约束 > 注解 > XML配置 > 代码
使用注解标识组件,注解是使用在类上面标识
- 注意:Spring本身不区分这四个注解,这四个注解本质是一样的,都是@Component,提供四个注解的目的是为了提高可读性
- 只用注解装配对象的话,那么默认是把类名首字母小写来作为beanId

- 可以使用value属性来设置beanId
- 当注解中 只使用一个value属性的时候,value关键字可以省略
装配对象的四个注解
| 注解 | 描述 |
|---|---|
| @Component | 标识一个受Spring IOC容器管理的普通组件 |
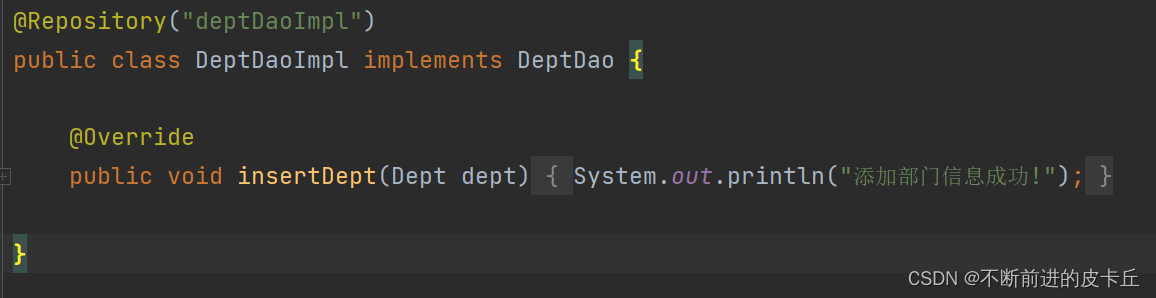
| @Repository | 标识一个收Spring IOC容器管理的持久化层组件 |
| @Service | 标识一个受Spring IOC容器管理的业务逻辑层组件 |
| @Controller | 标识一个受Spring IOC容器管理的表述层控制器组件 |
使用注解步骤
- 导入相关jar包(Spring自带)
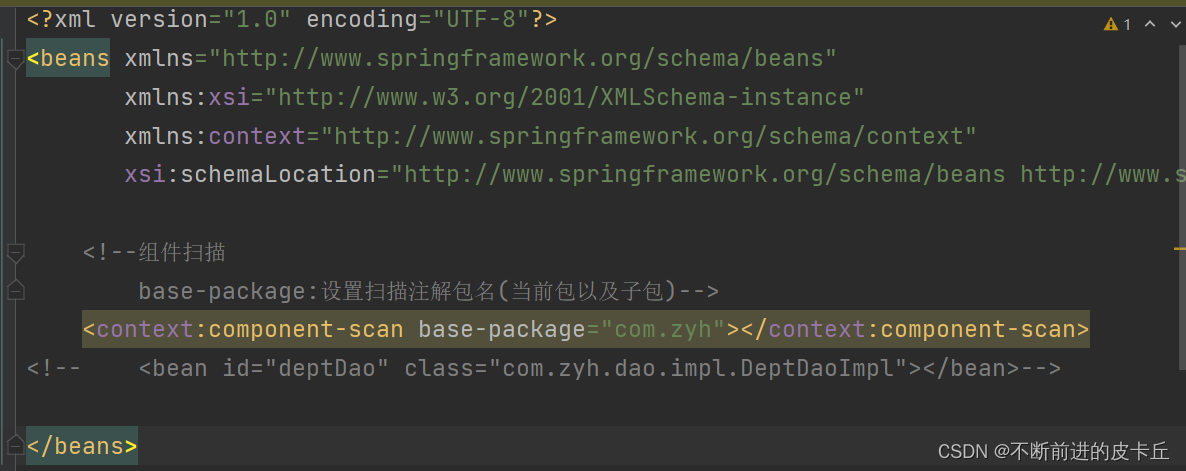
- 开启组件扫描(相当于用一个扫描器去扫描所有的注解)
 <!--组件扫描
        base-package:设置扫描注解包名(当前包以及子包)-->
    <context:component-scan base-package="com.zyh"></context:component-scan>
- 使用注解去标识组件
2.使用注解管理对象中属性的赖关系(自动装配)
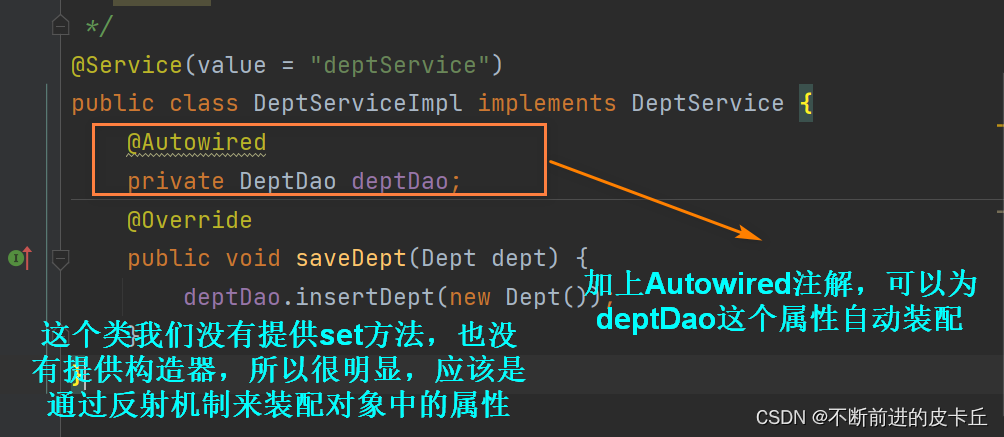
2.1@Autowired注解
-
@Autowired注解
-
作用:自动装配对象中的属性
-
装配原理:反射机制
-
-
装配方式:
-
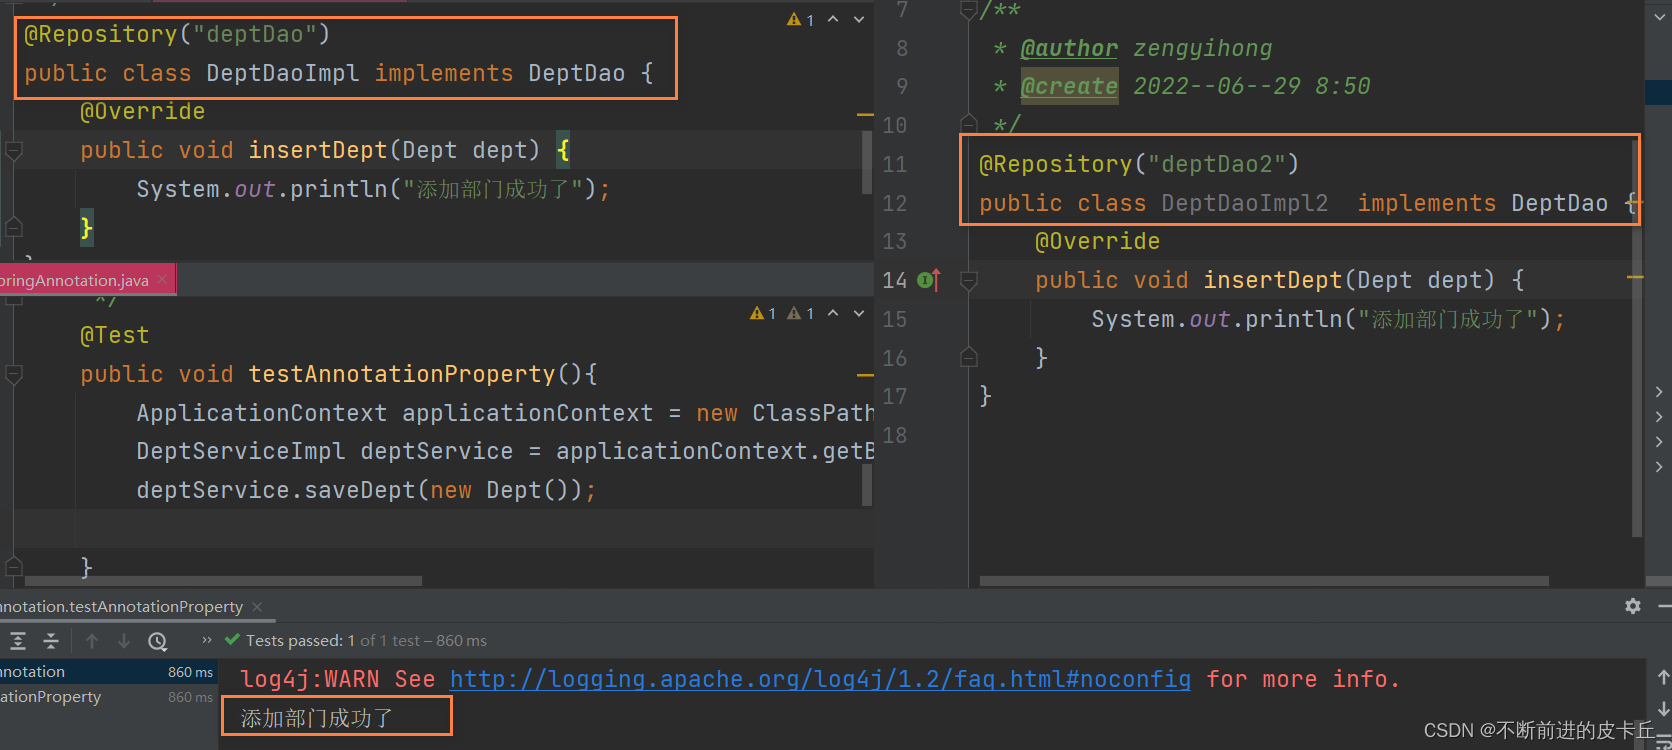
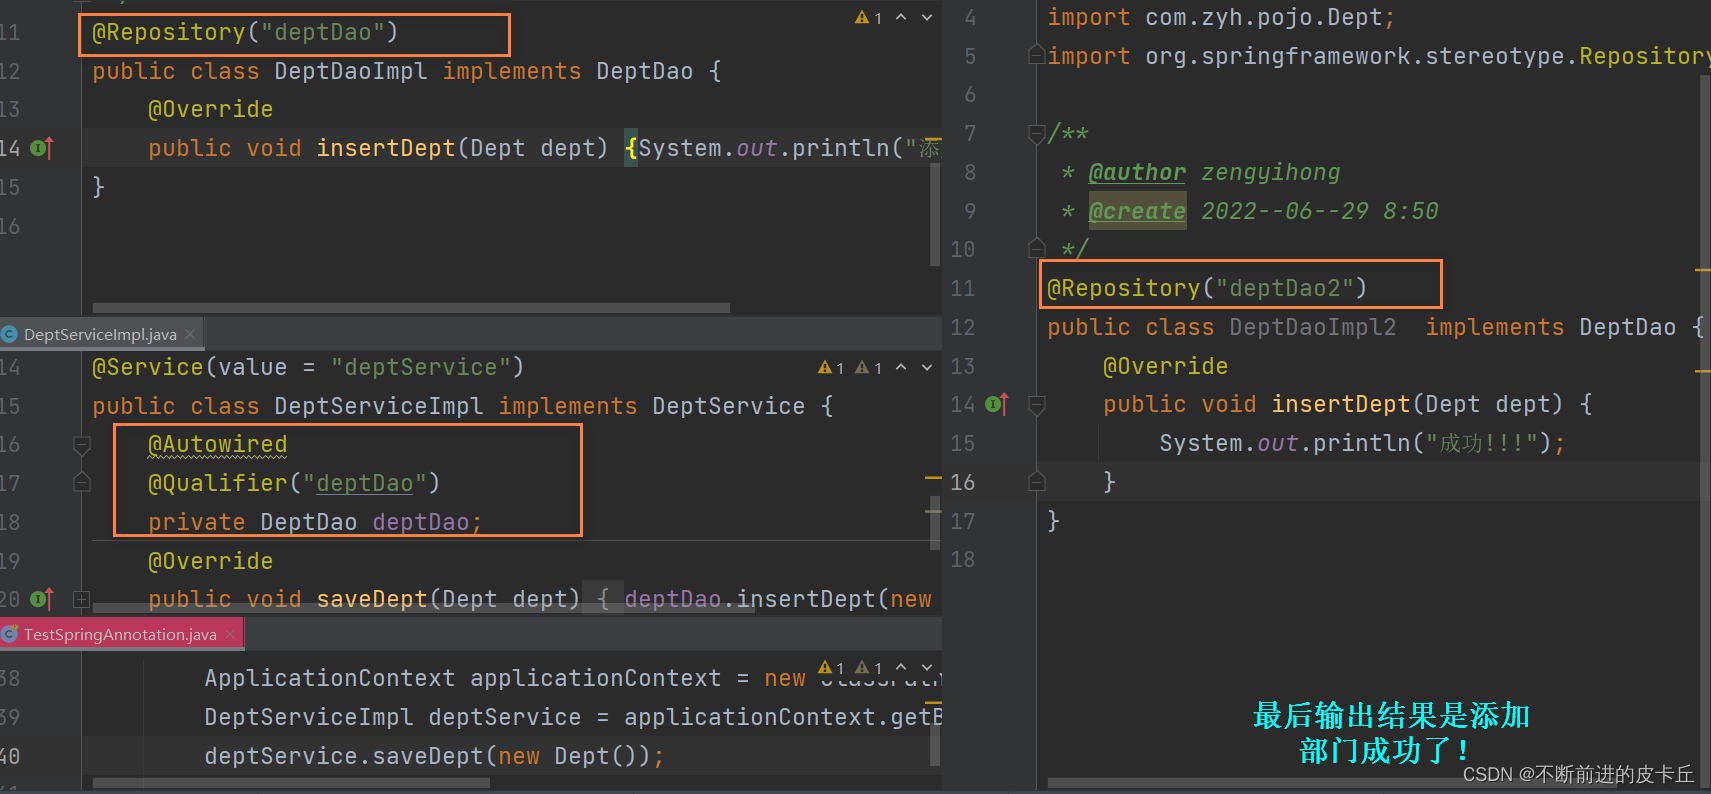
先按照byType进行匹配
- 匹配1个:匹配成功,正常使用
- 匹配0个:
- 默认[@Autowired(required=true)]报错
报错 org.springframework.beans.factory.UnsatisfiedDependencyException: Error creating bean with name 'deptService': Unsatisfied dependency expressed through field 'deptDao'; nested exception is org.springframework.beans.factory.NoSuchBeanDefinitionException: No qualifying bean of type 'com.zyh.dao.DeptDao' available: expected at least 1 bean which qualifies as autowire candidate. Dependency annotations: {@org.springframework.beans.factory.annotation.Autowired(required=true)}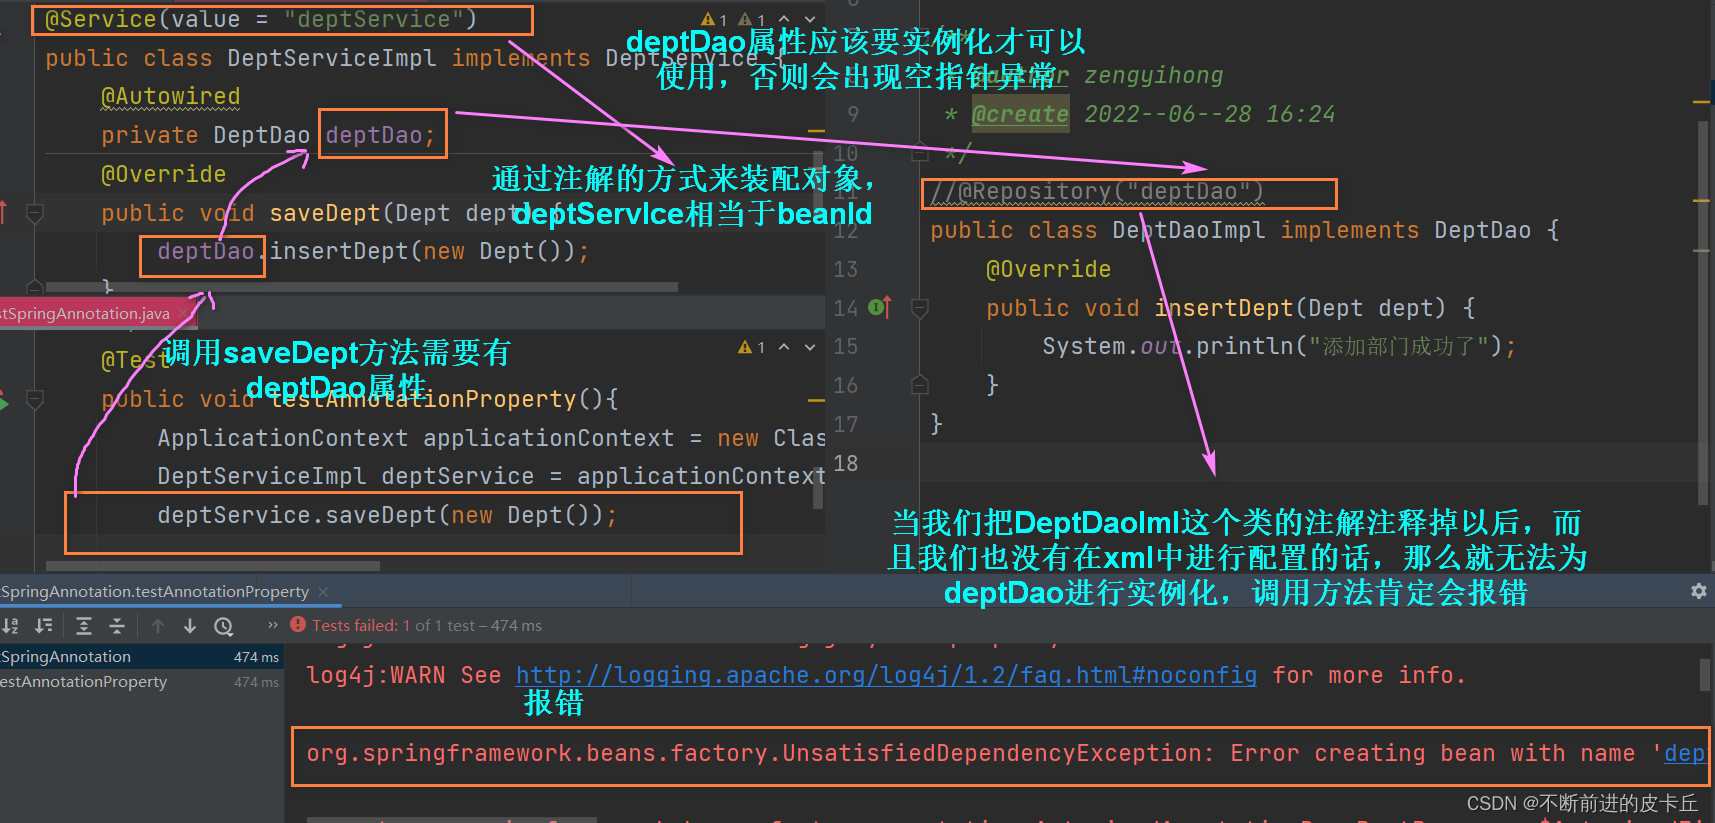
- 匹配多个
-
再按照byName进行唯一筛选
- 筛选成功(对象中的属性名称和beanId名称一样),成功使用
- 筛选失败,报错
-
-
-
@Autowired中required属性
- true:表示被标识的属性必须装配数值,如果没有装配的话,就会报错
- false:标识被标识的属性不一定要装配数值,如果没有装配的话,也不会报错
2.2@Qualifier注解
- @Qualifier注解
- 作用:配合@Autowired一起使用,用来设置beanId名称
- @Qualifier注解不能单独使用,必须和@Autowired注解一起使用
- @Autowired注解可以单独使用
- @Qualifier注解可以为对象中的属性指定beanId的值
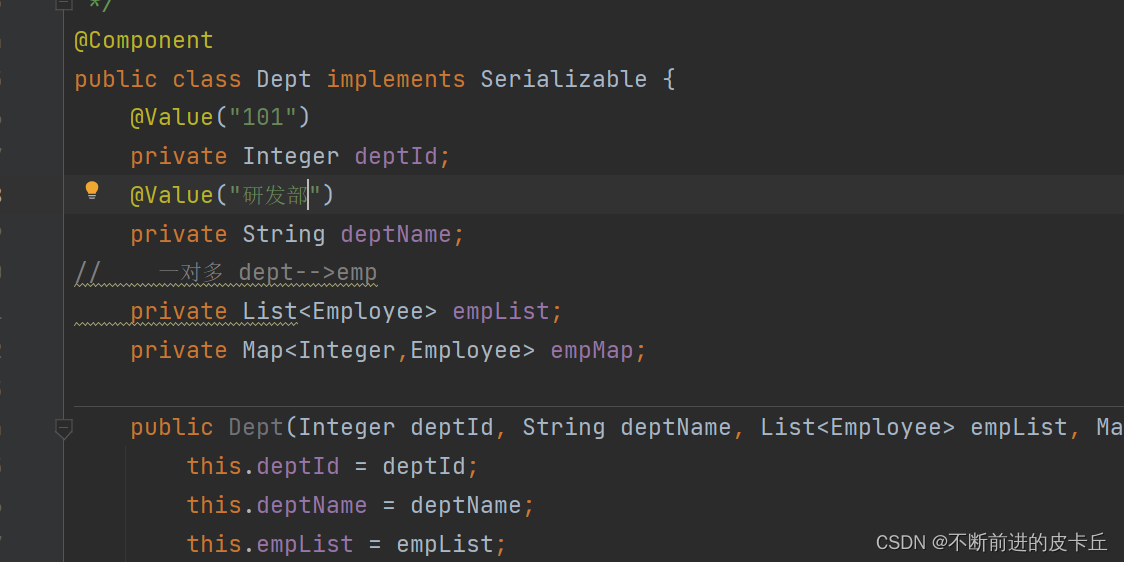
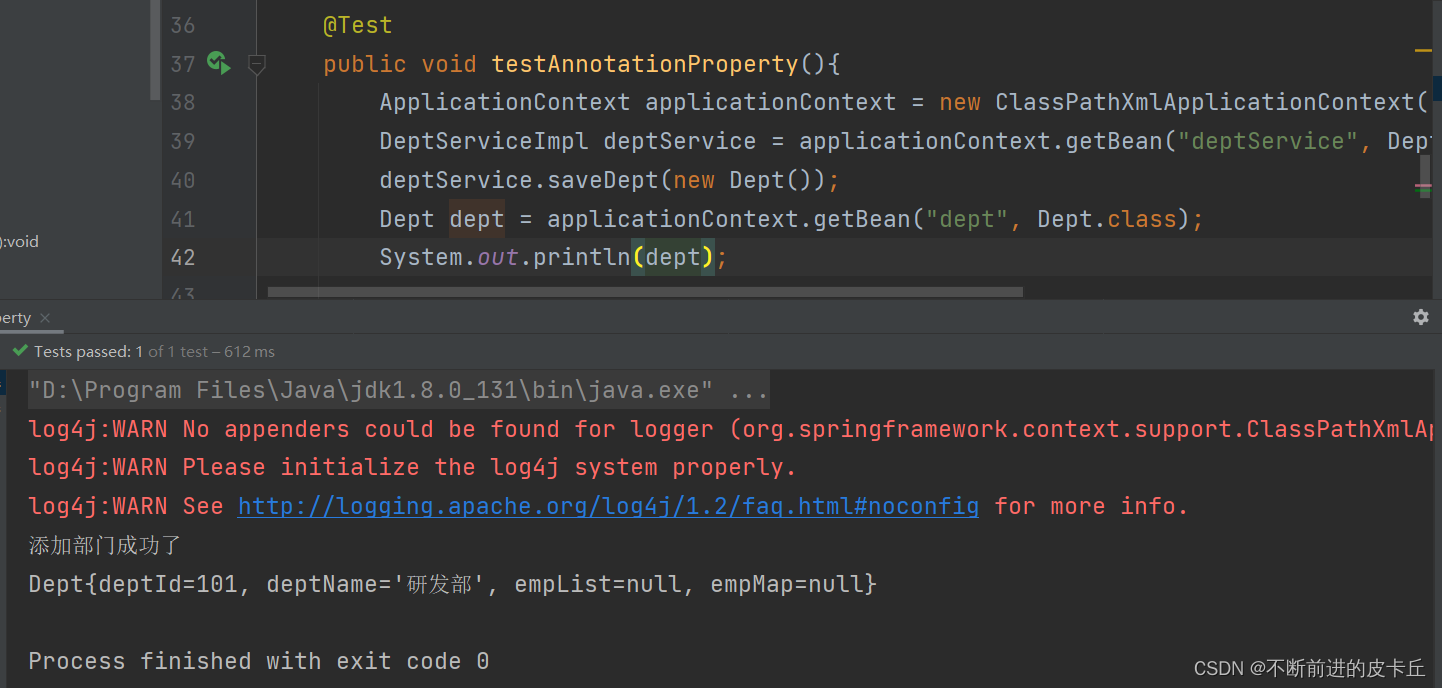
2.3@Value注解
- @Value
- 作用:装配对象中的属性 (字面量数值)
3.组件扫描
组件被上述注解标识后,还需要通过Spring进行扫描才能侦测到
3.1默认情况
当前包及其子包都会被扫描到
- 这种方法会扫描所有的包,但是如果我们只是想要扫描其中的几个包,需要怎么做呢
- 就得用到包含扫描
3.2 包含扫描
- 注意:在使用包含扫描之前,我们必须要设置use-default-filters=“false”(关闭当前包及其子包的扫描)
- type
- annotation:设置被扫描注解的全类名
- assignable:设置被扫描实现类的全类名
 <!--组件扫描
        base-package:设置扫描注解包名(当前包以及子包)
        annotation是设置注解的全路径
        assignable是设置类的全路径-->
    <context:component-scan base-package="com.zyh" use-default-filters="false">
        <context:include-filter type="annotation" expression="org.springframework.stereotype.Repository"/>
        <context:include-filter type="annotation" expression="org.springframework.stereotype.Service"/>
        <context:include-filter type="assignable" expression="com.zyh.controller.DeptController "/>
    </context:component-scan>
3.3排除扫描
如果我们不想扫描哪些包,我们就可以使用排除扫描
    <!-- 排除扫描-->
    <context:component-scan base-package="com.zyh">
        <context:exclude-filter type="annotation" expression="org.springframework.stereotype.Repository"/>
    </context:component-scan>
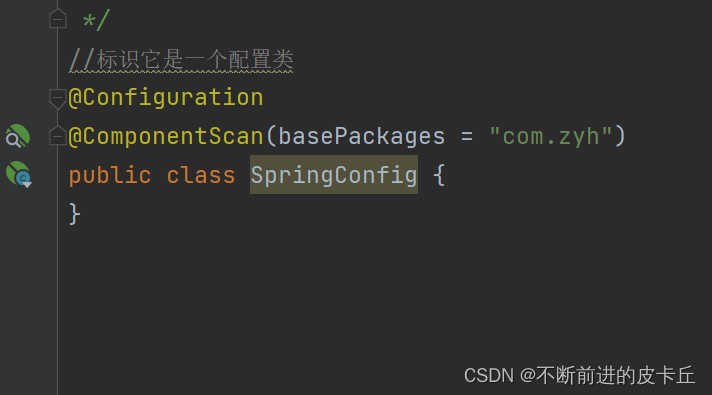
4.Spring完全注解开发(0配置)
可以使用一个配置类来代替配置
3.1完全注解开发步骤
-
①创建配置类
-
②在class上面添加注解
- @Configuration:标识当前类是一个配置类,它的作用是代替XML配置文件
- @ComponentScan:设置组件扫描当前包及其子包
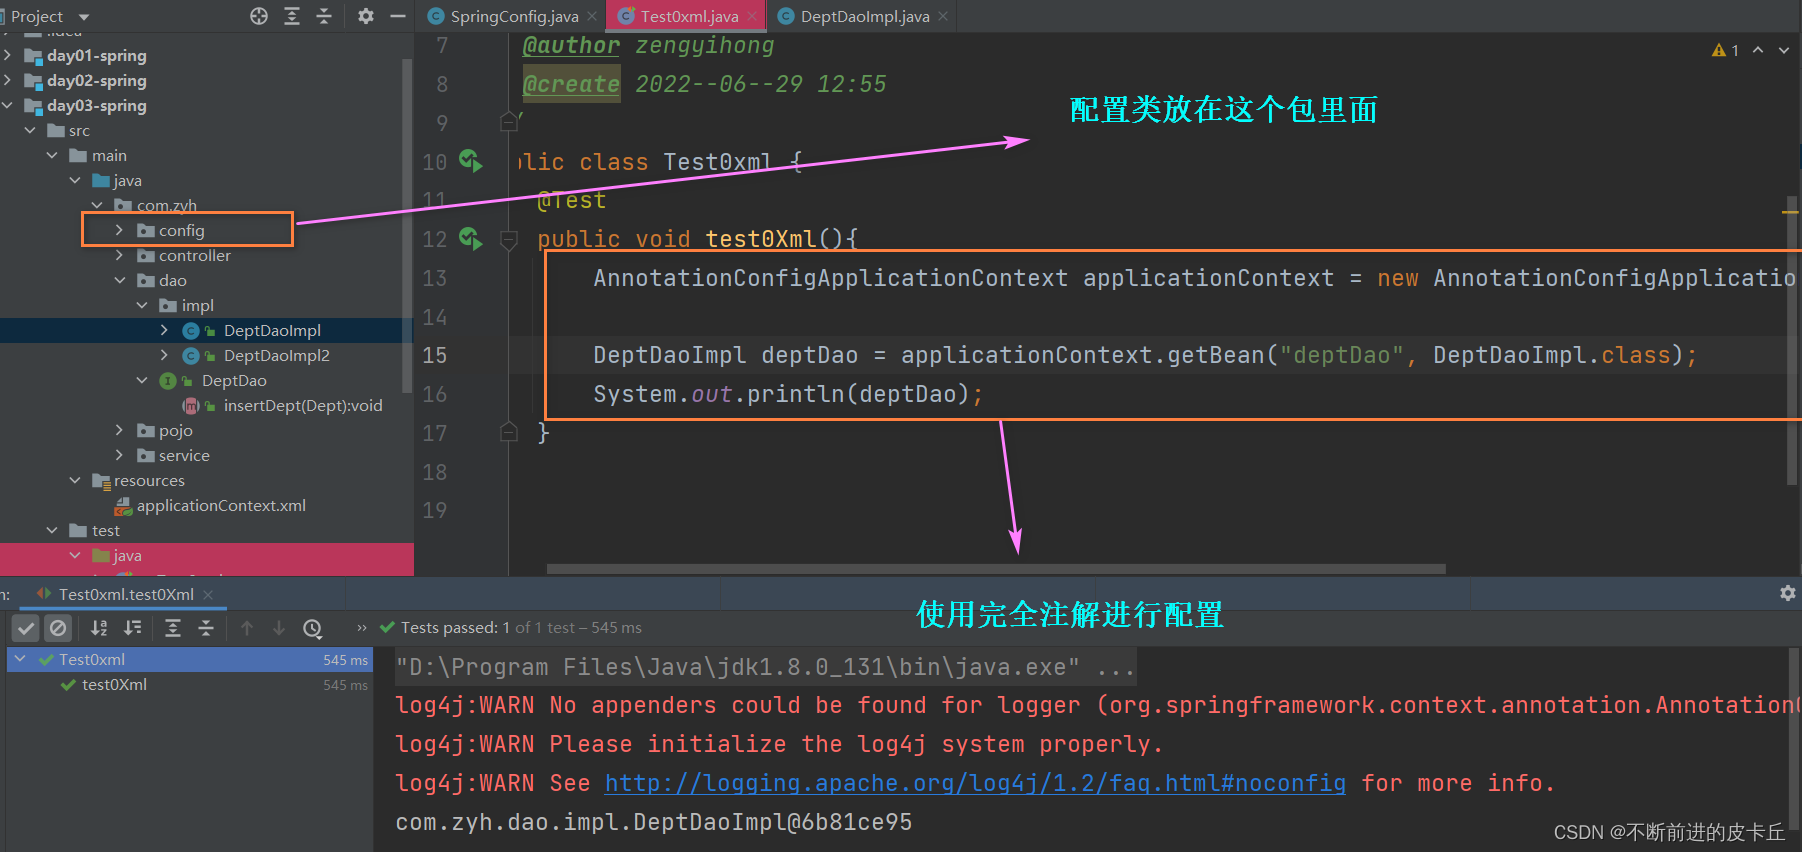
-
③使用AnnotationConfigApplicationContext容器对象
3.2 代码演示
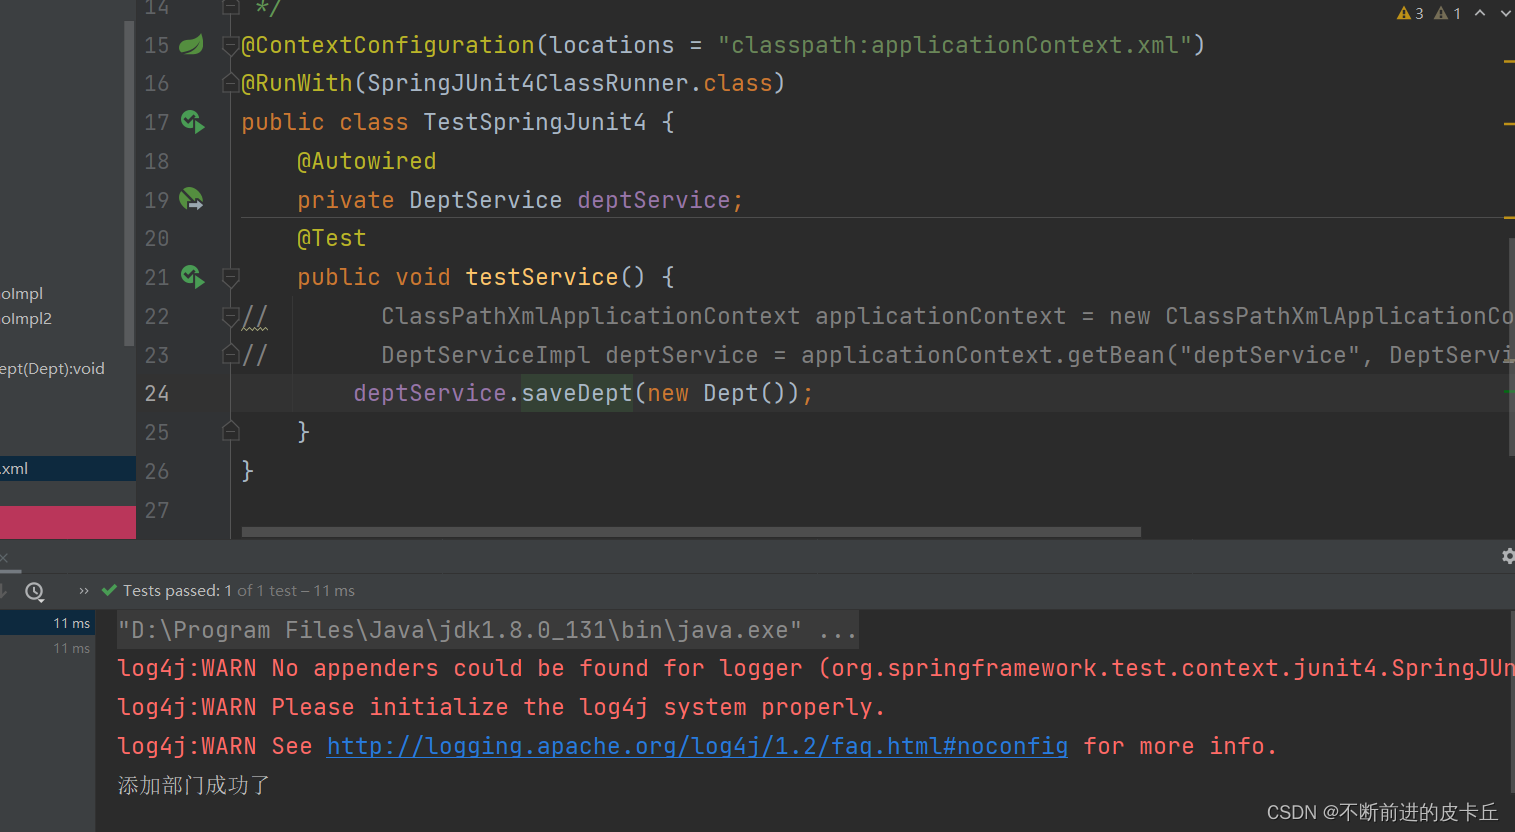
4.Spring整合Junit4步骤
因为Spring提供了对Junit的集成,所以可以在测试类中直接注入IOC容器中的对象,使用此功能需要导入spring-tesxt-5.3.1.8jar
- ①导入jar包
- spring-test-5.3.1.8.jar
 <dependency>
            <groupId>org.springframework</groupId>
            <artifactId>spring-test</artifactId>
            <version>5.3.18</version>
            <scope>test</scope>
        </dependency>
- ②指定spring配置文件路径
- @ContextConfiguration
- ③指定spring环境下运行Junit4的运行器
- @RunWith