Ioc是什么?
前提了解
IOC他获取到了对象他一定有一个地方去存储那个对象 beanName 和 Object 这样键值对存储 所以我们选择用map<String,Object>
来存储 ,我们这里解析xml使用的是dom4j 让我们一起了解如何解析xml和实例化吧
思路
通过解析xml拿到类的名字通过反射创建类 创建好类放入map中
主要类
import org.dom4j.Attribute;
import org.dom4j.Document;
import org.dom4j.DocumentException;
import org.dom4j.Element;
import org.dom4j.io.SAXReader;

import java.io.File;
import java.lang.reflect.Constructor;
import java.lang.reflect.Field;
import java.lang.reflect.InvocationTargetException;
import java.util.*;

/*
 * 第二个版本 添加byTaype 和byNmae类型自动装配
 * */
public class YonliBeanFactory {
    Map<String,Object> map = new HashMap<String,Object>();

    public YonliBeanFactory(String xml){
        parseXml(xml);
    }


    private void parseXml(String xml)  {
        File file = new File(this.getClass().getResource("/").getPath()+"//"+xml); //获取xml路径
        SAXReader reader = new SAXReader();                             //dom4j 对象


        try {

            Document document  =  reader.read(file);                       //dom4j 读取xml 获取documen对象
            Element elementRoot = document.getRootElement();               //得到最外面的标签 <beans>
           Attribute aDefault= elementRoot.attribute("default");
            boolean flag=false;
            if (aDefault!=null){
                flag=true;
            }
            for (Iterator<Element> itFirlst = elementRoot.elementIterator();itFirlst.hasNext();){   //便利beans下面的标签 <bean>
                Object object = null;
                Element elementFirstChil  = itFirlst.next();
                Attribute idAttribute    =    elementFirstChil.attribute("id");              //得到bean标签 的属性对象
                Attribute classAttribute =    elementFirstChil.attribute("class");
                String idvalue   = idAttribute.getValue();                                     //获取属性对象的值
                String classValue   = classAttribute.getValue();
                Class clazz  =  Class.forName(classValue);                                    //加载类
                                                             //新建 calss 加载的类
                for (Iterator<Element> itSecond=elementFirstChil.elementIterator();itSecond.hasNext();){     //判断<bean> 下面是不是有子标签
                    Element itSecondChil  = itSecond.next();
                    if (itSecondChil.getName().equals("property")){         //如果有子标签名字为 property 表示这是一个 注入属性
                        //通过set get 注入
                        object= clazz.newInstance();
                        String   ref    =  itSecondChil.attributeValue("ref");  //获取注入属性值value
                        String   name   =  itSecondChil.attributeValue("name");  //获取注入属性的名字
                        Object  injetObject =  map.get(ref);                        //获取之前注入的bean
                        Field field =  clazz.getDeclaredField(name);
                        field.set(object,injetObject);  //调用方法赋值               //反射复制


                    }else{
                        //证明有特殊构造器
                        String refVlaue = elementFirstChil.attribute("ref").getValue();
                        Object injetObject= map.get(refVlaue) ;
                        Class injectObjectClazz = injetObject.getClass();
                        Constructor constructor = clazz.getConstructor(injectObjectClazz.getInterfaces()[0]);
                        object = constructor.newInstance(injetObject);

                    };


                }

                if (object == null){//没有赋值证明没有子标签
                    if (flag){   //证明有这个标签
                       if (aDefault.getValue().equals("byType")){
                           Field fields[] = clazz.getDeclaredFields();
                           for (Field field: fields) {
                               //得到屬性的類型,比如String aa那麽這裏的field.getType()=String.class
                               Class injectObjectClazz = field.getType();
                               /**
                                * 由於是bytype 所以需要遍历map当中的所有对象
                                * 判断对象的类型是不是和这个injectObjectClazz相同
                                */
                               int count = 0;
                               Object injectObject = null;
                               for (String key : map.keySet()) {
                                   Class temp = map.get(key).getClass().getInterfaces()[0];
                                   if (temp.getName().equals(injectObjectClazz.getName())) {
                                       injectObject = map.get(key);
                                       //记录找到一个,因为可能找到多个count
                                       count++;
                                   }
                               }

                               if (count > 1) {
                                   throw new YongliSpringException("需要一个对象,但是找到了两个对象");
                               } else {
                                   object = clazz.newInstance();
                                   field.setAccessible(true);
                                   field.set(object, injectObject);
                               }


                           }

                       }
                       if(aDefault.getValue().equals("byName")){ //装配是根据名字
                           object = clazz.newInstance();
                           Field fields[] = clazz.getDeclaredFields();
                           for (Field field: fields) {
                               String fieldName = field.getName();
                               for (String key : map.keySet()) {
                                   if (key.equals(fieldName)){
                                       field.set(object,map.get(key));
                                   }

                               }


                           }


                       }

                    }

                }


                if(object==null){//沒有子標簽
                    object = clazz.newInstance();
                }
                map.put(idvalue,object);  //将本次循环的object放到map中
            }

        } catch (DocumentException e) {
            e.printStackTrace();
        } catch (ClassNotFoundException e) {
            e.printStackTrace();
        } catch (NoSuchFieldException e) {
            e.printStackTrace();
        } catch (IllegalAccessException e) {
            e.printStackTrace();
        } catch (InstantiationException e) {
            e.printStackTrace();
        } catch (NoSuchMethodException e) {
            e.printStackTrace();
        } catch (InvocationTargetException e) {
            e.printStackTrace();
        }
    }

    public  Object getBean(String beanName){

        return map.get(beanName);
    }


}
xml配置
<?xml version="1.0" encoding="UTF-8"?>

<!--
    1、哪些类需要我来关联
    2、怎么告诉我这些类(写bean)
    3、怎么维护依赖关系(settr、constr)
    4、怎么体现setter或者constr
 -->
<beans default="byName">
    <bean id="dao" class="com.yongli.dao.TestDaoImpl"></bean>

    <bean id="service" class="com.yongli.service.UserServiceImpl">

    </bean>


</beans>
xml需要注入的类
package com.yongli.dao;

public class TestDaoImpl implements TestDao {

    public void query() {
        System.out.println("test");
    }
}
package com.yongli.service;


import com.yongli.dao.TestDao;


public class UserServiceImpl implements UserService {


   public TestDao dao;


    public void find() {
        System.out.println("service");
        dao.query();
    }

   public void setDao(TestDao dao) {
        this.dao = dao;
    }
}
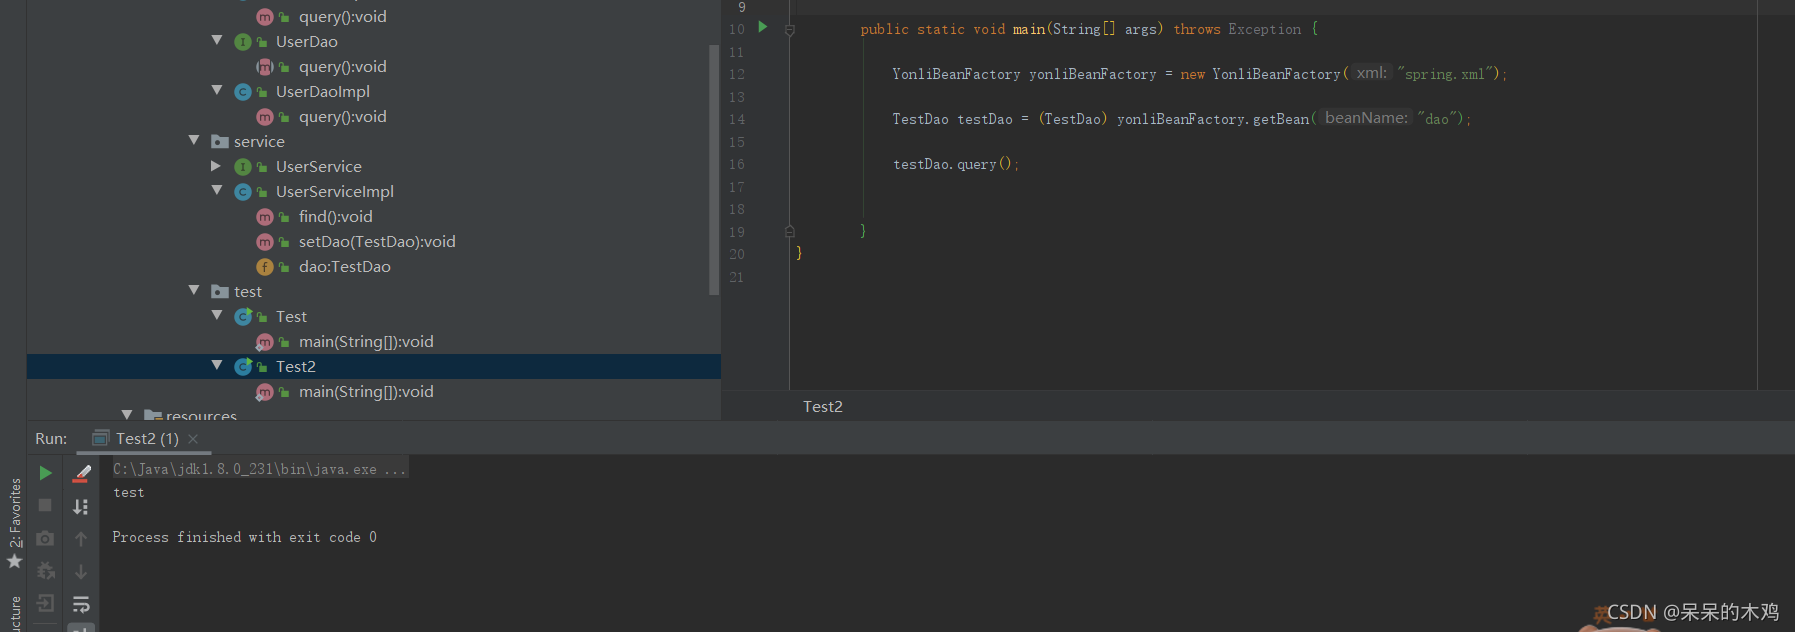
测试类
  public static void main(String[] args) throws Exception {

            YonliBeanFactory yonliBeanFactory = new YonliBeanFactory("spring.xml");

            TestDao testDao = (TestDao) yonliBeanFactory.getBean("dao");

            testDao.query();


        }
结果
基于注解注入
思路 通过传入的路径com.xx.xx 转化为路径 com\xx\xx 扫描 target 文件 来获得类的名字 通过反射拿到类对象 查看是否有指定的注解如果有 创建类实例 并且加入map
主要类
package com.org.springAnnotation;

import com.org.Yongli;

import java.io.File;

public class AnnotationConfigApplicationContext {

    public void scan(String basePackage){
        //获取这个类的路径
        String rootPath = this.getClass().getResource("/").getPath();
        //把得到的xx. 改成路径的 xxx/
        String  basePackagePath =basePackage.replaceAll("\\.","\\\\");
        //
        File file = new File(rootPath+"//"+basePackagePath);
        //返回文件下的文件名字
        String names[]=file.list();
        for (String name : names) {
            //移出.class 获取文件名字
            name=name.replaceAll(".class","");
            try {
                //拼接加载创建出来class
                Class clazz =  Class.forName(basePackage+"."+name);
                //判斷是否是屬於@servi@xxxx
                if(clazz.isAnnotationPresent(Yongli.class)){
                    //这里本来是存到map里面 spirng里面是存到数据结构里面没有写了
                    Yongli yongli = (Yongli) clazz.getAnnotation(Yongli.class);
                    System.out.println(clazz.newInstance());

                }

            } catch (Exception e) {
                //如果创建失败 到这里重新开始下一次循环
                e.printStackTrace();
            }
        }

    }
}
注解
package com.org;


import java.lang.annotation.Retention;
import java.lang.annotation.RetentionPolicy;
//注解生命周期
@Retention(RetentionPolicy.RUNTIME)
public @interface Yongli {
}
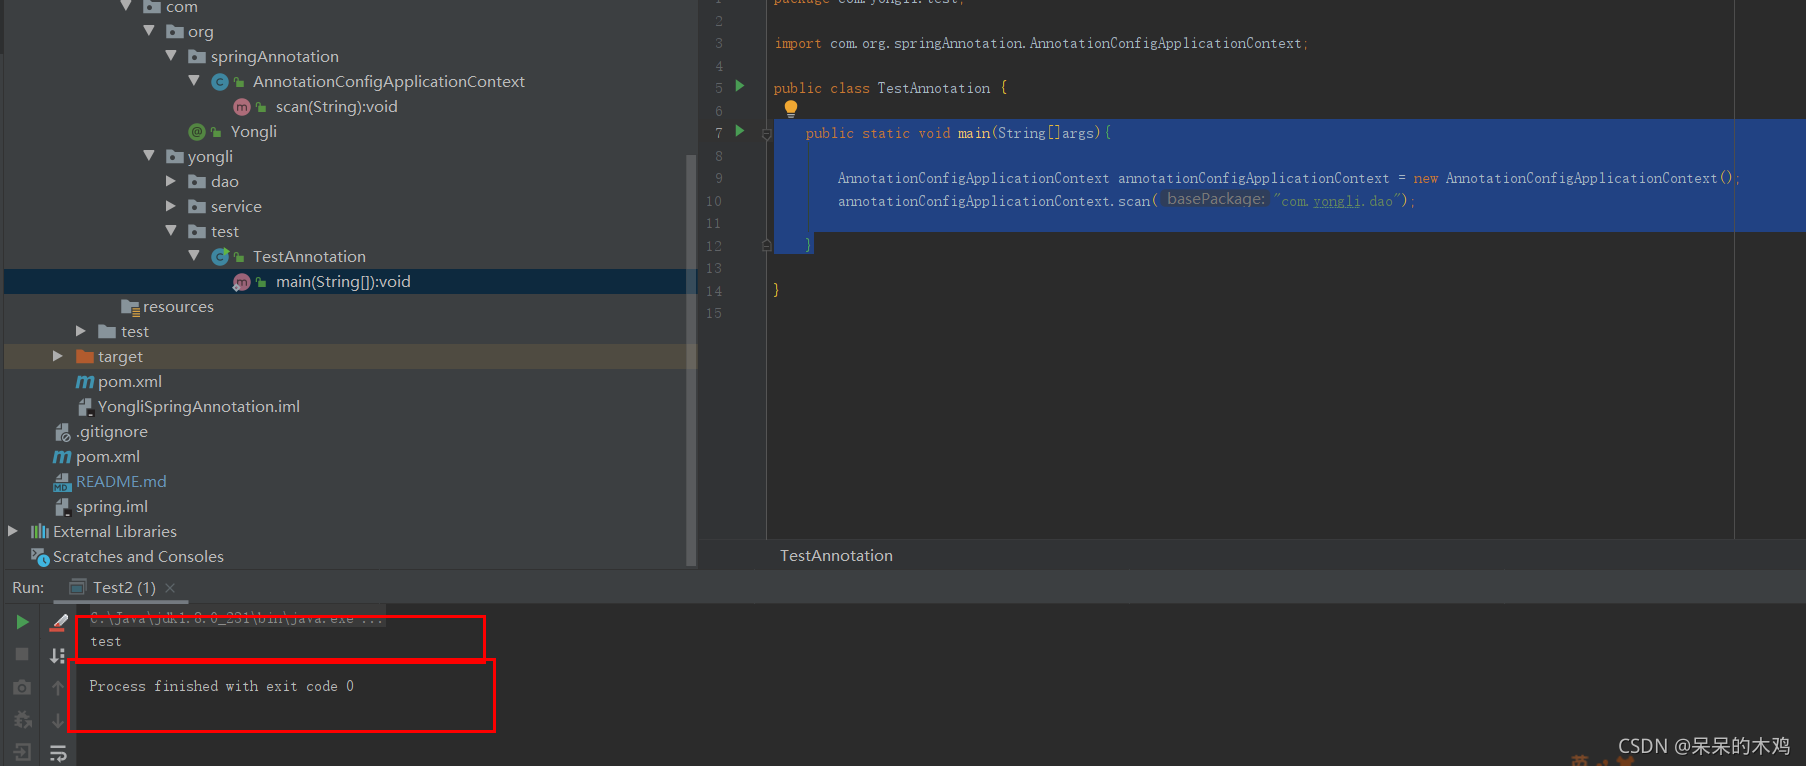
测试类
    public static void main(String[]args){

        AnnotationConfigApplicationContext annotationConfigApplicationContext = new AnnotationConfigApplicationContext();
        annotationConfigApplicationContext.scan("com.yongli.dao");

    }
结果图
结束语
spring基于xml 的是第二版增加了功能看起来不是那么容易 可以看第一版思路差不多 只是变了部分 注解版实在不想写了累了
源码地址 dome源码地址点击这里 有时候不知道为了什么去做这些只知道做下去迷茫~