版权声明:本文为博主原创文章,未经博主允许不得转载。 https://blog.csdn.net/cysion1989/article/details/84594934
说来汗颜,上传JCenter好几次了,过程依然记不得。趁着这次刚上传了个新的,把过程记录下来。感谢网上的那些教程,但总感觉不够结构清晰明了,所以写此博客记录一下。
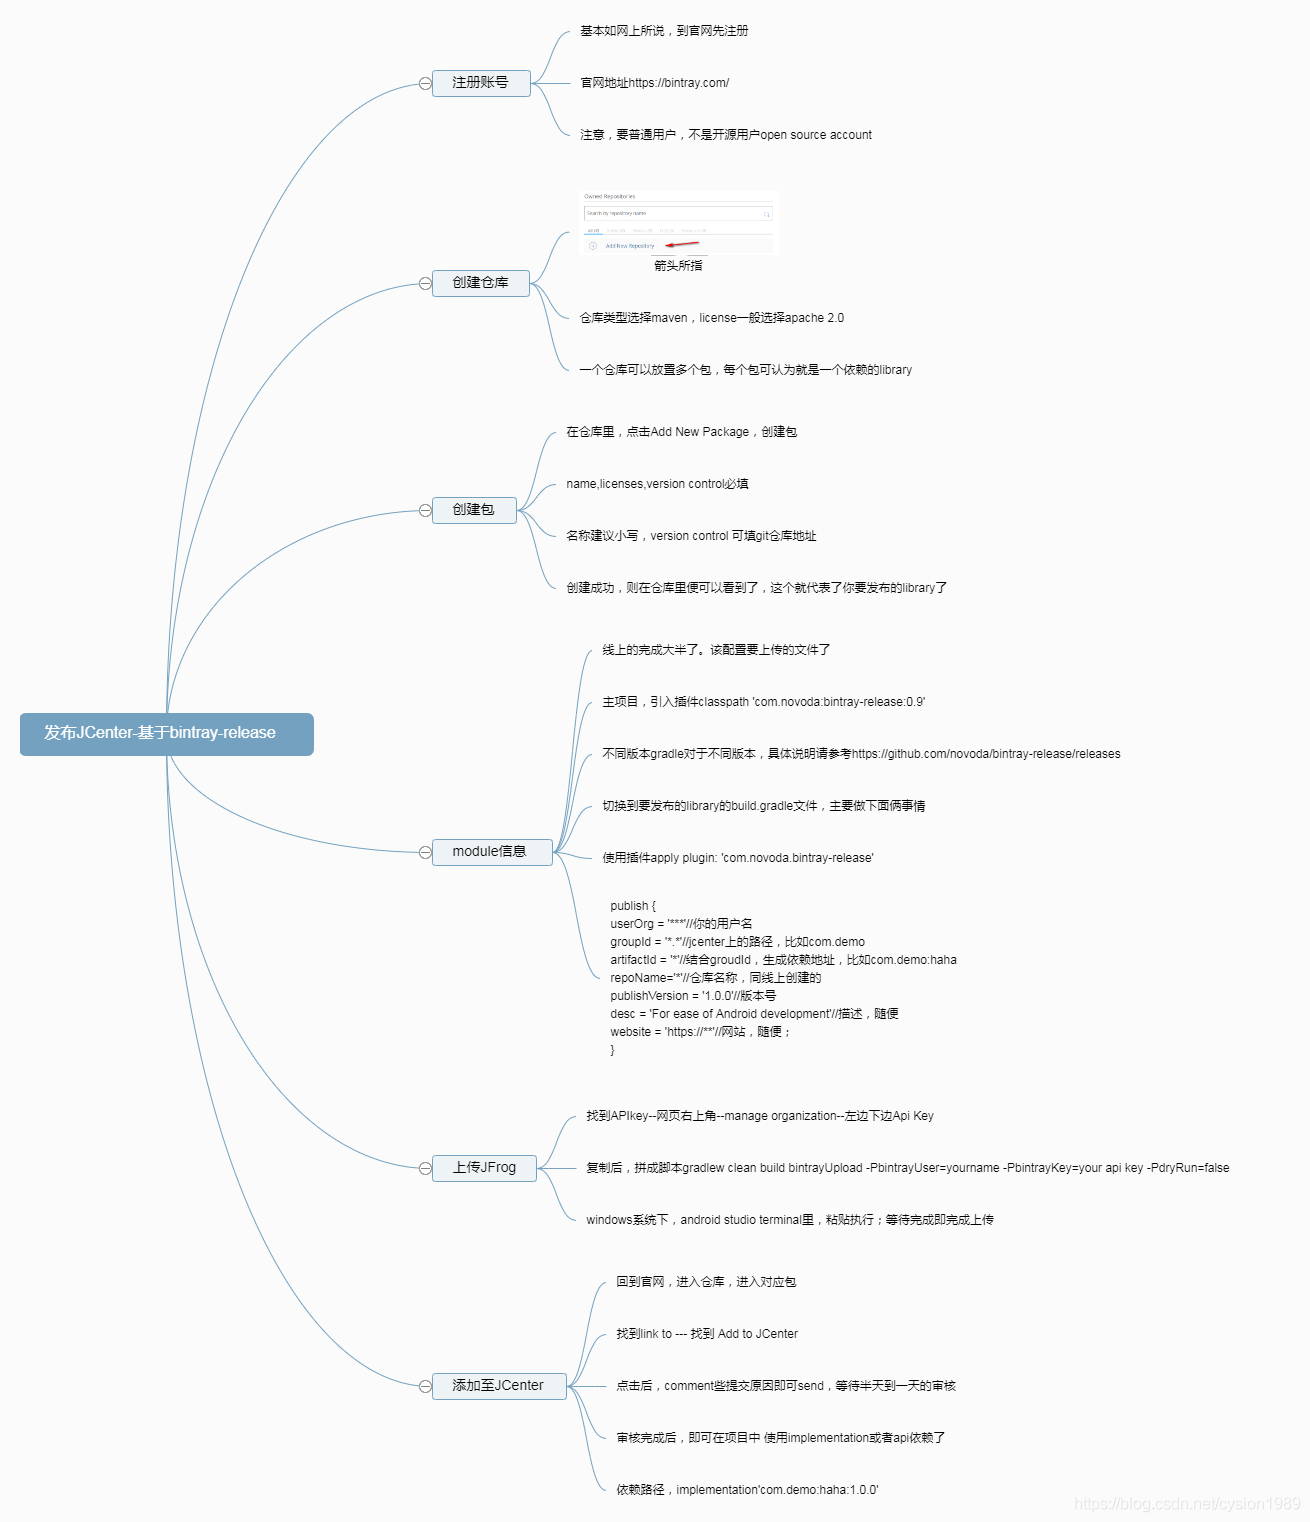
下面的就是上面脑图的解释:
发布JCenter-基于bintray-release
注册账号
基本如网上所说,到官网先注册
官网地址 https://bintray.com/
注意,要普通用户,不是开源用户open source account
创建仓库
箭头所指
仓库类型选择maven,license一般选择apache 2.0
一个仓库可以放置多个包,每个包可认为就是一个依赖的library
创建包
在仓库里,点击Add New Package,创建包
name,licenses,version control必填
名称建议小写,version control 可填git仓库地址
创建成功,则在仓库里便可以看到了,这个就代表了你要发布的library了
module信息
线上的完成大半了。该配置要上传的文件了
主项目build.gradle,引入插件
classpath ‘com.novoda:bintray-release:0.9’
不同版本gradle对于不同版本,具体说明请参考
https://github.com/novoda/bintray-release/releases
切换到要发布的library的build.gradle文件,主要做下面俩事情
使用插件
apply plugin: ‘com.novoda.bintray-release’
publish {
	userOrg = '***'//你的用户名
	groupId = '*.*'//jcenter上的路径,比如com.demo
	artifactId = '*'//结合groudId,生成依赖地址,比如com.demo:haha
	repoName='*'//仓库名称,同线上创建的
	publishVersion = '1.0.0'//版本号
	desc = 'For ease of Android development'//描述,随便
	website = 'https://**'//网站,随便;
}
上传JFrog
找到APIkey–网页右上角–manage organization–左边下边Api Key
复制后,拼成脚本
gradlew clean build bintrayUpload -PbintrayUser=yourname -PbintrayKey=your api key -PdryRun=false