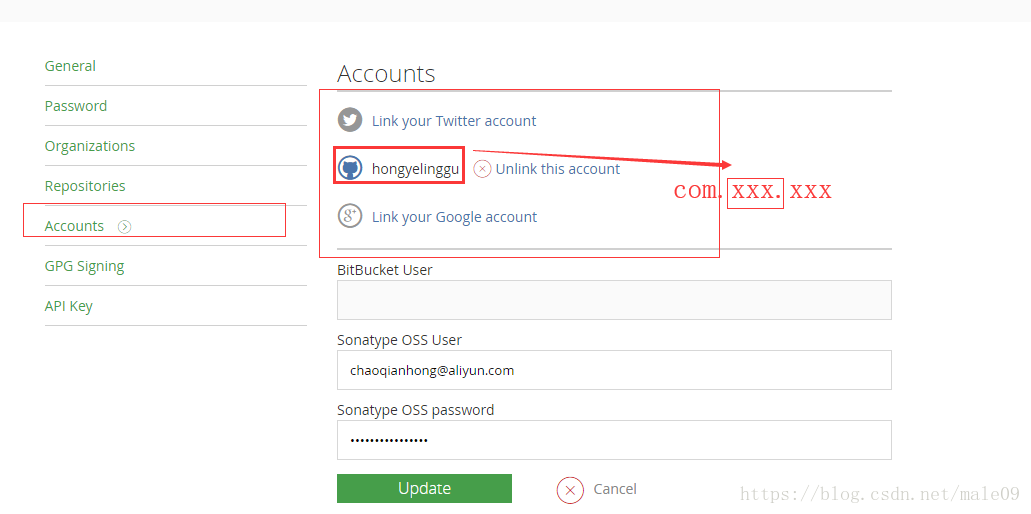
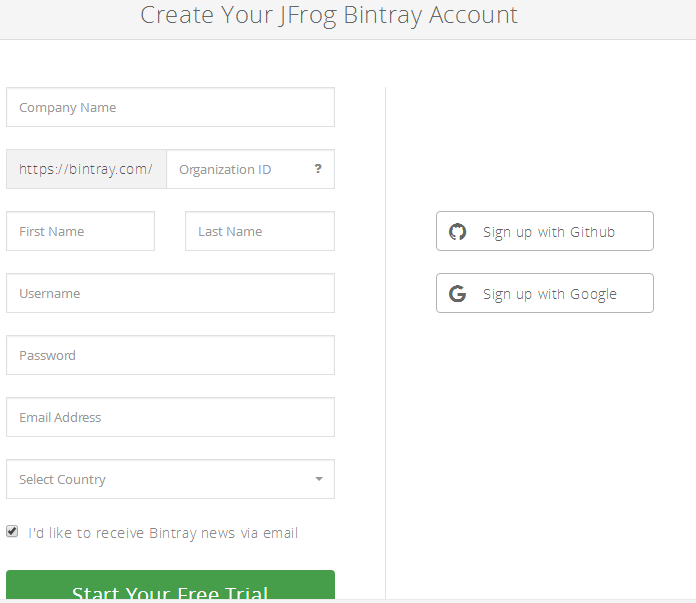
1.去jcenter官网注册个账号:https://bintray.com
2.在项目根目录的build.gradle(Project)添加配置
        classpath "com.jfrog.bintray.gradle:gradle-bintray-plugin:1.8.0"
        classpath "com.github.dcendents:android-maven-gradle-plugin:1.5"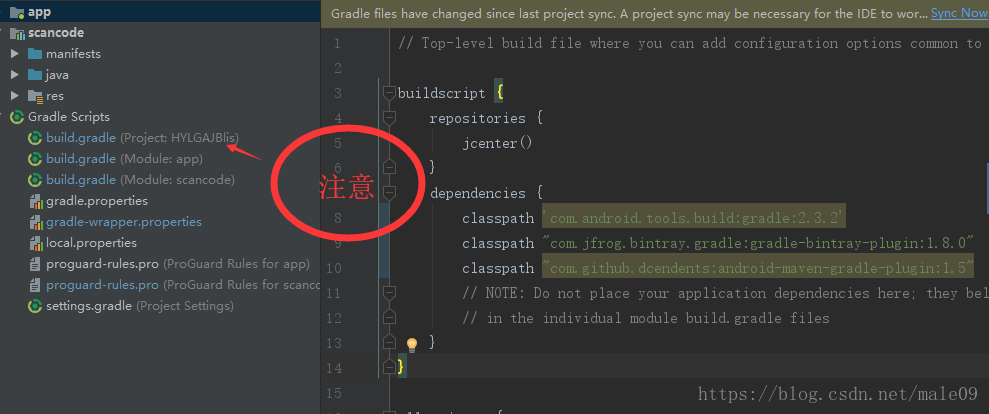
3.在你要上传的module的build.gradle中添加如下配置
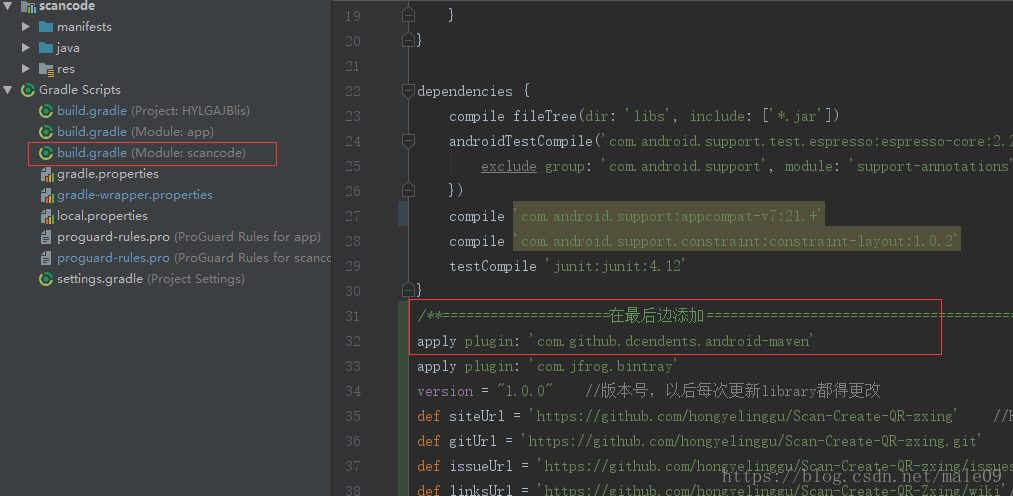
文本如下:
/**=====================在最后边添加==========================================================*/
apply plugin: 'com.github.dcendents.android-maven'
apply plugin: 'com.jfrog.bintray'
version = "1.0.0"    //版本号,以后每次更新library都得更改
def siteUrl = 'https://github.com/******'    //Homepage URL of the library
def gitUrl = 'https://github.com/******.git'    //Git repository url
def issueUrl = 'https://github.com/******/issues'    //issue url of the library
def linksUrl = 'https://github.com/******/wiki'//links url of the
library
/*=====(路径可以是假的)======*/
group = "com.hongyelinggu"    //组织
install {
    repositories.mavenInstaller {
        // This generates POM.xml with proper parameters
        pom {
            project {
                packaging 'aar'
                // Add your description here
                name '介绍'
                url siteUrl
                // Set your license
                licenses {
                    license {
                        name 'The Apache Software License, Version 2.0'
                        url 'http://www.apache.org/licenses/LICENSE-2.0.txt'
                    }
                }
                developers {
                    developer {
                        id '******' //your user ID
                        name '******' //your name
                        email '******' //your email
                    }
                }
                scm {
                    connection gitUrl
                    developerConnection gitUrl
                    url siteUrl
                }
            }
        }
    }
}
//生成源文件
task sourcesJar(type: Jar) {
    from android.sourceSets.main.java.srcDirs
    classifier = 'sources'
}
//生成文档
task javadoc(type: Javadoc) {
    source = android.sourceSets.main.java.srcDirs
    classpath += project.files(android.getBootClasspath().join(File.pathSeparator))
    options.encoding "UTF-8"
    options.charSet 'UTF-8'
    options.author true
    options.version true
    options.links linksUrl
    failOnError false
}
//文档打包成jar
task javadocJar(type: Jar, dependsOn: javadoc) {
    classifier = 'javadoc'
    from javadoc.destinationDir
}
//拷贝javadoc文件
task copyDoc(type: Copy) {
    from "${buildDir}/docs/"
    into "docs"
}

//上传到jcenter所需要的源码文件
artifacts {
    archives javadocJar
    archives sourcesJar
}
Properties properties = new Properties()
properties.load(project.rootProject.file('local.properties').newDataInputStream())
bintray {
    user = properties.getProperty("bintray.user")
    key = properties.getProperty("bintray.apikey")
    configurations = ['archives']
    pkg {
        repo = "Android-ProjectTools"    //发布到Bintray的哪个仓库
        name = "Scan-Create-QR-Zxing"    //发布到Bintray上的名字
        desc = "A library to add tag for Scan-Create-QR-zxing."    //项目描述
        websiteUrl = siteUrl
        vcsUrl = gitUrl
        issueTrackerUrl = issueUrl
        licenses = ["Apache-2.0"]
        labels = ['android']    //标签
        publish = true
        publicDownloadNumbers = true
    }
}
4.在你项目根目录的local.properties中添加用户名和API Key
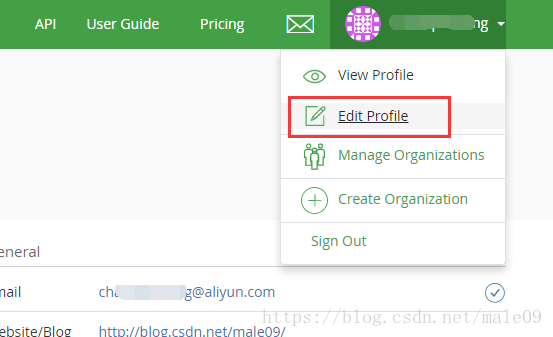
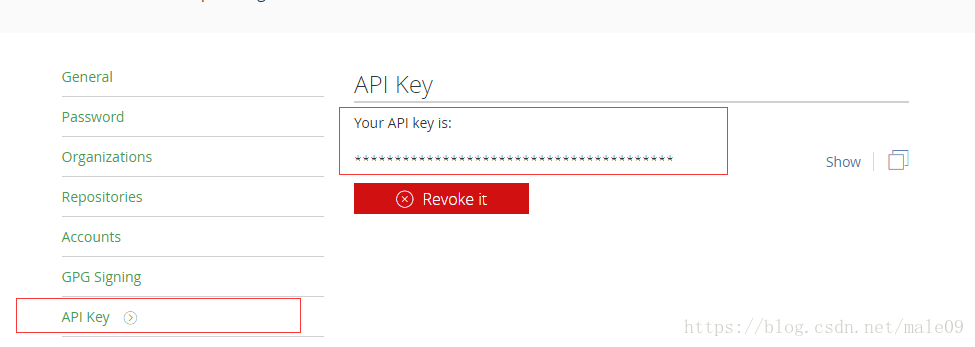
在如下图中的位置加入如下配置

文本:
bintray.user = ******
bintray.apikey = ******
5.执行命令
生成maven库所需要的POM文件:graedlew install
graedlew install
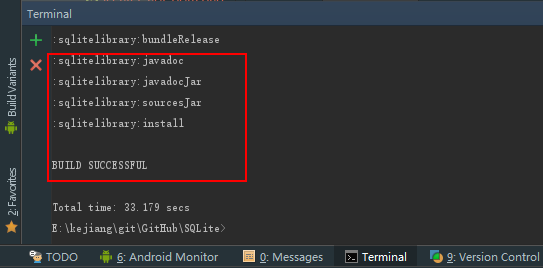
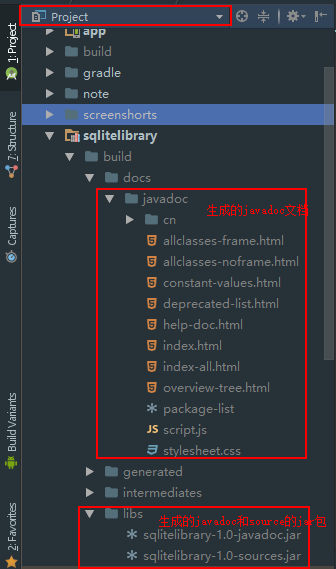
如果查看到BUILD SUCCESSFUL说明POM文件已经生成成功,并且在你的Android studio的Project视图中可以看到javadoc和javasource的jar包文件
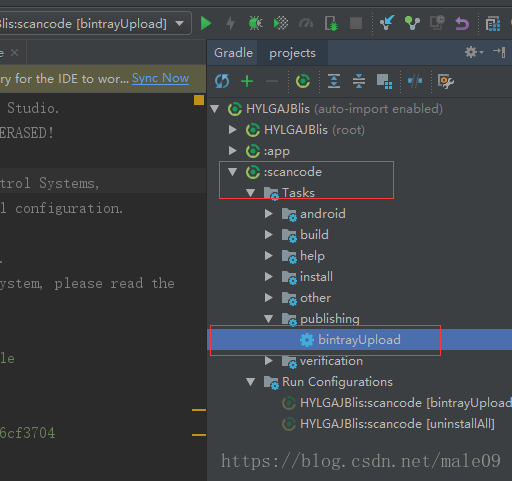
(2)上传你的Library库到jcenter的maven库:graedlew bintrayUpload
graedlew bintrayUpload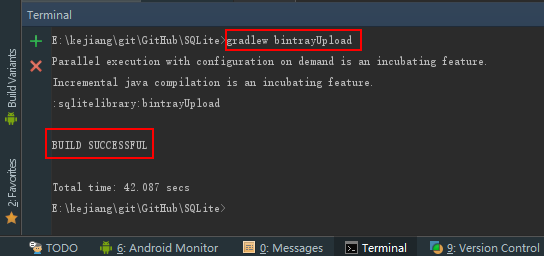
或者:
双击如图:
如果查看到BUILD SUCCESSFUL说明你的Library已经成功上传到了jcenter的maven库
6.查看上传的maven库,并提交审核