版本信息:elasticsearch-5.0.2、kibana-5.0.2-x86_64.rpm、x-pack-5.0.2.zip
操作信息:CentOS Linux release 7.3.1611 (Core)
1. jdk安装
cat /etc/profile
export JAVA_HOME=/usr/bin/java
export CLASSPATH=.:${JAVA_HOME}/lib
export PATH=${JAVA_HOME}/bin:$PATH
2.系统配置:关闭selinux、防火墙
cat /etc/security/limits.conf
* soft nofile 1024000
* hard nofile 1024000

* soft memlock unlimited
* hard memlock unlimited

cat /etc/sysctl.conf
vm.max_map_count=262144
3. elastic不能使用root用户
groupadd elastic
useradd -d /home/elastic -g elastic -p elastic elastic
4. elastic安装
tar xf elasticsearch-5.0.2.tar.gz -C /home/elstatic/
cat /home/elastic/elasticsearch-5.0.2/config/elasticsearch.yml
http.cors.enabled: true
http.cors.allow-origin: /.*/
http.cors.allow-credentials: true
bootstrap.memory_lock: true
cluster.name: es-jhl-1
node.name: es-jhl-node2
node.master: true
node.data: true
network.host: 0.0.0.0
http.port: 9202
discovery.zen.ping.unicast.hosts: ["192.168.171.251:9300", "192.168.171.252:9300", "192.168.171.253:9300"]
discovery.zen.minimum_master_nodes: 2

path.data: /data/elasticsearch
4.安装kibana
rpm -ivh kibana-5.0.2-x86_64.rpm
修改
/etc/kibana/kibana.yml
server.port: 5601
server.host: "192.168.10.41"
elasticsearch.url: "http://192.168.10.41:9200"
5. x-pack-5.0.2.zip已替换验证文件,后续可直接用普通lisense修改后,更改lisense,所有节点都要安装插件
su - elastic
/home/elastic/elasticsearch-5.0.2/bin/elasticsearch-plugin install file:///home/elasticsearch/x-pack-5.0.2.zip
修改config/elasticsearch.yml,添加:
xpack.security.audit.enabled: false
到elasticsearch-5.0.2/bin/x-pack/目录下执行(只需要在一个节点执行)
./syskeygen 生产秘钥文件/home/elastic/elasticsearch-5.0.2/config/x-pack/system_key
将此文件复制到其他节点相同目录。
重启所有节点elastic服务
6.
官网申请的普通版license文件修改:
"type":"platinum" //修改为白金版
"expiry_date_in_millis":3107746200000 //到期时间
将修改的license上传到任一节点,执行(一个节点执行即可)
curl -XPUT -u elastic 'http://localhost:9202/_xpack/license' -H "Content-Type: application/json" -d @license.json
提示:"acknowledged":true,"license_status":"valid" ,即为成功
也可通过:curl -XGET -u elastic:changeme 'http://localhost:9202/_xpack/license' 查看信息
Kibana默认密码账号:elastic/changeme
7. 需要进行展示的节点上执行(某一个节点安装,既能展示集群信息)
/usr/share/kibana/bin/kibana-plugin install file:///home/elasticsearch/x-pack-5.0.2.zip
修改配置文件/etc/kibana/kibana.yml
elasticsearch.username: "elastic"
elasticsearch.password: "changeme"
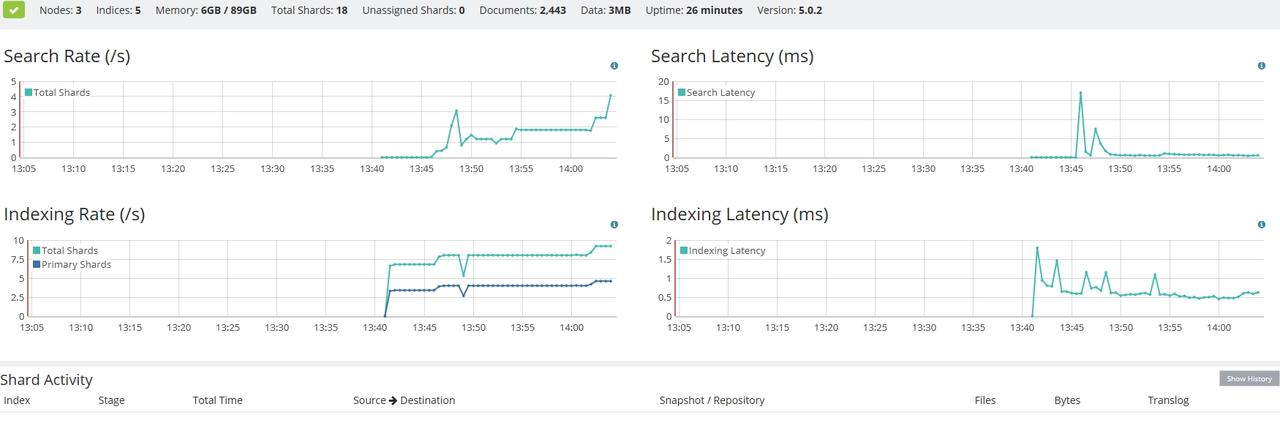
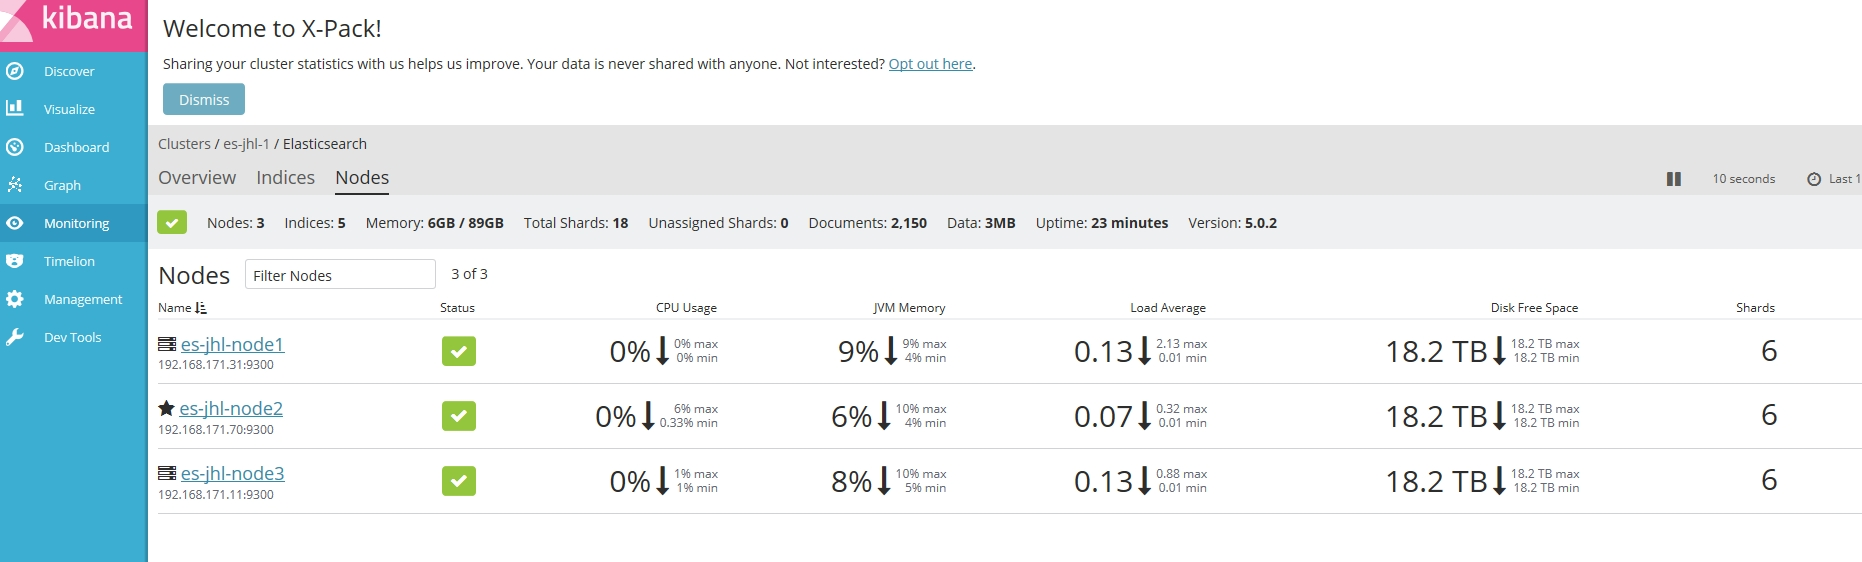
重启kibana服务,此时登录页面http://ip:5601需要输入默认账号密码,即可展示集群监控信息,如下下图: