开源代码地址:https://github.com/kpzhang93/MTCNN_face_detection_alignment
代码详细图解:持续更新中
感觉自己陷入了代码细节误区,本着时间紧任务重的理念,加上本人能力有限,暂时无法完成细节代码图解,但是可以简单写一下自己两周以来的学习感悟,和整体架构!
首先总体架构参考如下博客:https://zhuanlan.zhihu.com/p/38520597
代码部分总的执行流程如下:
代码结构截图:

代码实现模型的初始化,首先是构建mtcnn的tensorflow计算图,然后载入训练好的模型参数,细节是分别调用pnet,rnet,onet组装成mtcnn。里面涉及python装饰器的内容,首先写了一个基本的层,然后用装饰器分别实现神经网络各种层,感觉有点类似caffe的工厂模式。

代码实现最终的检测道德人脸框的四个点坐标和5个点的包括双眼,鼻尖,两个嘴角的坐标。

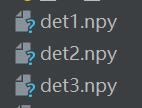
这是官方训练好的模型文件。

这里会对检测到的人脸框和五点位置进一步处理,最终得到我们想要的结果。

这里是代码的核心了,首先得到图像金字塔,参考博文。https://blog.csdn.net/poem_qianmo/article/details/26157633
然后输入pnet,返回值输入框的初始化,然后nms,然后rect实现正方形框输出,然后因为预测的框会超过原图边界,所以会涉及像素填充调用pad函数,然后输入到rnet,图像缩放、像素值归一化,归一化就是等比例缩放数值,如下图所示:

后面的也会有nms,等函数的调用就不一一细说了,先理解整体框架,具体代码实现讲解后面补充。
下面列出pro:net的网络结构图。

pnet 人脸得分 conv4-1, 人脸框对应 conv4-2,


rnet 人脸得分 conv5-1, 人脸框对应 conv5-2,

onet 人脸得分 conv6-1, 人脸框对应 conv6-2, 和 五点conv6-3 对应
代码解释:detect_face.py
1、def imresample(img, sz):函数主要功能对图片进行缩小放大。
im_data = cv2.resize(img, (sz[1], sz[0]), interpolation=cv2.INTER_AREA)
img 输入图片
sz[1], sz[0] resiz的尺寸
利用python opencv中的 cv.Resize(源,目标,变换方法)就可以实现变换为想要的尺寸了
源文件:就不用说了
目标:你可以对图像进行倍数的放大和缩小也可以直接的输入尺寸大小
变换的方法:
CV_INTER_NN <-- 最近邻插值,
CV_INTER_LINEAR <-- 双线性插值 (缺省使用)
CV_INTER_AREA <-- 使用象素关系重采样。当图像缩小时候,该方法可以避免波纹出现。当图像放大时,类似于 CV_INTER_NN 方法..
CV_INTER_CUBIC <-- 立方插值.
2、def rerec(bboxA):函数主要功能是将检测到的矩形框以原的中心点为中心转换为正方形。
# convert bboxA to square
h = bboxA[:,3]-bboxA[:,1]<--求检测框的高度
w = bboxA[:,2]-bboxA[:,0]<--求检测框的宽度
l = np.maximum(w, h)<--求高度宽度的最大值
bboxA[:,0] = bboxA[:,0]+w*0.5-l*0.5<--先求框的中心点坐标bboxA[:,0]+w*0.5,再按最大值以中心点为中心向外扩大l*0.5
bboxA[:,1] = bboxA[:,1]+h*0.5-l*0.5<--同上这样就可得到新的Xmin、Ymin坐标。
bboxA[:,2:4] = bboxA[:,0:2] + np.transpose(np.tile(l,(2,1)))<--首先将l的值复制两行然后转置然后前两列分别对应加上后两列,几何上就是Xmax = Xmin + l,Ymax = Ymin + 1。
下面是测试程序和效果图片
import numpy as np
import cv2
bboxA = np.array([[30, 20, 60, 60]])
img = np.ones((80, 80), dtype=np.uint8)
img[:, :] = 100
cv2.rectangle(img, (30, 20), (60, 60), (0, 255, 0), 1)
cv2.imwrite("pure.jpg", img)
h = bboxA[:, 3] - bboxA[:, 1]
w = bboxA[:, 2] - bboxA[:, 0]
l = np.maximum(w, h)
bboxA[:, 0] = bboxA[:, 0] + w * 0.5 - l * 0.5
bboxA[:, 1] = bboxA[:, 1] + h * 0.5 - l * 0.5
bboxA[:, 2:4] = bboxA[:, 0:2] + np.transpose(np.tile(l, (2, 1)))
img = cv2.imread("pure.jpg")
cv2.rectangle(img, (bboxA[0, 0:1], bboxA[0, 1:2]), (bboxA[0, 2:3], bboxA[0, 3]), (0, 255, 0), 1)
cv2.imwrite("pure.jpg", img)

4、def pad(total_boxes, w, h):
tmpw = (total_boxes[:,2]-total_boxes[:,0]+1).astype(np.int32)<--计算宽度有多少个像素,加1就是至少又有个像素值
tmph = (total_boxes[:,3]-total_boxes[:,1]+1).astype(np.int32)<--同上
numbox = total_boxes.shape[0]<--计算框的数目也就是矩阵有多少行
dx = np.ones((numbox), dtype=np.int32)<-创建数组
例程:
numbox = 5
dx = np.ones((numbox), dtype=np.int32)
print(dx)
[1 1 1 1 1]
dy = np.ones((numbox), dtype=np.int32)<--同上
edx = tmpw.copy().astype(np.int32)<--复制数组
例程:
total_boxes = np.array([[30, 20, 60, 60]])
tmpw = (total_boxes[:, 2] - total_boxes[:, 0] + 1).astype(np.int32)
print(tmpw)
edx = tmpw.copy().astype(np.int32)
print(edx)
[31]
[31]

x = total_boxes[:,0].copy().astype(np.int32)<--复制框的xmin、ymin,xmax、ymax 到 x 、y、ex、ey

total_boxes = np.array([[30, 20, 60, 60], [3, 2, 6, 6]])
x = total_boxes[:, 0].copy().astype(np.int32)
print(x)
y = total_boxes[:, 1].copy().astype(np.int32)
print(y)
ex = total_boxes[:, 2].copy().astype(np.int32)
print(ex)
ey = total_boxes[:, 3].copy().astype(np.int32)
print(ey)

[30  3]
[20  2]
[60  6]
[60  6]

tmp = np.where(ex>w)<--返回xmax大于w的索引

w = 6
total_boxes = np.array([[30, 20, 60, 60], [3, 2, 6, 6]])
x = total_boxes[:, 0].copy().astype(np.int32)
y = total_boxes[:, 1].copy().astype(np.int32)
ex = total_boxes[:, 2].copy().astype(np.int32)
print(ex)
ey = total_boxes[:, 3].copy().astype(np.int32)
tmp = np.where(ex > w)
print(tmp)

[60  6]
(array([0]),)
edx.flat[tmp] = np.expand_dims(-ex[tmp] + w + tmpw[tmp], 1)
-ex[tmp]<--xmax的负值,
tmpw[tmp]<--tmp是上一步获取的索引、tmpw 是 Xmax值的数组 通过索引值获取Xmax的值
np.expand_dims<--在某一维度上进行扩增
edx<--是宽的值
.flat<--降维的意思
np.array([[[[[1, 2, 3, 4, 5]]]]]).flat
>[1, 2, 3, 4, 5]

total_boxes = np.array([[30, 20, 60, 60], [3, 2, 6, 6]])
w = 6
tmpw = (total_boxes[:, 2] - total_boxes[:, 0] + 1).astype(np.int32)
tmph = (total_boxes[:, 3] - total_boxes[:, 1] + 1).astype(np.int32)
numbox = total_boxes.shape[0]

dx = np.ones((numbox), dtype=np.int32)
dy = np.ones((numbox), dtype=np.int32)
edx = tmpw.copy().astype(np.int32)
edy = tmph.copy().astype(np.int32)

x = total_boxes[:, 0].copy().astype(np.int32)
y = total_boxes[:, 1].copy().astype(np.int32)
ex = total_boxes[:, 2].copy().astype(np.int32)
ey = total_boxes[:, 3].copy().astype(np.int32)

tmp = np.where(ex > w)
print(tmp)

print(-ex[tmp])
print(tmpw[tmp])
print(-ex[tmp] + w + tmpw[tmp],)
print(np.expand_dims(-ex[tmp] + w + tmpw[tmp], 0))
print(np.expand_dims(-ex[tmp] + w + tmpw[tmp], 1))
edx.flat[tmp] = np.expand_dims(-ex[tmp] + w + tmpw[tmp], 1)
print(edx.flat[tmp])
ex[tmp] = w
print(ex[tmp])

(array([0]),)
[-60]
[31]
(array([-23], dtype=int32),)
[[-23]]
[[-23]]
[-23]
[6]
 I = np.argsort(s)
 升序排列 排在最后的是值最大的下标
例程
a = np.array([6, 0, 5,])
b = np.argsort(a)
print(b)
[1 2 0]
pick = np.zeros_like(s, dtype=np.int16)
其维度与矩阵W一致,并为其初始化为全0
xx1 = np.maximum(x1[i], x1[idx])
接收两个参数 分别和另一个比较 输出大的值
例程
x1 = np.array([6, 0, 5,])
b = np.argsort(x1)
# print(b)
i = b[-1]
idx = b[0:-1]
# print(idx)
xx1 = np.maximum(x1[i], x1[idx])
print(x1[i])
print(x1[idx])
print(xx1)

np.maximum([-2, -1, 0, 1, 2], 0)
print(np.maximum([-2, -1, 0, 1, 2], 0))
print(np.maximum([5, 9, 5, 1], 3))
xx1 = np.maximum(x1[i], x1[idx])最大的xmin
yy1 = np.maximum(y1[i], y1[idx])最大的ymin
 xx2 = np.minimum(x2[i], x2[idx])最小的xmax
  yy2 = np.minimum(y2[i], y2[idx])最小的ymax
w = np.maximum(0.0, xx2-xx1+1)最小的宽
h = np.maximum(0.0, yy2-yy1+1)最小的高
获取最小的面积
o = inter / np.minimum(area[i], area[idx])
返回的o是面积比值的数组
I = I[np.where(o<=threshold)]
返回满足条件o<=threshold的数组I 然后I进入下一个循环 一直到I里面一个元素都没有,返回pick数组 pick数组里面记录了比较过程中满足o > threshold 值的索引。