Unity版本:Unity 2018.2.14f1
原视频链接:https://unity3d.com/cn/learn/tutorials/s/space-shooter-tutorial
教程目录(持续更新中):
Unity游戏开发官方入门教程:飞机大战(一)——创建新项目、导入资源、设置场景
Unity游戏开发官方入门教程:飞机大战(二)——创建飞船对象
Unity游戏开发官方入门教程:飞机大战(三)——设置相机和光照
Unity游戏开发官方入门教程:飞机大战(四)——使用Quad加入背景
Unity游戏开发官方入门教程:飞机大战(五)——实现飞船控制脚本
Unity游戏开发官方入门教程:飞机大战(六)——创建子弹
Unity游戏开发官方入门教程:飞机大战(七)——发射子弹
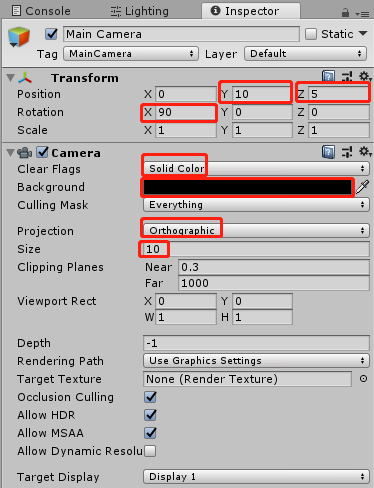
相机设置
1. 重置相机的Transform
2. Rotation的x设置为90
3. Position的y设置为10,z设置为5
4. Projections设置为orthographic(正交投影),因为相机俯视整个场景,不需要perspective(透视投影)
5. Size设置为10
6. Clear Flags设置为Solid Color
7. Background设置为黑色
相机设置参数如下:
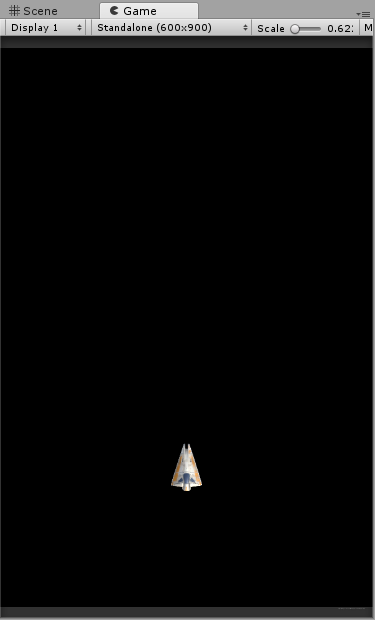
此时游戏效果如下:
光照设置
Main Light
1.删除原先自带的Directional Light
2.在Hierarchy中右键->Light->Directional Light
3.重命名为Main Light
4.重置Main Light的Transform
此时可见Main Light位于原点,跟Player重合:
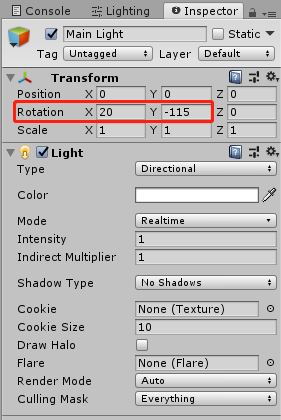
5.将Main Light的Rotation的x设置为20,y设置为-115
Main Light最终参数如下:
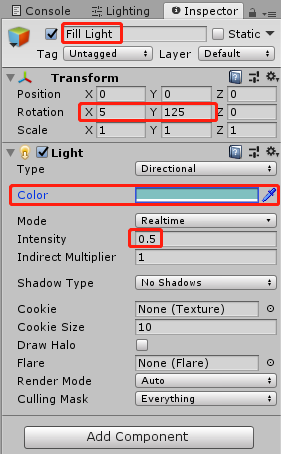
Fill Light
1.选中Main Light,Ctrl+D复制一份,重命名为Fill Light
2.重置Fill Light的Transform
3.将Fill Light的Rotation的x设置为5,y设置为125
4.将Fill Light的intensity设置为0.5
5.将Fill Light的Color的RGB分别设置为(128,192,192)
Fill Light最终参数如下:
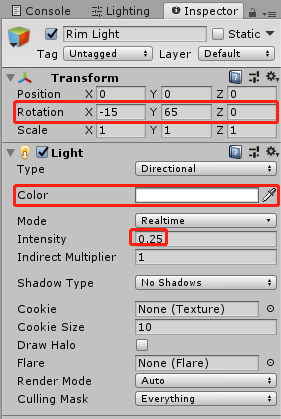
Rim Light
1.选中Fill Light,Ctrl+D复制一份,重命名为Rim Light
2.重置Rim Light的Transform
3.将Rim Light的颜色设置为白色
4.Rim Light的Rotation的x设置为-15,y设置为65
5.将Rim Light的intensity设置为0.25
Rim Light最终参数如下:
选中三个Light对象,当前场景和游戏的效果如下:
整合Light
1.在Hierarchy中 Shift + Ctrl + N,创建一个空的GameObject
2.将其重命名为Lighting
3.选中Main Light、Fill Light和Rim Light,拖拽进Lighting
这样就可以用Lighting这一GameObject来管理所有的Light,例如进行统一平移等变换操作。
由于是平行光,所以无论怎样平移,光效都不会改变。
具体效果见下图:
参考资料:https://unity3d.com/cn/learn/tutorials/s/space-shooter-tutorial