MNIST数据集是一个大型的手写体数字数据库,通常用于训练各种图像处理系统,也被广泛用于机器学习领域的训练和测试。MNIST数据库中的图像集是NIST(National Institute of Standards and Technology)的两个数据库的组合:专用数据库1和特殊数据库3。数据集是有250人手写数字组成,50%是高中学生,50%是美国人口普查局。
MNIST数据集分为60,000张的训练数据集合10,000张的测试数据集,每张图像的大小为28x28(像素);每张图像都为灰度图像,位深度为8(灰度图像是0-255)。
一、MNIST的下载
1.手动下载
下载地址:http://yann.lecun.com/exdb/mnist/
MNIST数据集包含4个文件,下载四个压缩文件,解压缩。解压缩后发现这些文件并不是标准的图像格式。这些图像数据都保存在二进制文件中。train文件是训练数据集,t10k是测试数据集,images文件是图像文件,lables文件是对应的标签文件。
train-images-idx3-ubyte.gz: training set images (9912422 bytes)
train-labels-idx1-ubyte.gz: training set labels (28881 bytes)
t10k-images-idx3-ubyte.gz: test set images (1648877 bytes)
t10k-labels-idx1-ubyte.gz: test set labels (4542 bytes)
2.使用tensorflow下载
from tensorflow.examples.tutorials.mnist import input_data
# 下载MNIST数据集
mnist = input_data.read_data_sets('/tmp/', one_hot=True)
# 数字(label)只能是0-9,神经网络使用10个出口节点就可以编码表示0-9;
# /tmp是macOS的临时目录,重启系统数据丢失; Linux的临时目录也是/tmp
二、数据的读取
1.单张图像的读取
MNIST的图像大小是28x28,我们先读取train-images图像中的第一张图像。
备注:因为images文件头部有4个integer的类型,需要跳过去;
import numpy as np
import struct
import cv2
import matplotlib.pyplot as plt

# 解压后的文件,先取train中的第一张手写图像
binfile = open('train-images.idx3-ubyte' , 'rb')
buf = binfile.read()

index = 0
magic,numImages,numRows,numColumns = struct.unpack_from('>IIII',buf,index)
index += struct.calcsize('>IIII')

im = struct.unpack_from('>784B' ,buf, index)  #28x28=784
index += struct.calcsize('>784B')
im = np.reshape(im,(28,28))

# 显示第一张图像
fig = plt.figure()
plotwindow = fig.add_subplot(111)
plt.imshow(im,cmap='gray')
plt.show()
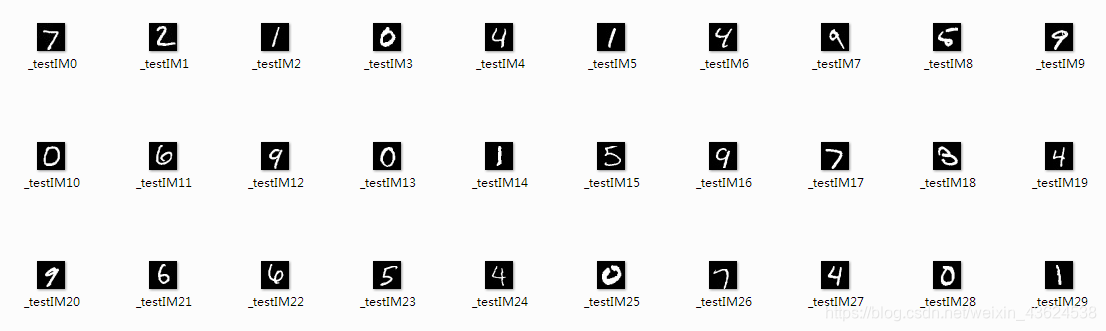
2.多张图像的读取
读取了100张的t10k的测试图像和标签,并且显示和保存到文件夹。
import numpy as np
import struct
import matplotlib.pyplot as plt
import cv2

def readfile():
    binfile1 = open('t10k-images.idx3-ubyte' , 'rb')
    buf1 = binfile1.read()
    binfile2 = open('t10k-labels.idx1-ubyte' , 'rb')
    buf2 = binfile2.read()
    return buf1, buf2

def get_image(buf1):
    image_index = 0
    image_index += struct.calcsize('>IIII')
    magic,numImages,imgRows,imgCols=struct.unpack_from(">IIII",buf1,0)
    im = []
    for i in range(100):
        temp = struct.unpack_from('>784B', buf1, image_index)
        im.append(np.reshape(temp,(28,28)))
        image_index += struct.calcsize('>784B')
    return im

def get_label(buf2):
    label_index = 0
    label_index += struct.calcsize('>II')
    return struct.unpack_from('>100B', buf2, label_index)

if __name__ == "__main__":
    image_data, label_data = readfile()
    im1 = get_image(image_data)
    label = get_label(label_data)

    for i in range(100):
        plt.subplot(10, 10, i + 1)
        title = str(label[i])
        plt.title(title)
        plt.imshow(im1[i], cmap='gray')
        cv2.imwrite("\\testIM"+str(i)+".jpg",im1[i])
    plt.show()
多张图像的结果如下图所示:
三、在tensorflow中的使用
MNIST数据集在机器学习方面已经被广泛应用,表现还算出色,比如说在MNIST上采用Softmax回归训练,在MNIST上使用CNN做可视化训练等等。在tensorflow上MNIST可以直接调取,只需要导入input_data.py这个文件就可以,不需要对其进行二进制文件转为图像文件的步骤,使用tensorflow.contrib.learn中的read_data_sets来加载数据就可以啦(FLAGS.data_dir是MNIST所在路径),代码如下:
import tensorflow as tf
from tensorflow.examples.tutorials.mnist import input_data
mnist = input_data.read_data_sets(FLAGS.data_dir,one_hot=True)
MNIST数据集就介绍到这里啦,MNIST数据集算是机器学习的入门数据集,在分类等问题上有很出色的表现!以后会陆续的出一些数据集的介绍和分享~请大家持续关注哦!蟹蟹大家!