本文内容来自尚硅谷
目录
1实现的功能
浏览器发送hello请求,服务器接受请求并处理,响应Hello World字符串;
2创建一个maven项目


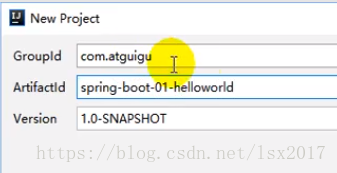

创建了一个maven项目

3导入spring boot相关的依赖
    <parent>
        <groupId>org.springframework.boot</groupId>
        <artifactId>spring-boot-starter-parent</artifactId>
        <version>1.5.9.RELEASE</version>
    </parent>
    <dependencies>
        <dependency>
            <groupId>org.springframework.boot</groupId>
            <artifactId>spring-boot-starter-web</artifactId>
        </dependency>
    </dependencies>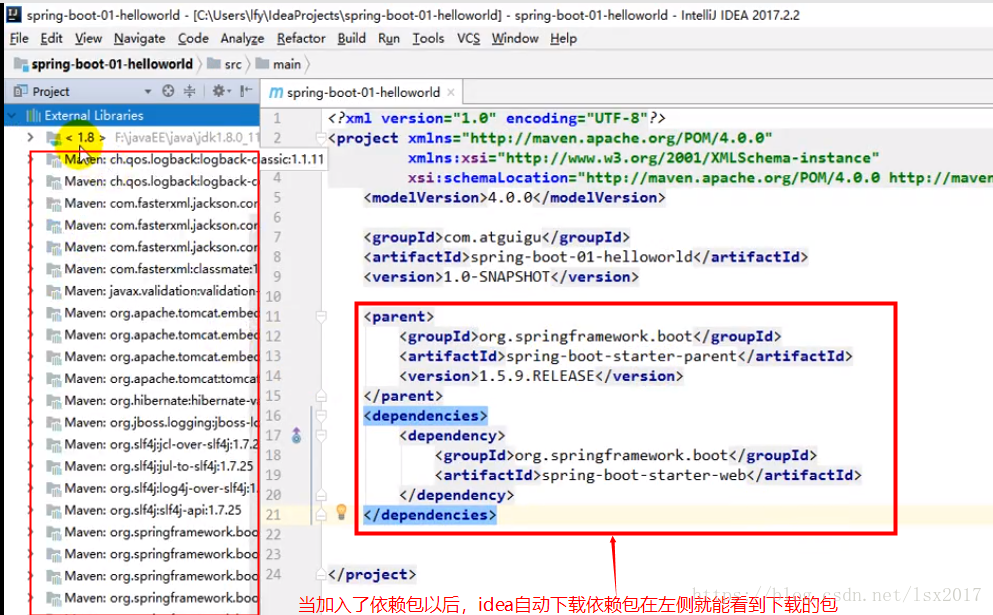
该依赖代码来自springboot官网的快速启动

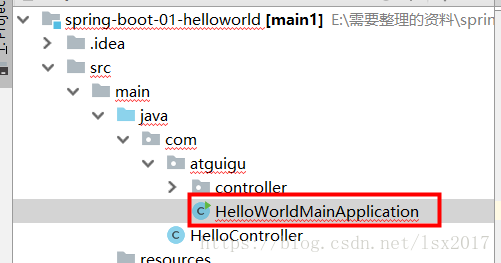
4编写一个主程序;启动Spring Boot应用
package com.atguigu;


import org.springframework.boot.SpringApplication;
import org.springframework.boot.autoconfigure.SpringBootApplication;


/**
 *  @SpringBootApplication 来标注一个主程序类,说明这是一个Spring Boot应用
 */
@SpringBootApplication
public class HelloWorldMainApplication {

    public static void main(String[] args) {

        // Spring应用启动起来
        SpringApplication.run(HelloWorldMainApplication.class,args);
    }
}
5、编写相关的Controller、Service

package com.atguigu.controller;


import org.springframework.stereotype.Controller;
import org.springframework.web.bind.annotation.RequestMapping;
import org.springframework.web.bind.annotation.ResponseBody;

@Controller
public class HelloController {

   @ResponseBody
   @RequestMapping("/hello")
    public String hello(){
        return "Hello World!";
    }
}
6运行main函数

