IdentityServer4是一套身份授权以及访问控制的解决方案,专注于帮助使用.Net 技术的公司为现代应用程序建立标识和访问控制解决方案,包括单点登录、身份管理、授权和API安全。
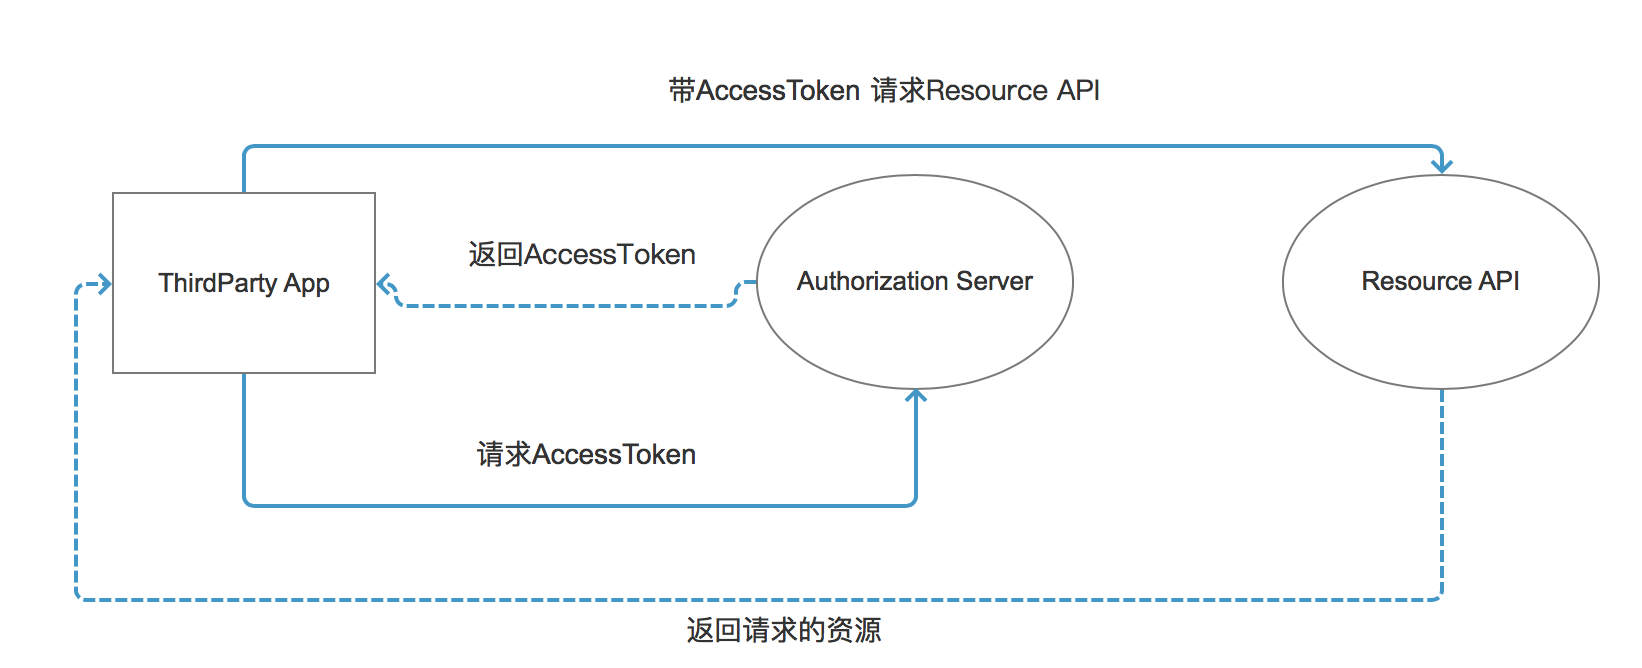
下面我将具体介绍如何在.Net Core中实现OAuth授权,从最简单的授权模式开始,在上一篇对OAuth2.0的详细描述中,在客户端模式中,我们说它在严格意义上讲是不存在授权的问题,我们再来看下它的授权流程:
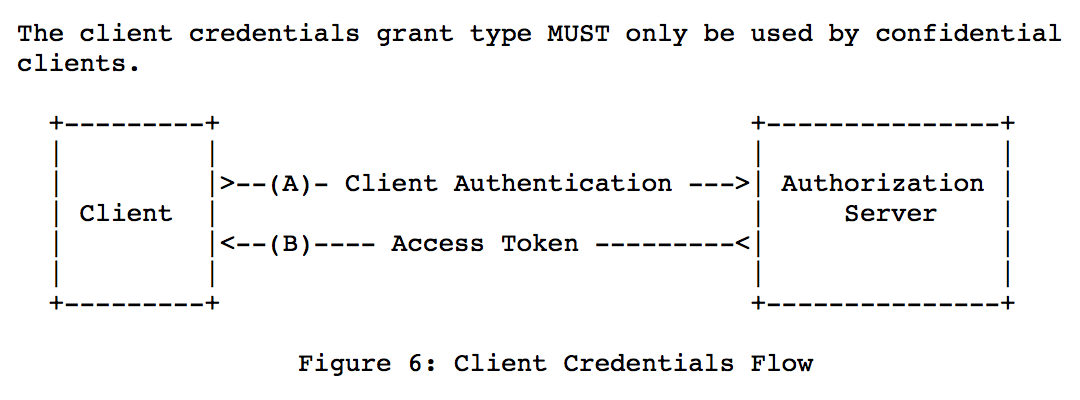
客户端在向授权服务器申请令牌后,授权服务器直接将令牌返回给了客户端,这个过程不需要其他角色的任何操作,只是客户端和授权服务器的交互。我们结合具体的示例来进一步了解这个过程。
操作系统:Mac OS
开发工具:VS Code
调试工具:Postman
开发框架:.Net Core 2.0
在具体示例实现之前,先说一下在VS Code我们会用到的插件,以方便我们的开发,毕竟VS Code没有我们宇宙第一IDE-Visual Studio那么强大,但是也是目前为止最好用的编辑器,它提供了各式各样的插件,几乎满足我们所有的开发需求。在这里我们用到的一个插件叫做Nuget Package Manager,这个插件可以方便我们使用快捷键对Nuget包进行管理。
接下来我们首先创建一个授权服务器的项目,打开VS Code使用控制台,创建一个WebApi的项目,使用命令:
dotnet new WebApi -n IdentityServer4.Server创建完成后,我们可以启动查看我们的项目,run一下:

这样我们的项目是可以运行成功的,下面我们进行添加IdentitServer4包的引用,在我们安装了Nuget Package Manager后,我们可以快速的使用快捷键,在Mac系统中使用command+p,然后输入">",然后输入Nuget... (注意一定要切换到当前的项目下)会出现以下提示:

选择第一个选项添加Package:

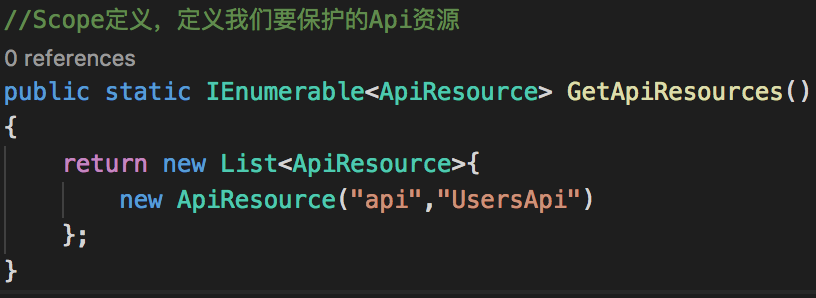
按回车,选择IdentityServer4最新版本的安装,这里是2.1.3,安装完后,我们在StartUp中添加IdentityServer4的引用,并使用AddIdentityServer()方法在依赖注入系统中注册IdentityServer,当然这里我们也可以等到添加完配置类后再进行操作。我们先添加一个配置类,叫做Config.cs,首先定义一个管道(Scope),指定我们所保护Api资源,该方法返回一个ApiResources集合,具体代码如下:new ApiResource("api","UsersApi"),第一个参数为Api的名称,第二个参数为显示的名称:
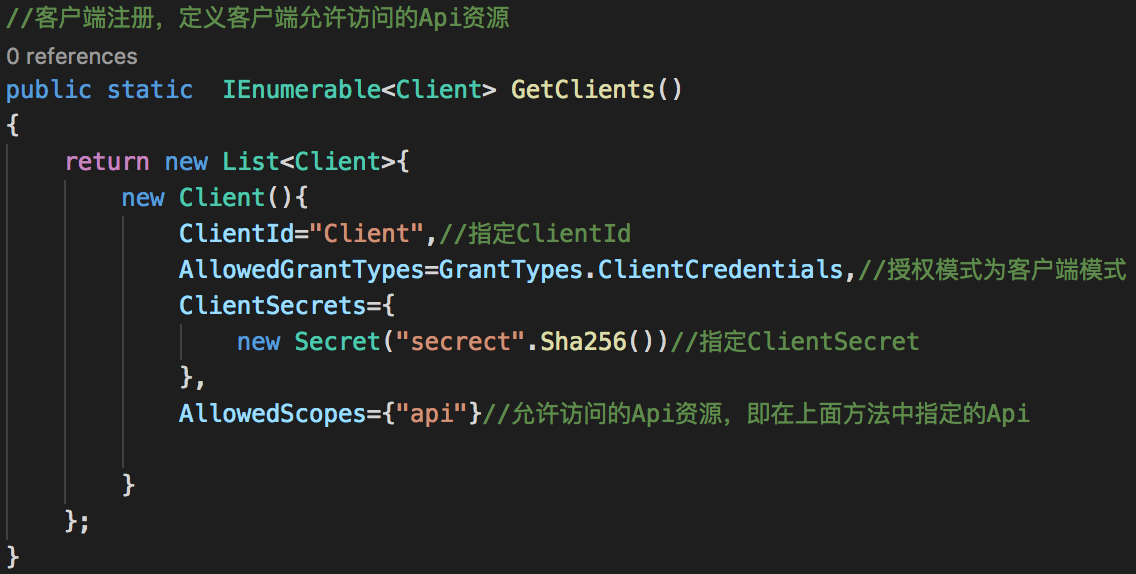
下一步进行客户端注册,定义给客户端可以返回的资源,即允许哪个Scope定义,代码如下:
下面我们将该配置注入到系统中,
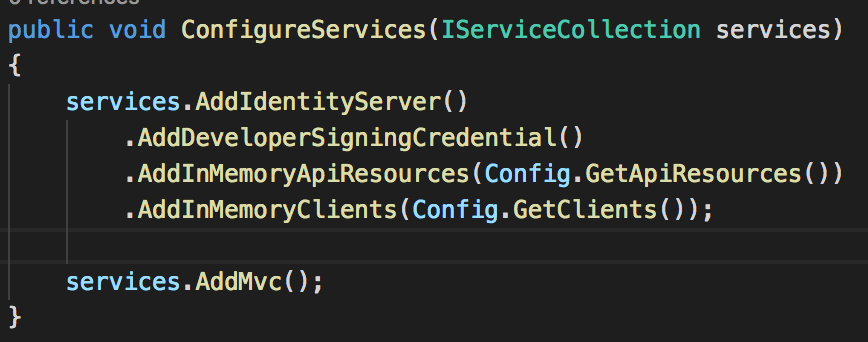
AddDeveloperSigningCredential(),是一种RSA证书加密方式,它会生成一个tempkey.rsa证书文件,项目每次启动时,会检查项目根目录是否存在该证书文件,若不存在,则会生成该文件,否则会继续使用该证书文件。后面依次将ApiResources和Clients添加到内存中。
下一步是配置IdentityServer4的管道,在Configure里面添加,app.UseIdentityServer(),在这里我们用不到mvc,将app.UseMvc()注释掉即可。下面我们运行我们的项目,当然直接访问http://localhost:5000是看不到任何东西的,在这里我们使用一个固定的地址http://localhost:5000/.well-known/openid-configuration,可以查看IdentityServer4的配置信息,运行格式化后内容如下:
{
    "issuer": "http://localhost:5000",
    "jwks_uri": "http://localhost:5000/.well-known/openid-configuration/jwks",
    "authorization_endpoint": "http://localhost:5000/connect/authorize",
    "token_endpoint": "http://localhost:5000/connect/token",
    "userinfo_endpoint": "http://localhost:5000/connect/userinfo",
    "end_session_endpoint": "http://localhost:5000/connect/endsession",
    "check_session_iframe": "http://localhost:5000/connect/checksession",
    "revocation_endpoint": "http://localhost:5000/connect/revocation",
    "introspection_endpoint": "http://localhost:5000/connect/introspect",
    "frontchannel_logout_supported": true,
    "frontchannel_logout_session_supported": true,
    "backchannel_logout_supported": true,
    "backchannel_logout_session_supported": true,
    "scopes_supported": [
        "api",
        "offline_access"
    ],
    "claims_supported": [],
    "grant_types_supported": [
        "authorization_code",
        "client_credentials",
        "refresh_token",
        "implicit"
    ],
    "response_types_supported": [
        "code",
        "token",
        "id_token",
        "id_token token",
        "code id_token",
        "code token",
        "code id_token token"
    ],
    "response_modes_supported": [
        "form_post",
        "query",
        "fragment"
    ],
    "token_endpoint_auth_methods_supported": [
        "client_secret_basic",
        "client_secret_post"
    ],
    "subject_types_supported": [
        "public"
    ],
    "id_token_signing_alg_values_supported": [
        "RS256"
    ],
    "code_challenge_methods_supported": [
        "plain",
        "S256"
    ]
}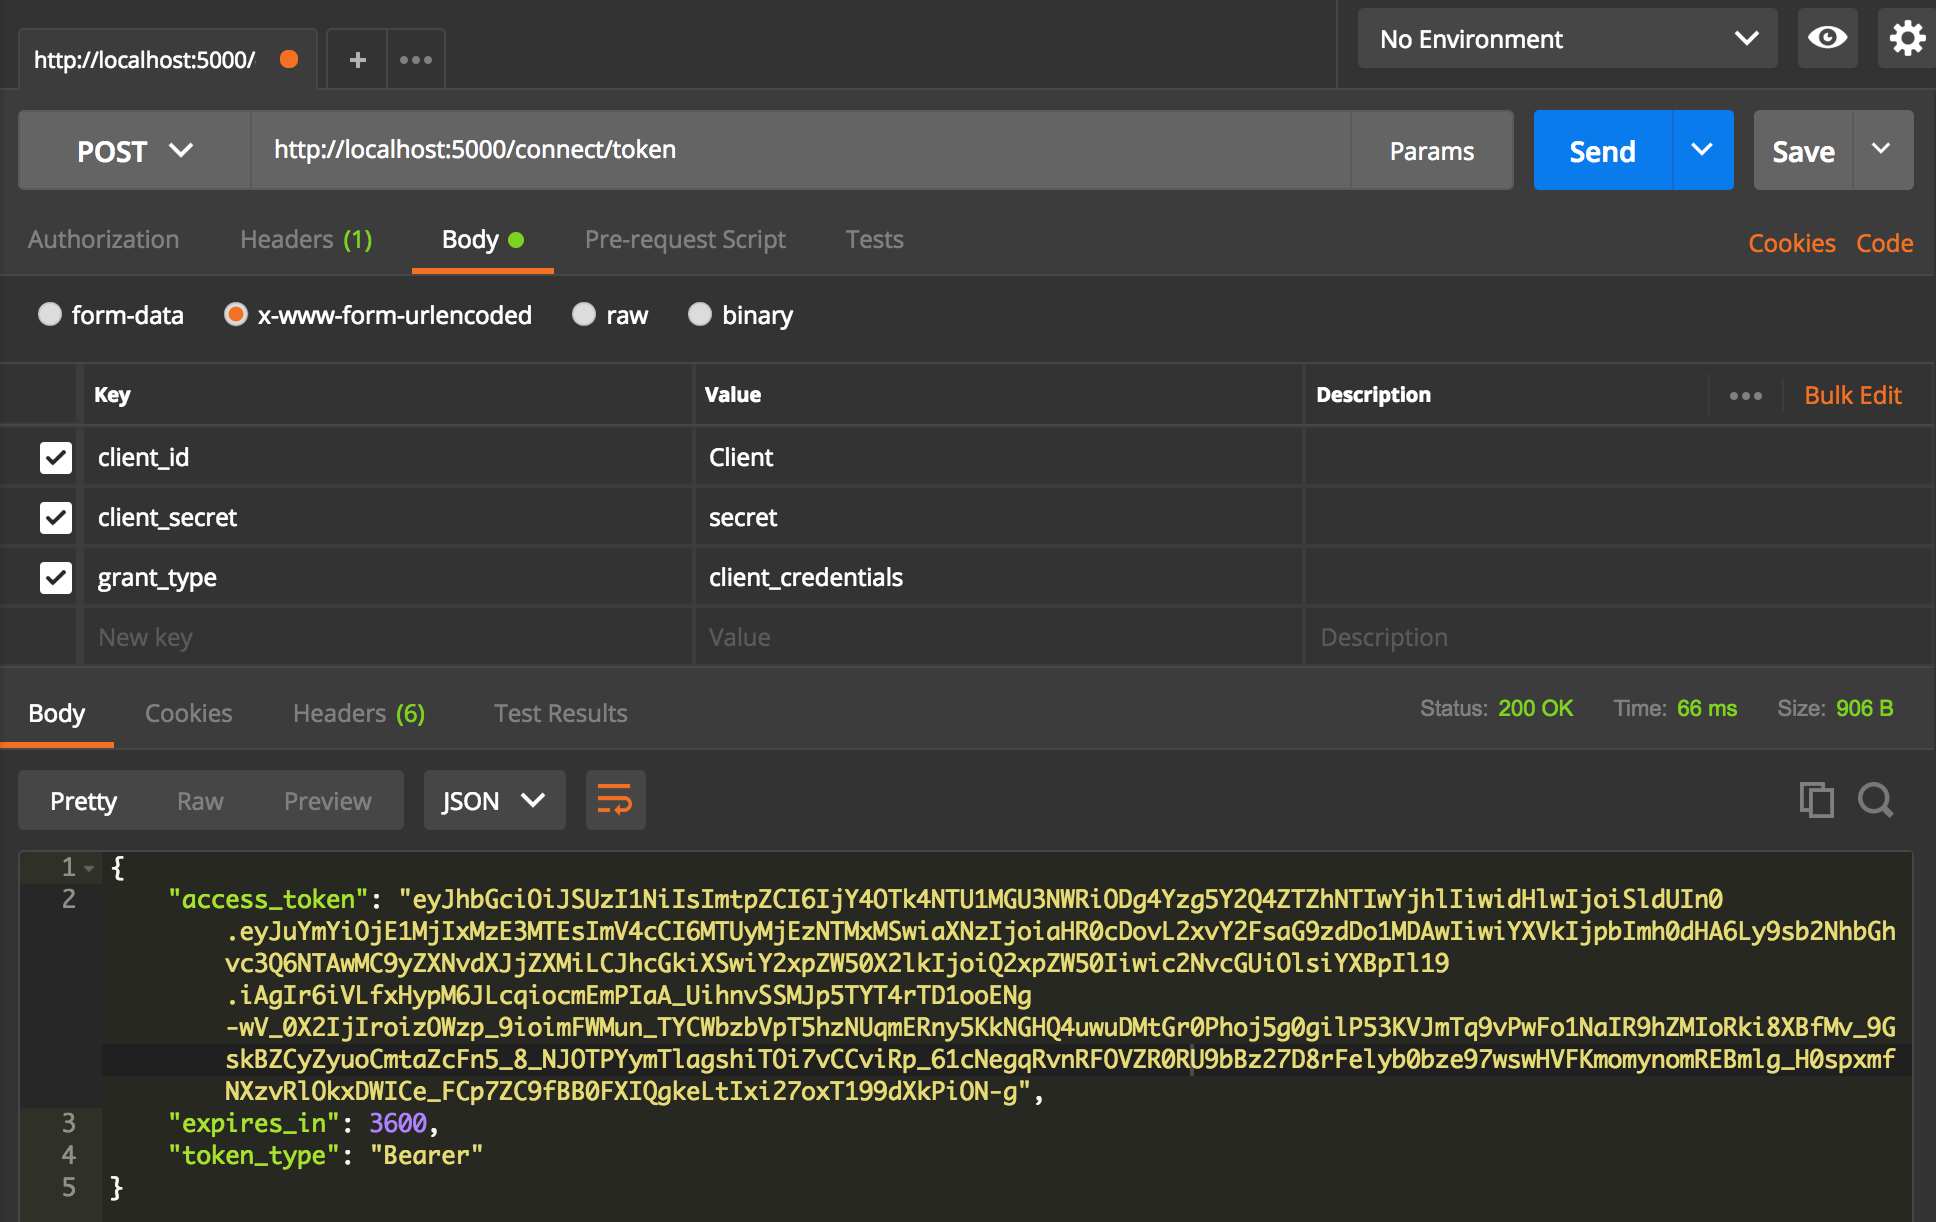
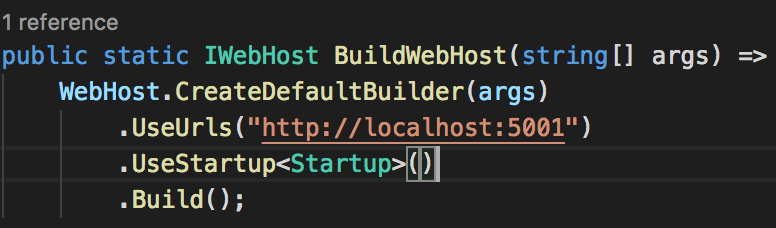
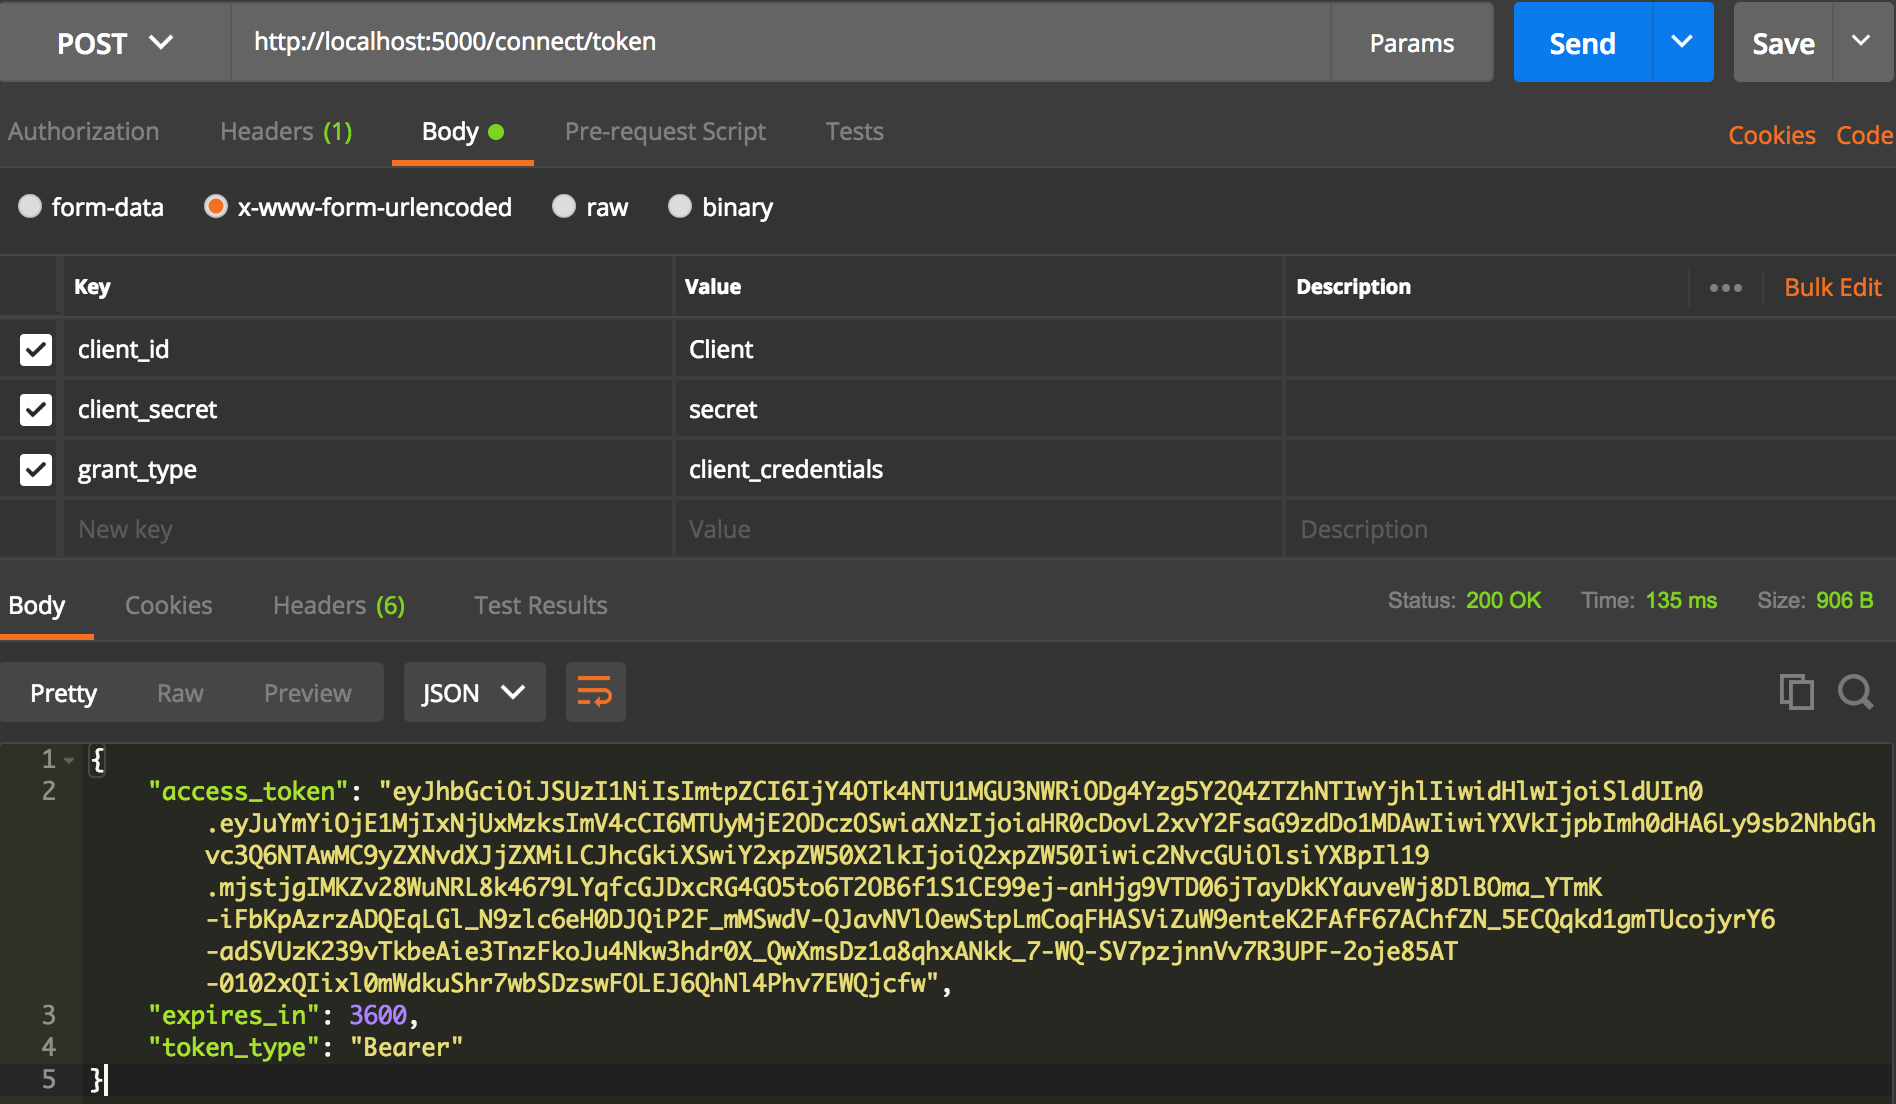
上面指定的3个参数都是客户端模式需要指定的参数,下面就是我们请求到的access token。接着我们创建一个Api,去调用我们的授权服务器进行授权,重复上面的步骤,创建一个WebApi项目,不再赘述,直接去配置调用授权服务器,这个项目只是一个Api的项目,不需要完整的IdentityServer4的引用,只引用一个IdentityServer4.AccessTokenValidation包就可以了。在授权服务器中我们已经占用5000端口,所以在这个项目中我们指定为5001端口,在Program.cs里面指定5001端口,添加.UseUrls("http://localhost:5001"):
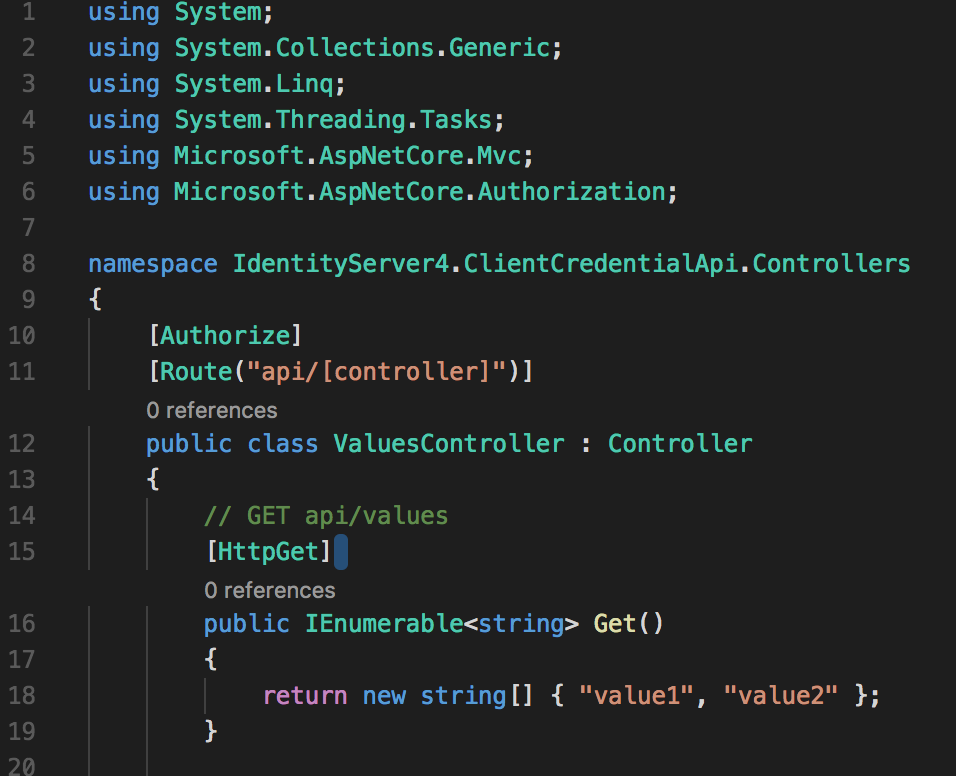
在ValuesController里面添加 Microsoft.AspNetCore.Authorization的引用,并添加[Authorize]标签,即要求该Controller要通过授权才可以访问,
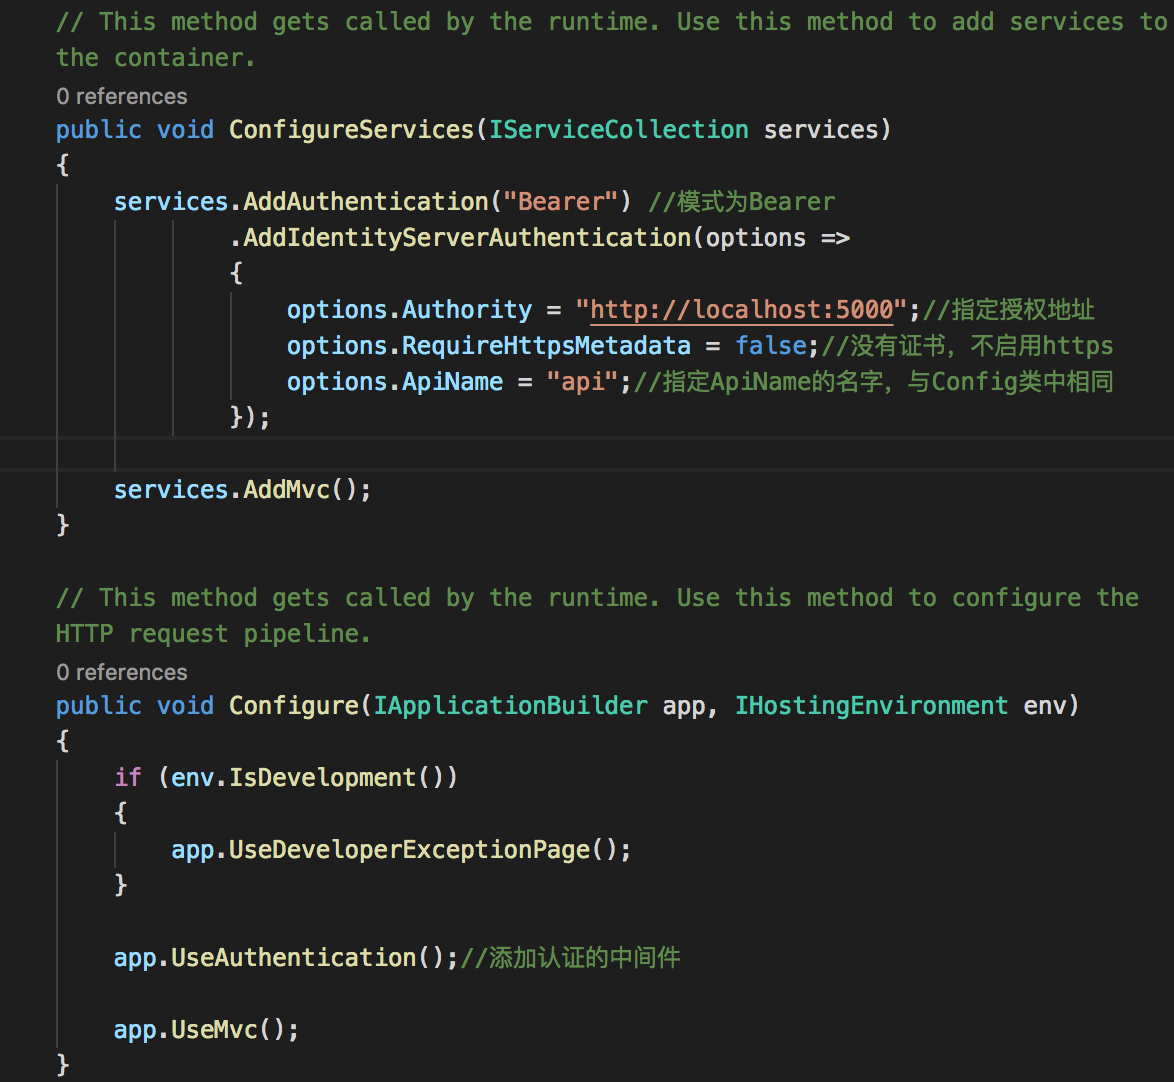
下面我们在StartUp.cs里面去配置授权服务:
接着我们分别启动授权服务器和Api,我们运行Api,访问:http://localhost:5001/api/values ,访问结果如下:

提示Http Error 401 ,在状态码中401即未授权,我们把它拿到Postman中运行:
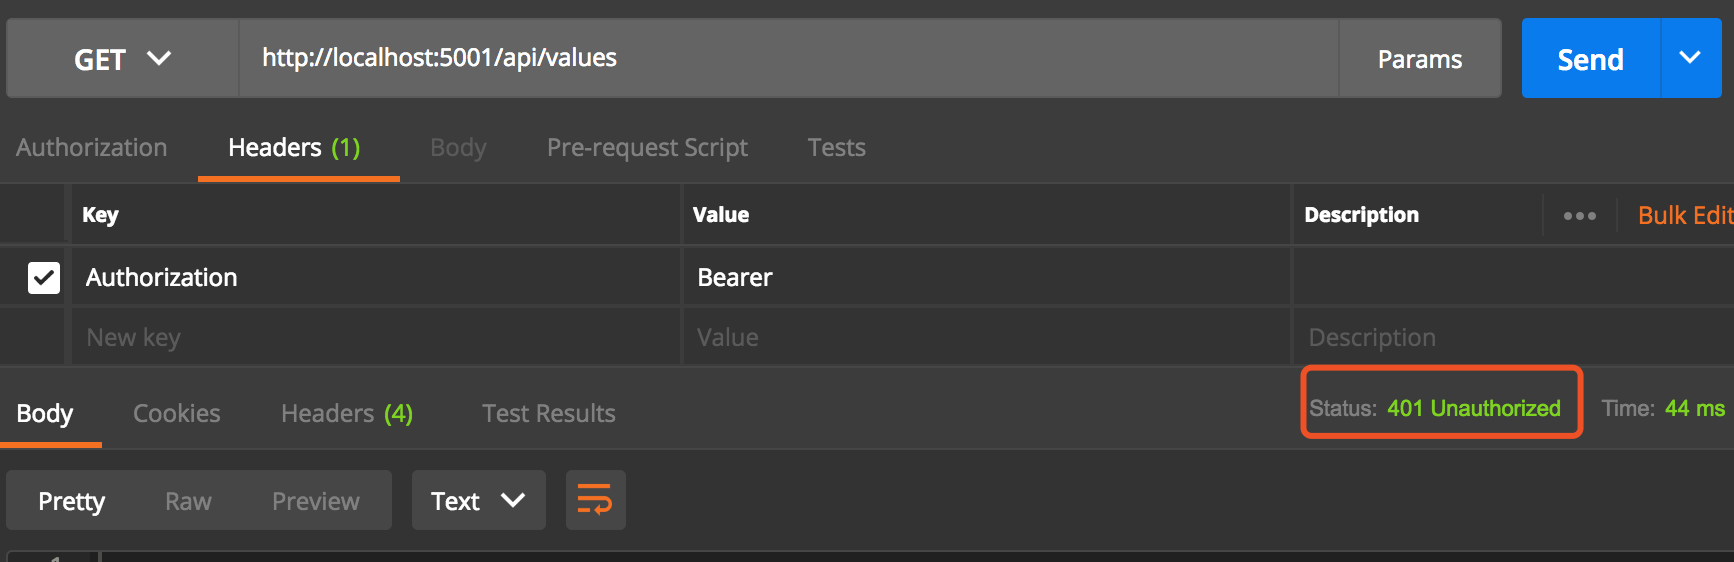
我们在Headers中指定Authorization 模式为Bearer,状态401 未授权,这个结果也是我们意料中的结果了,因为我们并未获取到令牌,我们继续使用Postman模拟获取到access token,
我们将获取到的access_token放到Api的Headers里面:
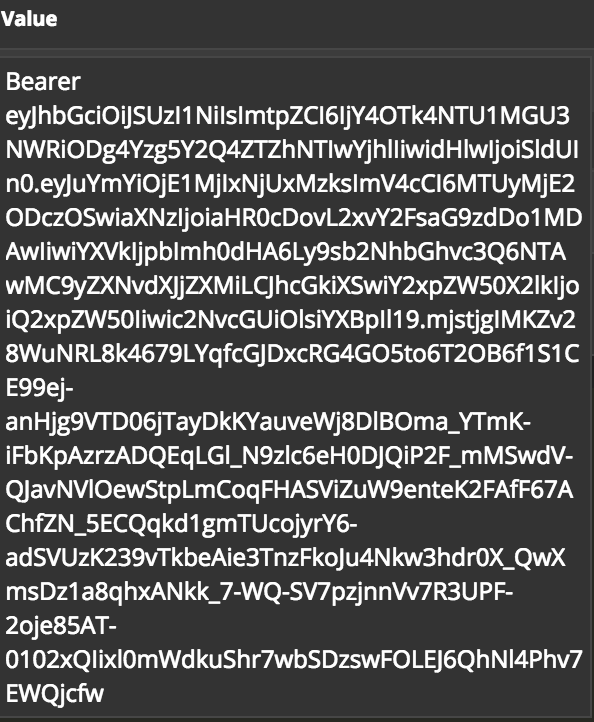
注意令牌与Bearer中间加空格,接下来继续请求:
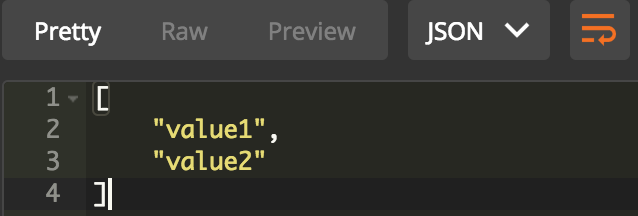
这样我们就拿到了Api里面要获取的值了,到这里我们使用Postman验证了我们的结果,下面我们再创建一个第三方应用,去请求我们的Api资源,继续了解我们的授权流程,客户端我使用控制台程序进行测试。
我们继续使用命令行创建第三方应用,名称为ThirdPartyApplication,IdentityServer4有一个专门专门为客户端程序用的Nuget包,叫做IdentityModel,我们还是通过快捷键添加Nuget Package,下面直接上代码,必要说明会在代码中直接注释:
using System;
using System.Net.Http;
using IdentityModel;
using IdentityModel.Client;


namespace ThirdPartyApplication
{
    class Program
    {
        static void Main(string[] args)
        {
            //请求授权服务器
            var diso=DiscoveryClient.GetAsync("http://localhost:5000").Result;
            if(diso.IsError)
            {
                Console.WriteLine(diso.Error);
            }

            //授权服务器根据客户端发来的请求返回令牌
            var tokenClient=new TokenClient(diso.TokenEndpoint,"Client","secret");
            var tokenResponse=tokenClient.RequestClientCredentialsAsync("api").Result;
            if(tokenResponse.IsError)
            {
                Console.WriteLine(tokenResponse.Error);
            }
            //如果成功,则打印输出返回的令牌信息
            else
            {
                Console.WriteLine(tokenResponse.Json);
            }

            //创建HttpClient对象
            var httpClient=new HttpClient();

            //设置Authorization的Value值
            httpClient.SetBearerToken(tokenResponse.AccessToken);

            //根据授权服务器返回的令牌信息请求Api资源
            var response= httpClient.GetAsync("http://localhost:5001/api/values").Result;

            //如果返回结果为成功,输出Api资源的结果
            if(response.IsSuccessStatusCode)
            {
                Console.WriteLine(response.Content.ReadAsStringAsync().Result);
            }
        }
    }
}
下面输出结果:
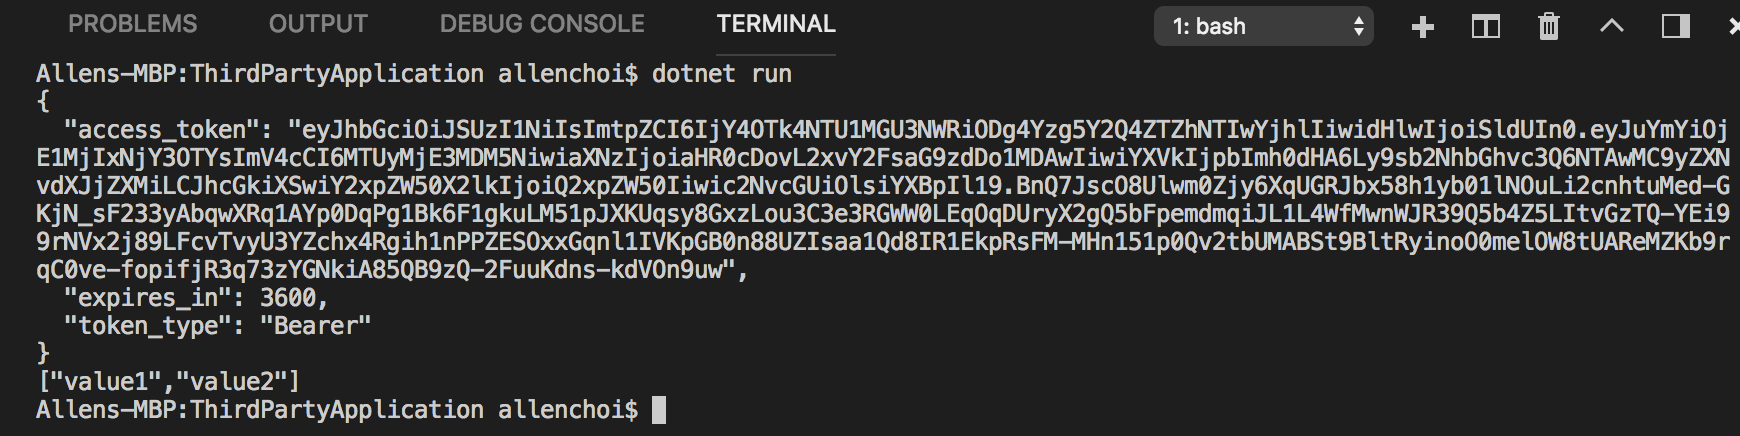
以上就是我们整个OAuth2.0授权模式中完整的客户端授权模式了,以上流程简化如下:
后面文章会继续讲解其他几种授权模式的使用。各位,晚安。

扫描二维码关注我的公众号,共同学习,共同进步!