这篇文章旨在通过一个小的 demo, 来回答三个问题:1、什么是 Nuxt.js。2、如何启用一个Nuxt.js 项目。3、如何构建一个通用的 ssr 项目。
一、友情链接
1、Nuxt.js 官网
2、Github(Nuxt.js)
3、可参考 Demo (nuxt-demo)
4、学习视频(YouTube 需翻墙)
二、什么是 Nuxt.js
如果你在用 React ,那么你一定知道 React 的服务端渲染应用框架 Next.js 。同样的基于 Vue.js 的 Nuxt.js 也是用于服务端渲染。
我们知道现在非常流行的客户端渲染的 web 开发方式,SPA(single page web application)单页应用。我们打包上线,只需要一个 index.html 和一个包含了各种静态资源的 static 文件夹,页面跳转靠路由,所有的东西全在一个 app.js 文件中。
这导致了单页面也存在着缺点:1、首屏加载慢,白屏。2、不利于 SEO。
这里我们就引出了,为什么需要有 Nuxt.js 这样的服务端渲染框架。Nuxt 的出现有效的解决了客户端渲染的单页面上述的两个问题。
我们来看看客户端/服务端渲染的直观差异吧:
URL:

  客户端:http://localhost:8080/#/findMusicComponent
  服务端:http://localhost:3000/recipes/2

路径的差距体现在,#上。推荐文章:https://segmentfault.com/a/1190000007238999
源代码:

  客户端:
  <body><div id="app"></div><!-- built files will be auto injected --><script type="text/javascript" src="/app.js"></script></body>

  服务端:
  <body data-n-head=""><div data-server-rendered="true" id="__nuxt"><div class="nuxt-progress" style="width:0%;height:2px;background-color:#3B8070;opacity:0;"></div><div id="__layout"><div><header data-v-46cf1d15><nav data-v-46cf1d15><ul data-v-46cf1d15><li data-v-46cf1d15><a href="/" class="nuxt-link-active" data-v-46cf1d15>Starting Page</a></li><li data-v-46cf1d15><a href="/recipes" class="nuxt-link-active" data-v-46cf1d15>Recipes</a></li><li data-v-46cf1d15><a href="/About" data-v-46cf1d15>About</a></li></ul></nav></header><section class="single-recipe"><h1>Delicious vigetable</h1><div class="recipe-image"><img src="https://images.pexels.com/photos/5938/food-salad-healthy-lunch.jpg" alt="Awesome vigetable"></div><p>This is a awesome vigetable</p></section></div></div></div><script type="text/javascript">window.__NUXT__={"layout":"default","data":[{"recipe":{"id":"2","title":"Delicious vigetable","previewText":"Awesome vigetable","descriptionText":"This is a awesome vigetable","thumbnail":"https:\u002F\u002Fimages.pexels.com\u002Fphotos\u002F5938\u002Ffood-salad-healthy-lunch.jpg"}}],"error":null,"state":{},"serverRendered":true};</script><script src="/_nuxt/manifest.js" defer></script><script src="/_nuxt/layouts_default.js" defer></script><script src="/_nuxt/pages_recipes__id_index.js" defer></script><script src="/_nuxt/vendor.js" defer></script><script src="/_nuxt/app.js" defer></script></body>

从源代码 body 的差异,就能知道为什么客户端渲染模式的单页面不利于 SEO,内容极少,对浏览器爬虫不友好。推荐文章:https://segmentfault.com/q/1010000009369779/a-1020000009370048
三、如何启用一个Nuxt.js 项目
首先,在看这篇文章之前,我认为您已经安装了 Node 和 NPM, 并且有了一定的 Vue 基础。
两种方法:
第一种:
1、npm install create-nuxt-app

2、create-nuxt-app your-app-name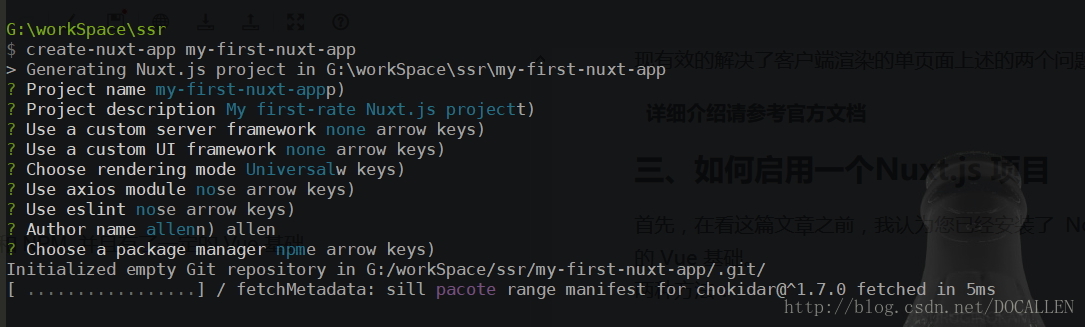
可一路回车。
3、初始化完成后,我们会得到这样的目录结构:
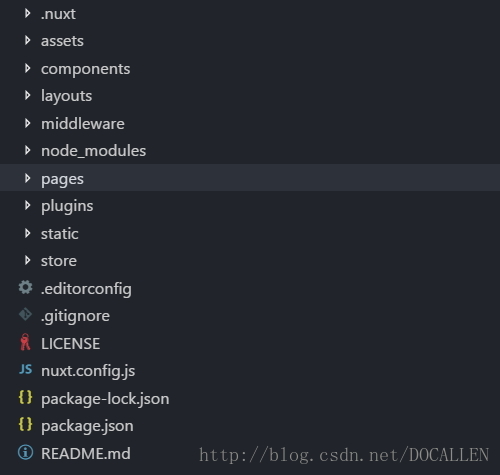
每一个文件夹代表的什么,可参考官方文档。
4、package.json 中记录着我们需要的信息,npm run dev 开始我们的 demo 吧
{
"name": "recipes",
"version": "1.0.0",
"description": "My outstanding Nuxt.js project",
"author": "allen",
"private": true,
"scripts": {
"dev": "nuxt",
"build": "nuxt build",
"start": "nuxt start",
"generate": "nuxt generate"
},
"dependencies": {
"nuxt": "^1.0.0"
},
"devDependencies": {
"cross-env": "^5.0.1"
}
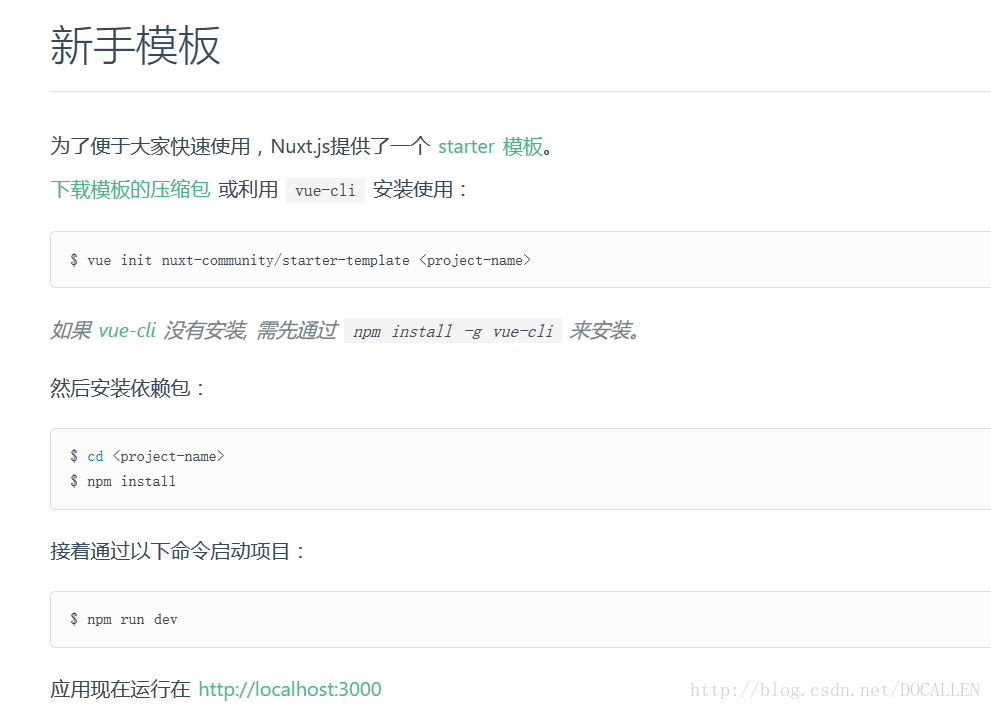
}第二种:
需要你安装过 vue-cli 官方脚手架,比较懒方法文档中已给出,截图参考。
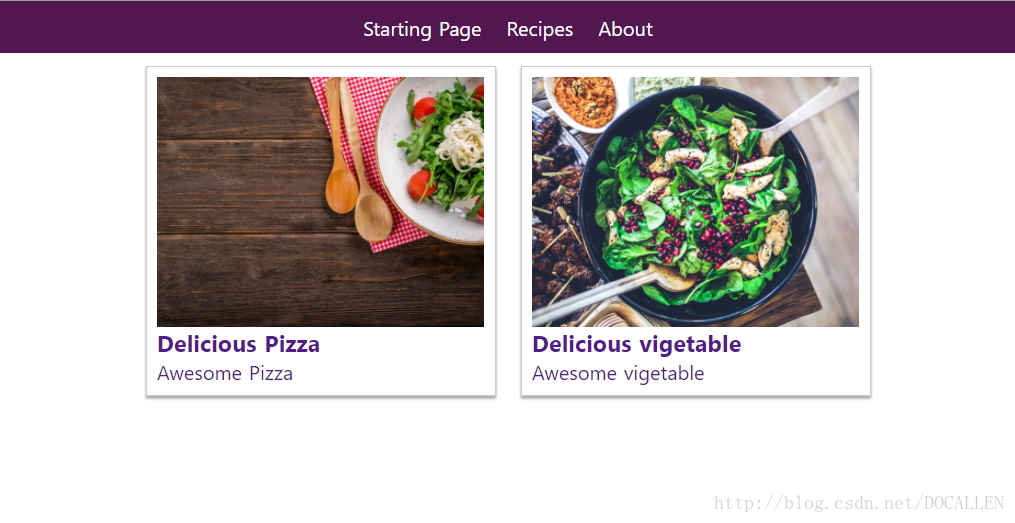
打开localhost:3000,如果你进行到一下截图的阶段,那么恭喜你,可以正式开发了!

四、如何构建一个通用的 ssr 项目
先来看一下 demo 的截图吧:
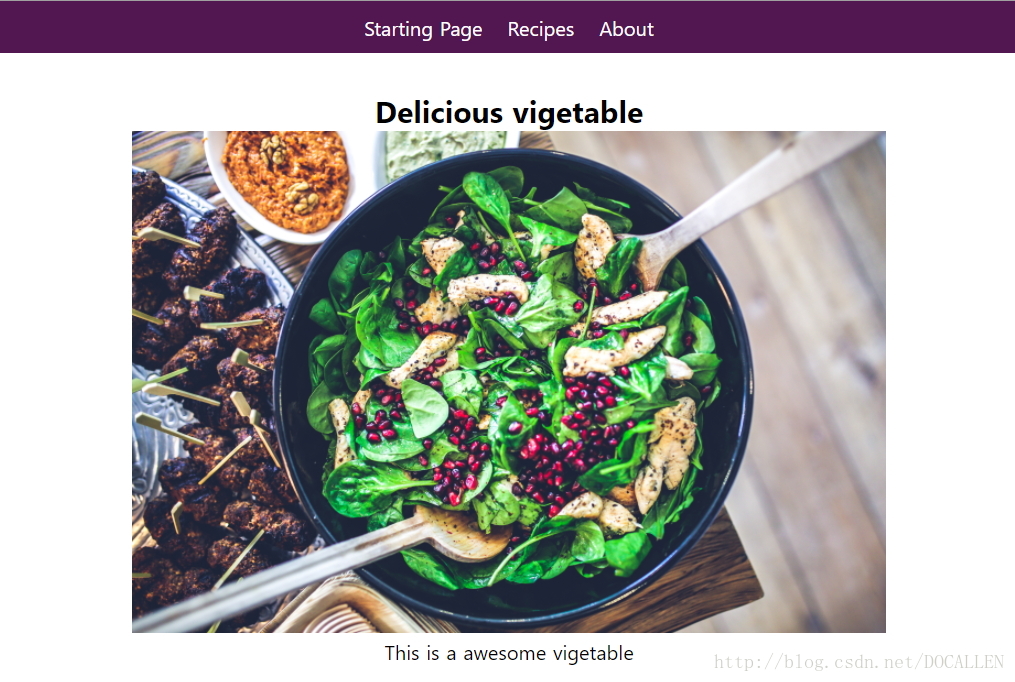
大体的结构:三个一级栏目(开始页、菜单栏、关于页),一个二级菜单(每道菜的详情页)。
在这边主要想讲一下,动态路由实现根据菜品的 id 参数跳转详情页。这和我们平时想法是一致的:首先在菜单栏中,点击某一个菜品,拿到对应的 id,然后跳转到详情页,向服务端进行异步请求,获取对应的 id 的菜品详情资料,最后在前端进行数据渲染。
我们需要实现的效果可以在 URL 上体现:

  菜单栏:http://localhost:3000/recipes
  Vigetable:http://localhost:3000/recipes/2
  Pizaa:http://localhost:3000/recipes/1
官网上对于动态路由有这样的一段:
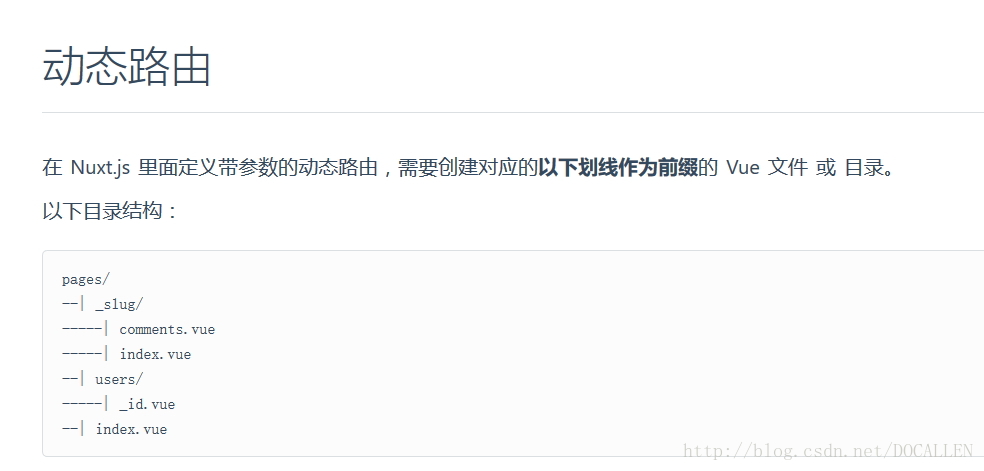
ok,现在我建一个以下划线为开头的详情的目录:
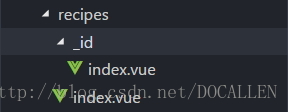
*_id 为详情目录,所有目录中的 index.vue 都是默认首页。
详情页源码:
/**
 * @Description: recipe
 */
<template>
  <section class="single-recipe">
    <h1>{{ recipe.title }}</h1>
    <div class="recipe-image">
      <img :src="recipe.thumbnail" :alt="recipe.previewText">
    </div>
    <p>{{ recipe.descriptionText }}</p>
  </section>
</template>

<script>
export default {
  /**
   * @description data from server
   */
asyncData (context) {
  return new Promise((resolve, reject) => {
    setTimeout(() => {
      resolve({
        recipe: [{
          id: '1',
          title: 'Delicious Pizza',
              previewText: 'Awesome Pizza',
              descriptionText: 'This is a nice Pizza',
              thumbnail: 'https://static.pexels.com/photos/326278/pexels-photo-326278.jpeg'
              },
          {
          id: '2',
          title: 'Delicious vigetable',
              previewText: 'Awesome vigetable',
              descriptionText: 'This is a awesome vigetable',
              thumbnail: 'https://images.pexels.com/photos/5938/food-salad-healthy-lunch.jpg'
          }].find(el => el.id === context.params.id)
        });
      }, 1500)
    })
  }
}
</script>

<style>
.single-recipe
{
  display: flex;
  flex-flow: column;
  justify-content: center;
  align-items: center;
  text-align: center;
  padding: 30px;
}
.recipe-image img
{
  width: 80%;
}
</style>
关键点就是 context.params.id,这就是每个菜品的 id,我这边是 new Promise 异步请求数据,正式的你是通过拿到 id,请求后台该 id 下唯一的详情数据。
看一下动态路由下 build 出来的 router.js 部分:
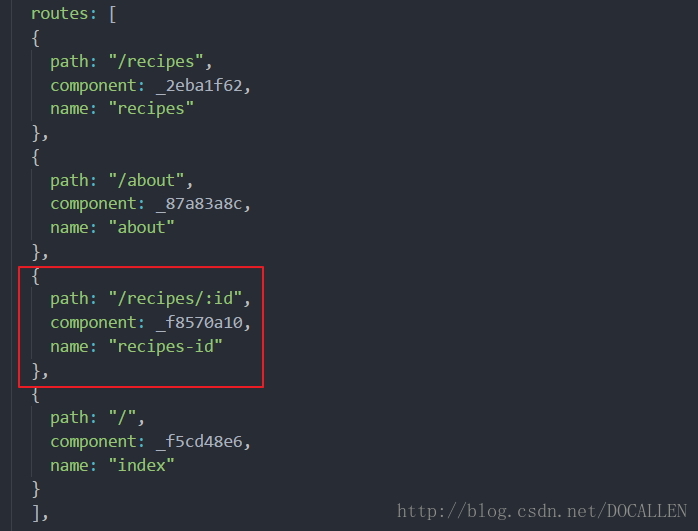
结论:只要根据 Nuxt.js 提供的路由规范,会让页面路由切换很轻松。
最后在发一下 Github 上的完整 Demo:可参考 Demo (nuxt-demo)
结语:希望我的文章能让你了解一些关于 Nuxt.js 的内容,或者开始认识 Nuxt.js。文章比较浅,如果你在未来想将服务端渲染应用到项目中,官方文档你需要详看。