版权声明:本文为博主原创文章,未经博主允许不得转载。 https://blog.csdn.net/qq_34598667/article/details/83184940
Spring 4.x 开发环境搭建
下载Spring开发包
可以去官网:http://spring.io/ 下载,不会下载的去百度一下,或者来这里1积分下载:https://download.csdn.net/download/qq_34598667/10732308
解压:Spring的目录结构
docs: API和开发规范
libs: jar包和源码
schema: 约束
新建项目名为spring_first(此以web项目为例)
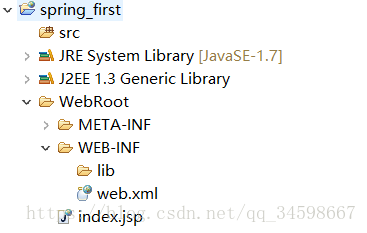
导jar包
进入到下载并解压的spring-framework-4.2.5.RELEASE的目录中,进入libs文件夹,找到如下jar包:
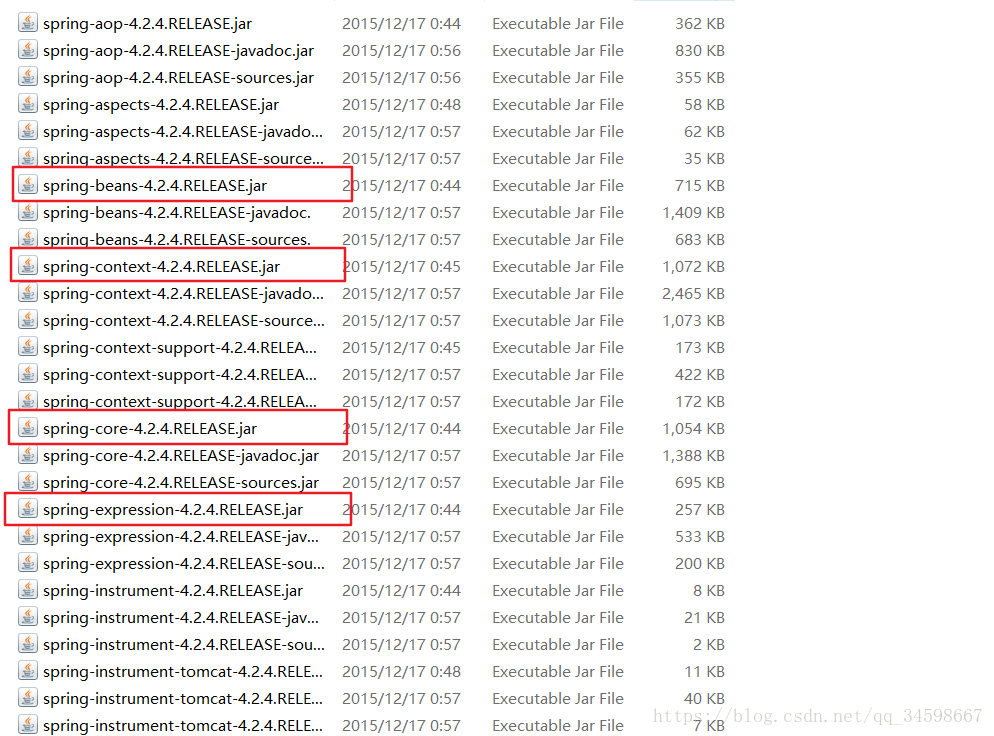
将他们复制到/WEB-INF/lib下。
同时我们还要将commons-logging-1.1.3.jar包拷贝到lib目录中。commons-logging.jar包是使用spring的必备包,用来记录程序运行时的活动的日志记录。
添加完以上5个jar包后效果如图:

编写Spring配置文件
编写Spring的配置文件,该配置文件模板可以从Spring的参考手册或Spring的例子中得到。配置文件的取名可以任意,文件可以存放在任何目录下,但考虑到通用性,一般放在类路径下。
在src下新建spring.xml配置文件,添加如下配置信息:
<?xml version="1.0" encoding="UTF-8"?>
<beans xmlns="http://www.springframework.org/schema/beans"
    xmlns:xsi="http://www.w3.org/2001/XMLSchema-instance"
    xsi:schemaLocation="http://www.springframework.org/schema/beans
        http://www.springframework.org/schema/beans/spring-beans.xsd">

</beans>
编写测试代码
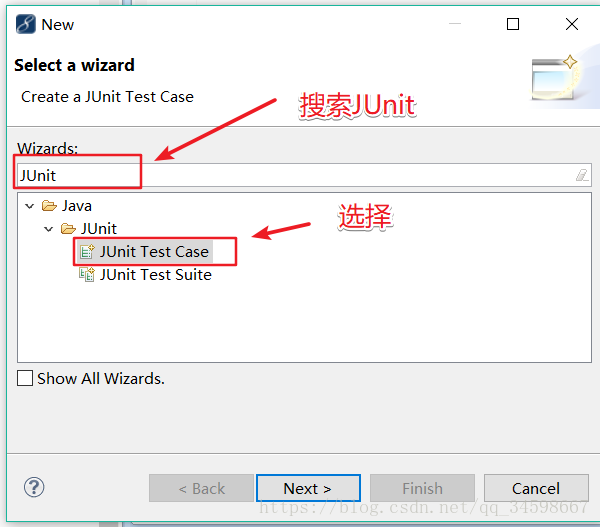
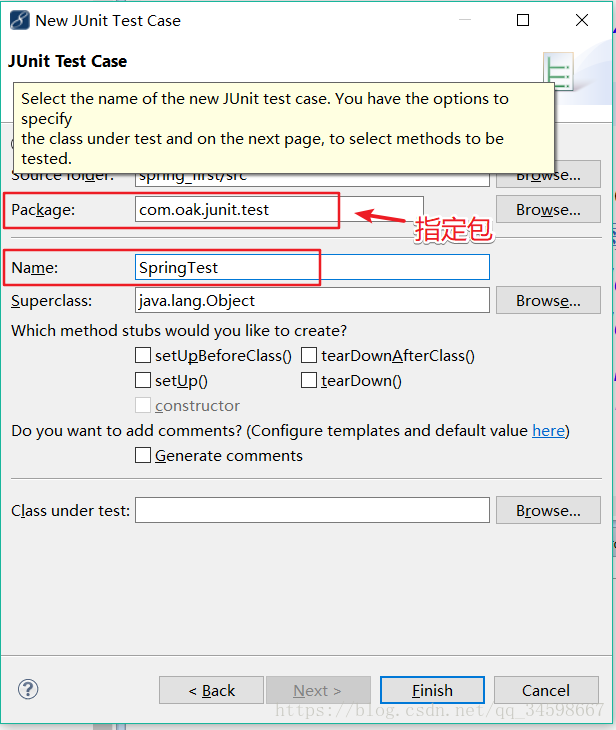
在src下新建junit.test包,并在该包下新建一个JUnit Test Case,SpringTest
创建类,指定包围com.oak.junit.test
编写测试方法
实例化Spring容器并查看:
	@Test
	public void testCtx() {
		// ApplicationContext是接口
        ApplicationContext ctx = new ClassPathXmlApplicationContext("spring.xml");
        System.out.println(ctx);
	}
实例化Spring容器常用的两种方式:
方法一:在类路径下寻找配置文件来实例化容器。
ApplicationContext ctx = new ClassPathXmlApplicationContext(new String[]{"spring.xml"});
方法二:在文件系统路径下寻找配置文件来实例化容器。
ApplicationContext ctx = new FileSystemXmlApplicationContext(new String[]{"d:\\beans.xml"});
junit运行正常则并输出spring则实例化成功。