打开源代码过程略去不谈,找到入口方法之后发现有两次调用,而我们实际需要开始关注的是下面这个方法。
public static ConfigurableApplicationContext run(Object[] sources, String[] args) {
        return (new SpringApplication(sources)).run(args);
}可以看到首先调用了有参构造方法,然后调用run(String[] args)进行后续操作。
构造方法中需要关注的是initialize()方法,其中跟此启动内置Tomcat相关的则是deduceWebEnvironment()这个方法,从命名可以得知此方法用于判断当前是否为Web环境。
//项目初始化
private void initialize(Object[] sources) {
        if (sources != null && sources.length > 0) {
            this.sources.addAll(Arrays.asList(sources));
        }

        //确定是否是Web环境
        this.webEnvironment =    this.deduceWebEnvironment();

        this.setInitializers(this.getSpringFactoriesInstances(ApplicationContextInitializer.class));
        this.setListeners(this.getSpringFactoriesInstances(ApplicationListener.class));
        this.mainApplicationClass = this.deduceMainApplicationClass();
}

//跟Web环境相关Class
private static final String[] WEB_ENVIRONMENT_CLASSES = new String[]{"javax.servlet.Servlet",
"org.springframework.web.context.ConfigurableWebApplicationContext"};

//判断是否web环境  只有数组中的Class全部存在才会判定为Web环境
private boolean deduceWebEnvironment() {
        String[] var1 = WEB_ENVIRONMENT_CLASSES;
        int var2 = var1.length;

        for(int var3 = 0; var3 < var2; ++var3) {
            String className = var1[var3];
            if (!ClassUtils.isPresent(className, (ClassLoader)null)) {
                return false;
            }
        }

        return true;
} 构造方法完成之后则是run(String[] args)方法。
  public ConfigurableApplicationContext run(String... args) {
        StopWatch stopWatch = new StopWatch();
        stopWatch.start();
        ConfigurableApplicationContext context = null;
        FailureAnalyzers analyzers = null;
        this.configureHeadlessProperty();
        SpringApplicationRunListeners listeners = this.getRunListeners(args);
        listeners.starting();

        try {
            ApplicationArguments applicationArguments = new DefaultApplicationArguments(args);
            ConfigurableEnvironment environment = this.prepareEnvironment(listeners, applicationArguments);
            Banner printedBanner = this.printBanner(environment);
            //创建ApplicationContext
            context = this.createApplicationContext();
            new FailureAnalyzers(context);
            this.prepareContext(context, environment, listeners, applicationArguments, printedBanner);
            //刷新Context
            this.refreshContext(context);
            this.afterRefresh(context, applicationArguments);
            listeners.finished(context, (Throwable)null);
            stopWatch.stop();
            if (this.logStartupInfo) {
                (new StartupInfoLogger(this.mainApplicationClass)).logStarted(this.getApplicationLog(), stopWatch);
            }

            return context;
        } catch (Throwable var9) {
            this.handleRunFailure(context, listeners, (FailureAnalyzers)analyzers, var9);
            throw new IllegalStateException(var9);
        }
}其中跟启动内置Tomcat相关的则是createApplicationContext()与refreshContext(context)方法,第一个方法大家顾名思义,功能在此不过多解释。下面是它的具体实现。
 //创建AnnotationConfigEmbeddedWebApplicationContext
  protected ConfigurableApplicationContext createApplicationContext() {
        Class<?> contextClass = this.applicationContextClass;
        if (contextClass == null) {
            try {
                contextClass = Class.forName(this.webEnvironment ? "org.springframework.boot.context.embedded.AnnotationConfigEmbeddedWebApplicationContext" : "org.springframework.context.annotation.AnnotationConfigApplicationContext");
            } catch (ClassNotFoundException var3) {
                throw new IllegalStateException("Unable create a default ApplicationContext, please specify an ApplicationContextClass", var3);
            }
        }

        return (ConfigurableApplicationContext)BeanUtils.instantiate(contextClass);
}可以看到,其主体是一个基于this.webEnvironment变量的判断,此处我们获取到的ConfigurableApplicationContext的具体实现是AnnotationConfigEmbeddedWebApplicationContext。然而Tomcat是在哪里启动的呢?接下来让我们看下refreshContext(context)的实现。
private void refreshContext(ConfigurableApplicationContext context) {
        this.refresh(context);
        if (this.registerShutdownHook) {
            try {
                context.registerShutdownHook();
            } catch (AccessControlException var3) {
                ;
            }
        }

}

protected void refresh(ApplicationContext applicationContext) {
        Assert.isInstanceOf(AbstractApplicationContext.class, applicationContext);
        ((AbstractApplicationContext)applicationContext).refresh();
}可以看到,其首先调用的refresh方法,而在此方法中,applicationContext被转形为AbstractApplicationContext,然后调用了其中的refresh()方法。
打开源码瞄两眼,原来是个抽象类。嗯,依赖抽象而不是实现。再看下依赖关系,
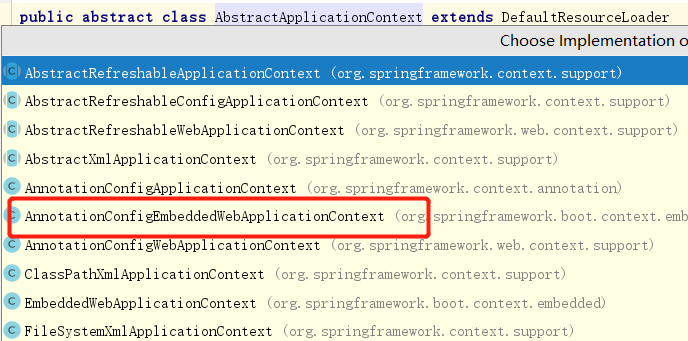
AnnotationConfigEmbeddedWebApplicationContext赫然在列。稍微看下refresh(),其中关键是onRefresh()这个方法。
/**
 * Template method which can be overridden to add context-specific refresh work.
 * Called on initialization of special beans, before instantiation of singletons.
 * <p>This implementation is empty.
 * @throws BeansException in case of errors
 * @see #refresh()
 */
protected void onRefresh() throws BeansException {
    // For subclasses: do nothing by default.
}但是我们在AnnotationConfigEmbeddedWebApplicationContext其实是没有找到关于onRefresh()的实现的。那父类呢?我们可以看到其是继承于EmbeddedWebApplicationContext的,观察下其关于onRefresh()的具体实现。
protected void onRefresh() {
    super.onRefresh();

    try {
        //创建Web容器
        this.createEmbeddedServletContainer();
    } catch (Throwable var2) {
        throw new ApplicationContextException("Unable to start embedded container", var2);
    }
}
从命名可以看出,这里是真正Tomcat开始创建的入口,其实现如下:
private void createEmbeddedServletContainer() {
        EmbeddedServletContainer localContainer = this.embeddedServletContainer;
        ServletContext localServletContext = this.getServletContext();
        if (localContainer == null && localServletContext == null) {
            EmbeddedServletContainerFactory containerFactory = this.getEmbeddedServletContainerFactory();
            this.embeddedServletContainer = containerFactory.getEmbeddedServletContainer(new ServletContextInitializer[]{this.getSelfInitializer()});
        } else if (localServletContext != null) {
            try {
                this.getSelfInitializer().onStartup(localServletContext);
            } catch (ServletException var4) {
                throw new ApplicationContextException("Cannot initialize servlet context", var4);
            }
        }

        this.initPropertySources();
}
至此,Spring boot内置ServletContainer启动流程完成。其流程如下: