一、PyMySQL模块
1.1 PyMySQL安装
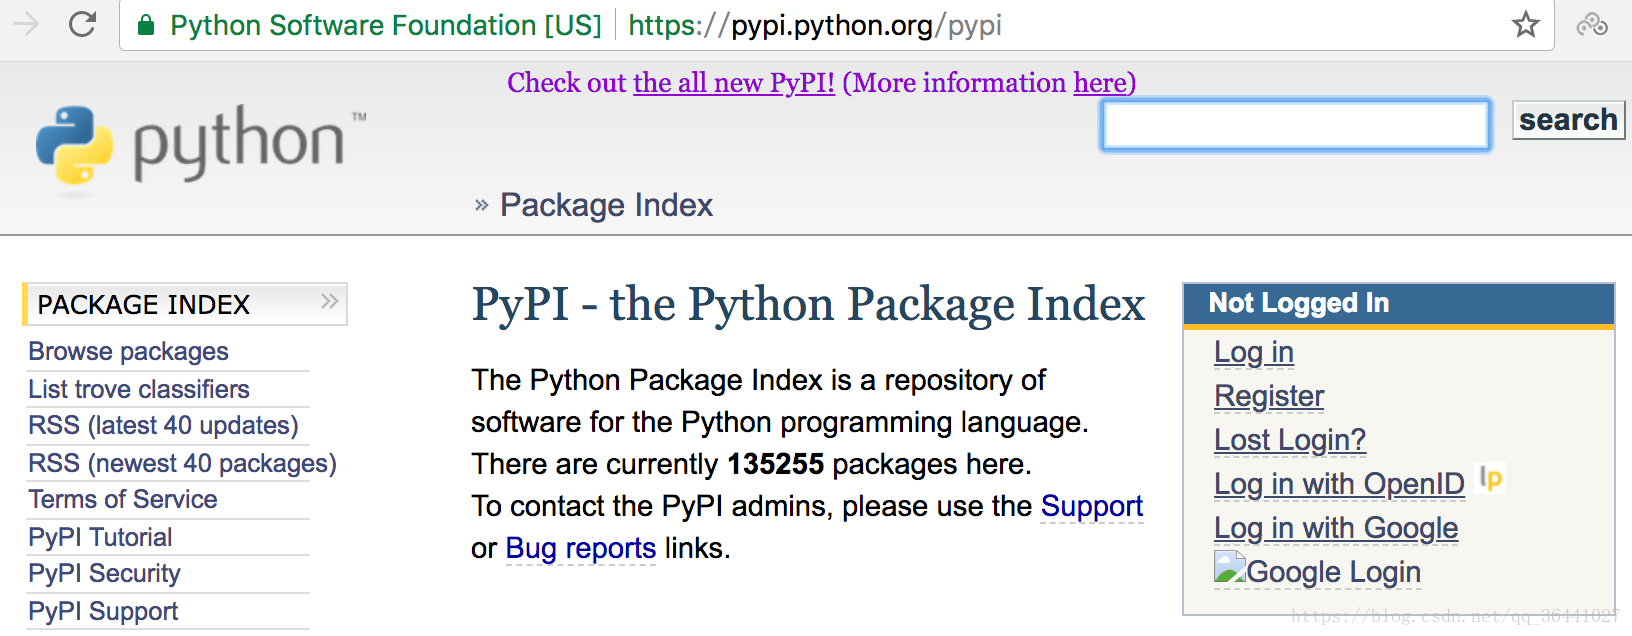
1.1.1 使用pypi
• pypi即python package index
• 是python语言的软件仓库
• 官方站点为https://pypi.python.org
1.1.2 通过pip安装PyMySQL模块
1. 安装依赖包
[root@localhost packages]# yum install -y gcc
2. 本地安装
[root@localhost packages]# pip3 install PyMySQL-0.8.0.tar.gz
3. 在线安装
[root@localhost packages]# pip3 install pymysql
1.1.3 使用国内镜像站点
1. 为了实现安装加速,可以配置pip安装时采用国内镜像站点
[root@localhost ~]# mkdir ~/.pip/
[root@localhost ~]# vim ~/.pip/pip.conf
[global]
index-url=hKp://pypi.douban.com/simple/
[install]
trusted-host=pypi.douban.com
1.2 PyMySQL应用
1.2.1 连接数据库
1. 创建连接是访问数据库的第一步
conn = pymysql.connect(host='127.0.0.1', port=3306, user='root',
passwd='tedu.cn', db='tkq1', charset='uU8')
1.2.2 游标
1. 游标(cursor)就是游动的标识
2. 通俗的说,一条sql取出对应n条结果资源的接口/句柄,就是游标,沿着游标可以一次取出一行
cursor = conn.cursor()
1.2.3 插入数据
1.对数据库表做修改操作,必须要commit
import pymysql
conn=pymysql.connect(
    host='127.0.0.1',
    port=3306,
    user='root',
    passwd='123456',
    db='tarena1804',
    charset='utf8'
)

cursor=conn.cursor() #创建游标
insert1 = 'INSERT INTO department VALUES (%s, %s)'
result1 = cursor.execute(insert1, (1, 'development'))
depts1 = [(2, 'operations'), (3, 'QA')]
depts2 = [(4, '人事部'), (5, '财务部')]
result2 = cursor.executemany(insert1, depts1)
result3 = cursor.executemany(insert1, depts2)

conn.commit()
cursor.close()
conn.close()
1.2.4 查询数据
1. 可以取出表中一条、多条或全部记录
import pymysql
conn=pymysql.connect(
    host='127.0.0.1',
    port=3306,
    user='root',
    passwd='123456',
    db='tarena1804',
    charset='utf8'
)

cursor=conn.cursor()   #创建游标
query1='select * from department'
cursor.execute(query1)
data1=cursor.fetchone()    #查询一条数据
print(data1)
print('*'*50)
data2=cursor.fetchmany(2)  #查询多条数据
print(data2)
print('*'*50)
data3=cursor.fetchall()    #查询所有数据
print(data3)
1.2.5 移动游标
1. 从头开始移动游标用mode=“absolute”,从相对位置移动游标可以使用mode=“relative”
cursor=conn.cursor()

query1='select * from department'
cursor.execute(query1)
cursor.scroll(1,'absolute')
data1=cursor.fetchone()
print(data1)
print('*'*50)
cursor.scroll(1)
data2=cursor.fetchone()
print(data2)
1.2.6 修改/删除记录
1.通过update/delete修改某一字段的值
import pymysql
conn=pymysql.connect(
    host='127.0.0.1',
    port=3306,
    user='root',
    passwd='123456',
    db='tarena1804',
    charset='utf8'
)

cursor=conn.cursor()
update1='update department set dep_name=%s where dep_name=%s'
delete1='delete from department where dep_id=%s'
cursor.execute(update1,('人力资源','人事部',))
cursor.execute(delete1,(5,))
conn.commit()
cursor.close()
conn.close()
二、SQLAlchemy基础
2.1 SQLAlchemy概述
2.1.1 SQLAlchemy安装
SQLAlchemy由官方收录,可以直接安装
[root@localhost packages]# pip3 install sqlalchemy
2.1.2 SQLAlchemy简介
SQLAlchemy是一款通过对象关系映射去兼容各种数据库的开源软件
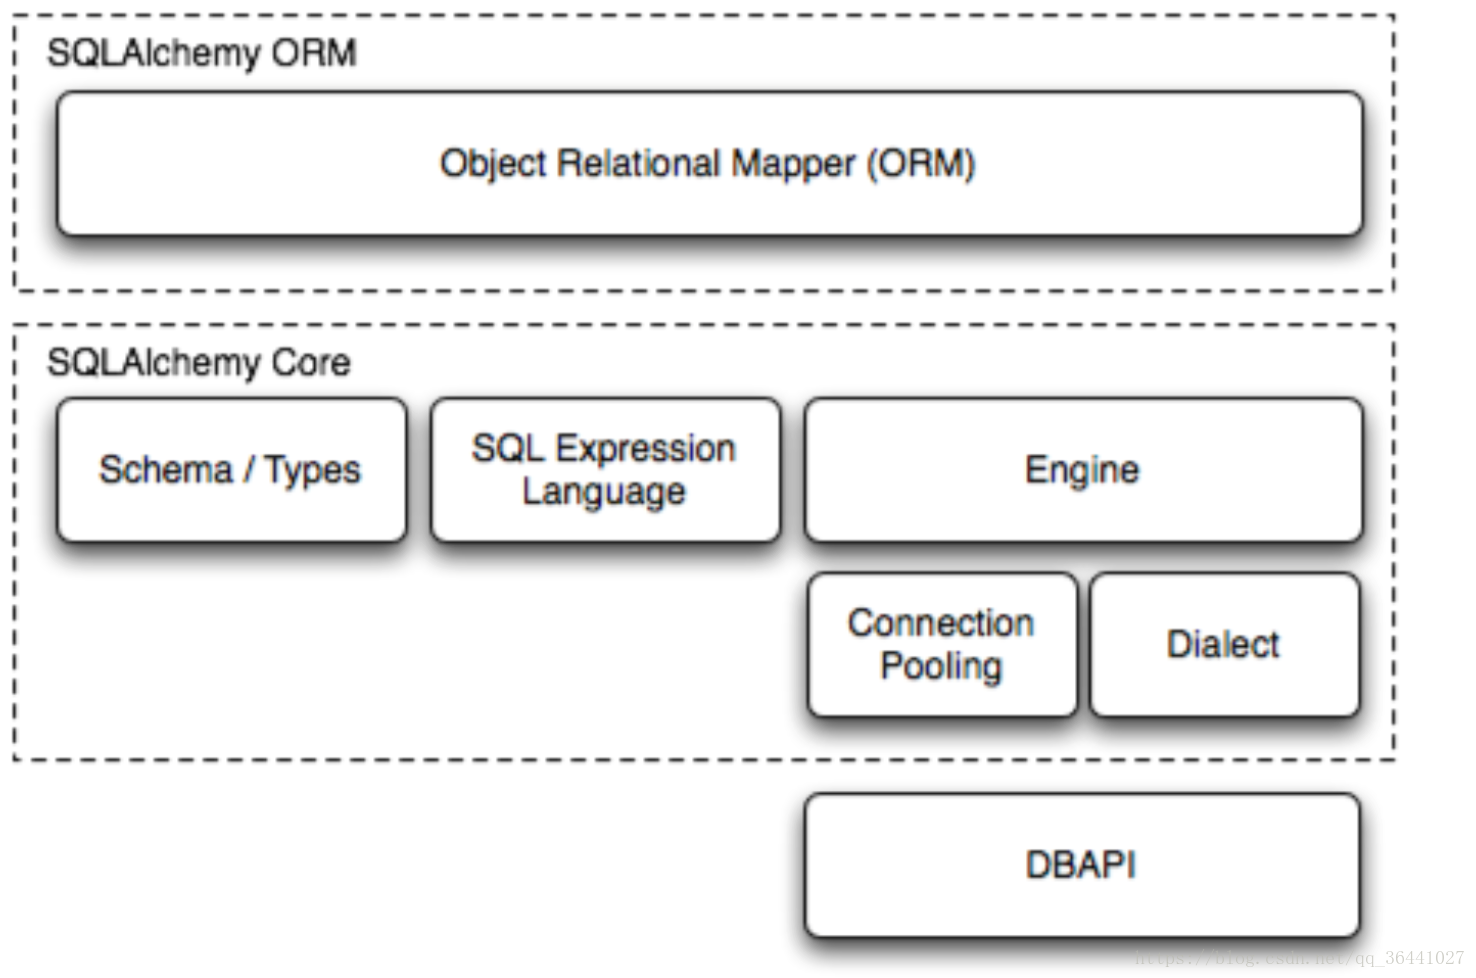
2.1.3 SQLAlchemy架构
2.1.4 ORM模型
1. ORM即对象关系映射
2. 数据库表是一个二维表,包含多行多列。把一个表的
内容用Python的数据结构表示出来的话,可以用一
个list表示多行,list的每一个元素是tuple,表示一行
记录
[
('1', 'Michael'),
('2', 'Bob'),
('3', 'Adam')
]
3.用tuple表示一行很难看出表的结构。如果把一个
tuple用class实例来表示,就可以更容易地看出表的
结构来
class User(object):
def __init__(self, id, name):
self.id = id
self.name = name
2.2 数据库对象管理
2.2.1 连接mysql
1. 通过create_engine实现数据库的连接
from sqlalchemy import create_engine

engine=create_engine(
    'mysql+pymysql://root:[email protected]/tedu1804?charset=utf8',
    encoding='utf8',
    echo=True
)
2.2.2 声明映射
1.在使用ORM的时候,首先需要定义基类
from sqlalchemy.ext.declarative import declarative_base
Base=declarative_base()   #生成ORM映射基类
2.2.3 创建映射类
from sqlalchemy	import Column,Integer,String
class Department(Base):
    __tablename__='department'  #对应表名
    dep_id=Column(Integer,primary_key=True)  #dep_id字段
    dep_name=Column(String(20),unique=True,nullable=False)
2.2.4 创建会话类
1. ORM需要创建会话类来访问数据库
from sqlalchemy.orm import sessionmaker
Session=sessionmaker(bind=engine)  #创建会话类,用于连接数据库
2.2.5 外键约束
dep_id=Column(Integer,ForeignKey('department.dep_id'))2.2.6 通过ORM在数据库中创建表
1. 创建employees表
2. 创建部门表
3. 创建salary表
4. 表间创建恰当的关系
from sqlalchemy import create_engine,Column,Integer,String,Date, ForeignKey
from sqlalchemy.ext.declarative import declarative_base
from sqlalchemy.orm import sessionmaker

engine=create_engine(
    'mysql+pymysql://root:[email protected]/tedu1804?charset=utf8',
    encoding='utf8',
    echo=True
)

Base=declarative_base()   #生成ORM映射基类
Session=sessionmaker(bind=engine)  #创建会话类,用于连接数据库

class Department(Base):
    __tablename__='department'  #对应表名
    dep_id=Column(Integer,primary_key=True)  #dep_id字段
    dep_name=Column(String(20),unique=True,nullable=False)

    def __str__(self):
        return '<部门: %s>' % self.dep_name

class Employee(Base):
    __tablename__ = 'employee'  # 对应表名
    emp_id=Column(Integer,primary_key=True)
    emp_name=Column(String(20),nullable=False)
    gender=Column(String(6))
    birth_date=Column(Date)
    phone=Column(String(11),unique=True)
    email=Column(String(50),unique=True)
    dep_id=Column(Integer,ForeignKey('department.dep_id'))

    # def __str__(self):
    #     return '<员工:%s>' % self.emp_name

class salary(Base):
    __tablename__ = 'salary'  # 对应表名
    autoid=Column(Integer,primary_key=True)
    emp_id=Column(Integer,ForeignKey('employee.emp_id'))
    date=Column(Date)
    basic=Column(Integer)
    awards=Column(Integer)

if __name__ == '__main__':
    Base.metadata.create_all(engine)
2.2.7 添加数据
1. 分别在部门表、员工表和工资表中加入数据
2. 通过SQLAlchemy代码实现
3. 应用SQLAlchemy每次一行数据和每次可加入多行数据
from dbconn import Department, Employee, Session

session=Session()
# dep_dev=Department(dep_name='department')
# dep_hr=Department(dep_name='人事部')
# dep_op=Department(dep_name='运维部')

wh = Employee(
    emp_name='王贺',
    gender='male',
    birth_date='1993-1-1',
    phone='17788990020',
    email='[email protected]',
    dep_id=1
)
lj = Employee(
    emp_name='李俊',
    gender='male',
    birth_date='1995-10-1',
    phone='15255667788',
    email='[email protected]',
    dep_id=3
)

zzh = Employee(
    emp_name='赵子浩',
    gender='male',
    birth_date='1999-5-4',
    phone='13656789987',
    email='[email protected]',
    dep_id=3
)

# session.add_all([dep_dev,dep_hr,dep_op])
session.add_all([wh, lj, zzh])
session.commit()
session.close()
三、 SQLAlchemy进阶
3.1 查询操作
3.1.1 基本查询
1.通过session的query([args .. ])函数创建查询对象
from dbconn import Session,Department,Employee

session=Session()
query1=session.query(Department)
print(query1)
for instance in query1:
    print(instance)   #取出的是每个部门的实例
print(query1[0].dep_id) #打印第一个部门的名称
print('#'*40)
3.1.2 排序
1. 通过order_by()函数可以实现按指定字段排序
2. 通过[start index: end index]实现数据的提取
query2=session.query(Department).order_by(Department.dep_id)[2:5]
print(query2)
for instance in query2:
    print(instance)
3.1.3 结果过滤
1. SQLAlchemy常用过滤操作符
1.1 相等
query.filter(Employees.name=='john')
1.2 不相等
query.filter(Employees.name!='john')
1.3 模糊查询
query.filter(Employees.name.like(' %j '))
1.4 in
query.filter(new_emp.name.in_(['bob', 'john'])
1.5 not in
query.filter(~new_emp.name.in_(['bob', 'john'])
1.6 字段为空
query.filter(new_emp.name.is_(None))
1.7 字段不为空
query.filter(new_emp.name.isnot(None))
1.8 多重条件and
from sqlalchemy import and_
query.filter(and_(new_sal.basic>=10000,
new_sal.extra>=2000))
1.9 多重条件or
from sqlalchemy import or_
query.filter(or_(new_sal.basic>=10000,
new_sal.extra>=3000))
1.10 filter()函数可以叠加使用
query3=session.query(Department).filter(Department.dep_id>2).filter(Department.dep_id<4)
print(query7)
for dep in query7:
    print(dep)
3.1.4 查询对象返回值
• all()返回列表
• first()返回结果中的第一条记录
• one()取出所有记录,如果不是一条记录则抛出异常
• scalar()调用one(),返回第一列的值
3.1.5 聚合
1.通过count()方法,统计行数
print(session.query(Departments).count())3.1.6 多表查询
1. 通过join()方法实现多表查询
q = session.query(Employees.name, Departments.dep_name).join(Departments,
Employees.dep_id==Departments.dep_id )
print(q.all())
3.2 修改操作
3.2.1 更新数据
1. 通过session的update()方法更新
from dbconn import Session,Department

session=Session()

q1=session.query(Department).filter(Department.dep_id==1)
for i in q1:
    print(i)
q1.update({Department.dep_name:'技术部'})
session.commit()
session.close()
2. 通过会话的字段赋值更新
from dbconn import Session,Department

session=Session()
q2=session.query(Department).get(1)
print(q2)
q2.dep_name='department'
session.commit()
session.close()
3.3 删除记录
1. 通过会话的delete()方法进行记录删除
from dbconn import Session,Department

session=Session()
q2=session.query(Department).get(2)
session.delete(q1)
session.commit()
session.close()