引
什么叫高斯模糊效果,通俗地说,就是毛玻璃效果,从iOS 7以来,就频繁地被设计使用,如果用得好,效果会显得非常的好。我们来看一个例子:
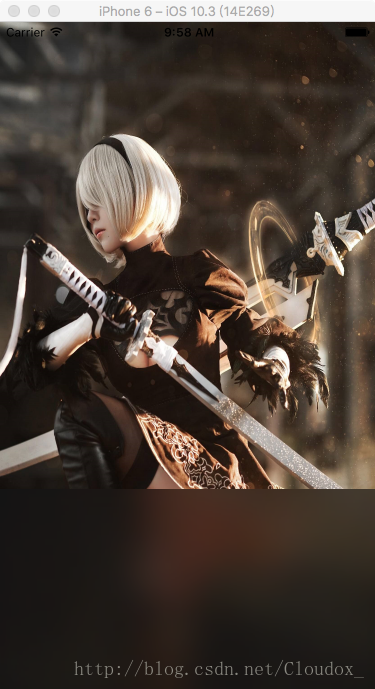
图中下面一小部分就是高斯模糊效果。要实现也很简单,iOS自身就支持这种效果。
iOS 7 UIToolbar
iOS 7开始,支持用UIToolbar来实现这种效果,代码很简单:
UIImageView *imageView = [[UIImageView alloc] initWithFrame:CGRectMake(0, 0, [UIScreen mainScreen].bounds.size.width, [UIScreen mainScreen].bounds.size.height)];
imageView.image = [UIImage imageNamed:@"neo.jpeg"];
[self.view addSubview:imageView];
/* UIBarStyle枚举:
UIBarStyleDefault
UIBarStyleBlack
UIBarStyleBlackOpaque
UIBarStyleBlackTranslucent
*/
UIToolbar *toolbar = [[UIToolbar alloc] initWithFrame:CGRectMake(0, imageView.frame.size.height * 0.7, imageView.frame.size.width, imageView.frame.size.height * 0.3)];
toolbar.barStyle = UIBarStyleBlackTranslucent;
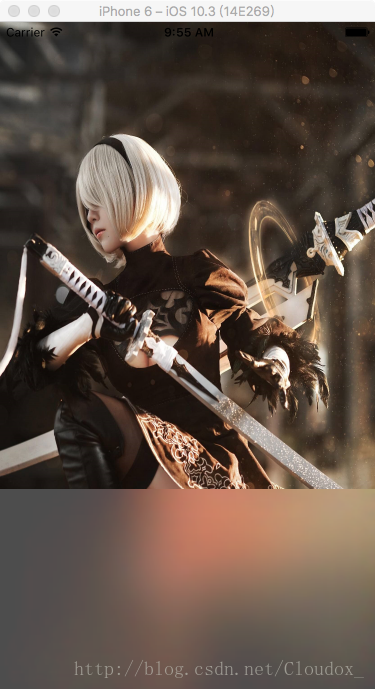
[self.view addSubview:toolbar];这个style实现出来就是这个效果:

事实上除了UIBarStyleDefault风格是白亮的模糊不太好看外,其他三种风格我都看不出有什么差别。
我们可以看一下UI层级:
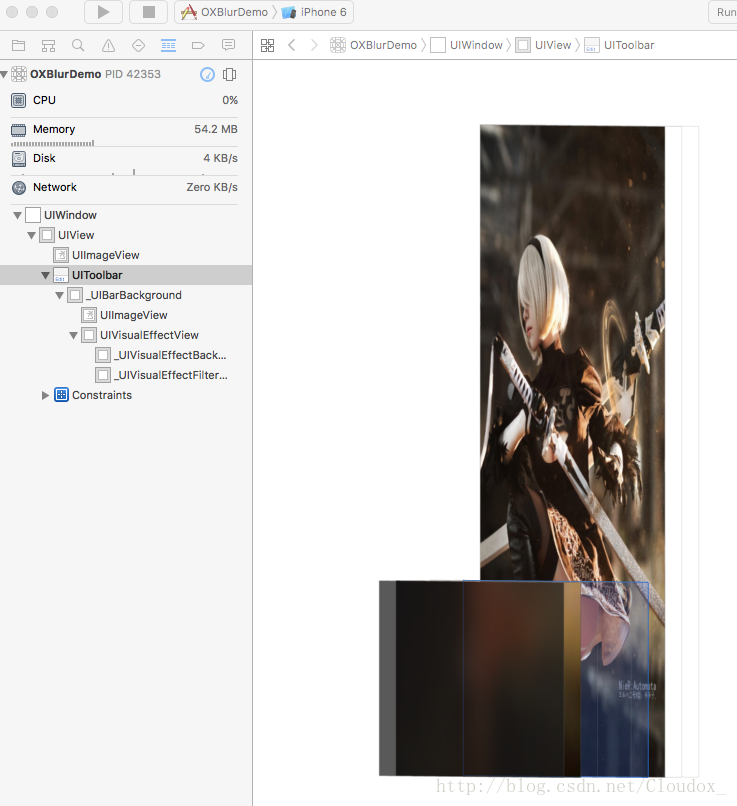
事实上就是在原本的图片视图上加了一层UIVisualEffectView,等于是覆盖了一块毛玻璃,很好理解,也很好用。
iOS 8 UIBlurEffect
从iOS 8开始,苹果开始支持一个新的实现方式——UIBlurEffect,苹果也推荐这种方式,当然如果你的应用要支持iOS 7,那还是用上一种。
这种方式的代码一样很简单,在代码中就直接用到了我们上面层级中看到的UIVisualEffectView,代码如下:
    UIImageView *imageView = [[UIImageView alloc] initWithFrame:CGRectMake(0, 0, [UIScreen mainScreen].bounds.size.width, [UIScreen mainScreen].bounds.size.height)];
    imageView.image = [UIImage imageNamed:@"neo.jpeg"];
    [self.view addSubview:imageView];

    /* UIBlurEffectStyle枚举
     UIBlurEffectStyleRegular
     UIBlurEffectStyleLight
     UIBlurEffectStyleDark
     UIBlurEffectStyleProminent
     UIBlurEffectStyleExtraLight
    */
    UIBlurEffect *effect = [UIBlurEffect effectWithStyle:UIBlurEffectStyleLight];
    UIVisualEffectView *effectView = [[UIVisualEffectView alloc] initWithEffect:effect];
    effectView.frame = CGRectMake(0, imageView.frame.size.height * 0.7, imageView.frame.size.width, imageView.frame.size.height * 0.3);
    [self.view addSubview:effectView];
确实这种方式的效果更加自然:
再看一下UI层级:
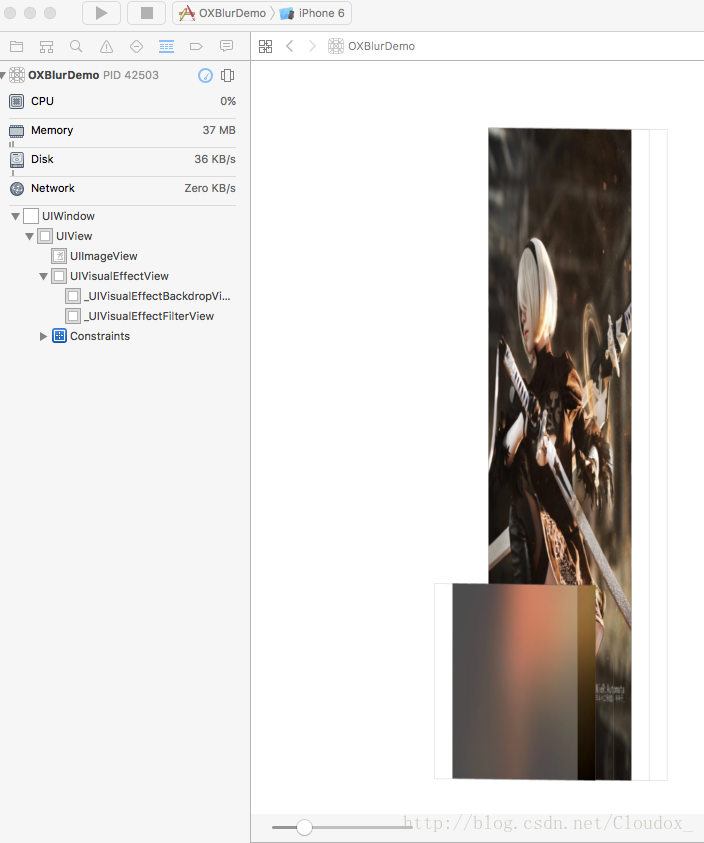
对比一下两种实现方式,其实是不一样的,感兴趣的可以研究一下原理。
我们把风格换成UIBlurEffectStyleDark后是这样的:
和UIToolbar的实现效果相比的话,要说没区别也有一点区别,总之就是觉得好看一些,所以还是推荐用这种方式。
结
不得不说毛玻璃(高斯模糊)效果配上好图片后的效果真的很赞,我可以玩很久,其实实现方式真的很简单,大家可以多多应用到自己的应用中去,相信一定会加分不少!
版权所有:http://blog.csdn.net/cloudox_
实例工程:https://github.com/Cloudox/OXBlurDemo
参考:http://www.cnblogs.com/arvin-sir/p/5131358.html?utm_source=tuicool&utm_medium=referral