下载 wxWidgets
从 wxWidgets官方网站 下载 3.1.0 版本的 Windows ZIP Source Code,解压。
我本机解压的目录是:
C:\Lib\wxWidgets\v3.1.0
设置环境变量
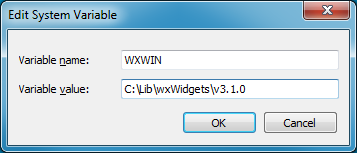
进入 Control Panel\System and Security\System,点击“Advanced system settings”。在 Advanced | Environment Variables中,增加或者编辑系统变量:WXWIN = C:\Lib\wxWidgets\v3.1.0
用nmake编译wxWidgets
打开 Visual Studio 2015 的 Windows Desktop Command Prompts:
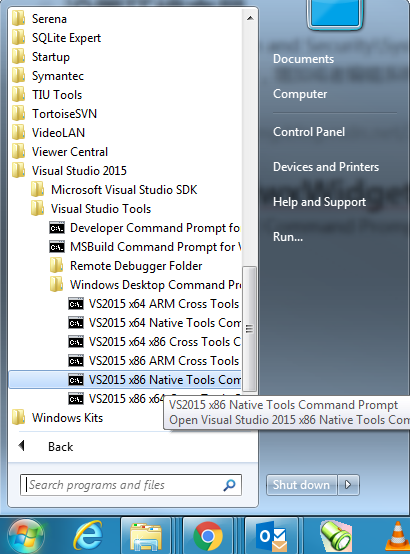
分别 以 Administrator 身份 打开 VS2015 x86 Native Tools Command Prompt 和 VS2015 x64 Native Tools Command Prompt。注意,如果不以 Administrator 身份打开,可能会遇到无法写某些文件的权限问题。
编译 x86 版本
在 VS2015 x86 Native Tools Command Prompt 中,先执行
cd /d %WXWIN%\build\msw
然后再通过 nmake 按照以下编译选项进行编译:
| Version | nmake command |
|---|---|
| Static libraries x86 Debug | nmake /f makefile.vc std=C++11 SHARED=0 BUILD=debug TARGET_CPU=X86 /A |
| Static libraries x86 Release | nmake /f makefile.vc std=C++11 SHARED=0 BUILD=release TARGET_CPU=X86 /A |
| Dynamic libraries x86 Debug | nmake /f makefile.vc std=C++11 SHARED=1 BUILD=debug TARGET_CPU=X86 /A |
| Dynamic libraries x86 Release | nmake /f makefile.vc std=C++11 SHARED=1 BUILD=release TARGET_CPU=X86 /A |
编译 x64 版本
在 VS2015 x64 Native Tools Command Prompt 中,先执行

cd /d %WXWIN%\build\msw
然后再通过 nmake 按照以下编译选项进行编译:
| Version | nmake command |
|---|---|
| Static libraries x64 Debug | nmake /f makefile.vc std=C++11 SHARED=0 BUILD=debug TARGET_CPU=X64 /A |
| Static libraries x64 Release | nmake /f makefile.vc std=C++11 SHARED=0 BUILD=release TARGET_CPU=X64 /A |
| Dynamic libraries x64 Debug | nmake /f makefile.vc std=C++11 SHARED=1 BUILD=debug TARGET_CPU=X64 /A |
| Dynamic libraries x64 Release | nmake /f makefile.vc std=C++11 SHARED=1 BUILD=release TARGET_CPU=X64 /A |
编译结果
编译好后,在这个目录下可看到刚刚编译出来的.lib或.dll:
%WXWIN%\lib\vc_dll
%WXWIN%\lib\vc_lib
%WXWIN%\lib\vc_x64_dll
%WXWIN%\lib\vc_x64_lib