导言:制作登录页是web开发中的第一步,而这次实战就要说一下编写登录页的主要步骤:
1)登录页的基础准备
2)访问登录页(重构SpringMVC)
3)账号密码登录并跳转页面
4)设置拦截器
5)页面国际化
6)多用户登录
7)remember me
(1)登录页的基础准备
首先我们就要上网找登录页的资源,下载到电脑中,里面包含了html页面还有css,js渲染文件。再将其导入(复制粘贴)到项目中:
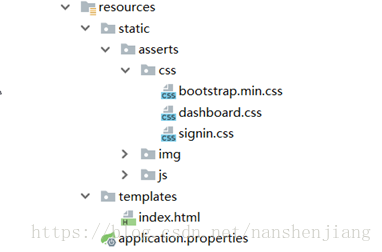
我这次找到首页的代码样式(单纯运行下面代码是不会有图形界面的,要有css,js,图片的支持)为:
<!DOCTYPE html>
<html lang="en">
<head>
<meta http-equiv="Content-Type" content="text/html; charset=UTF-8">
<meta name="viewport" content="width=device-width, initial-scale=1, shrink-to-fit=no">
<meta name="description" content="">
<meta name="author" content="">
<title>Signin Template for Bootstrap</title>
<!-- Bootstrap core CSS -->
<link href="asserts/css/bootstrap.min.css" rel="stylesheet">
<!-- Custom styles for this template -->
<link href="asserts/css/signin.css" rel="stylesheet">
</head>
<body class="text-center">
<form class="form-signin" action="dashboard.html">
<img class="mb-4" src="asserts/img/bootstrap-solid.svg" alt="" width="72" height="72">
<h1 class="h3 mb-3 font-weight-normal">Please sign in</h1>
<label class="sr-only">Username</label>
<input type="text" class="form-control" placeholder="Username" required="" autofocus="">
<label class="sr-only">Password</label>
<input type="password" class="form-control" placeholder="Password" required="">
<div class="checkbox mb-3">
<label>
<input type="checkbox" value="remember-me"> Remember me
</label>
</div>
<button class="btn btn-lg btn-primary btn-block" type="submit">Sign in</button>
<p class="mt-5 mb-3 text-muted">© 2017-2018</p>
<a class="btn btn-sm">中文</a>
<a class="btn btn-sm">English</a>
</form>
</body>
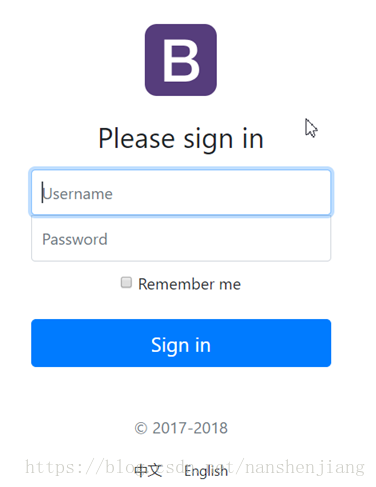
</html>运行的样式为:
现在是已经将登录页导入到项目中了,接下来我们要做一些准备,其中我们先要导入thymeleaf依赖进行渲染页面:
<dependency>

   <groupId>org.springframework.boot</groupId>

   <artifactId>spring-boot-starter-thymeleaf</artifactId>

</dependency>然后在该界面中加入thymeleaf的语法提示:
<html lang="en" xmlns:th="http://www.thymeleaf.org">
然后我们观察html中有一行:
<!-- Bootstrap core CSS -->
      <link href="asserts/css/bootstrap.min.css" rel="stylesheet">
是使用Bootstrap前端框架的,所以我们要导入bootstrap的依赖:
<dependency>

    <groupId>org.webjars</groupId>

    <artifactId>bootstrap</artifactId>

    <version>4.1.3</version>

</dependency>然后修改bootstrap原本指向的资源文件,asserts/css/bootstrap.min.css指向的是我们导入的asserts中的bootstrap文件,我们可以修改将其变为我们导入的bootstrap依赖中的文件,观察Maven目录中:
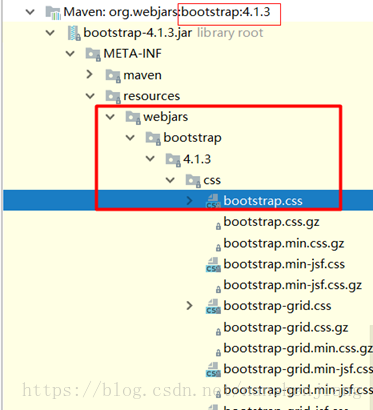
其中resources下就是webjars可以导入的,修改后为:
<link href="asserts/css/bootstrap.min.css" th:href="@{/webjars/bootstrap/4.1.3/css/bootstrap.css}" rel="stylesheet">
除了导入的webjars,我们还要修改一些其他的资源导入文件路径,比如代码中:
<!-- Custom styles for this template -->
<link href="asserts/css/signin.css " rel="stylesheet">
<img class="mb-4" src="asserts/img/bootstrap-solid.svg" alt="" width="72" height="72">分别修改后为:
<link href="asserts/css/signin.css "th:href="@{/asserts/css/signin.css}" rel="stylesheet"><img class="mb-4" src="asserts/img/bootstrap-solid.svg" th:src="@{/asserts/img/bootstrap-solid.svg}" alt="" width="72" height="72">这是使用了thymeleaf中的表达式@{},好处就是如果以后我们登录访问的页面前加入了新的路径(在配置文件中加入server.servlet.context-path=/xxx),也不会受到影响。
(2)访问登录页(重构SpringMVC)
之前的博客曾经说过:只要将首页命名为index.htem,同时放入静态资源文件路径,springMVC会自动识别,访问localhost:8080即可访问到登录页。
但是如果我们将登录页不命名为index.html,命名为其他,那是否有方法通过访问localhost:8080访问登录页。
假如我们命名为login.html:

则我们仅需要在controller中编写:
@Controller  //不可以是RestController
public class controller {
    @RequestMapping({"/","/login.html"})
    public String index(){
        return "login";
    }
}
此时运行项目,访问localhost:8080或者localhost:8080/login.html都可以访问到项目。
除了这种方法,这次来说一个使用WebMvcConfigurer扩展SpringMVC的方法:
//继承接口WebMvcConfigurer实现管理SpringMvc
@Configuration
public class ViewControllerimpl implements WebMvcConfigurer {

    //第一种实现方法:编写addViewControllers方法
    @Override
    public void addViewControllers(ViewControllerRegistry registry) {
        //将login.html映射到路径urlpath为:"/"上
        registry.addViewController("/").setViewName("login");
    }

    //第二种实现方法:添加WebMvcConfigurer组件
    @Bean
    public WebMvcConfigurer webMvcConfigurer() {
        WebMvcConfigurer adapter = new WebMvcConfigurer() {
            @Override
            public void addViewControllers(ViewControllerRegistry registry) {
                //将login.html映射到路径urlpath为:"/"上
                registry.addViewController("/").setViewName("login");
                registry.addViewController("/login.html").setViewName("login");
            }
        };
        return adapter;
    }
}注:Springboot2.0将原本1.5版本中手动配置springMVC的类WebMvcConfigurerAdapter取消了,取而代之的是接口WebMvcConfigurer
下面是WebMvcConfigurer的额外知识:
(1)假如在类外加上@EnableWebMvc,则该类会全面接管springMVC,导致原本SpringMVC做的配置失效,较少使用该注解。
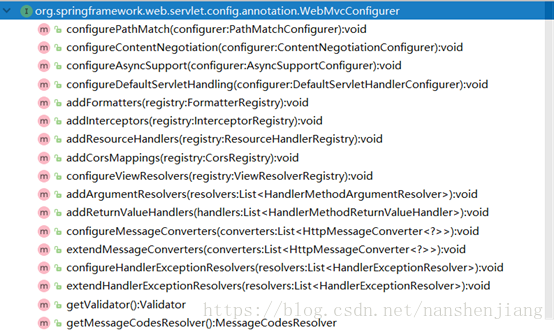
(2)WebMvcConfigurer还有其他修改SpringMVC的方法:
(3)账号密码登录并跳转页面
先要将主页面(也就是要跳转到的页面)及css,js,图片放入静态资源文件中:

首先要先做准备,先在登录页面的form表单中提交要登录的地址设置为/user/login,及提交的形式为post请求,原本为:
<form class="form-signin" action="dashboard.html">修改后为:
<form class="form-signin" action="dashboard.html" th:action="@{/user/login}" method="post">
除此之外,由于用户名和密码要提交,所以我们在用户名和密码中添加上name,原本为:
<input type="text" class="form-control" placeholder="Username" required="" autofocus="">
<input type="password" class="form-control" placeholder="Password" required="">
修改后为:
<input type="text" name="username" class="form-control" placeholder="Username" required="" autofocus="">
<input type="password" name="password" class="form-control" placeholder="Password" required="">
这时候就可以去编写controller:
@PostMapping("/user/login")
public String logininmain(@RequestParam("username") String username,
                          @RequestParam("password") String password){
    if("admin".equals(username)&&"123456".equals(password)) {
        //设置账号为:admin,密码为:123456
        return "dashboard";
    }
    else{
        //账号或者密码错误,返回主页面
        return "login";
    }
}
这时候算是完成了登录页面,假设我们这时候输入正确的账号密码登录进去,会发现页面无法渲染:

而我们刷新页面也会弹出需要重新提交表单:
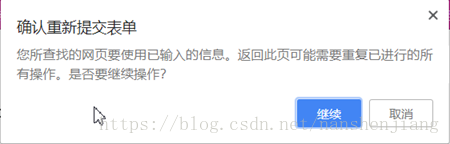
这时候我们需要的是进行重定向,也就是controller中的返回值是重定向后的页面,同时我们也给dashboard.html页面进行重新设置映射路径:
在WebMvcConfigurer添加:
registry.addViewController("/main.html").setViewName("dashboard");在controller中修改为:
@PostMapping("/user/login")
public String logininmain(@RequestParam("username") String username,
                          @RequestParam("password") String password){
    if("admin".equals(username)&&"123456".equals(password)) {
        //设置账号为:admin,密码为:123456
        //redirect是重定向
        return "redirect:/main.html";
    }
    else{
        //账号或者密码错误,返回主页面
        return "login";
    }
}
接下来,我们在输入错误的账号或者密码时候提示错误信息,这时候我们要去修改html代码,实现的效果为:

我们要在“请登录”和“用户名”之间添加p标签作为提示信息:
<!--加入p标签,标签的颜色设置为红色,标签的内容由controller中msg获得-->
<!--使用if方法,同时变量表达式中的内置工具判断msg是否为空-->
<p style="color: red" th:text="${msg}" th:if="${not #strings.isEmpty(msg)}"></p>
同时在controller中设置变量msg:
@PostMapping("/user/login")
public String logininmain(@RequestParam("username") String username,
                          @RequestParam("password") String password,
                          Map<String,Object> map){
    if("admin".equals(username)&&"123456".equals(password)) {
        //设置账号为:admin,密码为:123456
        return "redirect:/main.html";
    }
    else{
        //错误时设置msg
        map.put("msg","账号或者密码出错");
        //账号或者密码错误,返回主页面
        return "login";
    }
}
运行即可成功!
(4)设置拦截器
设置拦截器可以解决权限验证问题,假如我刚才进入的主页面我将地址记录下来,则下次我进入该界面,无需通过登录页,直接通过输入地址即可进入,这就失去了登录的作用了。
除此之外,拦截器还可以解决乱码问题(用request,response参数去设置编码)。
拦截器是实现接口HandlerInterceptor,编写:
public class intercetorConfig implements HandlerInterceptor {
    @Override
    public boolean preHandle(HttpServletRequest request, HttpServletResponse response, Object handler) throws Exception {
        return false;
    }

    @Override
    public void postHandle(HttpServletRequest request, HttpServletResponse response, Object handler, ModelAndView modelAndView) throws Exception {
    }

    @Override
    public void afterCompletion(HttpServletRequest request, HttpServletResponse response, Object handler, Exception ex) throws Exception {
    }
}
内有三个要实现的方法,而实现权限认证编写preHandle方法即可:
设置拦截器步骤:
1 . 首先在controller中将username注入到session中(通过HttpSession来实现,它的方法setattribute()用于保存session值,getarribute()用于取得保存值):
@PostMapping("/user/login")
    public String logininmain(@RequestParam("username") String username,
                              @RequestParam("password") String password,
                              Map<String,Object> map,
                              //设置变量session
                              HttpSession session){
        if("admin".equals(username)&&"123456".equals(password)) {
            //保存username的值设置名为user
            session.setAttribute("user",username);
            //设置账号为:admin,密码为:123456
            return "redirect:/main.html";
        }
        else{
            //错误时设置msg
            map.put("msg","账号或者密码出错");
            //账号或者密码错误,返回主页面
            return "login";
        }
    }
2.编写HandlerInterceptor中preHandle方法:
public class intercetorConfig implements HandlerInterceptor {
    @Override
    public boolean preHandle(HttpServletRequest request, HttpServletResponse response, Object handler) throws Exception {
        //通过getAttribute获取session的值
        Object user = request.getSession().getAttribute("user");
        //判断是否有保存值,有即证明登录成功
        if(user!=null){
             //session不空,表示有保存值,有登陆,放行
             return true;
        }else{
             //没有值,没有登录,返回到登录页面:
            request.getRequestDispatcher("/login.html").forward(request,response);
            //同时设置错误信息
            request.setAttribute("msg","没有权限");
             return false;
        }
    }

    @Override
    public void postHandle(HttpServletRequest request, HttpServletResponse response, Object handler, ModelAndView modelAndView) throws Exception {
    }

    @Override
    public void afterCompletion(HttpServletRequest request, HttpServletResponse response, Object handler, Exception ex) throws Exception {
    }
}
注意:一定要先设置错误信息,再进行页面返回,不然错误信息不会导入进项目。
3.在springMVC(在接口WebMvcConfigurer)中注册拦截器:
//继承接口WebMvcConfigurer实现管理SpringMvc
@Configuration
public class ViewControllerimpl implements WebMvcConfigurer {

    //第一种方法:直接编写实现方法
    @Override
    public void addInterceptors(InterceptorRegistry registry) {
        //排除"/"下的全部路径,除了"/login.html","/","/user/login"
        registry.addInterceptor(new intercetorConfig()).addPathPatterns("/**")
                .excludePathPatterns("/login.html","/","/user/login");
    }

    //第二种实现方法:添加WebMvcConfigurer组件
    @Bean
    public WebMvcConfigurer webMvcConfigurer() {
        WebMvcConfigurer adapter = new WebMvcConfigurer() {
            @Override
            public void addInterceptors(InterceptorRegistry registry) {
                //排除"/"下的全部路径,除了"/login.html","/","/user/login"
                registry.addInterceptor(new intercetorConfig()).addPathPatterns("/**")
                        .excludePathPatterns("/login.html","/","/user/login");
            }
        };
        return adapter;
    }
}
注:springboot2.0中使用拦截器会将静态资源文件夹中拦截,解决方法看博客
修改后的完整代码:
//继承接口WebMvcConfigurer实现管理SpringMvc
@Configuration
public class ViewControllerimpl implements WebMvcConfigurer {

    //第一种实现方法:编写addViewControllers方法
    @Override
    public void addViewControllers(ViewControllerRegistry registry) {
        //将login.html映射到路径urlpath为:"/"上
        registry.addViewController("/").setViewName("login");
        registry.addViewController("/login.html").setViewName("login");
        registry.addViewController("/main.html").setViewName("dashboard");
    }


    //第一种方法:直接编写实现方法
    @Override
    public void addInterceptors(InterceptorRegistry registry) {
        //排除"/"下的全部路径,除了"/login.html","/","/user/login"
        registry.addInterceptor(new intercetorConfig()).addPathPatterns("/**")
                .excludePathPatterns("/login.html","/","/user/login","/static/**");
    }
    //解决静态资源文件夹被拦截
    @Override
    public void addResourceHandlers(ResourceHandlerRegistry registry) {
        registry.addResourceHandler("/static/**").addResourceLocations("classpath:/static/");
        WebMvcConfigurer.super.addResourceHandlers(registry);
    }


    //第二种实现方法:添加WebMvcConfigurer组件
    @Bean
    public WebMvcConfigurer webMvcConfigurer() {
        WebMvcConfigurer adapter = new WebMvcConfigurer() {
            @Override
            public void addInterceptors(InterceptorRegistry registry) {
                //排除"/"下的全部路径,除了"/login.html","/","/user/login"
                registry.addInterceptor(new intercetorConfig()).addPathPatterns("/**")
                        .excludePathPatterns("/login.html","/","/user/login","/static/**");
            }

            @Override
            public void addResourceHandlers(ResourceHandlerRegistry registry) {
                registry.addResourceHandler("/static/**").addResourceLocations("classpath:/static/");
                WebMvcConfigurer.super.addResourceHandlers(registry);
            }

            @Override
            public void addViewControllers(ViewControllerRegistry registry) {
                //将login.html映射到路径urlpath为:"/"上
                registry.addViewController("/").setViewName("login");
                registry.addViewController("/login.html").setViewName("login");
                registry.addViewController("/main.html").setViewName("dashboard");
            }
        };
        return adapter;
    }
}
(5)页面国际化
国际化指的就是页面的文字是根据浏览器指定的国家语言而去设置,根据不同语言页面的文字也做相应的处理。而Spring Boot为国际化做了准备,仅需要少少的步骤就可以完成国际化操作。
首先编写国际化配置文件:
我建立一个文件夹为:i18n,里面首先设置了普通的配置文件:login.properties,而后为了设置两个语言:中文和美式英语,则配置了两个国际化配置文件:login_zn_CN.properties和login_en_US.properties,而后IDEA根据国际化配置文件固定格式(语言编号_国家)自动变为配置文件,目录如下:
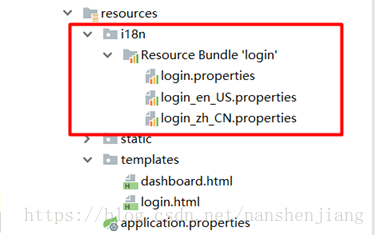
注意:由于国际化配置文件默认放在message文件夹中,而我修改为i18n,则需要在application.properties中配置:
#国际化文件位置配置
spring.messages.basename=i18n.login
而后打开其中的一个国际化配置文件:
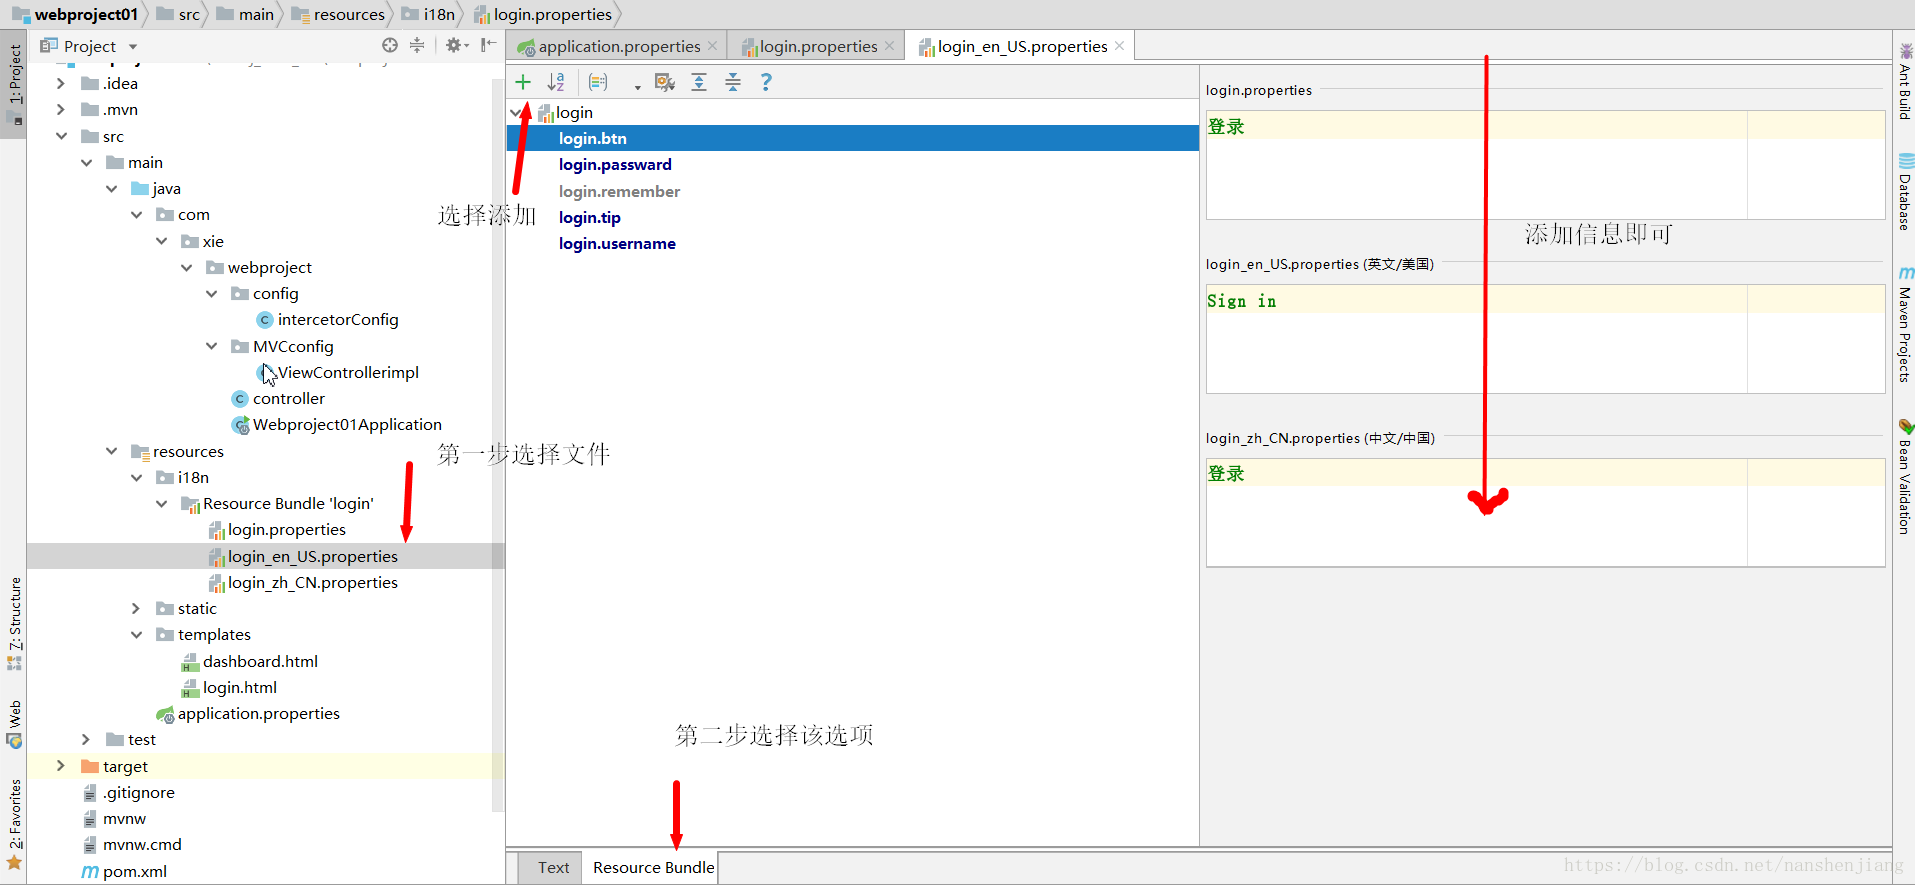
往里面添加需要变为国际化的变量,可以查看登录页的代码,将需要变化的文字添加变量即可。
然后修改登录页的html文件即可(全部要改变的量都要变化),其中我们之前学习thymeleaf的时候说过:#{...}用于国际化,而现在我们就是加入表达式#{...}修改原本的值:
比如,原先为:
<h1 class="h3 mb-3 font-weight-normal" >Please sign in</h1>添加上刚刚设置的变量:
<h1 class="h3 mb-3 font-weight-normal" th:text="#{login.tip}">Please sign in</h1>全篇修改完以后变为:
<!DOCTYPE html>
<html lang="en"  xmlns:th="http://www.thymeleaf.org">

   <head>
      <meta http-equiv="Content-Type" content="text/html; charset=UTF-8">
      <meta name="viewport" content="width=device-width, initial-scale=1, shrink-to-fit=no">
      <meta name="description" content="">
      <meta name="author" content="">
      <title>Signin Template for Bootstrap</title>
      <!-- Bootstrap core CSS -->
      <link href="asserts/css/bootstrap.min.css" th:href="@{/webjars/bootstrap/4.1.3/css/bootstrap.css}" rel="stylesheet">
      <!-- Custom styles for this template -->
      <link href="asserts/css/signin.css "th:href="@{/asserts/css/signin.css}" rel="stylesheet">
   </head>

   <body class="text-center">
      <form class="form-signin" action="dashboard.html" th:action="@{/user/login}" method="post">
         <img class="mb-4" src="asserts/img/bootstrap-solid.svg" th:src="@{/asserts/img/bootstrap-solid.svg}" alt="" width="72" height="72">
         <h1 class="h3 mb-3 font-weight-normal" th:text="#{login.tip}">Please sign in</h1>
         <!--加入p标签,标签的颜色设置为红色,标签的内容由controller中msg获得-->
         <!--使用if方法,同时变量表达式中的内置工具判断msg是否为空-->
         <p style="color: red" th:text="${msg}" th:if="${not #strings.isEmpty(msg)}"></p>
         <label class="sr-only" th:text="#{login.username}">Username</label>
         <input type="text" name="username" class="form-control" placeholder="Username" th:placeholder="#{login.username}" required="" autofocus="">
         <label class="sr-only"th:text="#{login.passward}">Password</label>
         <input type="password" name="password" class="form-control" placeholder="Password" th:placeholder="#{login.passward}" required="">
         <div class="checkbox mb-3">
            <label>
          <input type="checkbox" value="remember-me">[[#{login.remember}]]
        </label>
         </div>
         <button class="btn btn-lg btn-primary btn-block" type="submit" th:text="#{login.btn}">Sign in</button>
         <p class="mt-5 mb-3 text-muted">© 2017-2018</p>
         <a class="btn btn-sm">中文</a>
         <a class="btn btn-sm">English</a>
      </form>

   </body>

</html>
这时候我们的国际化设置就已经完成了,我们通过修改浏览器默认的语言便可以修改我们登录页的语言。
但如果我们需要通过按中文和English切换:
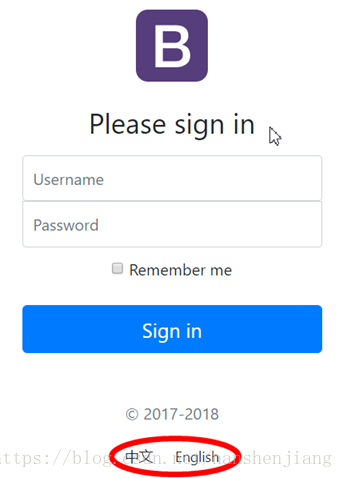
则需要更多的操作。
首先我们要区分,所以在按中文和English时要返回一些信息,所以我们要在登录页的html文件中做修改:
原本为:
<a class="btn btn-sm" ">中文</a>
<a class="btn btn-sm" ">English</a>
修改后为:
<a class="btn btn-sm" th:href="@{/login.html?lan=zh_CN}">中文</a>
<a class="btn btn-sm" th:href="@{/login.html?lan=en_US}">English</a>
我们定义了一个变量lan来接收按钮返回的值,而我们在按中文的时候,浏览器自动变为:
这时候我们编写接口LocaleResolver:
public class MyLocaleResolver implements LocaleResolver {
    @Override
    public Locale resolveLocale(HttpServletRequest httpServletRequest) {
        //设立变量来接收按钮返回的值,返回的值的类型为xx_xx
        String lan = httpServletRequest.getParameter("lan");
        Locale locale=Locale.getDefault();//获取系统默认的locale值
        if(!StringUtils.isEmpty(lan)){  //假如lan不为空,即按了按钮
            //进行截串,以"_"为区分
            String[] split = lan.split("_");
            //将截串后的两个字段放入locale中
            locale=new Locale(split[0],split[1]);
        }
        return locale;
    }

    @Override
    public void setLocale(HttpServletRequest httpServletRequest, HttpServletResponse httpServletResponse, Locale locale) {

    }
}
最后将LocaleResolver在WebMvcConfigurer中激活:
//激活LocaleResolver
@Bean
public LocaleResolver localeResolver(){
    return new MyLocaleResolver();
}
运行代码即可成功
(6)多用户登录
多用户登录的话涉及到了spring security中的权限管理,这在我的博客学习笔记——spring boot(9)中有说明,有需要的同学可以去那篇博客学习,多用户多账号都是通过数据库存储,同时通过配置类进行认证。
(7)remember me
同样的,remember me的功能在博客学习笔记——spring boot(9)中有说明,因为spring security是集成了remember me的功能,实现起来十分简单。首先需要在spring security配置类中的方法configure(HttpSecurity http)中声明rememberMe().key(KEY),其中KEY是自定义的值。然后在前端页面中remember me的input中声明name为:remember-me即可实现,具体可以观察我的博客。