一、SpringBoot介绍
1 什么是Spring Boot
Spring Boot是一个框架,一种全新的编程规范,他的生产简化了框架的使用,所谓简化是指简化了Spring众多框架中所需的大量且繁琐对的配置文件,所以Spring Boot是一个服务于框架的框架,服务范围是简化配置文件。所以从本质上来说,Spring Boot其实就是Spring框架的另一种表现形式。
2 Spring Boot特征
- 使用Spring Boot可以创建独立的Spring应用程序
- 在Spring Boot中直接嵌入了Tomcat、Jetty、Undertow等Web容器,所以在使用SpringBoot 做 Web 开发时不需要部署 WAR 文件
- 通过提供自己的启动器(Starter)依赖,简化项目构建配置
- 尽量的自动配置 Spring 和第三方库
- 提供了生产就绪特征,如:度量指标,运行状况检查和外部化配置
- 绝对没有代码生成,也不需要 XML 配置文件
3 Spring Boot 版本介绍
SNAPSHOT:快照版,即开发版。
CURRENT:最新版,但是不一定是稳定版。
GA:General Availability,正式发布的版本。
二、 创建基于 Spring Boot 的项目
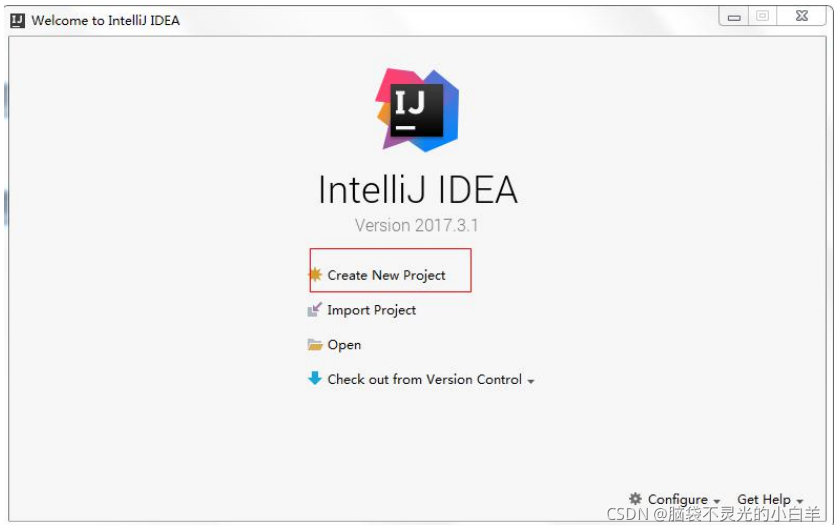
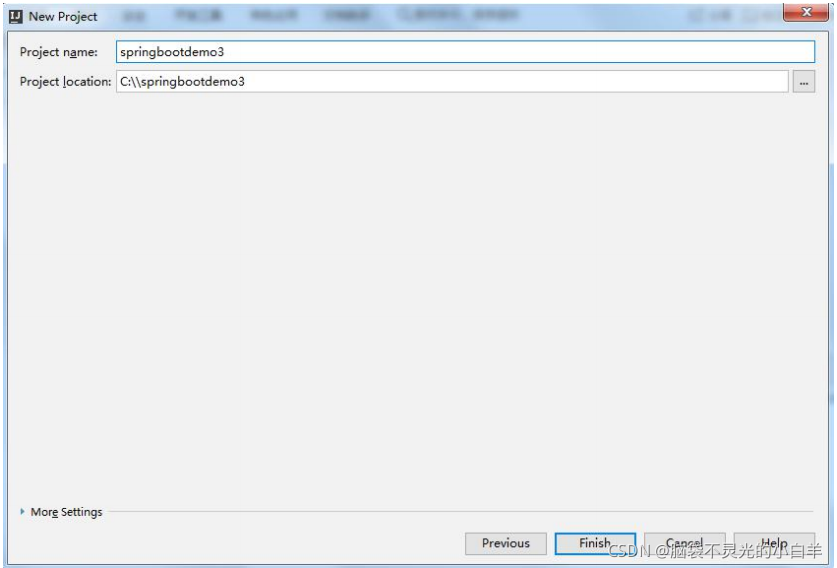
1 通过官网创建项目


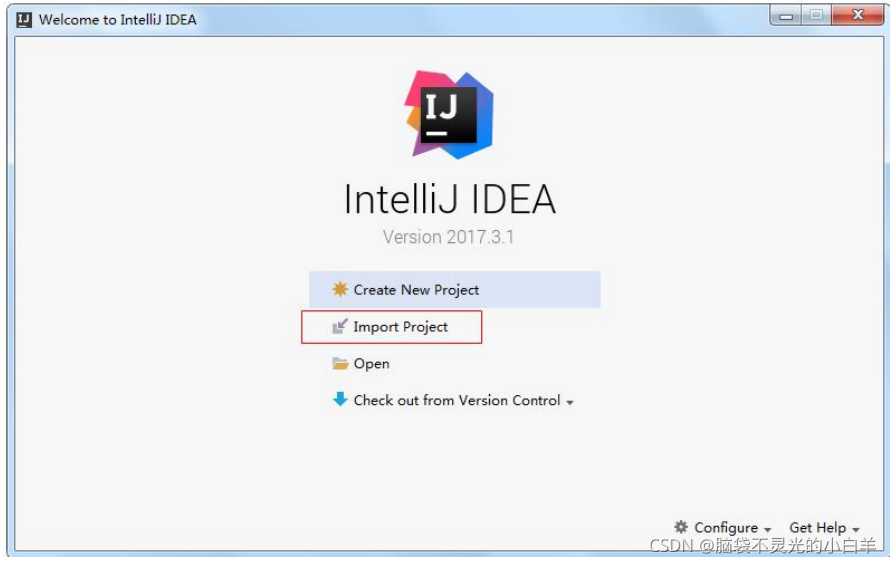
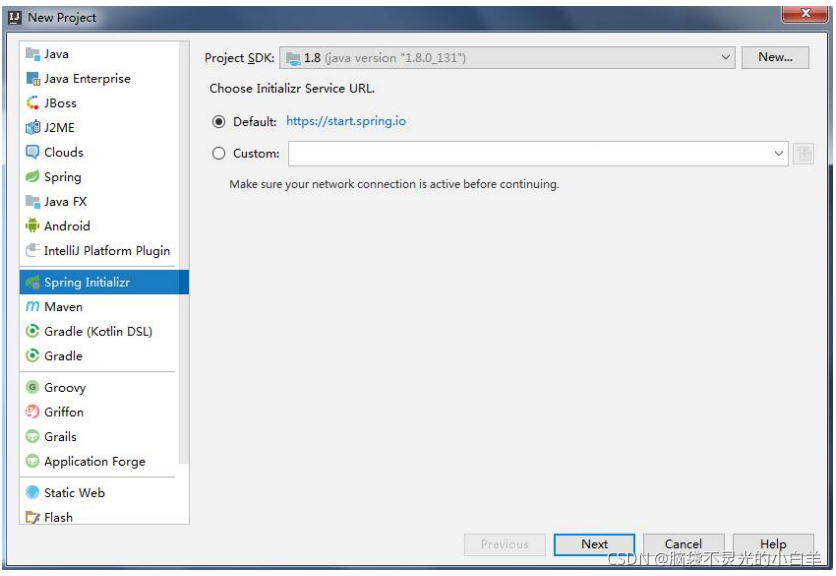
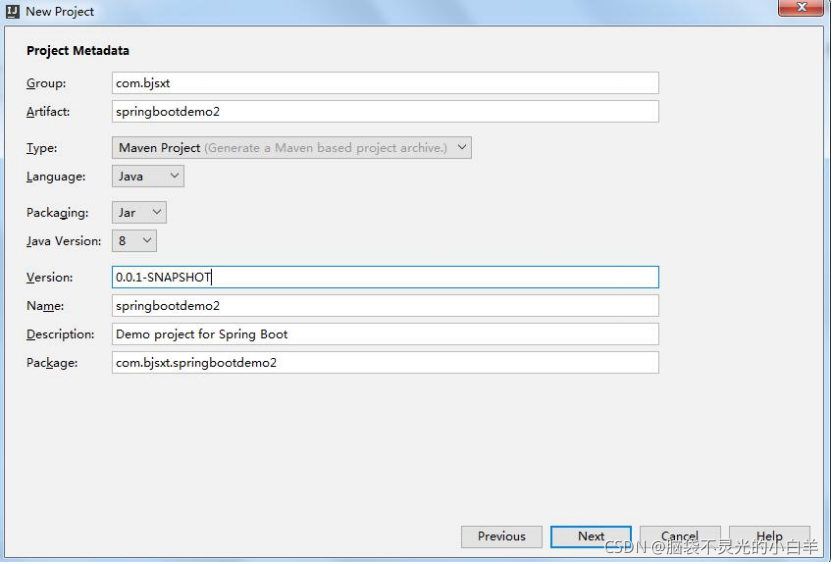
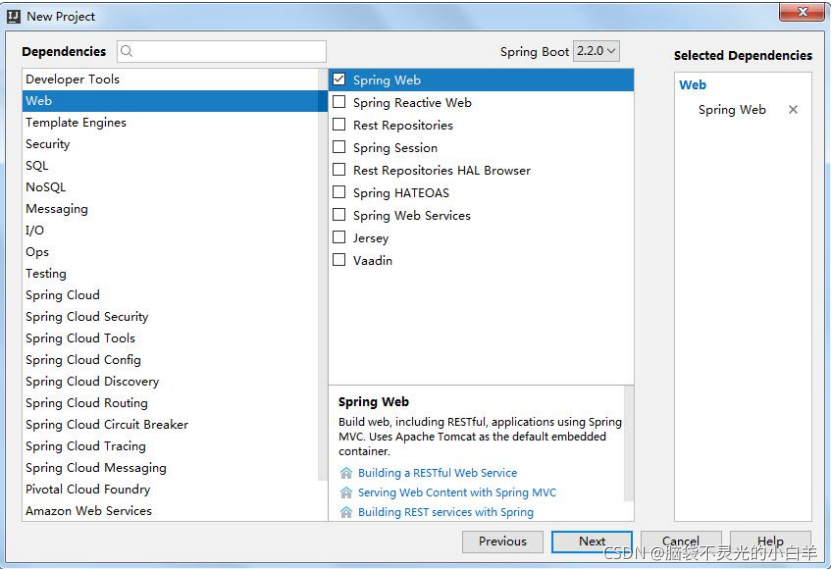
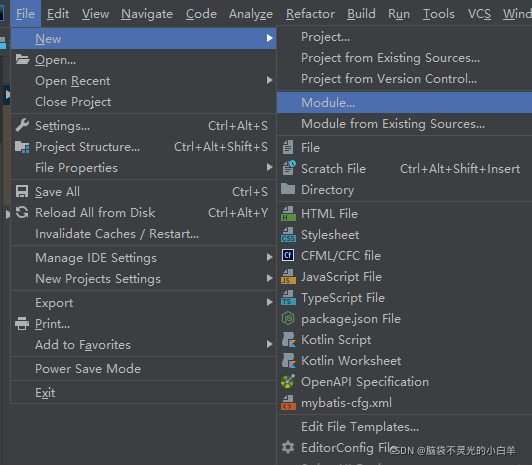
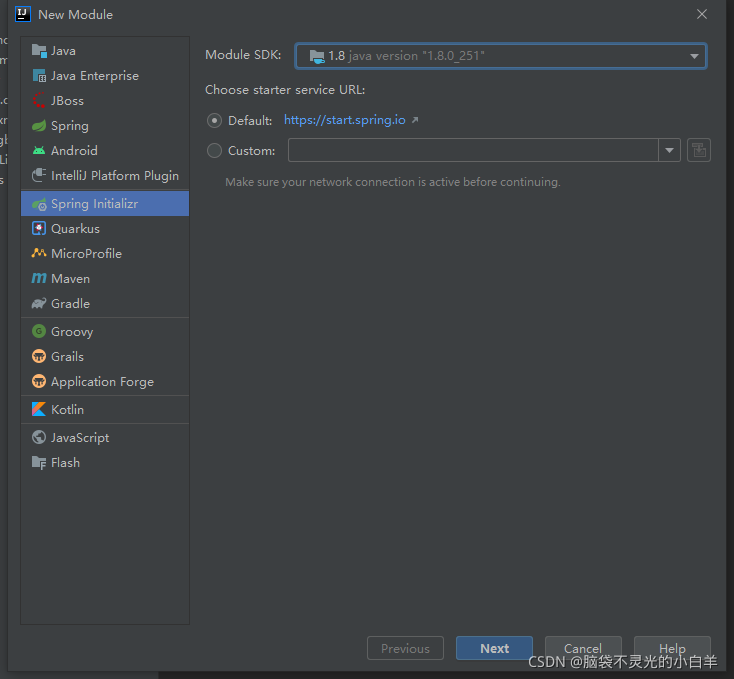
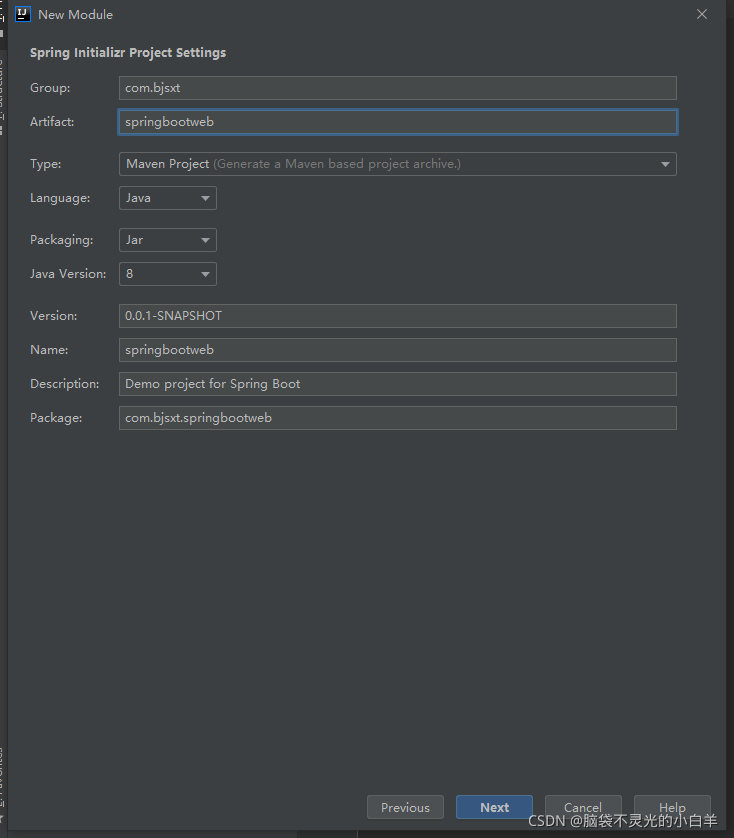
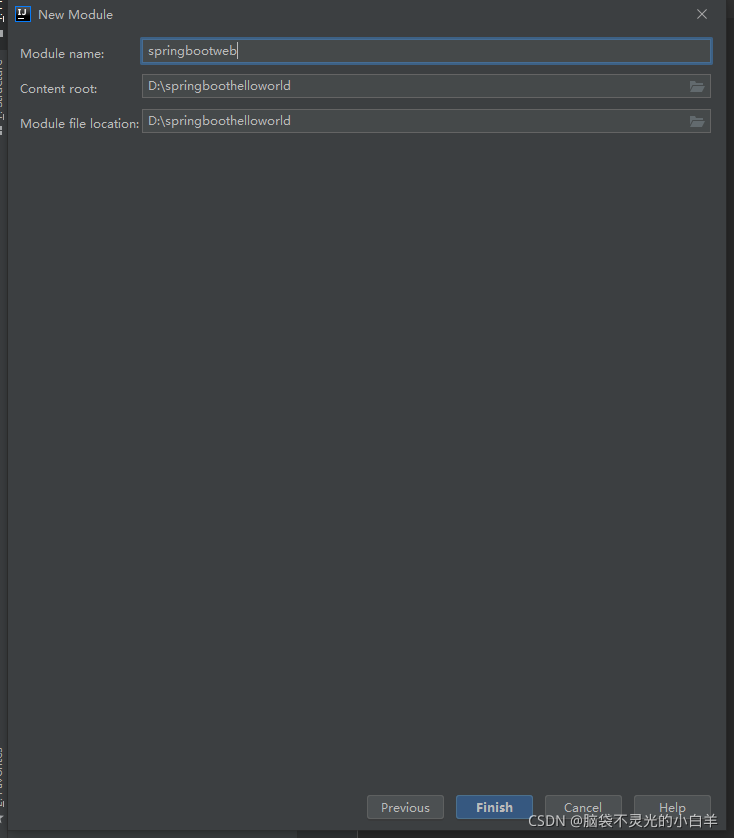
2 通过 IDEA 的脚手架工具创建
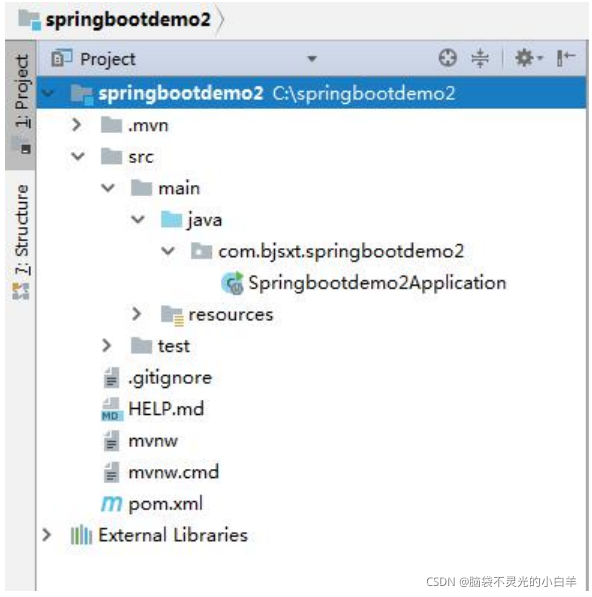
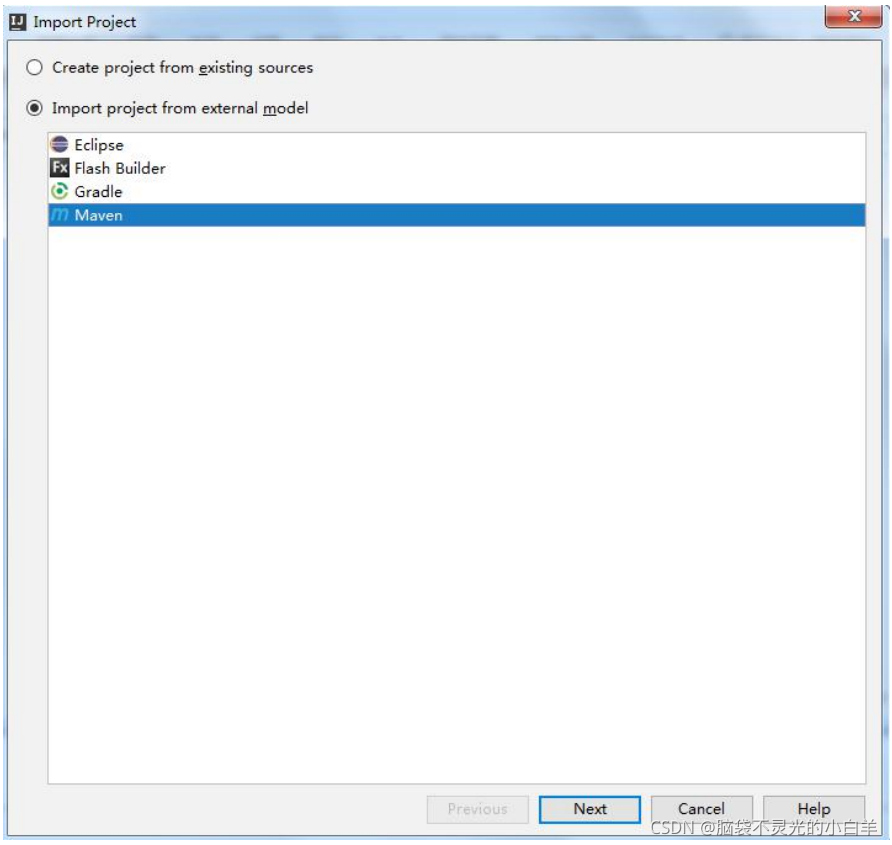
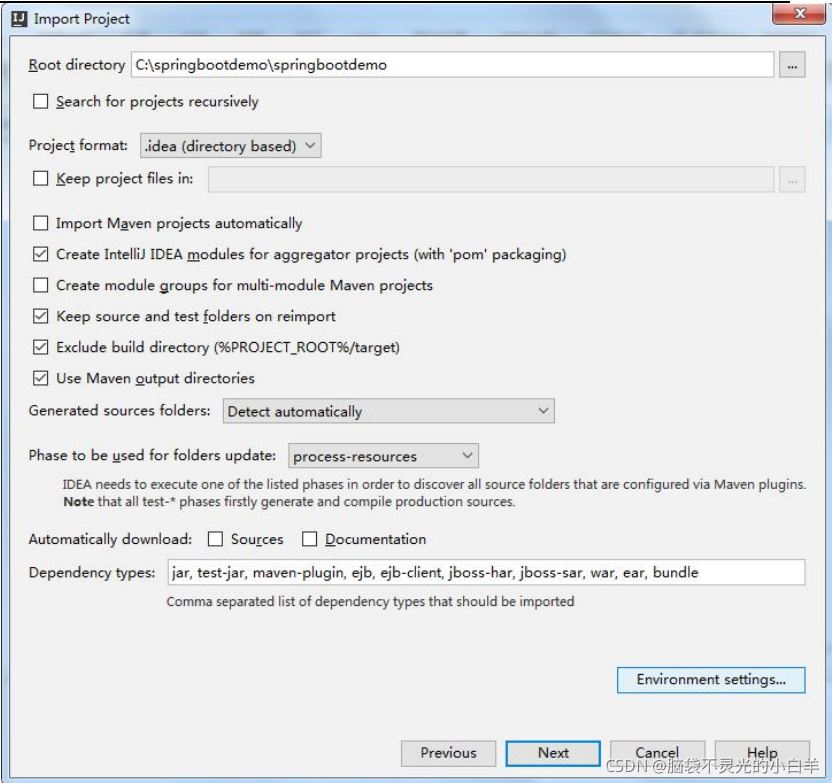
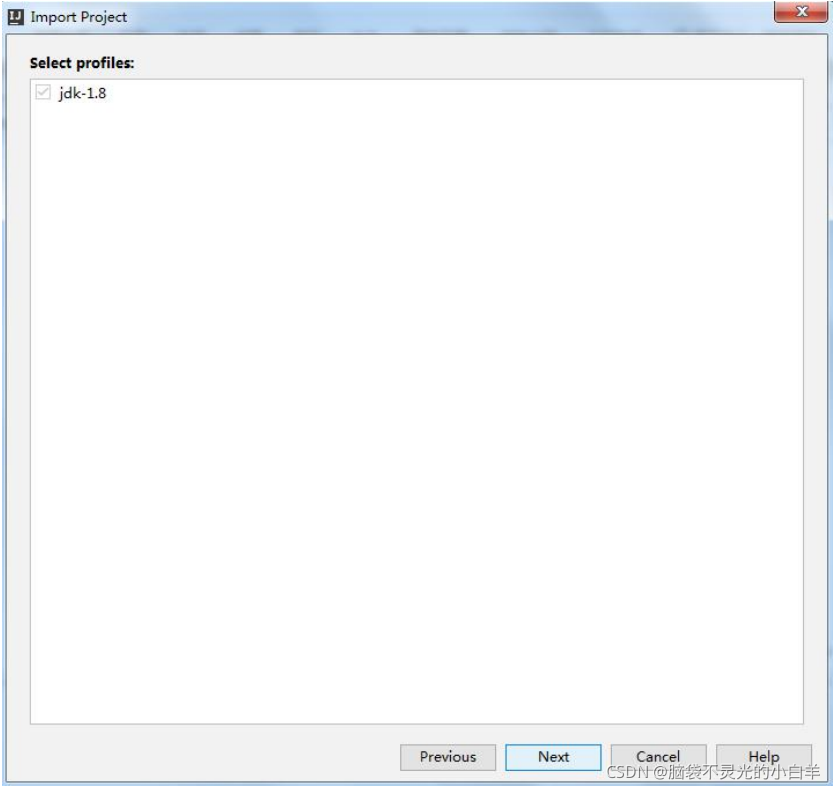
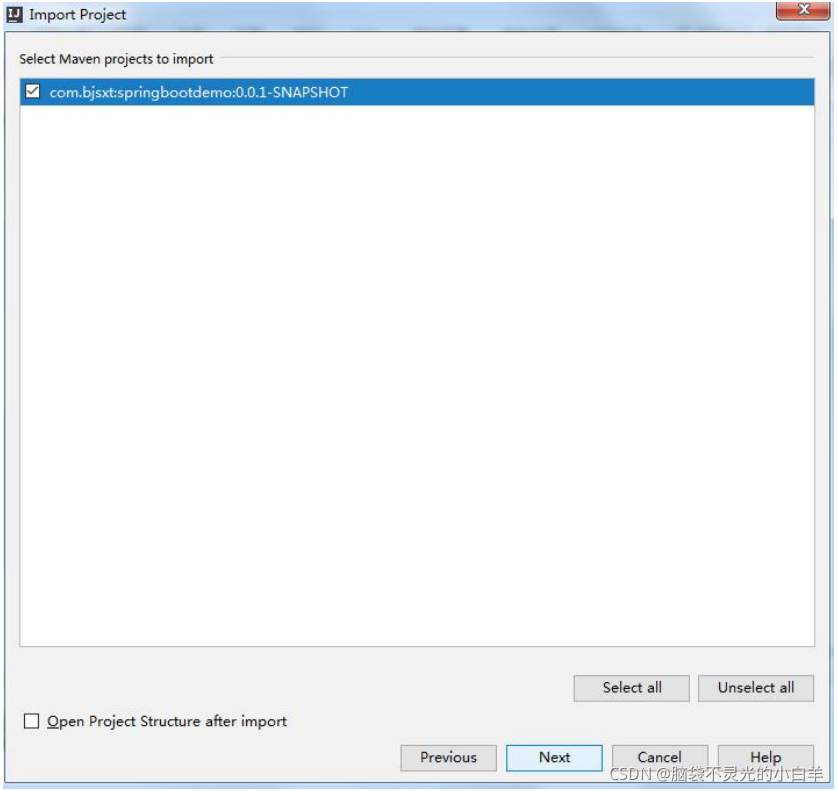
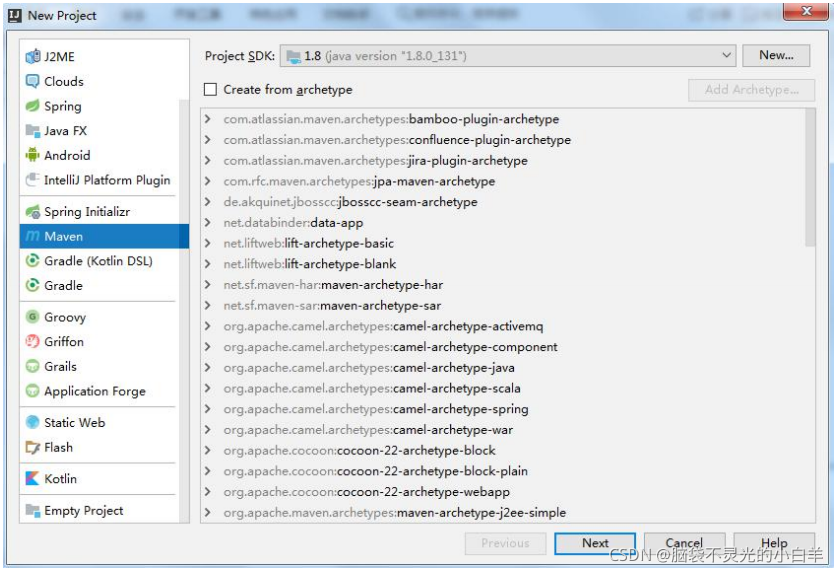
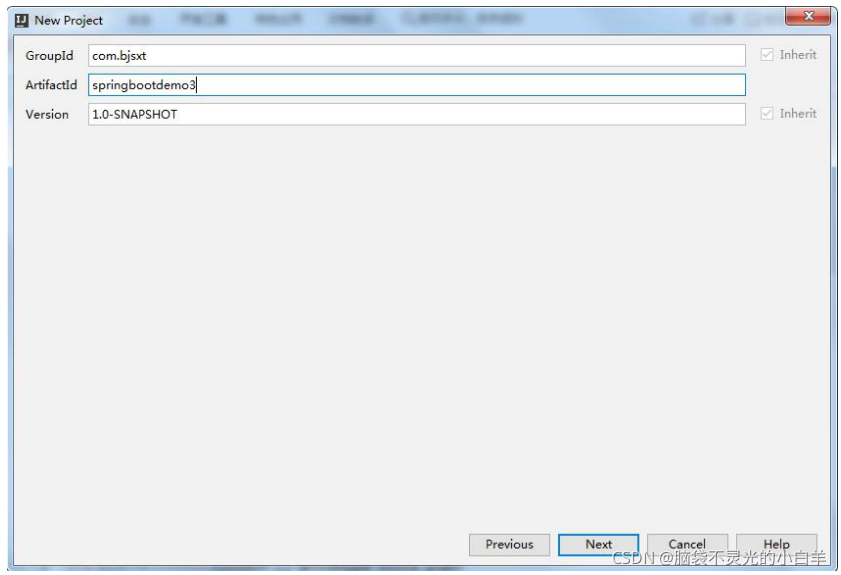
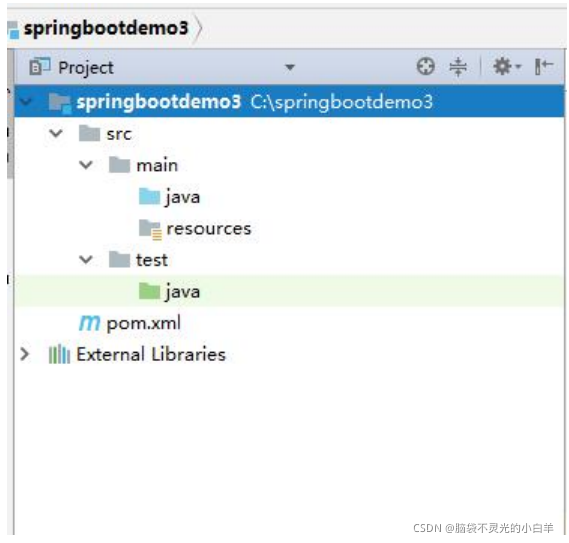
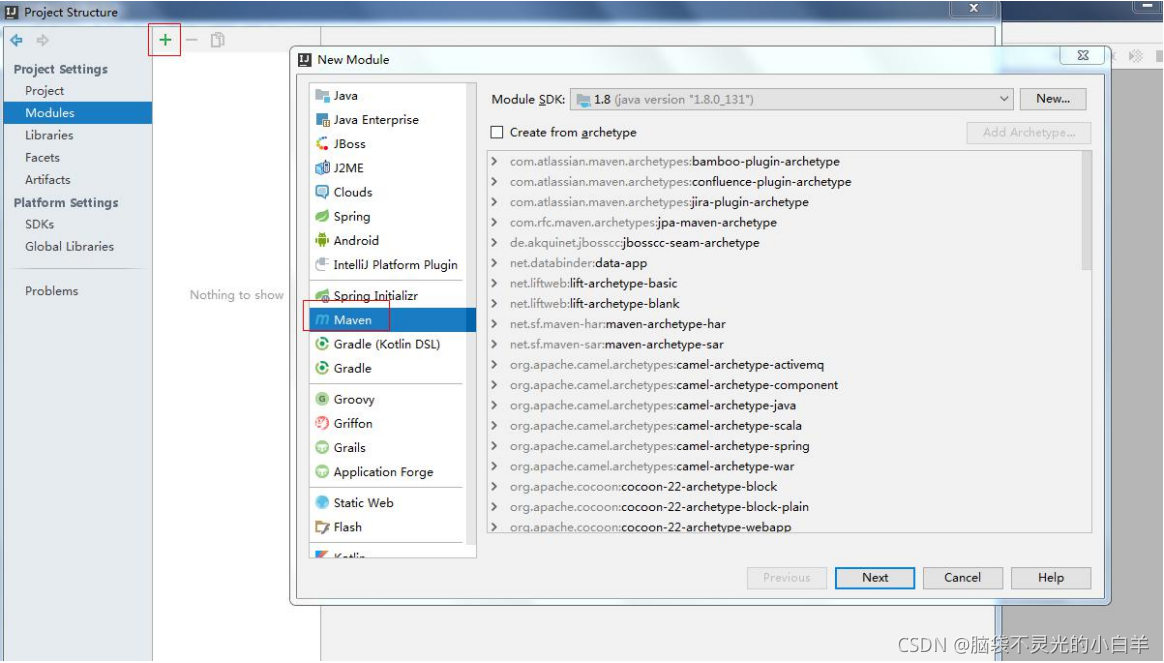
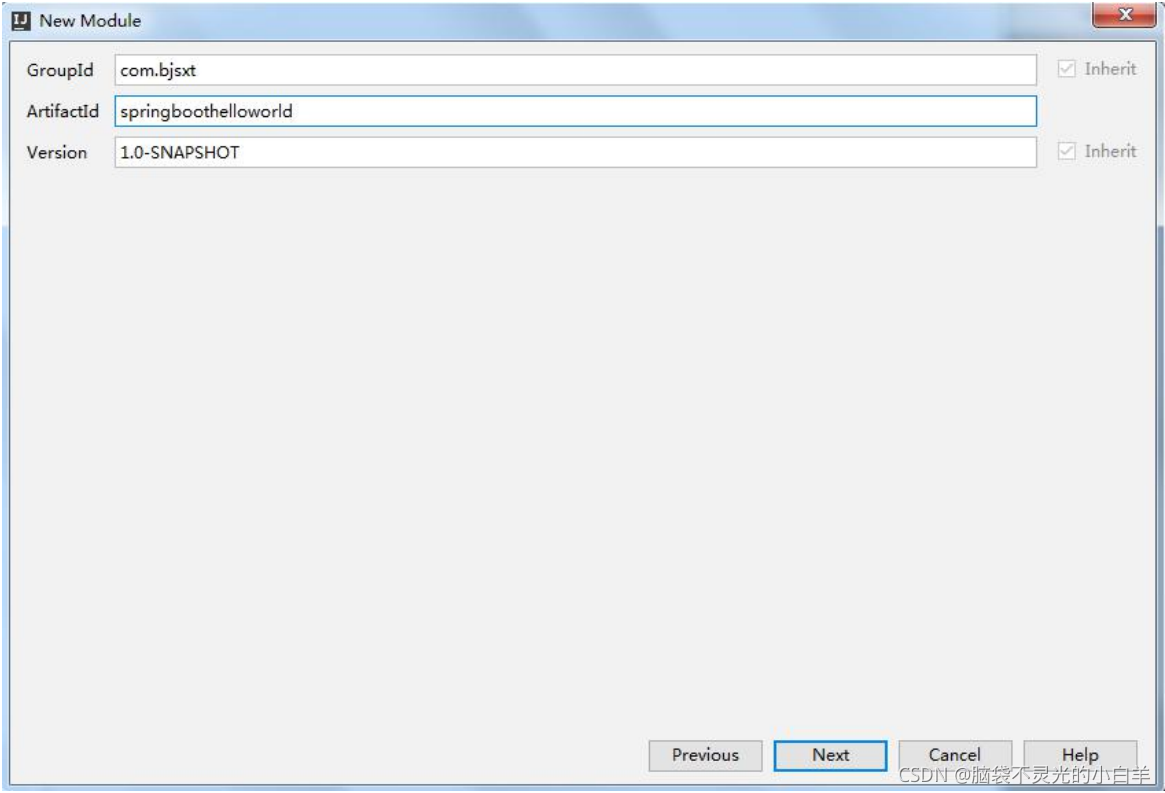
3 通过 IDEA 的 Maven 项目创建
修改 POM 文件
<?xml version="1.0" encoding="UTF-8"?>
<project xmlns="http://maven.apache.org/POM/4.0.0" xmlns:xsi="http://www.w3.org/2001/XMLSchema-instance"
	xsi:schemaLocation="http://maven.apache.org/POM/4.0.0 https://maven.apache.org/xsd/maven-4.0.0.xsd">
	<modelVersion>4.0.0</modelVersion>

	<groupId>com.bjsxt</groupId>
	<artifactId>springbootdemo3</artifactId>
	<version>1.0-SNAPSHOT</version>

	<parent>
		<groupId>org.springframework.boot</groupId>
		<artifactId>spring-boot-starter-parent</artifactId>
		<version>2.2.0.RELEASE</version>
		<relativePath/> <!-- lookup parent from repository -->
	</parent>

	<description>Demo project for Spring Boot</description>
	<properties>
		<java.version>1.8</java.version>
	</properties>
	<dependencies>
		<dependency>
			<groupId>org.springframework.boot</groupId>
			<artifactId>spring-boot-starter-web</artifactId>
		</dependency>

		<dependency>
			<groupId>org.springframework.boot</groupId>
			<artifactId>spring-boot-starter-test</artifactId>
			<scope>test</scope>
		</dependency>
	</dependencies>

	<build>
		<plugins>
			<plugin>
				<groupId>org.springframework.boot</groupId>
				<artifactId>spring-boot-maven-plugin</artifactId>
			</plugin>
		</plugins>
	</build>

</project>
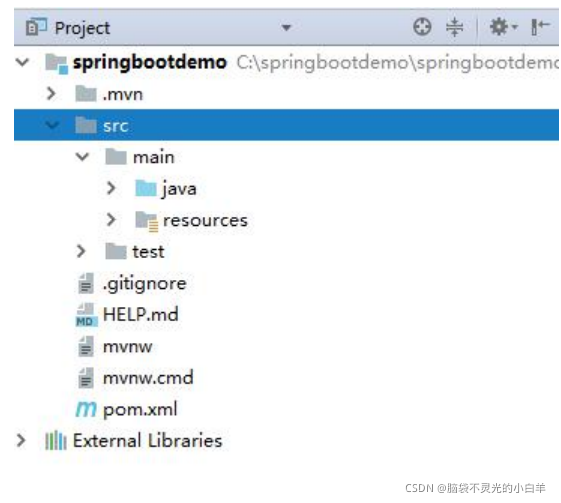
三、 Spring Boot 项目结构介绍
1 POM 文件
1.1继承
<parent>
	<groupId>org.springframework.boot</groupId>
	<artifactId>spring-boot-starter-parent</artifactId>
	<version>2.2.0.RELEASE</version>
	<relativePath/> <!-- lookup parent from repository -->
</parent>
Spring Boot 的父级依赖,只有继承它项目才是 Spring Boot 项目。 spring-boot-starter-parent 是一个特殊的 starter,它用来提供相关的 Maven 默认依赖。使 用它之后,常用的包依赖可以省去 version 标签。
1.2依赖
<dependency>
	<groupId>org.springframework.boot</groupId>
	<artifactId>spring-boot-starter-web</artifactId>
</dependency>
启动器依赖
1.3插件
<build>
	<plugins>
		<plugin>
			<groupId>org.springframework.boot</groupId>
			<artifactId>spring-boot-maven-plugin</artifactId>
		</plugin>
	</plugins>
</build>
spring-boot-maven-plugin 插件是将 springboot 的应用程序打包成 jar 包的插件。将所有 应用启动运行所需要的 jar 包都包含进来,从逻辑上将具备了独立运行的条件。当运行"mvn package"进行打包后,使用"java -jar"命令就可以直接运行。
2 启动类
Spring Boot 的启动类的作用是启动 Spring Boot 项目,是基于 Main 方法来运行的。 注意:启动类在启动时会做注解扫描(@Controller、@Service、@Repository…),扫描 位置为同包或者子包下的注解,所以启动类的位置应放于包的根下。
2.1启动类与启动器区别:
- 启动类表示项目的启动入口
- 启动器表示 jar 包的坐标
2.2创建启动类
/**
*Spring Boot 启动类
*/
@SpringBootApplication
public class SpringbootdemoApplication {


	public static void main(String[] args) {


		SpringApplication.run(SpringbootdemoApplication.class, args);
	}

}
3 启动器
Spring Boot 将所有的功能场景都抽取出来,做成一个个的 starter(启动器),只需要在项 目里面引入这些 starter 相关场景的所有依赖都会导入进来,要用什么功能就导入什么场景, 在 jar 包管理上非常方便,最终实现一站式开发。
Spring Boot 提供了多达 44 个启动器。
-
spring-boot-starter
这是 Spring Boot 的核心启动器,包含了自动配置、日志和 YAML。 -
spring-boot-starter-actuator
帮助监控和管理应用。 -
spring-boot-starter-web
支持全栈式 Web 开发,包括 Tomcat 和 spring-webmvc。 -
spring-boot-starter-amqp
通过 spring-rabbit 来支持 AMQP 协议(Advanced Message Queuing Protocol)。 -
spring-boot-starter-aop
支持面向方面的编程即 AOP,包括 spring-aop 和 AspectJ。 -
spring-boot-starter-artemis
通过 Apache Artemis 支持 JMS 的 API(Java Message Service API)。 -
spring-boot-starter-batch
支持 Spring Batch,包括 HSQLDB 数据库。 -
spring-boot-starter-cache
支持 Spring 的 Cache 抽象。 -
spring-boot-starter-cloud-connectors
支持 Spring Cloud Connectors,简化了在像 Cloud Foundry 或 Heroku 这样的云平台上连 接服务。 -
spring-boot-starter-data-elasticsearch
支持 ElasticSearch 搜索和分析引擎,包括 spring-data-elasticsearch。 -
spring-boot-starter-data-gemfire
支持 GemFire 分布式数据存储,包括 spring-data-gemfire。 -
spring-boot-starter-data-jpa
支持 JPA(Java Persistence API),包括 spring-data-jpa、spring-orm、Hibernate。 -
spring-boot-starter-data-mongodb
支持 MongoDB 数据,包括 spring-data-mongodb。 -
spring-boot-starter-data-rest
通过 spring-data-rest-webmvc,支持通过 REST 暴露 Spring Data 数据仓库。 -
spring-boot-starter-data-solr
支持 Apache Solr 搜索平台,包括 spring-data-solr。 -
spring-boot-starter-freemarker
支持 FreeMarker 模板引擎。 -
spring-boot-starter-groovy-templates
支持 Groovy 模板引擎。 -
spring-boot-starter-hateoas
通过 spring-hateoas 支持基于 HATEOAS 的 RESTful Web 服务。 -
spring-boot-starter-hornetq
通过 HornetQ 支持 JMS。 -
spring-boot-starter-integration
支持通用的 spring-integration 模块。 -
spring-boot-starter-jdbc
支持 JDBC 数据库。 -
spring-boot-starter-jersey
支持 Jersey RESTful Web 服务框架。 -
spring-boot-starter-jta-atomikos
通过 Atomikos 支持 JTA 分布式事务处理。 -
spring-boot-starter-jta-bitronix
通过 Bitronix 支持 JTA 分布式事务处理。 -
spring-boot-starter-mail
支持 javax.mail 模块。 -
spring-boot-starter-mobile
支持 spring-mobile。 -
spring-boot-starter-mustache
支持 Mustache 模板引擎。 -
spring-boot-starter-redis
支持 Redis 键值存储数据库,包括 spring-redis。 -
spring-boot-starter-security
支持 spring-security。 -
spring-boot-starter-social-facebook
支持 spring-social-facebook -
spring-boot-starter-social-linkedin
支持 pring-social-linkedin -
spring-boot-starter-social-twitter
支持 pring-social-twitter -
spring-boot-starter-test
支持常规的测试依赖,包括 JUnit、Hamcrest、Mockito 以及 spring-test 模块。 -
spring-boot-starter-thymeleaf
支持 Thymeleaf 模板引擎,包括与 Spring 的集成。 -
spring-boot-starter-velocity
支持 Velocity 模板引擎。 -
spring-boot-starter-websocket
支持 WebSocket 开发。 -
spring-boot-starter-ws
支持 Spring Web Services。 -
spring-boot-starter-actuator
增加了面向产品上线相关的功能,比如测量和监控。 -
spring-boot-starter-remote-shell
增加了远程 ssh shell 的支持。 -
spring-boot-starter-jetty
引入了 Jetty HTTP 引擎(用于替换 Tomcat)。 -
spring-boot-starter-log4j
支持 Log4J 日志框架。 -
spring-boot-starter-logging
引入了 Spring Boot 默认的日志框架 Logback。 -
spring-boot-starter-tomcat
引入了 Spring Boot 默认的 HTTP 引擎 Tomcat。 -
spring-boot-starter-undertow
引入了 Undertow HTTP 引擎(用于替换 Tomcat)。
4 配置文件
Spring Boot 提供一个名称为 application 的全局配置文件,支持两种格式 properteis 格式 与 YAML 格式。
4.1Properties 格式
配置 Tomcat 监听端口
server.port=8888
4.2YAML 格式
YAML 格式配置文件的扩展名可以是 yaml 或者 yml。
4.2.1基本格式要求
- 大小写敏感
- 使用缩进代表层级关系
- 相同的部分只出现一次
配置 Tomcat 监听端口
server:
	port: 8888
4.3配置文件存放位置
- 当前项目根目录中
- 当前项目根目录下的一个/config子目录中
- 项目的resources即classpath根路径中
- 项目的resources即classpath跟路径下的/config目录中
4.4配置文件加载顺序
4.4.1不同格式的加载顺序
如 果 同 一 个 目 录 下 , 有 application.yml 也 有 application.properties , 默 认 先 读 取 application.properties。
如果同一个配置属性,在多个配置文件都配置了,默认使用第 1 个读取到的,后面读取 的不覆盖前面读取到的。
4.4.2不同位置的加载顺序
4.4.2.1 当前项目根目录下的一个/config 子目录中(最高)
 config/application.properties
 config/application.yml
4.4.2.2 当前项目根目录中(其次)
application.properties
application.yml
4.4.2.3 项目的 resources 即 classpath 根路径下的/config 目录中(一般)
resources/config/application.properties
resources/config/application.yml
4.4.2.4 项目的 resources 即 classpath 根路径中(最后)
resources/application.properties
resources/application.yml
4.5配置文件中的占位符
4.5.1 占位符语法
语法:${}
4.5.2占位符作用
- "${}"中可以获取框架提供的方法中的值如:random.int 等。
- 占位符可以获取配置文件中的键的值赋给另一个键作为值。
4.5.3生成随机数
${random.value} - 类似 uuid 的随机数,没有"-"连接
${random.int} - 随机取整型范围内的一个值
${random.long} - 随机取长整型范围内的一个值
${random.long(100,200)} - 随机生成长整型 100-200 范围内的一个值
${random.uuid} - 生成一个 uuid,有短杠连接
${random.int(10)} - 随机生成一个 10 以内的数
${random.int(100,200)} - 随机生成一个 100-200 范围以内的数
4.6 bootstrap 配置文件
4.6.1 bootstrap 配置文件介绍
Spring Boot 中有两种上下文对象,一种是 bootstrap, 另外一种是 application, bootstrap 是应用程序的父上下文,也就是说 bootstrap 加载优先于 applicaton。bootstrap 主要用于从 额外的资源来加载配置信息,还可以在本地外部配置文件中解密属性。这两个上下文共用一 个环境,它是任何 Spring 应用程序的外部属性的来源。bootstrap 里面的属性会优先加载, 它们默认也不能被本地相同配置覆盖。
4.6.2bootstrap 配置文件特征
- boostrap 由父 ApplicationContext 加载,比 applicaton 优先加载。
- boostrap 里面的属性不能被覆盖。
4.6.3 bootstrap 与 application 的应用场景
application 配置文件主要用于 Spring Boot 项目的自动化配置。
bootstrap 配置文件有以下几个应用场景。
- 使用 Spring Cloud Config 配置中心时,这时需要在 bootstrap 配置文件中添加连接到配置中心的配置属性来加载外部配置中心的配置信息。
- 一些固定的不能被覆盖的属性。
- 一些加密/解密的场景。
5 Spring Boot 的核心注解
5.1@SpringBootApplication
是 SpringBoot 的启动类。
此注解等同于@Configuration+@EnableAutoConfiguration+@ComponentScan 的组合。
5.2@SpringBootConfiguration
@SpringBootConfiguration 注解是@Configuration 注解的派生注解,跟@Configuration 注解的功能一致,标注这个类是一个配置类,只不过@SpringBootConfiguration 是 springboot 的注解,而@Configuration 是 spring 的注解
5.3@Configuration
通过对 bean 对象的操作替代 spring 中 xml 文件
5.4@EnableAutoConfiguration
Spring Boot 自动配置(auto-configuration):尝试根据你添加的 jar 依赖自动配置你的 Spring 应用。是@AutoConfigurationPackage 和@Import(AutoConfigurationImportSelector.class) 注解的组合。
5.5@AutoConfigurationPackage
@AutoConfigurationPackage 注解,自动注入主类下所在包下所有的加了注解的类 (@Controller,@Service 等),以及配置类(@Configuration)
5.6@Import({AutoConfigurationImportSelector.class})
直接导入普通的类
导入实现了 ImportSelector 接口的类
导入实现了 ImportBeanDefinitionRegistrar 接口的类
5.7@ComponentScan
组件扫描,可自动发现和装配一些 Bean。
5.8@ConfigurationPropertiesScan
@ConfigurationPropertiesScan 扫描配置属性。@EnableConfigurationProperties 注解的作 用是使用 @ConfigurationProperties 注解的类生效。
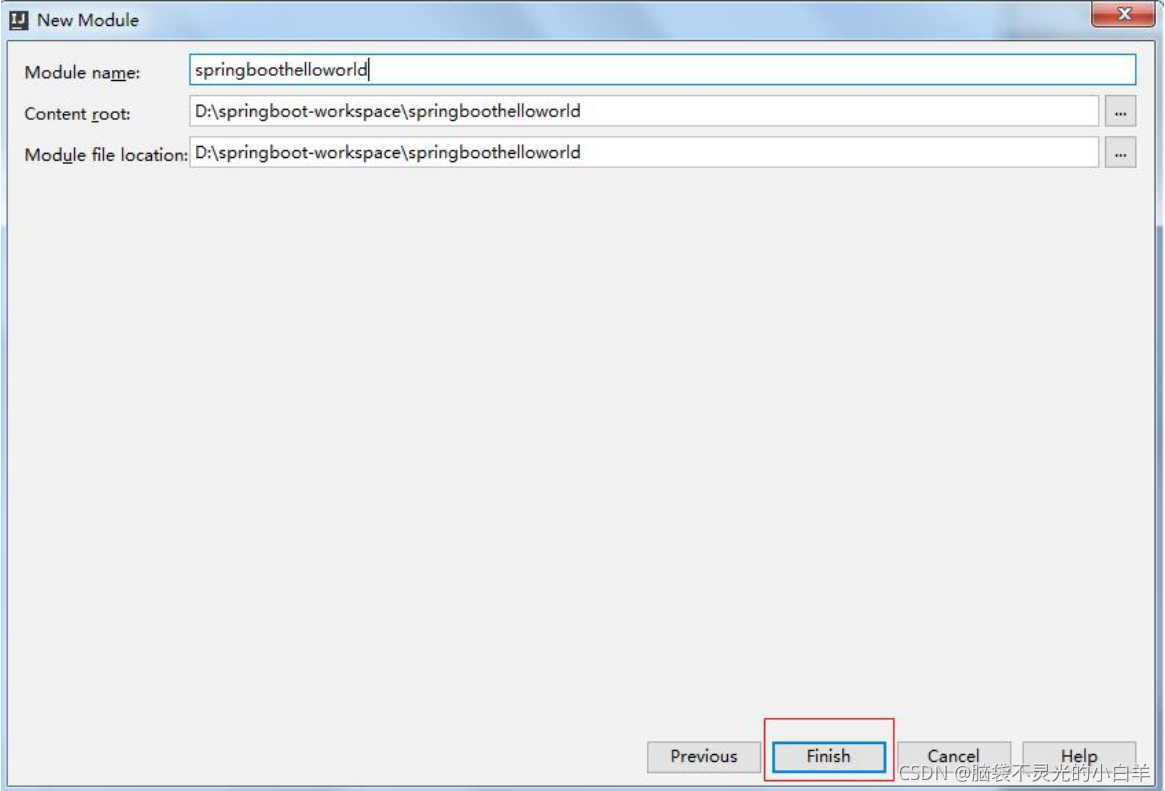
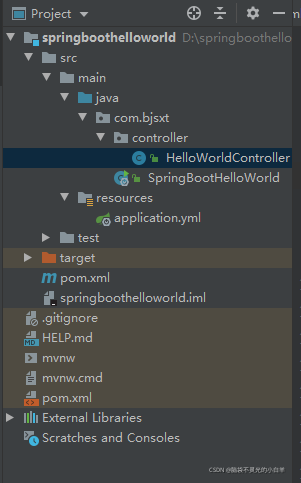
四、编写HelloWorld
1 创建项目


2 修改 POM 文件
<?xml version="1.0" encoding="UTF-8"?>
<project xmlns="http://maven.apache.org/POM/4.0.0"
         xmlns:xsi="http://www.w3.org/2001/XMLSchema-instance"
         xsi:schemaLocation="http://maven.apache.org/POM/4.0.0 http://maven.apache.org/xsd/maven-4.0.0.xsd">
    <modelVersion>4.0.0</modelVersion>

    <groupId>com.bjsxt</groupId>
    <artifactId>springboothelloworld</artifactId>
    <version>1.0-SNAPSHOT</version>

    <parent>
        <groupId>org.springframework.boot</groupId>
        <artifactId>spring-boot-starter-parent</artifactId>
        <version>2.2.0.RELEASE</version>
    </parent>
    <dependencies>
        <dependency>
            <groupId>org.springframework.boot</groupId>
            <artifactId>spring-boot-starter-web</artifactId>
        </dependency>
    </dependencies>

    <build>
        <plugins>
            <plugin>
                <groupId>org.springframework.boot</groupId>
                <artifactId>spring-boot-maven-plugin</artifactId>
            </plugin>
        </plugins>
    </build>
</project>
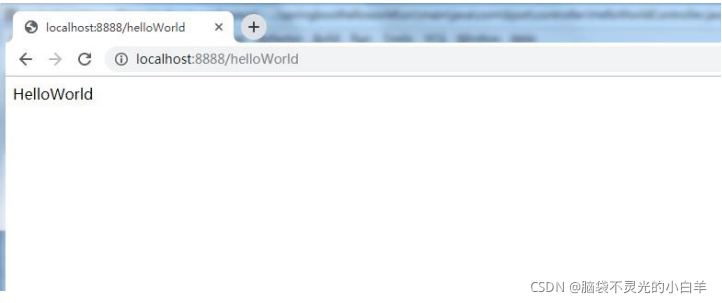
3 修改Tomcat端口
server:
	port: 8888
4 创建启动类
/**
 * 启动类
 */
@SpringBootApplication
public class SpringBootHelloWorld {


    public static void main(String[] args) {


        SpringApplication.run(SpringBootHelloWorld.class, args);
    }
}
5 创建Controller
/**
 * 处理请求Controller
 */
@RestController //@Controller + @ResponsBody 直接返回字符串
public class HelloWorldController {


    @RequestMapping("/helloWorld")
    public String showHelloWorld(){


        return "HelloWorld";
    }
}
6 Spring Boot 在 Controller 中常用注解
6.1@RestController
@RestController 相当于@Controller+@ResponseBody 注解
如果使用@RestController 注解 Controller 中的方法无法返回页面,相当于在方法上面自 动 加 了 @ResponseBody 注 解 , 所 以 没 办 法 跳 转 并 传 输 数 据 到 另 一 个 页 面 , 所 以InternalResourceViewResolver 也不起作用,返回的内容就是 Return 里的内容。
6.2@GetMapping
@GetMapping 注解是@RequestMapping(method = RequestMethod.GET)的缩写。
6.3@PostMapping
@PostMapping 注解是@RequestMapping(method = RequestMethod.POST)的缩写。
6.4@PutMapping
@PutMapping 注解是@RequestMapping(method = RequestMethod.PUT)的缩写。
6.5@DeleteMapping
@DeleteMapping 注解是@RequestMapping(method = RequestMethod.DELETE)的缩写。
五、 Spring Boot 整合 Web 层技术
整合 Servlet
1 整合 Servlet 方式一
1.1通过注解扫描完成 Servlet 组件的注册
1.1.1创建 Servlet

/**
     * 整合Servlet方式一
     */
    @WebServlet(name = "FirstServlet",urlPatterns = "/first" )
    public class FirstServlet extends HttpServlet{


        public void doGet(HttpServletRequest request,HttpServletResponse response){


            System.out.println("First Servlet........");
        }
    }
1.1.2 修改启动类
@SpringBootApplication
@ServletComponentScan//在 spring Boot 启动时会扫描@WebServlet 注解,并将该类实例化
public class SpringbootwebApplication {


	public static void main(String[] args) {


SpringApplication.run(SpringbootwebApplication.class, args);
	}
}
2 整合 Servlet 方式二
2.1通过方法完成 Servlet 组件的注册
2.1.1创建 Servlet
/**
* 整合 Servlet 方式二
*/
public class SecondServlet extends HttpServlet {


	public void doGet(HttpServletRequest request, HttpServletResponse response){


	System.out.println("Second Servlet........");
	}
}
2.1.2 创建Servlet配置类
/**
* Servlet 配置类
*/
 @Configuration
 public class ServletConfig {


 /**
 * 完成 Servlet 组件的注册
 */
 	@Bean
	 public ServletRegistrationBean getServletRegistrationBean(){


		 ServletRegistrationBean bean = new ServletRegistrationBean(new SecondServlet());
		 bean.addUrlMappings("/second");
		 return bean;
	 }
 }
3 整合 Filter 方式一
3.1通过注解扫描完成 Filter 组件注册
3.1.1创建 Filter
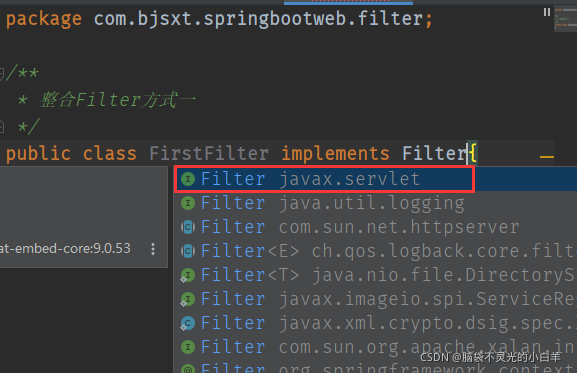
/**
 * 整合Filter方式一
 */
//@WebFilter(filterName = "FirstFilter",urlPatterns = {"*.do","*.jsp"})
@WebFilter(filterName = "FirstFilter",urlPatterns = "/first")

public class FirstFilter implements Filter {


    @Override
    public void init(FilterConfig filterConfig) throws ServletException {


    }

    @Override
    public void doFilter(ServletRequest servletRequest, ServletResponse servletResponse, FilterChain filterChain) throws IOException, ServletException {


        System.out.println("进入First Filter");
        filterChain.doFilter(servletRequest, servletResponse);
        System.out.println("离开First Filter");
    }

    @Override
    public void destroy() {


    }
}
3.1.2 修改启动类
@SpringBootApplication
@ServletComponentScan//在 spring Boot 启动时会扫描@WebServlet ,@WebFilter注解,并将该类实例化

public class SpringbootwebApplication {


    public static void main(String[] args) {


        SpringApplication.run(SpringbootwebApplication.class, args);
    }

}
4 整合 Filter 方式二
4.1通过方法完成 Filter 组件注册
4.1.1创建 Filter
/**
 * 整合Filter方式二
 */
public class SecondFilter implements Filter {


    @Override
    public void init(FilterConfig filterConfig) throws ServletException {


    }

    @Override
    public void doFilter(ServletRequest servletRequest, ServletResponse servletResponse, FilterChain filterChain) throws IOException, ServletException {


        System.out.println("进入Second Filter");
        filterChain.doFilter(servletRequest, servletResponse);
        System.out.println("离开Second Filter");
    }

    @Override
    public void destroy() {


    }
}
4.1.2创建 Filter 配置类
/**
 * Filter配置类
 */
@Configuration
public class FilterConfig {


    /**
     * 完成Filter主键的注册
     */
    @Bean
    public FilterRegistrationBean getFilterRegistrationBean(){


        FilterRegistrationBean bean = new FilterRegistrationBean(new SecondFilter());
//        bean.addUrlPatterns(new String[]{"*.do","*.jsp"});
        bean.addUrlPatterns("/second");
        return bean;
    }
}
5 整合 Listener 方式一
5.1通过注解扫描完成 Listener 组件注册
5.1.1编写 Listener
/**
 * 整合Listener
 */
@WebListener
public class FirstListener implements ServletContextListener {


    public void contextDestroyed(ServletContextEvent event){


    }

    public void contextInitialized(ServletContextEvent event){


        System.out.println("Listener.....Init....");
    }
}
5.1.2修改启动类
@SpringBootApplication
@ServletComponentScan//在 spring Boot 启动时会扫描@WebServlet ,@WebFilter,@WebListener注解,并将该类实例化

public class SpringbootwebApplication {


    public static void main(String[] args) {


        SpringApplication.run(SpringbootwebApplication.class, args);
    }

}
6 整合 Listener 方式二
6.1通过方法完成 Listener 组件注册
6.1.1编写 Listener
/**
 * 整合Listener方式二
 */
public class SecondListener implements ServletContextListener {


    public void contextDestroyed(ServletContextEvent event){


    }

    public void contextInitialized(ServletContextEvent event){


        System.out.println("Second...Listener.....Init....");
    }
}
6.1.2创建 Listener 配置类
/**
 * Listener配置类
 */
@Configuration
public class ListenerConfig {


    @Bean
    public ServletListenerRegistrationBean getServletListenerRegistrationBean(){


        ServletListenerRegistrationBean bean = new ServletListenerRegistrationBean(new SecondListener());
        return bean;
    }
}
六、 Spring Boot 访问静态资源
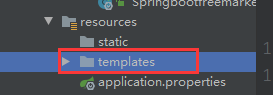
在 SpringBoot 项目中没有我们之前常规 web 开发的 WebContent(WebApp),它只有 src 目录。在 src/main/resources 下面有两个文件夹,static 和 templates。SpringBoot 默认在 static 目录中存放静态页面,而 templates 中放动态页面。
1static目录
Spring Boot 通过 classpath/static 目录访问静态资源。注意存放静态资源的目录名称必须 是 static。
2 templates 目录
在 Spring Boot 中不推荐使用 jsp 作为视图层技术,而是默认使用 Thymeleaf 来做动态页 面。Templates 目录这是存放 Thymeleaf 的页面。
3 静态资源存放其他位置
3.1Spring Boot 访问静态资源的位置
classpath:/META‐INF/resources/
classpath:/resources/
classpath:/static/
classpath:/public/
3.2自定义静态资源位置
在配置文件application.properties中添加配置信息
#配置静态资源访问路径
spring.resources.static-locations=classpath:/suibian/,cla sspath:/static/
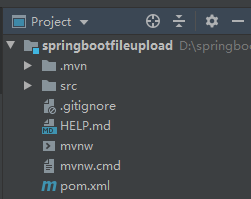
七、 Spring Boot 文件上传
1 创建项目
2 POM 文件
2 POM 文件
<?xml version="1.0" encoding="UTF-8"?>
<project xmlns="http://maven.apache.org/POM/4.0.0" xmlns:xsi="http://www.w3.org/2001/XMLSchema-instance"
         xsi:schemaLocation="http://maven.apache.org/POM/4.0.0 https://maven.apache.org/xsd/maven-4.0.0.xsd">
    <modelVersion>4.0.0</modelVersion>
    <parent>
        <groupId>org.springframework.boot</groupId>
        <artifactId>spring-boot-starter-parent</artifactId>
        <version>2.5.5</version>
        <relativePath/> <!-- lookup parent from repository -->
    </parent>
    <groupId>com.bjsxt</groupId>
    <artifactId>springbootfileupload</artifactId>
    <version>0.0.1-SNAPSHOT</version>
    <name>springbootfileupload</name>
    <description>Demo project for Spring Boot</description>
    <properties>
        <java.version>1.8</java.version>
    </properties>
    <dependencies>
        <dependency>
            <groupId>org.springframework.boot</groupId>
            <artifactId>spring-boot-starter-web</artifactId>
        </dependency>

        <dependency>
            <groupId>org.springframework.boot</groupId>
            <artifactId>spring-boot-starter-test</artifactId>
            <scope>test</scope>
            <exclusions>
                <exclusion>
                    <groupId>org.junit.vintage</groupId>
                    <artifactId>junit-vintage-engine</artifactId>
                </exclusion>
            </exclusions>
        </dependency>
    </dependencies>

    <build>
        <plugins>
            <plugin>
                <groupId>org.springframework.boot</groupId>
                <artifactId>spring-boot-maven-plugin</artifactId>
            </plugin>
        </plugins>
    </build>

</project>
3 启动类
@SpringBootApplication
public class SpringbootfileuploadApplication {


    public static void main(String[] args) {


        SpringApplication.run(SpringbootfileuploadApplication.class, args);
    }

}
4 编写上传页面
<html>
<head></head>
<body>
    <from action="/fileUploadController" method="post" enctype="multipart/form-data">
        <input type="file" name="file"/>
        <input type="submit" value="OKOK"/>
    </from>
</body>
</html>
5 编写 Controller
/**
* 文件上传 *
*/
@RestController
public class FileUploadController {


/**
* 文件上传
*/
@PostMapping("/fileUploadController")
public String fileUpload(MultipartFile file)throws Exception{


	System.out.println(file.getOriginalFilename());
	file.transferTo(new File("c:/"+file.getOriginalFilename()));
	return "OK";
	}
}
6 修改上传文件大小
#配置单个上传文件的大小的限制
spring.servlet.multipart.max-file-size=2MB
#配置在一次请求中上传文件的总容量的限制
spring.servlet.multipart.max-request-size=20MB
八、 Spring Boot 整合视图层技术
1 Spring Boot 整合 JSP 技术
1.1创建项目
1.2修改 POM 文件,添加 JSP 引擎与 JSTL 标签库
<?xml version="1.0" encoding="UTF-8"?>
<project xmlns="http://maven.apache.org/POM/4.0.0" xmlns:xsi="http://www.w3.org/2001/XMLSchema-instance"
         xsi:schemaLocation="http://maven.apache.org/POM/4.0.0 https://maven.apache.org/xsd/maven-4.0.0.xsd">
    <modelVersion>4.0.0</modelVersion>
    <parent>
        <groupId>org.springframework.boot</groupId>
        <artifactId>spring-boot-starter-parent</artifactId>
        <version>2.5.5</version>
        <relativePath/> <!-- lookup parent from repository -->
    </parent>
    <groupId>com.bjsxt</groupId>
    <artifactId>springbootfsp</artifactId>
    <version>0.0.1-SNAPSHOT</version>
    <name>springbootfsp</name>
    <description>Demo project for Spring Boot</description>
    <properties>
        <java.version>1.8</java.version>
    </properties>
    <dependencies>
        <dependency>
            <groupId>org.springframework.boot</groupId>
            <artifactId>spring-boot-starter-web</artifactId>
        </dependency>

        <!--添加JSP引擎,SpringBoot内置的Tomcat中没有此依赖-->
        <dependency>
            <groupId>org.apache.tomcat.embed</groupId>
            <artifactId>tomcat-embed-jasper</artifactId>
        </dependency>

        <!--添加JSPL坐标依赖-->
        <dependency>
            <groupId>javax.servlet</groupId>
            <artifactId>jstl</artifactId>
        </dependency>

        <dependency>
            <groupId>org.springframework.boot</groupId>
            <artifactId>spring-boot-starter-test</artifactId>
            <scope>test</scope>
        </dependency>
    </dependencies>

    <build>
        <plugins>
            <plugin>
                <groupId>org.springframework.boot</groupId>
                <artifactId>spring-boot-maven-plugin</artifactId>
            </plugin>
        </plugins>
    </build>

</project>
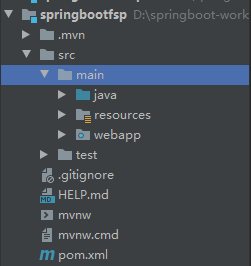
1.3创建 webapp 目录
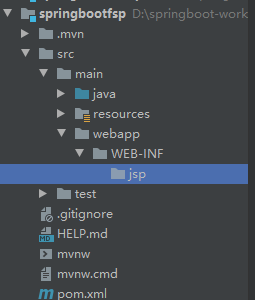
1.4标记为 web 目录

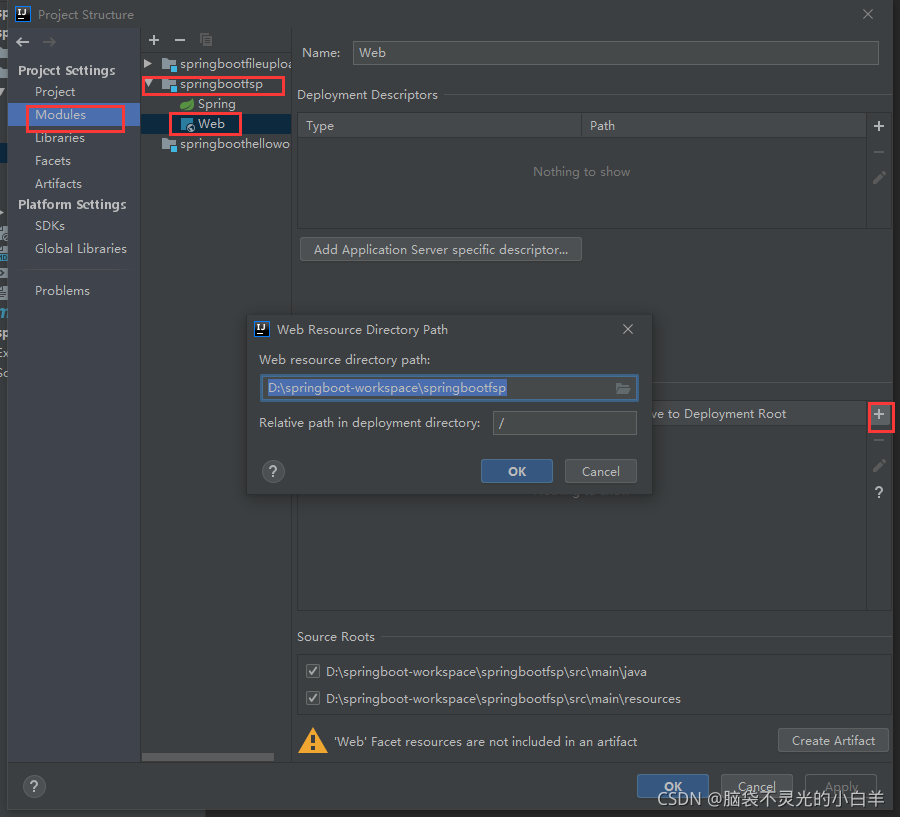
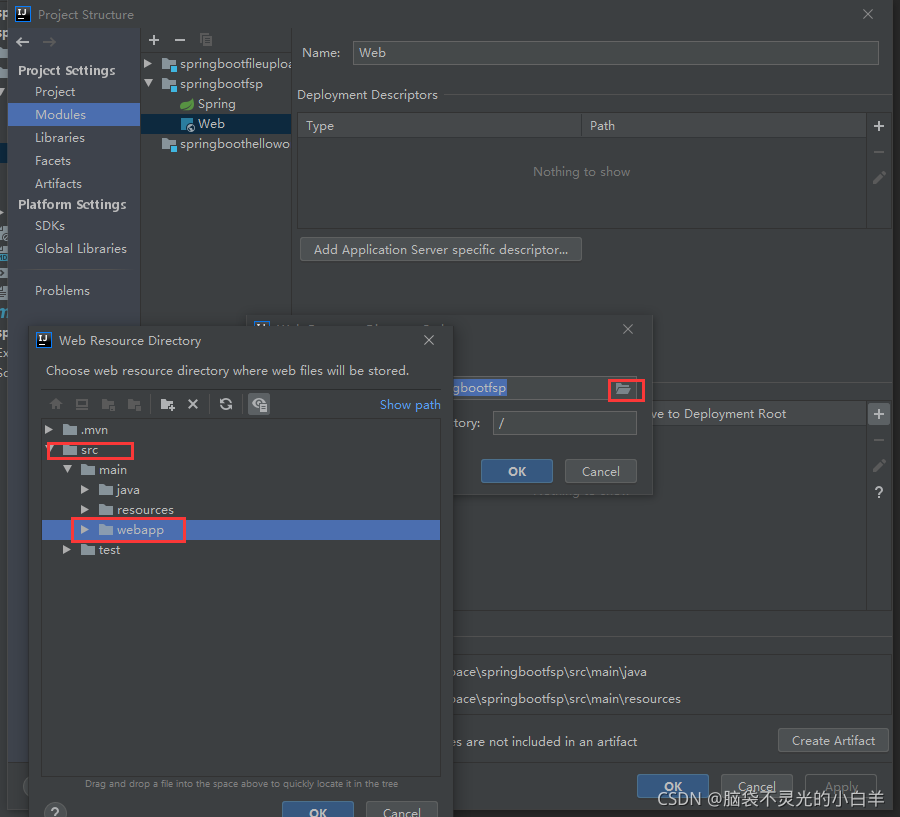
一路ok即可
1.5创建 JSP
<%@ page contentType="text/html;charset=UTF-8" language="java" %>
<html>
<head>
    <title>Title</title>
</head>
<body>
    <h2>Hello JSP</h2>
</body>
</html>
1.6修改配置文件,配置视图解析器
spring.mvc.view.prefix=/WEB-INF/jsp/
spring.mvc.view.suffix=.jsp
1.7创建 Controller
/**
 * 页面跳转Controller
 */
@Controller
public class PageController {


    /**
     * 页面跳转
     */
    @GetMapping("/{page}")
    public String showPage(@PathVariable String page){


        return page;
    }
}
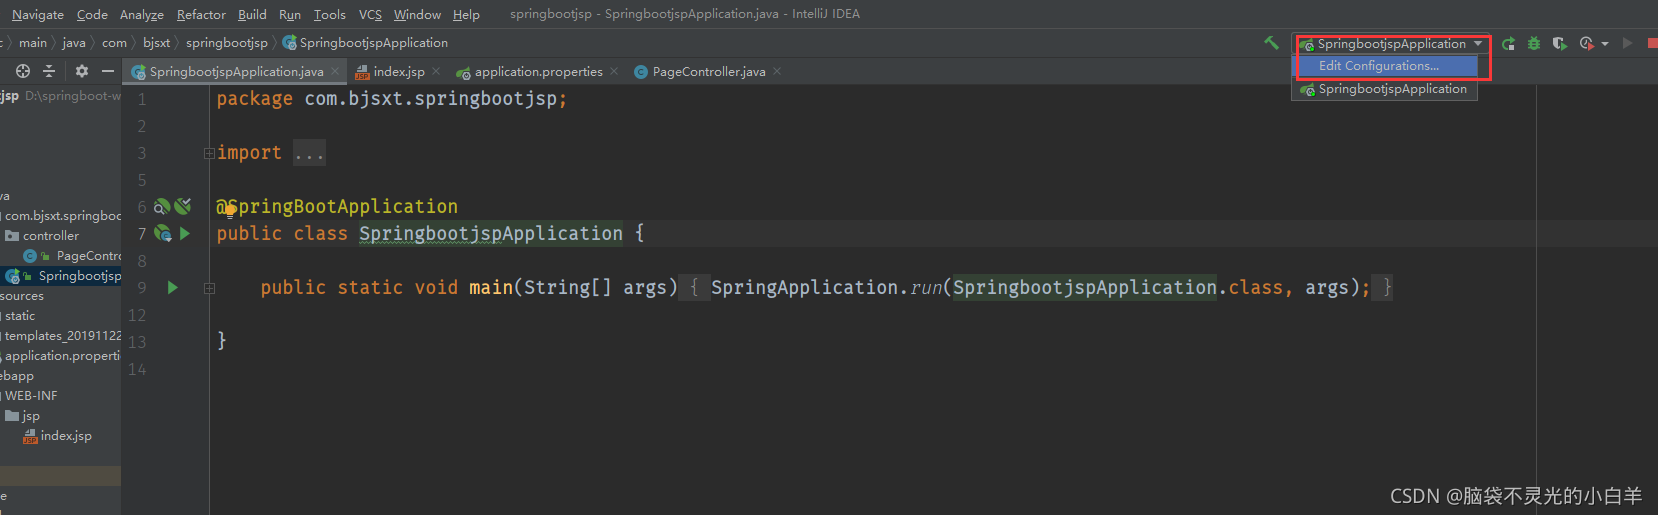
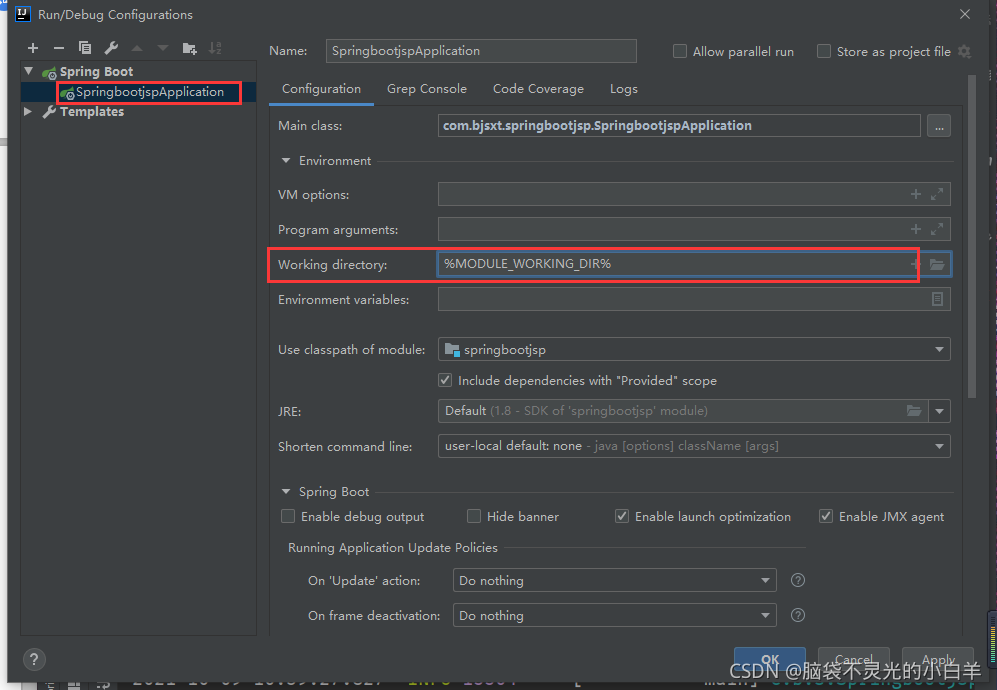
如果在IDEA中项目结构为聚合工程。那么在运行JSP是需要指定路径的。如果项目结构为独立项目则不需要。
2 Spring Boot 整合 Freemarker
2.1创建项目
2.2修改 POM 文件,添加 Freemarker 启动器
<?xml version="1.0" encoding="UTF-8"?>
<project xmlns="http://maven.apache.org/POM/4.0.0" xmlns:xsi="http://www.w3.org/2001/XMLSchema-instance"
         xsi:schemaLocation="http://maven.apache.org/POM/4.0.0 https://maven.apache.org/xsd/maven-4.0.0.xsd">
    <modelVersion>4.0.0</modelVersion>
    <parent>
        <groupId>org.springframework.boot</groupId>
        <artifactId>spring-boot-starter-parent</artifactId>
        <version>2.5.5</version>
        <relativePath/> <!-- lookup parent from repository -->
    </parent>
    <groupId>com.bjsxt</groupId>
    <artifactId>springbootfreemarker</artifactId>
    <version>0.0.1-SNAPSHOT</version>
    <name>springbootfreemarker</name>
    <description>Demo project for Spring Boot</description>
    <properties>
        <java.version>1.8</java.version>
    </properties>
    <dependencies>
        <dependency>
            <groupId>org.springframework.boot</groupId>
            <artifactId>spring-boot-starter-web</artifactId>
        </dependency>
        <!--Freemarker启动器依赖-->
        <dependency>
            <groupId>org.springframework.boot</groupId>
            <artifactId>spring-boot-test-autoconfigure</artifactId>
        </dependency>

        <dependency>
            <groupId>org.springframework.boot</groupId>
            <artifactId>spring-boot-starter-test</artifactId>
            <scope>test</scope>
        </dependency>
    </dependencies>

    <build>
        <plugins>
            <plugin>
                <groupId>org.springframework.boot</groupId>
                <artifactId>spring-boot-maven-plugin</artifactId>
            </plugin>
        </plugins>
    </build>

</project>
2.3创建 Users 实体
package com.bjsxt.springbootfreemarker.pojo;

public class Users {


    private String username;
    private String usersex;
    private String userage;

    public Users(String username, String usersex, String userage) {


        this.username = username;
        this.usersex = usersex;
        this.userage = userage;
    }

    public Users() {


    }

    public String getUsername() {


        return username;
    }

    public void setUsername(String username) {


        this.username = username;
    }

    public String getUsersex() {


        return usersex;
    }

    public void setUsersex(String usersex) {


        this.usersex = usersex;
    }

    public String getUserage() {


        return userage;
    }

    public void setUserage(String userage) {


        this.userage = userage;
    }
}
2.4创建 Controller
/**
 * UsersController
 */
@Controller
public class UsersController {


    /**
     * 处理请求,返回数据
     */
    @GetMapping("/showUsers")
    public String showUsers(Model model){


        List<Users> list = new ArrayList<>();
        list.add(new Users("admin","F","32"));
        list.add(new Users("LiSi","F","42"));
        list.add(new Users("XiaoLi","M","22"));
        model.addAttribute("list",list);
        return "usersList";
    }
}
2.5创建视图
创建视图注意这里的后缀应该是.ftl,但是因为其结构是一样的,为了方便可以先直接创建.html文件,最后再改回后缀即可。
<!DOCTYPE html>
<html lang="en">
<head>
    <meta charset="UTF-8">
    <title>Title</title>
</head>
<body>
    <table border="1" align="center" width="50%">
        <tr>
            <th>Name</th>
            <th>Sex</th>
            <th>Age</th>
        </tr>

        <#--循环迭代标记,list 指的是需要迭代的key,user表示每迭代一个就赋给user属性-->
        <#list list as user>
            <tr>
                <td>${user.username}</td>
                <td>${user.usersex}</td>
                <td>${user.userage}</td>
            </tr>
        </#list>
    </table>
</body>
</html>
2.6修改配置文件添加后缀
spring.freemarker.suffix=.ftl
3 Spring Boot 整合 Thymeleaf
3.1Thymeleaf 介绍
Thymeleaf的主要目标是将优雅的自然模板带到开发工作流程中,并将HTML在浏览器中正确显示,并且可以作为静态原型,让开发团队能更容易地协作。Thymeleaf能够处理HTML、XML、javaScript、CSS甚至纯文本。
长期以来JSP在视图领域有非常重要的地位 ,随着时间的变迁,出现了一位新的挑战者:Thymeleaf,Thymeleaf是原生的,不依赖于标签库,它能够在接受原始HTML的地方进行编辑和渲染,因为它没有与Servlet规范耦合,因此Thymeleaf模板能进入JSP所无法设计的领域。
3.2Thymeleaf 基本使用
3.2.1创建项目
3.2.2修改 POM 文件,添加 Thymeleaf 启动器依赖
<?xml version="1.0" encoding="UTF-8"?>
<project xmlns="http://maven.apache.org/POM/4.0.0" xmlns:xsi="http://www.w3.org/2001/XMLSchema-instance"
         xsi:schemaLocation="http://maven.apache.org/POM/4.0.0 https://maven.apache.org/xsd/maven-4.0.0.xsd">
    <modelVersion>4.0.0</modelVersion>
    <parent>
        <groupId>org.springframework.boot</groupId>
        <artifactId>spring-boot-starter-parent</artifactId>
        <version>2.5.5</version>
        <relativePath/> <!-- lookup parent from repository -->
    </parent>
    <groupId>com.bjsxt</groupId>
    <artifactId>springbootthymeleaf</artifactId>
    <version>0.0.1-SNAPSHOT</version>
    <name>springbootthymeleaf</name>
    <description>Demo project for Spring Boot</description>
    <properties>
        <java.version>1.8</java.version>
    </properties>
    <dependencies>
        <dependency>
            <groupId>org.springframework.boot</groupId>
            <artifactId>spring-boot-starter-web</artifactId>
        </dependency>
        <!--添加Thymeleaf启动器依赖-->
        <dependency>
            <groupId>org.springframework.boot</groupId>
            <artifactId>spring-boot-starter-thymeleaf</artifactId>
        </dependency>
        <dependency>
            <groupId>org.springframework.boot</groupId>
            <artifactId>spring-boot-starter-test</artifactId>
            <scope>test</scope>
        </dependency>
    </dependencies>

    <build>
        <plugins>
            <plugin>
                <groupId>org.springframework.boot</groupId>
                <artifactId>spring-boot-maven-plugin</artifactId>
            </plugin>
        </plugins>
    </build>

</project>
3.2.3创建 Controller
/**
 * 页面跳转Controller
 */
@Controller
public class PageController {


    /**
     * 页面跳转方法
     */
    @GetMapping("/show")
    public String showPage(Model model){


        model.addAttribute("msg","Hello Thymeleaf");
        return "index";
    }
}
3.2.4创建视图
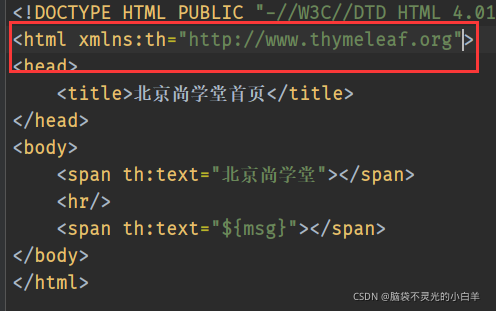
<!DOCTYPE HTML PUBLIC "-//W3C//DTD HTML 4.01 Transitional//EN" "http://www.w3.org/TR/html4/loose.dtd">
<html>
<head>
    <title>北京尚学堂首页</title>
</head>
<body>
    <span th:text="北京尚学堂"></span>
    <hr/>
    <span th:text="${msg}"></span>
</body>
</html>
3.3Thymeleaf 语法讲解
命名空间:xmlns:th=“http://www.thymeleaf.org”
3.3.1字符串与变量输出操作
3.3.1.1 th:text
th:text
在页面中输出值
3.3.1.2 th:value
th:value
可以将一个值放入到 input 标签的 value 中
3.3.2字符串操作
Thymeleaf 提供了一些内置对象,内置对象可直接在模板中使用。这些对象是以#引用 的。
3.3.2.1 使用内置对象的语法
1)引用内置对象需要使用#
2)大部分内置对象的名称都以 s结尾。如:strings、numbers、dates
${#strings.isEmpty(key)}
判断字符串是否为空,如果为空返回 true,否则返回 false

${#strings.contains(msg,'T')}
判断字符串是否包含指定的子串,如果包含返回 true,否则返回 false

${#strings.startsWith(msg,'a')}
判断当前字符串是否以子串开头,如果是返回 true,否则返回 false

${#strings.endsWith(msg,'a')}
判断当前字符串是否以子串结尾,如果是返回 true,否则返回 false

${#strings.length(msg)}
返回字符串的长度

${#strings.indexOf(msg,'h')}
查找子串的位置,并返回该子串的下标,如果没找到则返回-1

${#strings.substring(msg,2)}
${#strings.substring(msg,2,5)}
截取子串,用户与 jdk String 类下 SubString 方法相同

${#strings.toUpperCase(msg)}
${#strings.toLowerCase(msg)}
字符串转大小写。
3.3.3日期格式化处理
${#dates.format(key)}
格式化日期,默认的以浏览器默认语言为格式化标准

${#dates.format(key,'yyyy/MM/dd')}
按照自定义的格式做日期转换 ${#dates.year(key)}

${#dates.month(key)}
${#dates.day(key)}
Year:取年 Month:取月 Day:取日
/**
 * 页面跳转Controller
 */
@Controller
public class PageController {


    /**
     * 页面跳转方法
     */
    @GetMapping("/show")
    public String showPage(Model model){


        model.addAttribute("msg","Hello Thymeleaf");
        model.addAttribute("date",new Date());
        return "index";
    }
}
<!DOCTYPE HTML PUBLIC "-//W3C//DTD HTML 4.01 Transitional//EN" "http://www.w3.org/TR/html4/loose.dtd">
<html xmlns:th="http://www.thymeleaf.org">
<head>
<title>北京尚学堂首页</title>
</head>
<body>
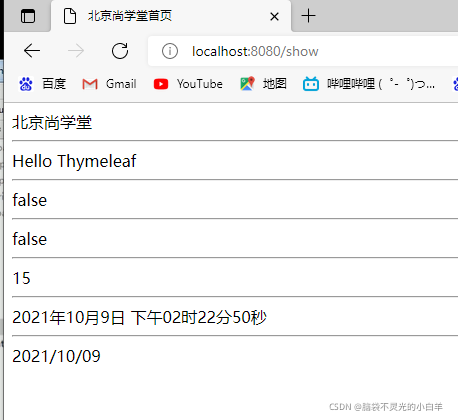
<span th:text="北京尚学堂"></span>
<hr/>
<span th:text="${msg}"></span>
<hr/>
<span th:text="${#strings.isEmpty(msg)}"></span>
<hr/>
<span th:text="${#strings.contains(msg,'s')}"></span>
<hr/>
<span th:text="${#strings.length(msg)}"></span>
<hr/>
<span th:text="${#dates.format(date)}"></span>
<hr/>
<span th:text="${#dates.format(date,'yyyy/MM/dd')} "></span>
</body>
</html>
3.3.4条件判断
3.3.4.1 th:if
th:if
条件判断
3.3.4.2 th:switch / th:case
th:switch / th:case
th:switch / th:case 与 Java 中的 switch 语句等效,有条件地显示匹配的内容。如果有 多个匹配结果只选择第一个显示。
th:case="*"表示 Java 中 switch 的 default,即没有 case 的值为 true 时则显示 th:case="*" 的内容。
3.3.5迭代遍历
3.3.5.1 th:each
th:each
迭代器,用于循环迭代集合

/**
 * 页面跳转Controller
 */
@Controller
public class PageController {


    /**
     * 页面跳转方法
     */
    @GetMapping("/show")
    public String showPage(Model model){


        model.addAttribute("msg","Hello Thymeleaf");
        model.addAttribute("date",new Date());
        model.addAttribute("sex","女");
        model.addAttribute("id","12");
        List<Users> list = new ArrayList<>();
        list.add(new Users("1","admin",23));
        list.add(new Users("2","lisi",34));
        list.add(new Users("3","zhangsan",25));
        list.add(new Users("4","wangwu",31));
        list.add(new Users("5","liuxi",22));
        model.addAttribute("list",list);
        return "index";
    }
}
<!DOCTYPE HTML PUBLIC "-//W3C//DTD HTML 4.01 Transitional//EN" "http://www.w3.org/TR/html4/loose.dtd">
<html xmlns:th="http://www.thymeleaf.org">
<head>
    <title>北京尚学堂首页</title>
</head>
<body>
    <span th:text="北京尚学堂"></span>
    <hr/>
    <span th:text="${msg}"></span>
    <hr/>
    <span th:text="${#strings.isEmpty(msg)}"></span>
    <hr/>
    <span th:text="${#strings.contains(msg,'s')}"></span>
    <hr/>
    <span th:text="${#strings.length(msg)}"></span>
    <hr/>
    <span th:text="${#dates.format(date)}"></span>
    <hr/>
    <span th:text="${#dates.format(date,'yyyy/MM/dd')} "></span>
    <div>
        <span th:if="${sex} == '男'">
            性别:男
        </span>
        <span th:if="${sex} == '女'">
             性别:女
        </span>
    </div>
    <hr/>
    <div th:switch="${id}">
        <span th:case="1">ID为1</span>
        <span th:case="2">ID为2</span>
        <span th:case="3">ID为3</span>
        <span th:case="4">ID为4</span>
        <span th:case="*">ID为*</span>
    </div>
    <table border="1" width="50%">
        <tr>
            <th>ID</th>
            <th>Name</th>
            <th>Age</th>
        </tr>
        <tr th:each="u : ${list}">
            <td th:text="${u.id}"></td>
            <td th:text="${u.name}"></td>
            <td th:text="${u.age}"></td>
        </tr>
    </table>
</body>
</html>
3.3.5.2 th:each 状态变量
- index:当前迭代器的索引 从 0 开始
- count:当前迭代对象的计数 从 1 开始
- size:被迭代对象的长度
- odd/even:布尔值,当前循环是否是偶数/奇数 从 0 开始
- first:布尔值,当前循环的是否是第一条,如果是返回 true 否则返回 false
- last:布尔值,当前循环的是否是最后一条,如果是则返回 true 否则返回 false
3.3.6th:each 迭代 Map
/**
 * 页面跳转Controller
 */
@Controller
public class PageController {


    /**
     * 页面跳转方法
     */
    @GetMapping("/show")
    public String showPage(Model model){


        model.addAttribute("msg","Hello Thymeleaf");
        model.addAttribute("date",new Date());
        model.addAttribute("sex","女");
        model.addAttribute("id","12");
        List<Users> list = new ArrayList<>();
        list.add(new Users("1","admin",23));
        list.add(new Users("2","lisi",34));
        list.add(new Users("3","zhangsan",25));
        list.add(new Users("4","wangwu",31));
        list.add(new Users("5","liuxi",22));
        model.addAttribute("list",list);

        Map<String,Users> map = new HashMap<>();
        map.put("user1",new Users("1","admin",23));
        map.put("user2",new Users("2","lisi",34));
        map.put("user3",new Users("3","wangwu",31));
        map.put("user4",new Users("4","liuxi",22));
        model.addAttribute("map",map);
        return "index";
    }
}
<!DOCTYPE HTML PUBLIC "-//W3C//DTD HTML 4.01 Transitional//EN" "http://www.w3.org/TR/html4/loose.dtd">
<html xmlns:th="http://www.thymeleaf.org">
<head>
    <title>北京尚学堂首页</title>
</head>
<body>
    <span th:text="北京尚学堂"></span>
    <hr/>
    <span th:text="${msg}"></span>
    <hr/>
    <span th:text="${#strings.isEmpty(msg)}"></span>
    <hr/>
    <span th:text="${#strings.contains(msg,'s')}"></span>
    <hr/>
    <span th:text="${#strings.length(msg)}"></span>
    <hr/>
    <span th:text="${#dates.format(date)}"></span>
    <hr/>
    <span th:text="${#dates.format(date,'yyyy/MM/dd')} "></span>
    <div>
        <span th:if="${sex} == '男'">
            性别:男
        </span>
        <span th:if="${sex} == '女'">
             性别:女
        </span>
    </div>
    <hr/>
    <div th:switch="${id}">
        <span th:case="1">ID为1</span>
        <span th:case="2">ID为2</span>
        <span th:case="3">ID为3</span>
        <span th:case="4">ID为4</span>
        <span th:case="*">ID为*</span>
    </div>
    <!--list迭代遍历-->
    <table border="1" width="50%">
        <tr>
            <th>ID</th>
            <th>Name</th>
            <th>Age</th>
        </tr>
        <tr th:each="u : ${list}">
            <td th:text="${u.id}"></td>
            <td th:text="${u.name}"></td>
            <td th:text="${u.age}"></td>
        </tr>
    </table>
    <!--th:each 状态变量-->
    <hr/>
     <table border="1" width="50%">
          <tr>
              <th>ID</th>
              <th>Name</th>
              <th>Age</th>
              <th>Index</th>
              <th>Count</th>
              <th>Size</th>
              <th>Odd</th>
              <th>Even</th>
              <th>First</th>
              <th>Last</th>
          </tr>
          <tr th:each="u,var : ${list}">
              <td th:text="${u.id}"></td>
              <td th:text="${u.name}"></td>
              <td th:text="${u.age}"></td>
              <td th:text="${var.index}"></td>
              <td th:text="${var.count}"></td>
              <td th:text="${var.size}"></td>
              <td th:text="${var.odd}"></td>
              <td th:text="${var.even}"></td>
              <td th:text="${var.first}"></td>
              <td th:text="${var.last}"></td>
          </tr>
     </table>
      <!--th:each 迭代 Map-->
    <hr/>
     <table border="1" width="50%">
            <tr>
                <th>Value</th>
            </tr>
            <tr th:each="m : ${map}">
                <td th:text="${m}"></td>
            </tr>
     </table>

     <hr/>
      <table border="1" width="50%">
             <tr>
                 <th>ID</th>
                 <th>Name</th>
                 <th>Age</th>
                 <th>Key</th>
             </tr>
             <tr th:each="m : ${map}">
                 <td th:text="${m.value.id}"></td>
                 <td th:text="${m.value.name}"></td>
                 <td th:text="${m.value.age}"></td>
                 <td th:text="${m.key}"></td>
             </tr>
      </table>
</body>
</html>
3.3.7操作域对象
/**
 * 页面跳转Controller
 */
@Controller
public class PageController {


    /**
     * 页面跳转方法
     */
    @GetMapping("/show")
    public String showPage(Model model, HttpServletRequest request){


        model.addAttribute("msg","Hello Thymeleaf");
        model.addAttribute("date",new Date());
        model.addAttribute("sex","女");
        model.addAttribute("id","12");
        List<Users> list = new ArrayList<>();
        list.add(new Users("1","admin",23));
        list.add(new Users("2","lisi",34));
        list.add(new Users("3","zhangsan",25));
        list.add(new Users("4","wangwu",31));
        list.add(new Users("5","liuxi",22));
        model.addAttribute("list",list);

        Map<String,Users> map = new HashMap<>();
        map.put("user1",new Users("1","admin",23));
        map.put("user2",new Users("2","lisi",34));
        map.put("user3",new Users("3","wangwu",31));
        map.put("user4",new Users("4","liuxi",22));
        model.addAttribute("map",map);

        request.setAttribute("req","HttpServletRequest");
        request.getSession().setAttribute("ses","HttpSession");
        request.getSession().getServletContext().setAttribute("app","application");
        return "index";
    }
}
3.3.7.1 HttpServletRequest
request.setAttribute("req","HttpServletRequest");
      HttpServletRequest: <span th:text="${#httpServletRequest.getAttribute('req')}"></span>
                          <span th:text="${#request.getAttribute('req')}"></span>
3.3.7.2 HttpSession
request.getSession().setAttribute("ses","HttpSession");
HttpSession: <span th:text="${session.ses}"></span><br/>
             <span th:text="${#session.getAttribute('ses')}"></span><br/>
3.3.7.3 ServletContext
request.getSession().getServletContext().setAttribute("app","application");
Application: <span th:text="${application.app}"></span>
             <span th:text="${#servletContext.getAttribute('app')}"></span>
<hr/>
ServletContext: <span th:text="${application.app}"></span>
                <span th:text="${#servletContext.getAttribute('app')}"></span>
3.3.8URL 表达式
3.3.8.1 语法
在 Thymeleaf 中 URL 表达式的语法格式为@{}
3.3.8.2 URL 类型
3.3.8.2.1绝对路径
<a th:href="@{http://www.baidu.com}">绝对路径</a>
3.3.8.2.2相对路径
/**
 * 页面跳转Controller
 */
@Controller
public class PageController {


    /**
     * 页面跳转方法
     */
    @GetMapping("/show")
    public String showPage(Model model, HttpServletRequest request){


        model.addAttribute("msg","Hello Thymeleaf");
        model.addAttribute("date",new Date());
        model.addAttribute("sex","女");
        model.addAttribute("id","12");
        List<Users> list = new ArrayList<>();
        list.add(new Users("1","admin",23));
        list.add(new Users("2","lisi",34));
        list.add(new Users("3","zhangsan",25));
        list.add(new Users("4","wangwu",31));
        list.add(new Users("5","liuxi",22));
        model.addAttribute("list",list);

        Map<String,Users> map = new HashMap<>();
        map.put("user1",new Users("1","admin",23));
        map.put("user2",new Users("2","lisi",34));
        map.put("user3",new Users("3","wangwu",31));
        map.put("user4",new Users("4","liuxi",22));
        model.addAttribute("map",map);

        request.setAttribute("req","HttpServletRequest");
        request.getSession().setAttribute("ses","HttpSession");
        request.getSession().getServletContext().setAttribute("app","application");
        return "index";
    }

    @GetMapping("/show2")
    public String show2(){


        return "index2";
    }
}
<a th:href="@{/show2}">打开index2</a>
相对于当前项目的根
<a th:href="@{/show}">相对路径</a>

相对于服务器路径的根
<a th:href="@{~/project2/resourcename}">相对于服务器的根</a>
3.3.8.3 在 URL 中传递参数
3.3.8.3.1在普通格式的 URL 中传递参数
方式一
修改show2方法
 @GetMapping("/show2")
    public String show2(String id,String name){


        System.out.println(id+"\t"+name);
        return "index2";
    }
<a th:href="@{/show2?id=1&name=zhangsan}">普通格式的 URL 中传递参数1</a>


方式二
<a th:href="@{/show2(id=1,name=zhangsan)}">普通 URL 格式传参2</a>
方式三
model.addAttribute("id",100);
model.addAttribute("name","lisi");
动态参数传递值
<a th:href="@{

     '/show2?id='+${id}+'&name='+${name}}"> 普 通 URL 格 式 传 参3 </a>
方式四
<a th:href="@{/show2(id=${id},name=${name})}">普通 URL 格式传参4</a>
3.3.8.3.2在 restful 格式的 URL 中传递参数
添加show3方法
方式一
 @GetMapping("/show3/{id}")
    public String show3(@PathVariable String id){


        System.out.println(id);
        return "index2";
    }
<a th:href="@{/show3/{id}(id=1)}">restful 格式传参 方式一</a>
方式二
@GetMapping("/show3/{id}/{name}")
    public String show3(@PathVariable String id,@PathVariable String name){


        System.out.println(id+"\t"+name);
        return "index2";
    }
<a th:href="@{/show3/{id}/{name}(id=1,name=admin)}">restful 格 式 传 参 方式二 </a>
方式三
@GetMapping("/show4/{id}")
    public String show4(@PathVariable String id, String name){


        System.out.println(id+"\t"+name);
        return "index2";
    }
<a th:href="@{/show4/{id}(id=1,name=admin)}">restful 格式传参 方式三</a>
方式四
<a th:href="@{/show3/{id}(id=${id},name=${name})}">restful 格式传参 方式四</a>
3.3.9在配置文件中配置 Thymeleaf
spring.thymeleaf.prefix=classpath:/templates/suibian/ #配置视图路径
spring.thymeleaf.suffix=.html #配置视图模板
spring.thymeleaf.mode=HTML #配置视图模板类型,如果视图模板使用的 是 html5 需要配置
spring.thymeleaf.encoding=utf-8 #配置编码方式
spring.thymeleaf.servlet.content-type=text/html #响应类型
#配置页面缓存
spring.thymeleaf.cache=false