随着项目的功能不断增多启动项目需要的时间就越来越长,如果每个功能都从Controller入口进行测试,不仅费时而且费力。
那么这时候单元测试就体现出非常大的优势了,对所有的接口进行测试,可以非常快速的发现问题,而且方便调试。而且通过编写单元测试来发现代码结构的不合理性,通常来说代码结构越合理,单元测试写的越方便。
假设有这个场景,我们的项目启动需要30s,共有A、B、C、D这四个service,A依赖B、C这两个service,D Service为需要自动注入属性值的Service。这里使用线程睡眠的方式模拟启动延迟:
@SpringBootApplication
public class Main {
    public static void main(String[] args) {
        SpringApplication.run(Main.class, args);
    }

    @Bean
    public ApplicationRunner applicationRunner() throws InterruptedException {
        System.out.println("===================模拟延迟--------------------");
        Thread.sleep(30000);
        return args -> {
            System.out.println("===================模拟延迟启动--------------------");
        };
    }
}
如果使用SpringBootTest,那么得要等到项目启动后才执行测试方法。
故此添加了MainTest单元测试:
@RunWith(SpringRunner.class)
@SpringBootTest(classes = Main.class)
public class MainTest {
    @Autowired
    private AService aService;

    @Before
    public void before() {
        System.out.println("start=============");
    }

    @Test
    public void testStartUp() {
        aService.doSmthing();
        System.out.println("--------------测试----------");
    }
}
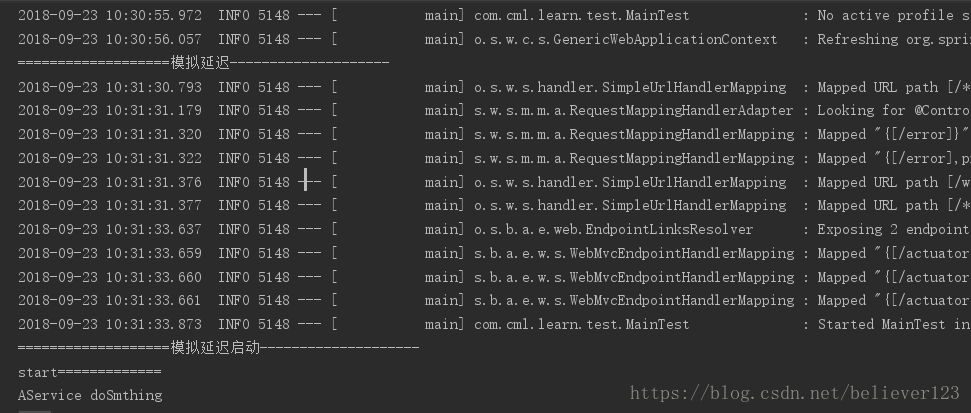
从控制台可以看出,要等到项目30s后才执行到我们的测试方法,要是有多个单元测试单单启动就浪费了大量的时间:
拆分单元测试
例如我们只需要测试A服务,那么可以使用ContextConfiguration指定需要启动的类和依赖类,由于A依赖B、C两个服务,因此ContextConfiguration注入了A、B、C三个类,如:
@RunWith(SpringRunner.class)
@ContextConfiguration(classes = {
        AService.class,
        BService.class,
        CService.class
})
public class AServiceTest {
    @Autowired
    private AService aService;


    @Test
    public void test() {
        aService.doSmthing();
    }

}
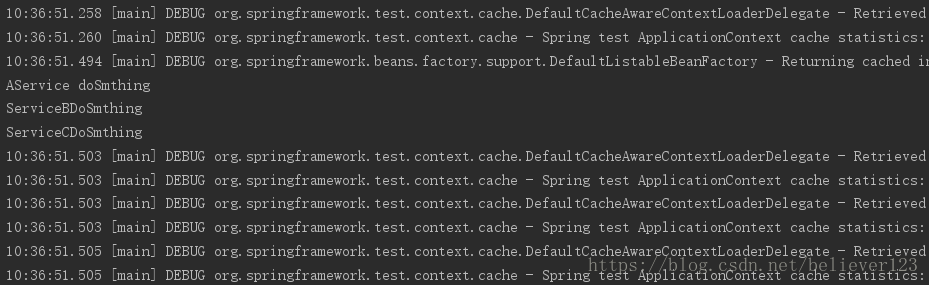
运行后如下,不到1s就执行完了。
使用Mock服务
比如我们需要测试A的服务方法,B、C服务并不是我们关注的重点,这个时候可以将BC服务mock出来。
@RunWith(SpringRunner.class)
@ContextConfiguration(classes = {
        AService.class
})
public class AServiceMockTest {
    @Autowired
    private AService aService;
    @MockBean
    private BService bService;
    @MockBean
    private CService cService;

    @Before
    public void setUp() {
        Mockito.when(bService.doSmthing()).thenReturn("mockBServce");
        Mockito.when(cService.doSmthing()).thenReturn("mockCServce");
    }

    @Test
    public void test() {
        aService.doSmthing();
    }

}
占位符测试
通常我们有配置文件,如果使用配置中的属性可以使用@Value("${key}")进行注入,如D Service:
@Service
public class DService {
    @Value("${config.username}")
    private String username;

    public String doSmthing() {
        return username+" doSmthing";
    }
}
在需要的属性不多的情况下,我们可以使用@TestPropertySource进行注入,注意这里需要注入PropertySourcesPlaceholderConfigurer类,详见:https://docs.spring.io/spring-boot/docs/2.0.1.RELEASE/reference/htmlsingle/#boot-features-testing-spring-boot-applications
@RunWith(SpringRunner.class)
@ContextConfiguration(classes = {
        DService.class,
        PropertySourcesPlaceholderConfigurer.class
})
@TestPropertySource(properties = {"config.username=myUsername"})
public class DServiceTest {
    @Autowired
    private DService dService;

    @Test
    public void test() {
        String result = dService.doSmthing();
        System.out.println(result);
    }
}
运行后输出如下:
myUsername doSmthing
如果属性多,那么使用注解注入就不太方便了,这时可以使用属性文件进行配置,
@TestPropertySource(“classpath:application.properties”)或者在ContextConfiguration中添加initializers=ConfigFileApplicationContextInitializer.class进行自动配置,默认会配置resoruces下的application.properties属性文件
@RunWith(SpringRunner.class)
@ContextConfiguration(classes = {
        DService.class,
        PropertySourcesPlaceholderConfigurer.class
}, initializers = ConfigFileApplicationContextInitializer.class)
public class DServicePropertiesTest {
    @Autowired
    private DService dService;

    @Test
    public void test() {
        String result = dService.doSmthing();
        System.out.println(result);
    }
}
总结
以上例子说明了@SpringBootTest、@TestPropertySource、PropertySourcesPlaceholderConfigurer、ConfigFileApplicationContextInitializer等使用。已经可以覆盖到大部分常用的单元测试情况了,更多的使用方式可以参考Spring官网和SpringBoot中的单元测试这章节:
- https://docs.spring.io/spring/docs/5.0.8.RELEASE/spring-framework-reference/testing.html#testpropertysource
- https://docs.spring.io/spring-boot/docs/2.0.1.RELEASE/reference/htmlsingle/#boot-features-testing-spring-boot-applications
以上代码已经提交到工程:LearnTest
SpringBootLearning是对springboot学习与研究项目,是根据实际项目的形式对进行配置与处理,欢迎star与fork。
[oschina 地址]
http://git.oschina.net/cmlbeliever/SpringBootLearning
[github 地址]
https://github.com/cmlbeliever/SpringBootLearning