同样是自定义view的练习。
图片录制有问题,将就看吧。
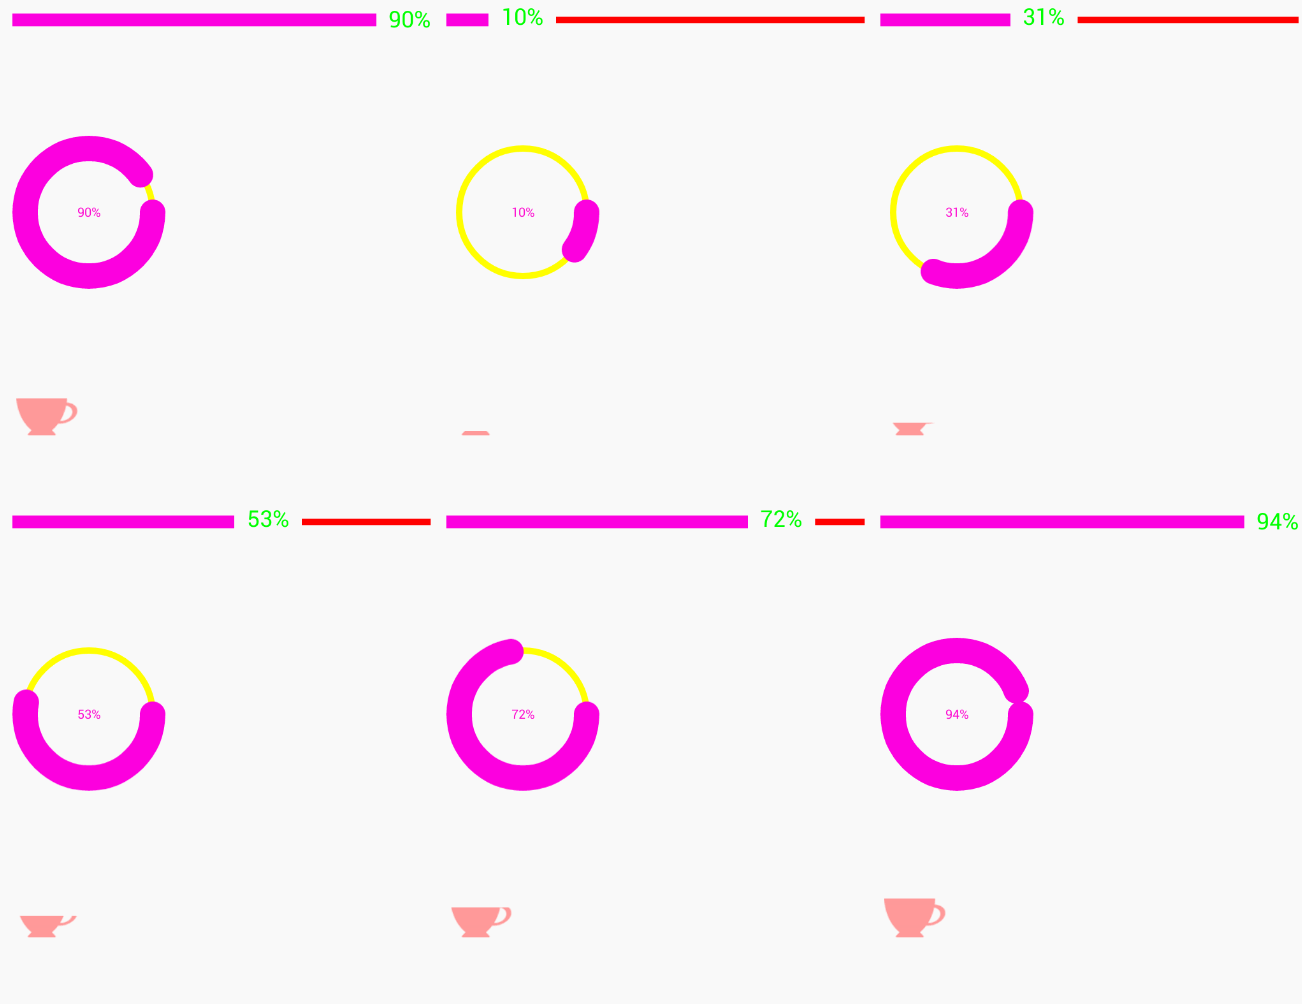
效果图:
思路:
1. 继承ProgressBar
2. 实现其构造器
3. 初始化画笔 、提取xml属性
4. 测量
5. 绘图
传统进度条
继承ProgressBar
public class MyProgressBar1_Horizontal extends ProgressBar{}
实现其构造器
public MyProgressBar1_Horizontal(Context context) {
    this(context, null);
}

public MyProgressBar1_Horizontal(Context context, AttributeSet attrs) {
    this(context, attrs, 0);
}

public MyProgressBar1_Horizontal(Context context, AttributeSet attrs, int defStyleAttr) {
    super(context, attrs, defStyleAttr);
    init();
    parseStyle(context, attrs);
初始化画笔 、提取xml属性
//提取xml属性
private void parseStyle(Context context, AttributeSet attr) {
    TypedArray typedArray = context.obtainStyledAttributes(attr, R.styleable.MyProgressBar1_Horizontal);

    color_text = typedArray.getColor(R.styleable.MyProgressBar1_Horizontal_colortext, COLOR_TEXT);
    color_fore = typedArray.getColor(R.styleable.MyProgressBar1_Horizontal_colorfore, COLOR_FORE);
    color_background = typedArray.getColor(R.styleable.MyProgressBar1_Horizontal_colorbackground, COLOR_BACKGROUND);

    height_text = (int) typedArray.getDimension(R.styleable.MyProgressBar1_Horizontal_heighttext, HEIGHT_TEXT);
    height_fore = (int) typedArray.getDimension(R.styleable.MyProgressBar1_Horizontal_heightfore, HEIGHT_FORE);
    height_background = (int) typedArray.getDimension(R.styleable.MyProgressBar1_Horizontal_heightbacground, HEIGHT_BACKGROUND);

    gap = (int) typedArray.getDimension(R.styleable.MyProgressBar1_Horizontal_gap, GAP);

    typedArray.recycle();
}
//初始化画笔
protected void init() {
    paint = new Paint();
    paint.setStyle(Paint.Style.STROKE);
    paint.setAntiAlias(true);
    paint.setDither(true);
    paint.setStrokeCap(Paint.Cap.ROUND);
}
测量
@Override
protected synchronized void onMeasure(int widthMeasureSpec, int heightMeasureSpec) {
    int width = MeasureSpec.getSize(widthMeasureSpec);
    int height = measureHeight(heightMeasureSpec);
    drawWiath = width - getPaddingLeft() - getPaddingRight();
    drawHeight = height;
    setMeasuredDimension(width, height);
}

private int measureHeight(int heightMeasureSpec) {

    if (MeasureSpec.getMode(heightMeasureSpec) != MeasureSpec.EXACTLY) {
        return Math.max(Math.max(height_background, height_fore), height_text);
    }
    return MeasureSpec.getSize(heightMeasureSpec);
}
绘图
@Override
protected synchronized void onDraw(Canvas canvas) {
    canvas.save();
//        canvas.translate();//这里没有移动坐标
    float percentage = getProgress() * 1.0f / getMax();
    String text = getProgress() + "%";
    float measureText = paint.measureText(text);

    if (measureText + percentage * drawWiath + gap / 2 <= drawWiath) {

        paint.setStrokeCap(Paint.Cap.ROUND);
        paint.setStrokeWidth(height_fore);
        paint.setColor(color_fore);
        canvas.drawLine(0, drawHeight / 2, percentage * drawWiath, drawHeight / 2, paint);


        paint.setStyle(Paint.Style.FILL);
        paint.setTextSize(height_text);
        paint.setStrokeWidth(height_text);
        paint.setColor(color_text);
        canvas.drawText(text, percentage * drawWiath + gap / 2, drawHeight / 2 - (paint.descent() + paint.ascent() / 2), paint);
        measureText = paint.measureText(text);

        paint.setStrokeCap(Paint.Cap.ROUND);
        paint.setStrokeWidth(height_background);
        paint.setColor(color_background);
        canvas.drawLine(percentage * drawWiath + gap + measureText, drawHeight / 2, drawWiath, drawHeight / 2, paint);
    } else {
        paint.setStrokeCap(Paint.Cap.ROUND);
        paint.setStrokeWidth(height_fore);
        paint.setColor(color_fore);
        canvas.drawLine(0, drawHeight / 2, drawWiath - measureText - gap/2, drawHeight / 2, paint);

        paint.setStyle(Paint.Style.FILL);
        paint.setTextSize(height_text);
        paint.setStrokeWidth(height_text);
        paint.setColor(color_text);
        canvas.drawText(text, drawWiath - measureText, (drawHeight - paint.descent() - paint.ascent()) / 2, paint);

    }


    canvas.restore();
}
其他的大致都是这个思路。
比如圆形的:同样是重复上面的步骤,只不过测量和绘图时会有写不同
测量:以宽高中最小的一方为圆的半径
绘制:

    @Override
    protected synchronized void onDraw(Canvas canvas) {

        paint.setDither(true);
        paint.setAntiAlias(true);

        String text = getProgress() + "%";
        float textWidth;
        float textHeight = paint.descent() + paint.ascent();
        float sweepAngle = getProgress() * 1.0f / getMax() * 360;//角度
        RectF rectF = new RectF(0, 0, drawRadius * 2, drawRadius * 2);

        canvas.save();
        canvas.translate(getPaddingLeft() + maxPaintWidth / 2, getPaddingTop() + maxPaintWidth / 2);
        //背景
        paint.setStyle(Paint.Style.STROKE);
        paint.setStrokeWidth(height_background);
        paint.setColor(color_background);
        canvas.drawCircle(drawRadius, drawRadius, drawRadius, paint);
        //前景
        paint.setStyle(Paint.Style.STROKE);
        paint.setStrokeWidth(height_fore);
        paint.setColor(color_fore);
        canvas.drawArc(rectF, 0, sweepAngle, false, paint);
        //文字
        paint.setStyle(Paint.Style.FILL);
        paint.setColor(color_text);
        paint.setTextSize(height_text);
        paint.setStrokeWidth(height_text);
        textWidth = paint.measureText(text);
        canvas.drawText(text, drawRadius - textWidth / 2, drawRadius - textHeight / 2, paint);
        canvas.restore();
    }
在这里要注意一点,在绘制文字时候,应该将画笔设置为paint.setStyle(Paint.Style.FILL);
如果画笔仍然为paint.setStyle(Paint.Style.STROKE);则会出现绘制失败(绘制乱七八糟的)。
clip类型进度条(我也不知道叫啥)
效果就是效果图下面的杯子。
显示
1. 在布局文件中写出(不要在意我起什么名字了)
<sunshine.myapplication.MyProgressBar_2
    android:layout_width="wrap_content"
    android:layout_marginTop="300dp"
    android:layout_height="wrap_content"
    sunshine:max="100"
    sunshine:progress="80" />
2. 在drawable中创建一个 clip 便签的xml文件
clipOrientation和gravity 可以控制显示的方向位置等
 loading_progress是杯子的图片
<?xml version="1.0" encoding="utf-8"?>
 <clip xmlns:android="http://schemas.android.com/apk/res/android"
    android:clipOrientation="vertical"
    android:drawable="@drawable/loading_progress"
    android:gravity="bottom" >
</clip>
3. 创建一个ImageView
这个ImageView其实就是显示出来的控件,只不过我们在这个View上进行了一些小的‘内幕’操作
<?xml version="1.0" encoding="utf-8"?>
<ImageView xmlns:android="http://schemas.android.com/apk/res/android"
    android:id="@+id/myprogressbar_2"
    android:layout_width="wrap_content"
    android:layout_height="wrap_content"
    android:layout_gravity="center"
    android:paddingLeft="3dp"
    android:paddingTop="3dp"
    android:scaleType="centerInside"
    android:src="@drawable/myprogressbar_2" />
实现
对我们的ImageView进行“内幕”操作
public class MyProgressBar_2 extends FrameLayout {
    private final int DEF_MAX = 100;
    private final int DEF_PROGRESS = 0;
    private int pro = 0;
    private int max, progress;
    private ClipDrawable drawable;


    public MyProgressBar_2(Context context) {
        this(context, null);
    }

    public MyProgressBar_2(Context context, AttributeSet attrs) {
        this(context, attrs, 0);
    }

    public MyProgressBar_2(Context context, AttributeSet attrs, int defStyleAttr) {
        super(context, attrs, defStyleAttr);
        init(context, attrs);
    }

    private void init(Context context, AttributeSet attrs) {

        TypedArray typedArray = context.obtainStyledAttributes(attrs, R.styleable.MyProgressBar_2);
        max = typedArray.getInteger(R.styleable.MyProgressBar_2_max, DEF_MAX);
        progress = typedArray.getInteger(R.styleable.MyProgressBar_2_progress, DEF_PROGRESS);
        typedArray.recycle();
//看这里
        View view = LayoutInflater.from(context).inflate(R.layout.myprogressbar_2, null);
        addView(view);

        ImageView imageView = (ImageView) findViewById(R.id.myprogressbar_2);
        drawable = (ClipDrawable) imageView.getDrawable();
        setProgress(progress);
    }


    public void setProgress(int progress) {
        pro = progress;
        if (pro > max)
            pro = max;
        drawable.setLevel(pro * (10000/ max ));
    }

    public int getProgress() {
        return pro;
    }
扩展
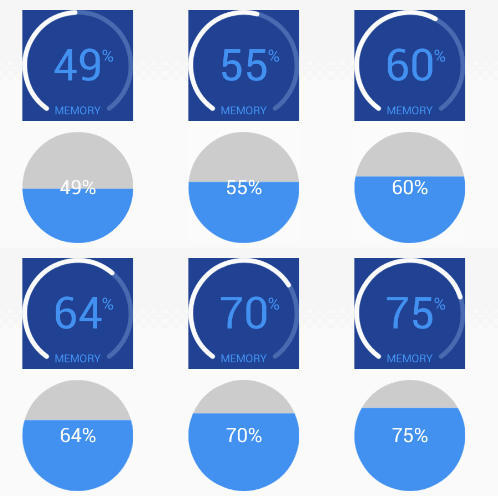
我们有时候可能会看见仪表盘这样的进度条
其实原理还是一样的
第一个:绘制的起点和中点发送了改变
第二个:其实是以圆直径为总长度,根据进度来绘制相应角度的扇形,然后将画笔设置为FILL就可以了(当时不知道设置为fill就可以填充,走了点弯路)
至于那些有颜色渐变的,也就是将画笔设置一下就可以了,网上有很多资料的。
差不多就到这里了,学会举一反三就好了,
分享一个专门做绘图的第三方库:XCL:http://www.oschina.net/p/xcl-charts
在鸿洋大神的微博上看见他分享了一个绘图的,也拿来分享下:SmallChart https://github.com/Idtk/SmallChart
本周任务原应本月15号完成,实际为12号完成。
任务完成~

