keil MDK5搭建STM32开发环境
https://blog.csdn.net/scien2011/article/details/52497966
keil5下载stm32程序方法
https://jingyan.baidu.com/article/6dad50753da33ca122e36e5e.html
keil uVersion4的安装卸载+破解
https://blog.csdn.net/yangzigege/article/details/77847561?locationNum=1&fps=1
先安装c51的程序,

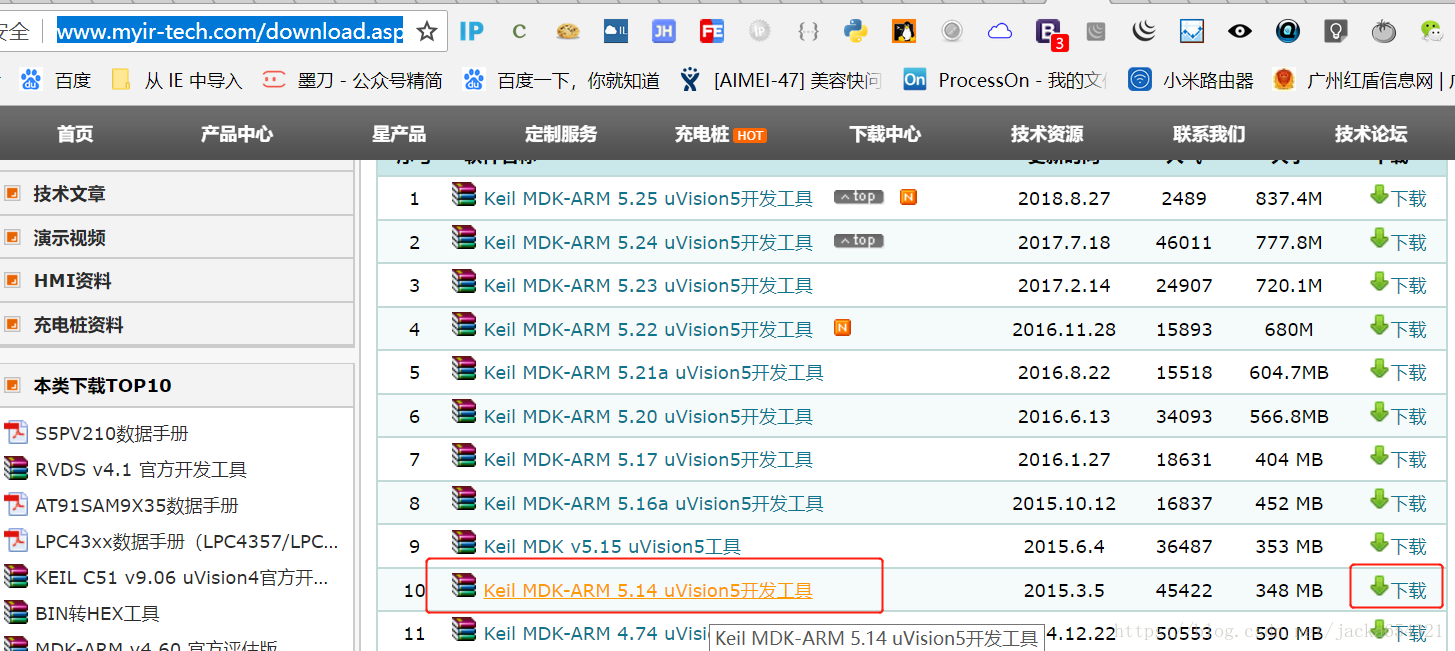
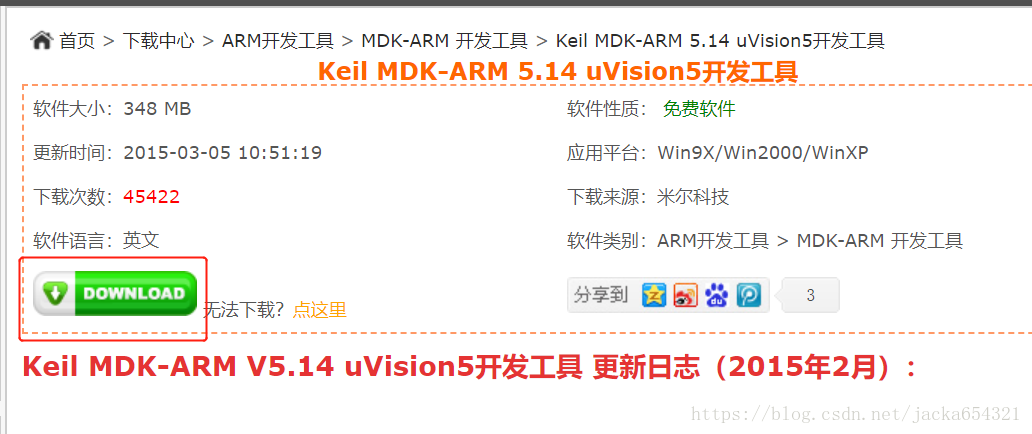
下载适合自己版本的下载MDK-ARM并安装;
可自行到官网,下载安装;(注意需要注册)
https://www.keil.com/download/product/
或者在此网站下载,安装
http://www.myir-tech.com/download.asp?nid=25
百度网盘:
https://pan.baidu.com/s/1qWJnFtU
安装完可在Keil uVision5内打开;
安装适合自己模块的库;
安装完成后;
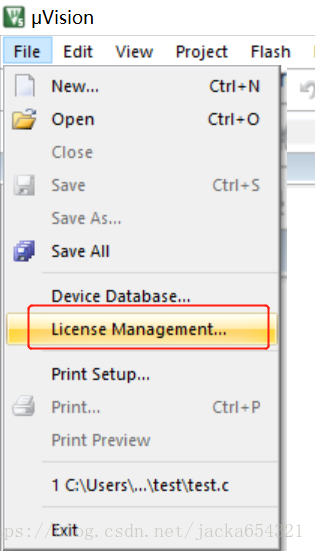
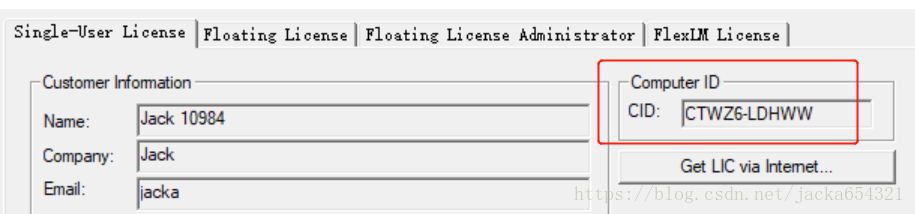
安装完关闭,返回Keil uVision5,打开license management,复制CID;
打开注册机,粘贴CID,根据自己开发需求选择Target,本例STM32选 ARM;如果是进行51单片机开发,选择C51。
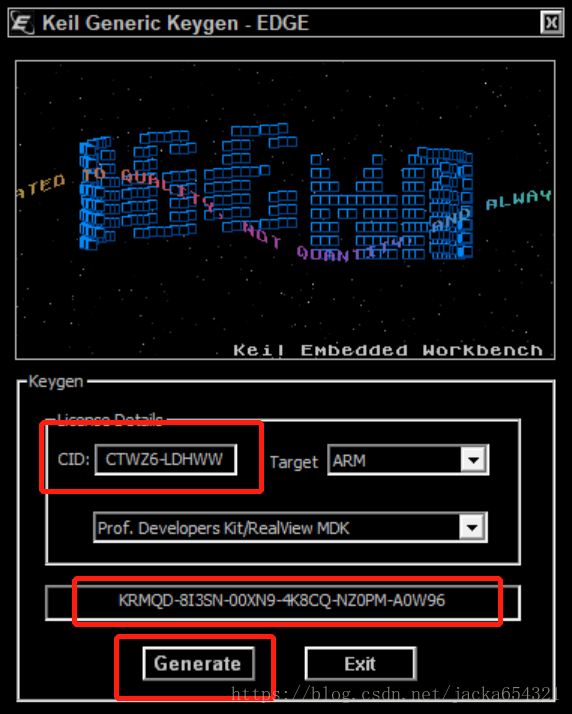
拷贝该许可编码,回到Keil软件的License Managerment页面,在“New License ID Code(LIC)”地方,输入刚刚拷贝的许可编码,点击“ADD LIC”按扭;
此时,底下会出现“LIC Added Successfully”提示,表示已经破解成功。

keil软件新建工程
http://www.yahboom.com/build.html?id=829&cid=152
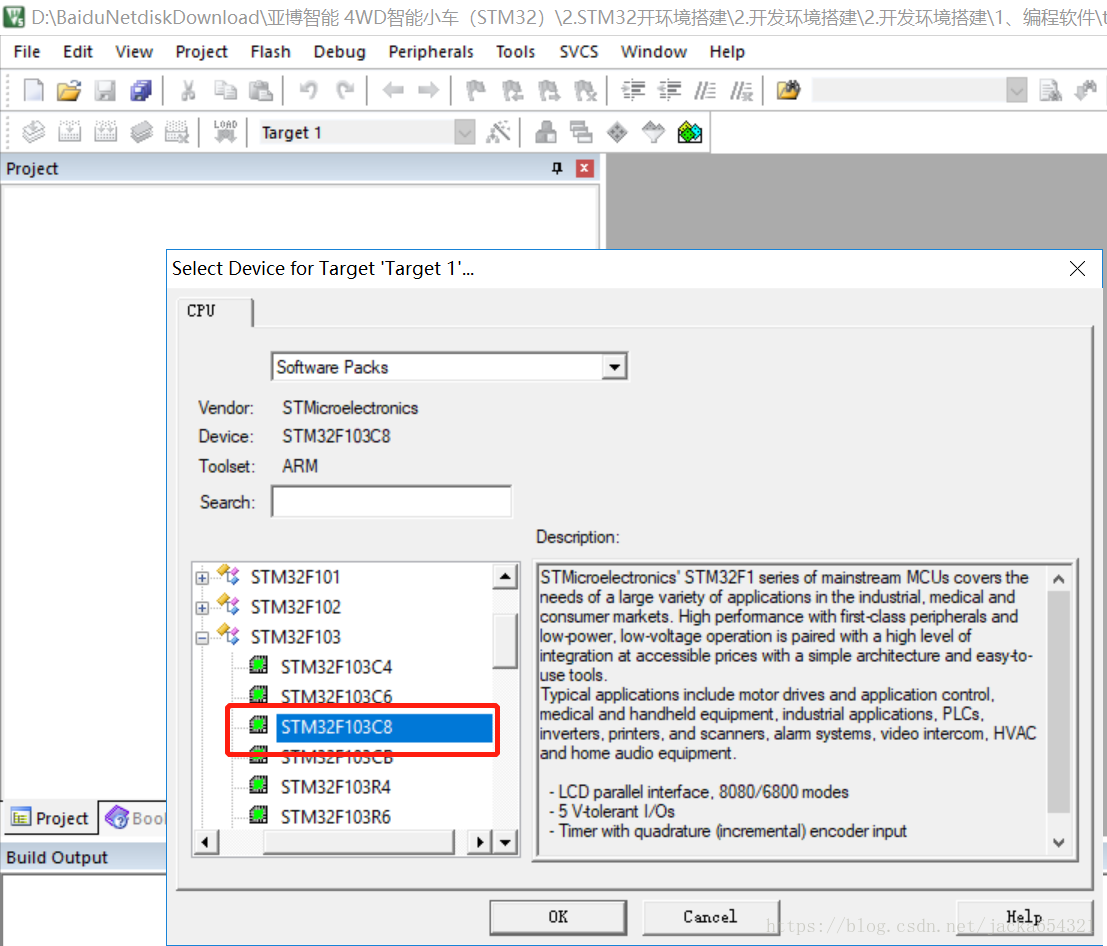
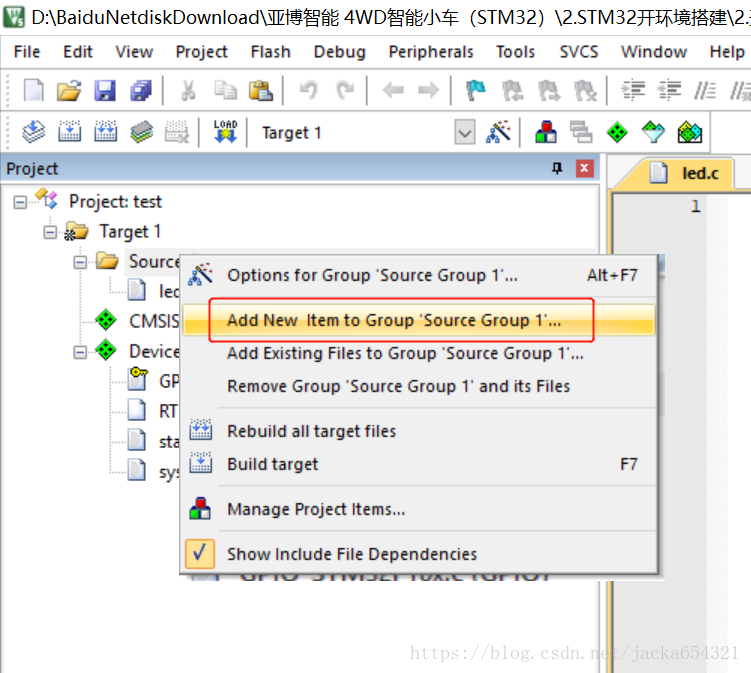
新建项目
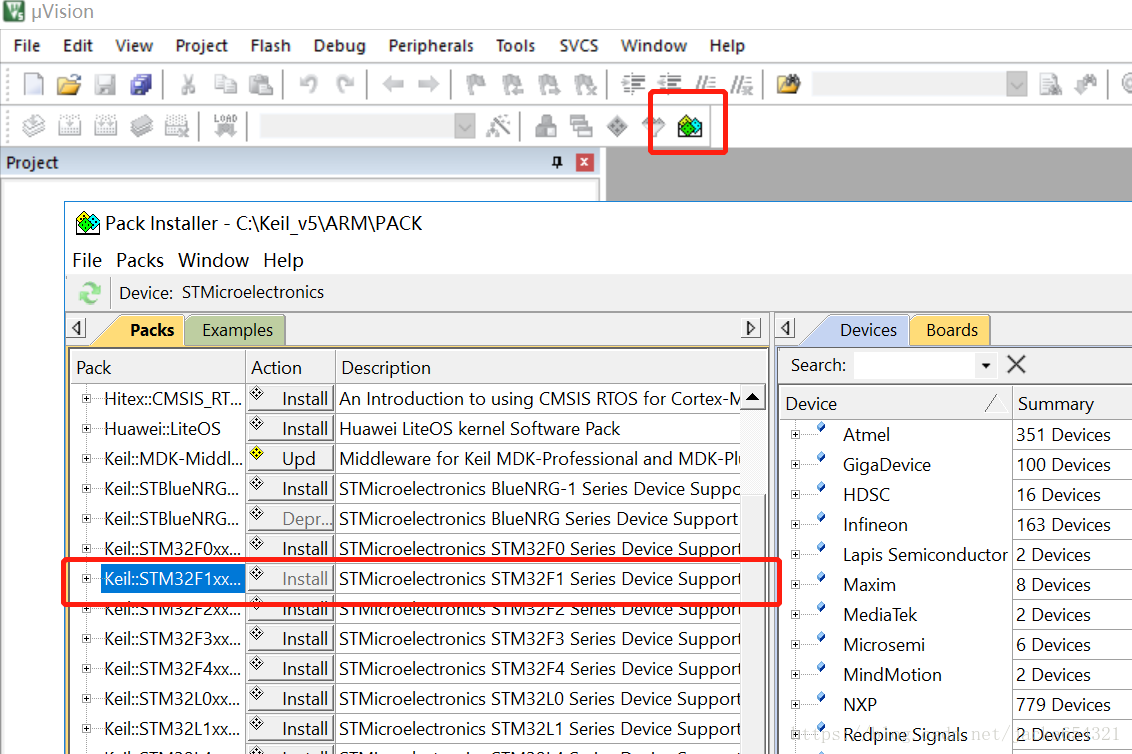
选择 project 目录, 选择STMicroelectronics,选择对应的使用的STM芯片,我们小车用的是STM32F103C8这个芯片,然后我们点击OK;
下一步会出现运行环境管理器窗口,这是通过选项配置需要的官方库;
CMSIS -> CORE 必选
Device -> Startup 必选
如果要启用GPIO,则选择 STM32Cube HAL -> GPIO,会出现如下情况:
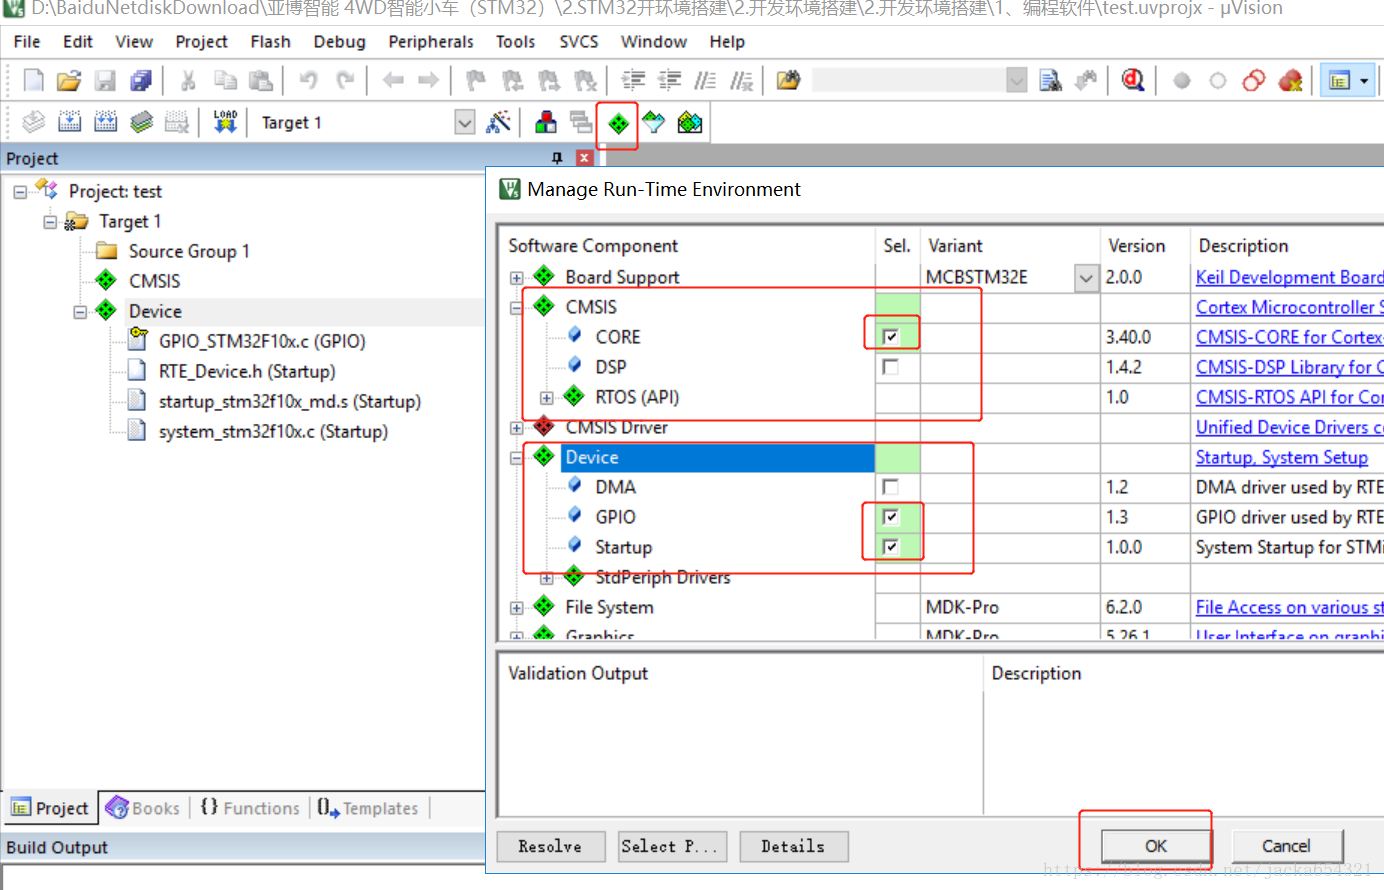
黄色 代表需要依赖其他库,会在下方提示需要的库,单击定位到选项
绿色 代表该库已经可用
红色 代表与其他库冲突
编写第一个程序:
//这是点亮一个LED的程序,LED接在PG13
#include "stm32f4xx_hal.h"

int main()
{
    __GPIOG_CLK_ENABLE();
    GPIO_InitTypeDef GPIO_InitStruct;
    GPIO_InitStruct.Pin   = GPIO_PIN_13;
    GPIO_InitStruct.Mode  = GPIO_MODE_OUTPUT_PP;
    GPIO_InitStruct.Pull  = GPIO_PULLDOWN;
    GPIO_InitStruct.Speed = GPIO_SPEED_LOW;
    HAL_GPIO_Init(GPIOG, &GPIO_InitStruct);
    while (1) {
        HAL_GPIO_WritePin(GPIOG, GPIO_PIN_13, GPIO_PIN_SET);
    }
}
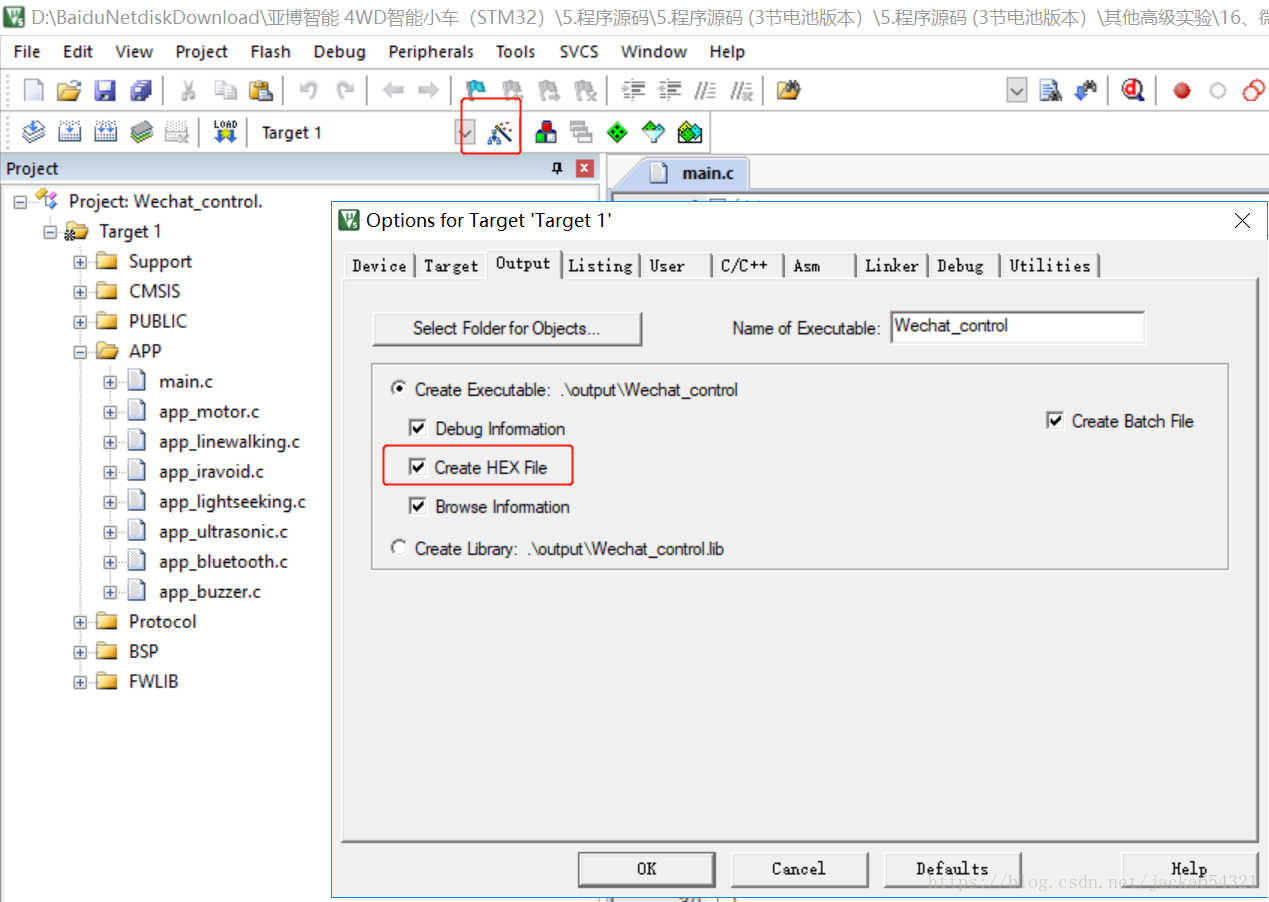
生成HEX文件
点击魔术棒打开配置窗口,到Output选项卡,勾选Create HEX File,编译后就会在Objects文件夹生成HEX文件。
ST-LINK utility的使用
用keil MDK上传程序
keil MDK上传的是axf文件,不是hex文件,可以免去上一步 (生成HEX文件 );
点击魔术棒打开配置界面,选择自己的编程器
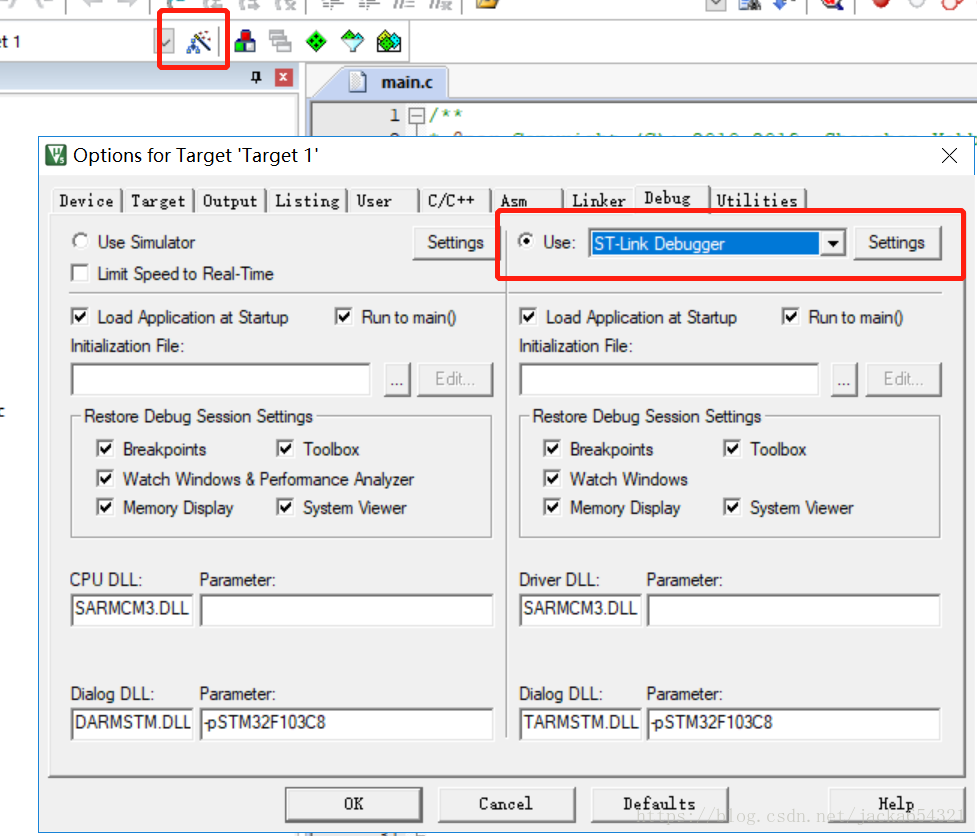
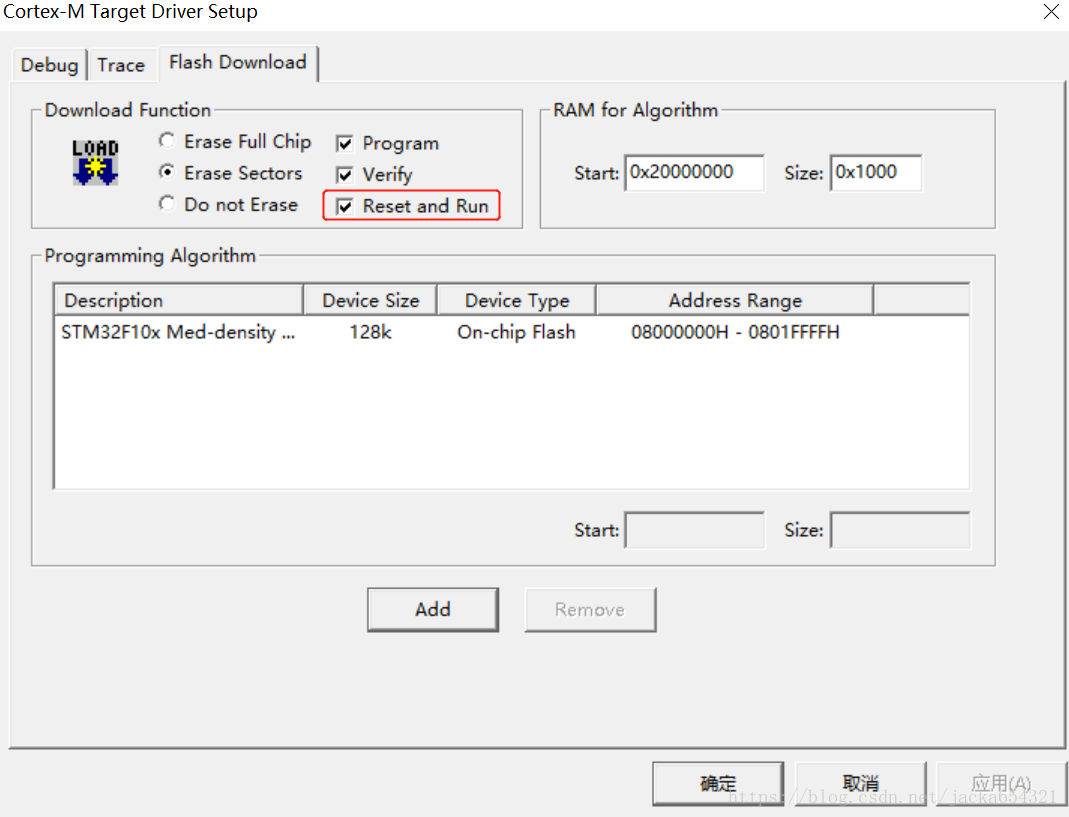
然后点setting,到flash Download勾选reset and run,这会在上传程序后让开发板自动重启运行程序,否则需要手动按复位键才能运行程序。
Port端口选SW,其他的配置一般默认就好。查看选择Debug Adapter,如果为空,插入ST-LINK V2,再重新打开option 设置即可看到;
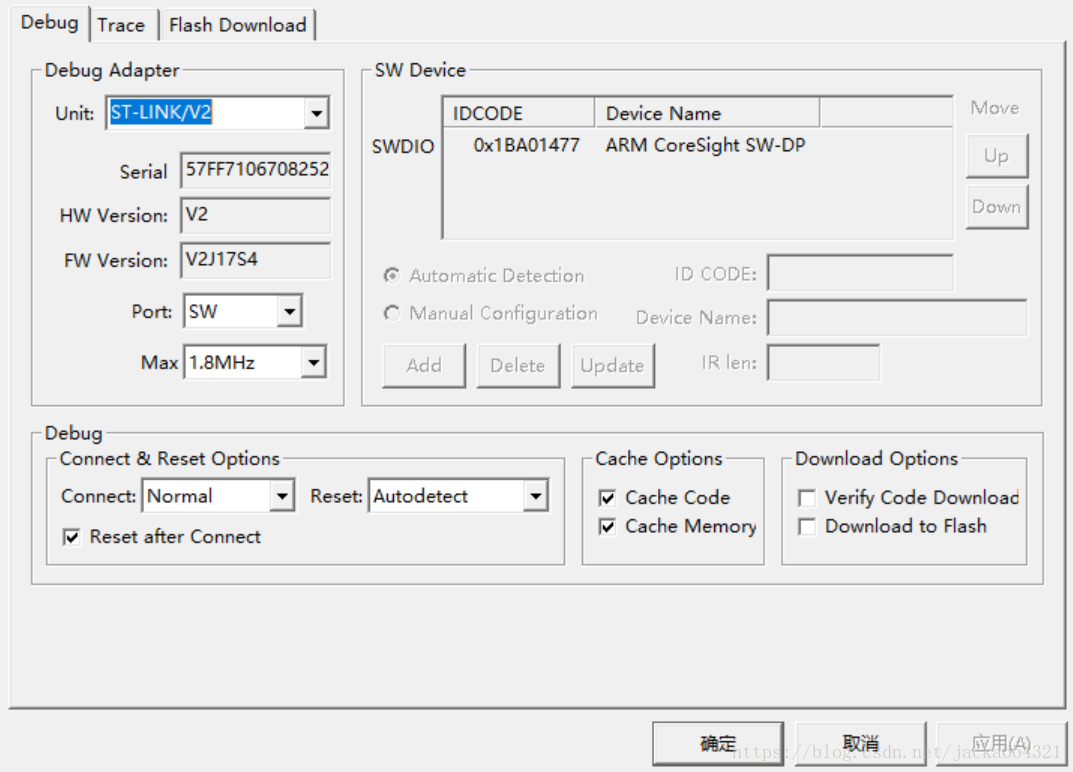
然后点download就可以下载了
修改代码:4WD车底盘改为越野底盘,前后左右转向需要修改;
进入函数
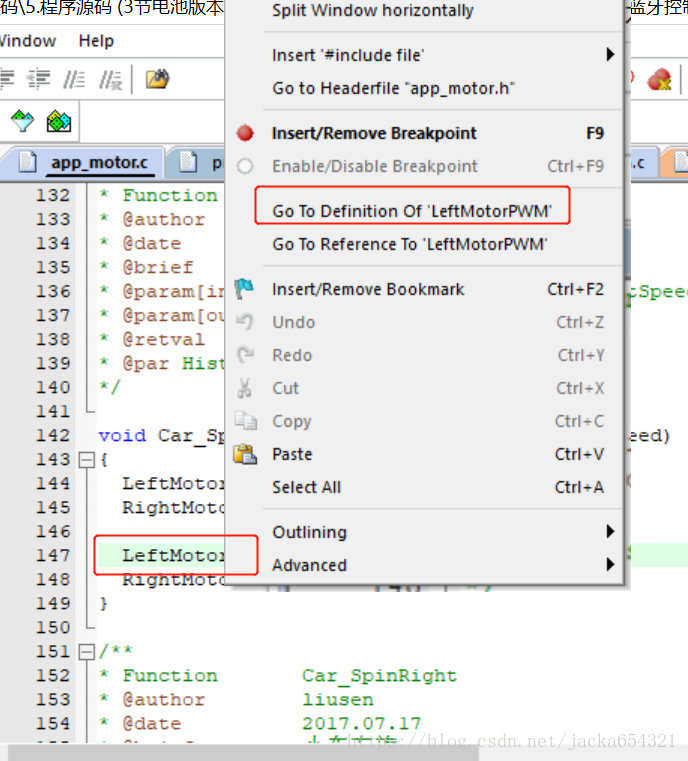
层层打开,可修改引脚接口:
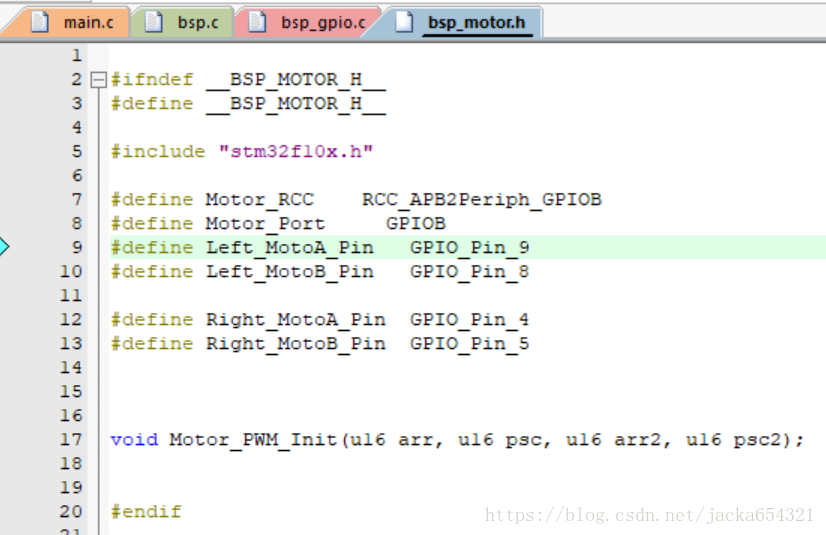
app_motor.c:
#include "app_motor.h"
#include "sys.h"
#include "bsp_motor.h"

#define  LeftMotor_Go()			{GPIO_SetBits(Motor_Port, Left_MotoA_Pin); GPIO_ResetBits(Motor_Port, Left_MotoB_Pin);}
#define  LeftMotor_Back()		{GPIO_ResetBits(Motor_Port, Left_MotoA_Pin); GPIO_SetBits(Motor_Port, Left_MotoB_Pin);}
#define  LeftMotor_Stop()		{GPIO_ResetBits(Motor_Port, Left_MotoA_Pin); GPIO_ResetBits(Motor_Port, Left_MotoB_Pin);}

#define  RightMotor_Go()		{GPIO_SetBits(Motor_Port, Right_MotoA_Pin); GPIO_ResetBits(Motor_Port, Right_MotoB_Pin);}
#define  RightMotor_Back()		{GPIO_ResetBits(Motor_Port, Right_MotoA_Pin); GPIO_SetBits(Motor_Port, Right_MotoB_Pin);}
#define  RightMotor_Stop()		{GPIO_ResetBits(Motor_Port, Right_MotoA_Pin); GPIO_ResetBits(Motor_Port, Right_MotoB_Pin);}

#define  LeftMotorPWM(Speed)	TIM_SetCompare2(TIM4, Speed);
#define  RightMotorPWM(Speed)	TIM_SetCompare1(TIM4, Speed);


void Car_Run(int Speed)
{
	LeftMotor_Go();
	//RightMotor_Go();
	LeftMotorPWM(Speed);
	//RightMotorPWM(Speed);
}


void Car_Back(int Speed)
{
	LeftMotor_Back();
	//RightMotor_Back();

	LeftMotorPWM(Speed);
	//RightMotorPWM(Speed);
}


void Car_Left(int Speed)
{
	//LeftMotor_Stop();
	RightMotor_Go();
	LeftMotor_Go();
	//LeftMotorPWM(0);
	RightMotorPWM(Speed);
	LeftMotorPWM(Speed);
}

/**
* Function       Car_Right
*/

void Car_Right(int Speed)
{
	LeftMotor_Go();
	//RightMotor_Stop();
	RightMotor_Back();

	LeftMotorPWM(Speed);
	RightMotorPWM(Speed);
}

/**
* Function       Car_Stop
*/

void Car_Stop(void)
{
	LeftMotor_Stop();
	RightMotor_Stop();

	LeftMotorPWM(0);
	RightMotorPWM(0);
}

/**
* Function       Car_SpinLeft
*/

void Car_SpinLeft(int LeftSpeed, int RightSpeed)
{
	LeftMotor_Back();
	RightMotor_Go();

	LeftMotorPWM(LeftSpeed);
	RightMotorPWM(RightSpeed);
}

/**
* Function       Car_SpinRight
*/

void Car_SpinRight(int LeftSpeed, int RightSpeed)
{
	//LeftMotor_Go();
	RightMotor_Back();
	LeftMotor_Back();

	LeftMotorPWM(LeftSpeed);
	RightMotorPWM(RightSpeed);
}
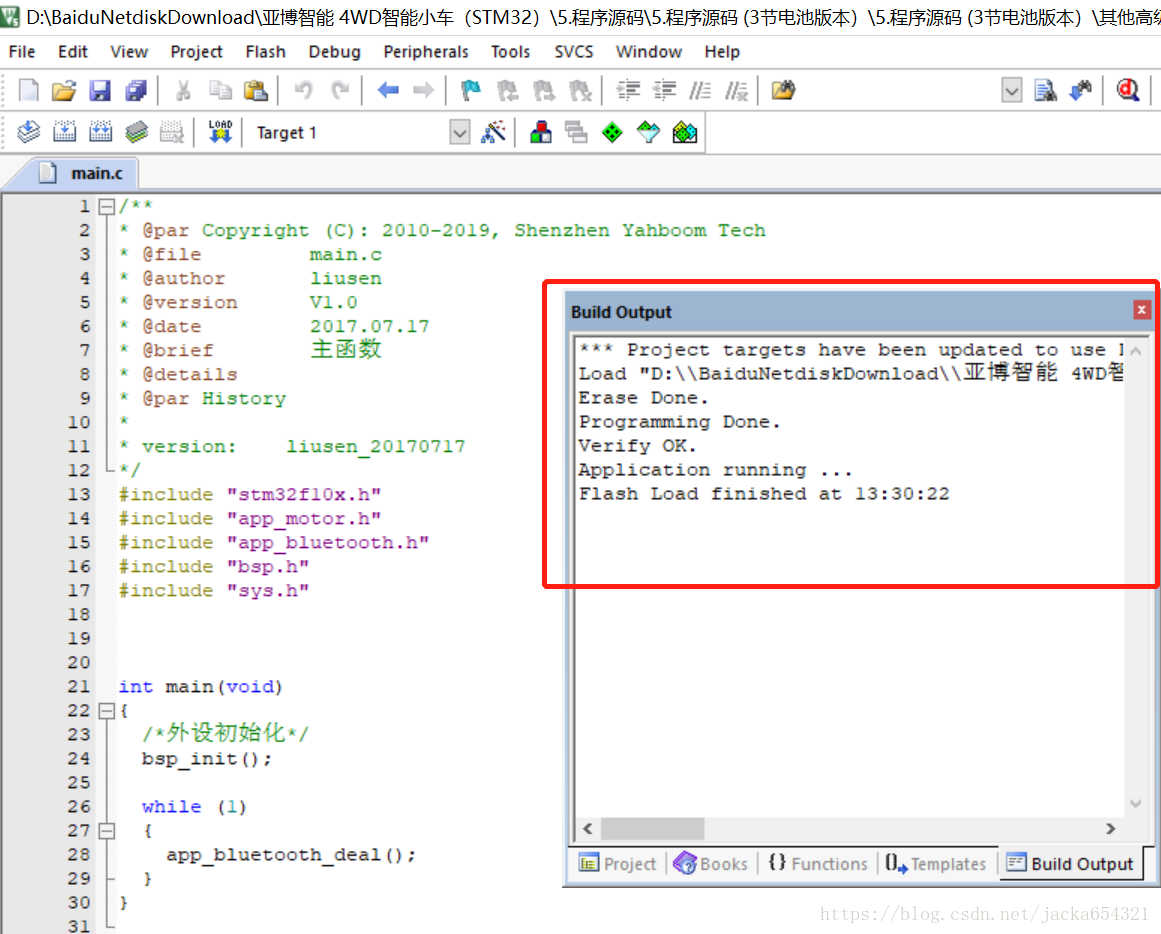
修改好后,需要先build(F7)一下,再按上面流程,把更新好的烧录进去;
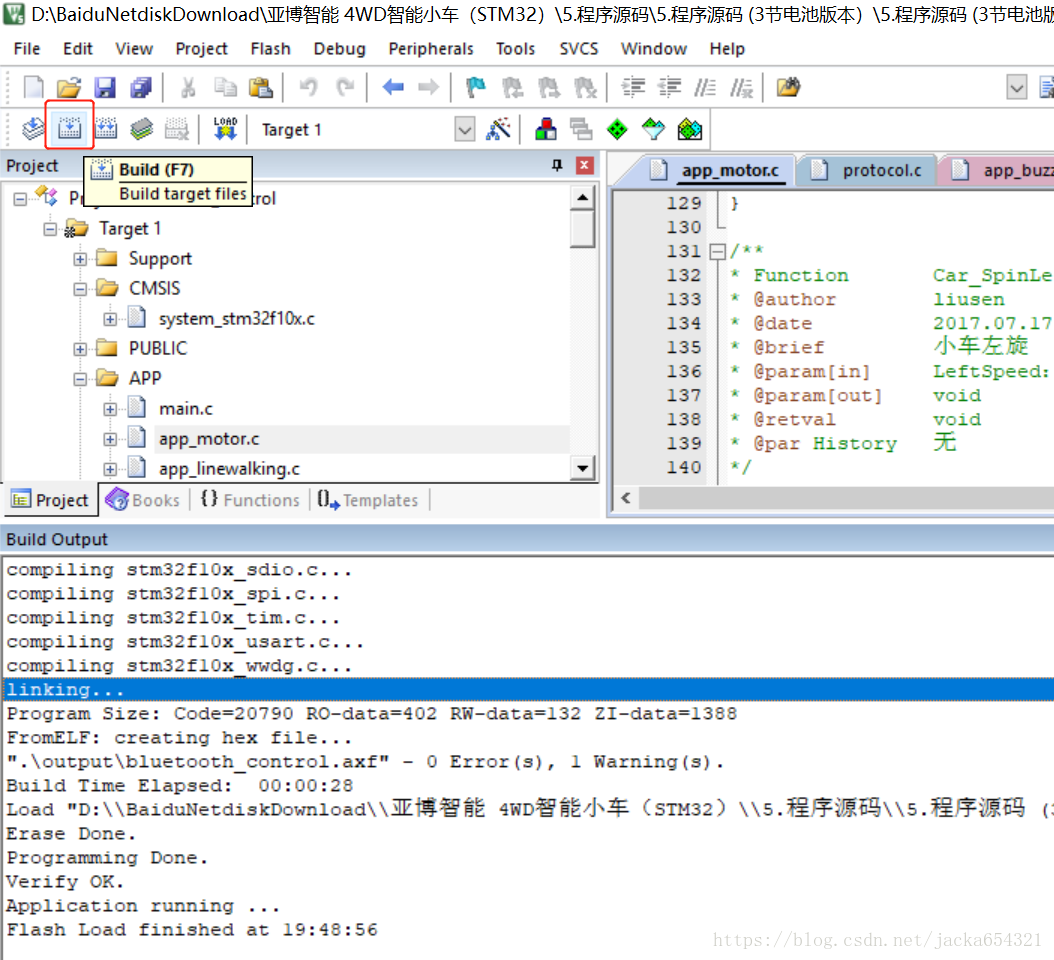
*** Note: Rebuilding project, since 'Options->Output->Create Batch File' is selected.
Rebuild target 'Target 1'
assembling startup_stm32f10x_md.s...
compiling system_stm32f10x.c...
compiling delay.c...
compiling sys.c...
compiling usart.c...
compiling main.c...
compiling app_motor.c...
compiling app_linewalking.c...
compiling app_iravoid.c...
compiling app_lightseeking.c...
compiling app_ultrasonic.c...
compiling app_bluetooth.c...
Source\APP\app_bluetooth.c(89): warning:  #223-D: function "app_IRFollow" declared implicitly
                case 6: app_IRFollow(); break;                          //跟随模式
Source\APP\app_bluetooth.c: 1 warning, 0 errors
compiling app_buzzer.c...
compiling app_colormode.c...
compiling protocol.c...
compiling bsp.c...
compiling bsp_gpio.c...
compiling bsp_motor.c...
compiling bsp_servo.c...
compiling bsp_timer.c...
compiling bsp_colorful.c...
compiling bsp_linewalking.c...
compiling bsp_iravoid.c...
compiling bsp_lightseeking.c...
compiling bsp_ultrasonic.c...
compiling bsp_adc.c...
compiling bsp_buzzer.c...
compiling bsp_fire.c...
compiling bsp_gs.c...
compiling misc.c...
compiling stm32f10x_adc.c...
compiling stm32f10x_bkp.c...
compiling stm32f10x_can.c...
compiling stm32f10x_cec.c...
compiling stm32f10x_crc.c...
compiling stm32f10x_dac.c...
compiling stm32f10x_dbgmcu.c...
compiling stm32f10x_dma.c...
compiling stm32f10x_exti.c...
compiling stm32f10x_flash.c...
compiling stm32f10x_fsmc.c...
compiling stm32f10x_gpio.c...
compiling stm32f10x_i2c.c...
compiling stm32f10x_iwdg.c...
compiling stm32f10x_pwr.c...
compiling stm32f10x_rcc.c...
compiling stm32f10x_rtc.c...
compiling stm32f10x_sdio.c...
compiling stm32f10x_spi.c...
compiling stm32f10x_tim.c...
compiling stm32f10x_usart.c...
compiling stm32f10x_wwdg.c...
linking...
Program Size: Code=20790 RO-data=402 RW-data=132 ZI-data=1388
FromELF: creating hex file...
".\output\bluetooth_control.axf" - 0 Error(s), 1 Warning(s).
Build Time Elapsed:  00:00:28
Load "D:\\BaiduNetdiskDownload\\亚博智能 4WD智能小车(STM32)\\5.程序源码\\5.程序源码 (3节电池版本)\\5.程序源码 (3节电池版本)\\其他高级实验\\14、蓝牙控制小车\\code\\STM32四驱车运动库函数版本\\output\\bluetooth_control.axf"
Erase Done.
Programming Done.
Verify OK.
Application running ...
Flash Load finished at 19:48:56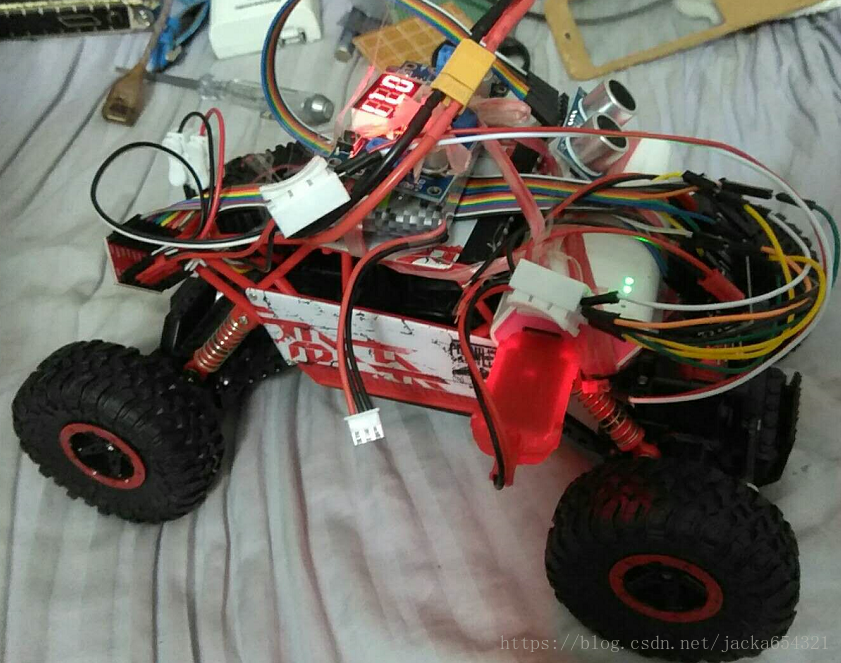
后记
目前stm32有两个程序库,一个是标准库,一个是hal库。hal库是新开发的库,有更好的可移植性,但是很多函数和变量的命名跟标准库不一样,因此不兼容标准库写得程序。标准库官方已不再更新,hal库将是未来的趋势。 官方提供了更为方便的初始化代码的工具 STM32CubeMX,利用这个工具可以用图形化的方法配置芯片并生成初始化代码,支持mdk,EWARM多种IDE,支持stm32全系列单片机,只有hal库。 用STM32CubeMX就不需要用的keil MDK的包管理器了,就免去了第3步的器件安装和第4步的新建工程。用STM32CubeMX建立的工程会生成一个模板,在主函数的while()里的空白处写用户程序,方便很多,也规范很多。