数据绑定流程(数据转换,数据格式化,数据校验)
1. Spring MVC 主框架将 ServletRequest 对象及目标方法的入参实例传递给 WebDataBinderFactory 实例,以创建 DataBinder 实例对象
2. DataBinder 调用装配在 Spring MVC 上下文中的 ConversionService 组件进行数据类型转换、数据格式化工作。将 Servlet 中的请求信息填充到入参对象中
3. 调用 Validator 组件对已经绑定了请求消息的入参对象进行数据合法性校验,并最终生成数据绑定结果 BindingData 对象
4. Spring MVC 抽取 BindingResult 中的入参对象和校验错误对象,将它们赋给处理方法的响应入参
Spring MVC 通过反射机制对目标处理方法进行解析,将请求消息绑定到处理方法的入参中。数据绑定的核心部件是 DataBinder,运行机制如下:

使用binderFactory创建一个绑定器,WebDataBinder
WebDataBinder binder = binderFactory.createBinder(request, attribute, name);
if (binder.getTarget() != null) {
//绑定数据
bindRequestParameters(binder, request);
//校验数据
validateIfApplicable(binder, parameter);
//错误信息
if (binder.getBindingResult().hasErrors()) {
if (isBindExceptionRequired(binder, parameter)) {
throw new BindException(binder.getBindingResult());
}
}
}
数据绑定流程中的组件介绍:
①数据类型转换组件(了解它可以自定义类型转换器)

ConversionService 是 Spring 类型转换体系的核心接口。
可以利用 ConversionServiceFactoryBean 在 Spring 的 IOC 容器中定义一个 ConversionService.
Spring 将自动识别出 IOC 容器中的 ConversionService,并在 Bean 属性配置及 Spring MVC 处理方法入参绑定等场合使用它进行数据的转换
可通过 ConversionServiceFactoryBean 的 converters 属性注册自定义的类型转换器
②验证组件(在服务器端对用户信息的合法性进行验证)

③错误消息保存组件(用于保存数据校验后的错误信息,然后在页面就可以进行获取)

组件详细介绍:
ConversionService
conversionService在工作的时候,里面装配了很多的xxxConvertor,用于数据在不同类型之间的转换。
其中的一个数据类型转换器
final class StringToCharacterConverter implements Converter<String, Character> {
@Override
public Character convert(String source) {
if (source.length() == 0) {
return null;
}
if (source.length() > 1) {
throw new IllegalArgumentException(
"Can only convert a [String] with length of 1 to a [Character]; string value '" + source + "' has length of " + source.length());
}
return source.charAt(0);
}
}
自定义类型转换器
数据绑定核心思想:
1、WebDataBinder用来将请求过来的数据和指定的对象进行绑定
2、WebDataBinder里面注册了
1)有负责数据转换/格式化工作的ConversionService组件。
这个组件在工作的时候使用他里面各种转换器和格式化器进行工作
2)还注解了一堆验证组件Validators
3)还将数据绑定的结果(失败信息)放在BindingResult
在熟知了数据绑定的流程我们可以自定义类型转换器并让其工作:
需求:
使用表单提交value="1-tom-email-男-dd",提交后框架可以帮助我们自动包装成对象。框架默认并没有符合我们需求的类型转换器,我们需要自定义一个
表单
<form action="${pageContext.request.contextPath }/save" method="post">
<input type="text" name="emp" value="1-tom-email-男-dd">
<input type="submit" value="提交">
</form>
①编写一个自定义类型转换器实现Converter<S,T>
需要实现public interface Converter<S, T>接口
自定义类型转换器
package com.atguigu.convert;
import org.springframework.core.convert.converter.Converter;
import com.atguigu.entities.Employee;
/**
* 创建自定义的类型转换器,将我们的字符串转换成对象
* @author LENOVO
*
*/
public class EmployeeConvert implements Converter<String, Employee> {
@Override
public Employee convert(String src) {
System.out.println(src);
if(src!=null&&!"".equals(src)) {
//将其利用split根据分割线拆分成数组
String[] split = src.split("-");
Employee employee = new Employee(Integer.parseInt(split[0]), split[1], split[2], 0, null);
return employee;
};
return null;
}
}
②在ConversionService组件的创建工厂中注册自定义转换器
<bean id="conversionServiceFactoryBean" class="org.springframework.context.support.ConversionServiceFactoryBean">
<property name="converters">
<set>
<!--在ConversionService组件中创建工厂中注册自定义的转换器-->
<bean class="com.atguigu.convert.EmployeeConvert"></bean>
</set>
</property>
</bean>
③告诉SpringMVC用这个工厂创建ConversionService 组件
<mvc:annotation-driven conversion-service="conversionServiceFactoryBean"/>
数据格式化:
在SpringMVC框架中格式化器和类型转换器都在ConversionService 组件中,我们在数据类型转换的时候,还可以根据指定的格式进行格式化并转换
但是我们自定义的类型转换器,不具有格式化功能。
原因:
ConversionServiceFactoryBean造出的ConversionService组件是DefaultConversionService,不具有格式化功能
而默认配置的ConversionService组件是DefaultFormattingConversionService
配置既可以实现类型转换(含自定义类型转换)和数据格式功能
<!--配置一个既有格式化功能又能数据类型转换的创建工厂 -->
<bean id="formattingConversionServiceFactoryBean" class="org.springframework.format.support.FormattingConversionServiceFactoryBean">
<property name="converters">
<set>
<bean class="com.atguigu.convert.EmployeeConvert"></bean>
</set>
</property>
</bean>
<!--告诉SpringMVC用这个工厂创建ConversionService组件-->
<mvc:annotation-driven conversion-service="formattingConversionServiceFactoryBean"/>
提供给测试所有的handle
/**
* 自定义类型转化器的测试
* @param employee
* @return
*/
@RequestMapping(value="/save",method=RequestMethod.POST)
public String save(@RequestParam("emp") Employee employee) {
System.out.println(employee);
return "input";
}
annotation-driven细节
既没有配置 <mvc:default-servlet-handler/> 也没有配置 <mvc:annotation-driven/>

使用默认的适配器帮我们执行方法
现象:可以处理正常的请求,但是不能访问静态资源
配置 <mvc:default-servlet-handler/>没有配置 <mvc:annotation-driven/>

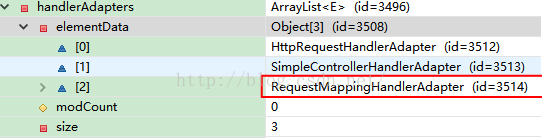
我们发现AnnotationMethodHandlerAdapter没有,所以不能正常干活了。所以请求无法处理
现象:静态资源能访问,动态请求又不行了
配置<mvc:default-servlet-handler/>也配置<mvc:annotation-driven/>
现象:静态资源可以访问,动态请求也可以处理
<!--若配置直接映射,会把初始干活的干掉,
但是配置上<mvc:annotation-driven/>,高级干活的RequestMappingHandlerAdapter不会被干掉
-->
<mvc:view-controller path="/abc" view-name="input"/>
配置直接映射出现的情况:没有帮我们处理请求的适配器了。
综上:
<mvc:annotation-driven/>(单独配置它,无法访问静态资源)
<mvc:default-servlet-handler/>(把这个配上就有可以访问静态资源了)
因此当我们使用SpringMVC框架做表现层开发时这两个配置是标配
数据校验
JSR 303 是 Java 为 Bean 数据合法性校验提供的标准框架,它已经包含在 JavaEE 6.0 中 . JSR 303 通过在 Bean 属性上标注类似于 @NotNull、@Max 等标准的注解指定校验规则,并通过标准的验证接口对 Bean 进行验证。
常用的校验注解:

Hibernate Validator 是 JSR 303 的一个参考实现,除支持所有标准的校验注解外,它还支持以下的扩展注解
扩展注解

Spring 4.0 拥有自己独立的数据校验框架,同时支持 JSR 303 标准的校验框架。Spring 在进行数据绑定时,可同时调用校验框架完成数据校验工作。
在 Spring MVC 中,可直接通过注解驱动的方式进行数据校验
Spring 的 LocalValidatorFactroyBean 既实现了 Spring 的 Validator 接口,也实现了 JSR 303 的 Validator 接口。只要在 Spring 容器中定义了一个 LocalValidatorFactoryBean,即可将其注入到需要数据校验的 Bean 中。
<mvc:annotation-driven/> 会默认装配好一个 LocalValidatorFactoryBean,通过在处理方法的入参上标注 @valid 注解即可让 Spring MVC 在完成数据绑定后执行数据校验的工作
Spring 本身并没有提供 JSR303 的实现,所以必须将 JSR303 的实现者的 jar 包放到类路径下。
数据校验的方式:
在已经标注了 JSR303 注解的表单/命令对象前标注一个 @Valid,Spring MVC 框架在将请求参数绑定到该入参对象后,就会调用校验框架根据注解声明的校验规则实施校验
Spring MVC 是通过对处理方法签名的规约来保存校验结果的:前一个表单/命令对象的校验结果保存到随后的入参中,这个保存校验结果的入参必须是 BindingResult 或 Errors 类型,这两个类都位于 org.springframework.validation 包中
需校验的 Bean 对象和其绑定结果对象或错误对象时成对出现的,它们之间不允许声明其他的入参 Errors 接口提供了获取错误信息的方法,如 getErrorCount() 或 getFieldErrors(String field) BindingResult 扩展了 Errors 接口
如何获取校验结果:
在目标方法中获取校验结果
在表单/命令对象类的属性中标注校验注解,在处理方法对应的入参前添加 @Valid,Spring MVC 就会实施校验并将校验结果保存在被校验入参对象之后的 BindingResult 或 Errors 入参中。
常用方法:
FieldError getFieldError(String field)
List<FieldError> getFieldErrors()
Object getFieldValue(String field)
Int getErrorCount()
如何在页面上显示错误:
Spring MVC 除了会将表单/命令对象的校验结果保存到对应的 BindingResult 或 Errors 对象中外,
还会将所有校验结果保存到"隐含模型” 即使处理方法的签名中没有对应于表单/命令对象的结果入参,校验结果也会保存在 “隐含对象” 中。
隐含模型中的所有数据最终将通过 HttpServletRequest 的属性列表暴露给 JSP 视图对象,因此在 JSP 中可以获取错误信息 在 JSP 页面上可通过 <form:errors path=“userName”> 显示错误消息
实现服务器端数据校验测试:
①导入hibernate validator相关jar包
classmate-0.8.0.jar
hibernate-validator-5.0.0.CR2.jar
hibernate-validator-annotation-processor-5.0.0.CR2.jar
validation-api-1.1.0.CR1.jar
jboss-logging-3.1.1.GA.jar

若是因为tomacat服务器版本太低,发生El异常,导入增强版的ELjar包
把这三个增强版的ELjar包放到tomacat的lib中
②给javabean添加验证规则(准备校验的对象)
public class Employee {
private Integer id;
@NotEmpty
private String lastName;
private String email;
//1 male, 0 female
private Integer gender;
private Department department;
//指定日期提交的格式
@Past
@DateTimeFormat(pattern="yyyy-MM-dd")
private Date birth;
③给要验证的参数加@Valid,添加的验证规则才有效
@RequestMapping(value="/save",method=RequestMethod.POST)
public String save(@Valid Employee employee, BindingResult result) {
System.out.println(employee);
//打印错误信息
System.out.println(result.getAllErrors());
//返回输入页面
return "input";
}
④给tomcat添加增强版el(若是出现el异常,导增强版的eljar包)
这时的错误提示消息只是框架根据本地,显示的默认错误信息,我们想要让他显示我们自己的错误消息
⑤错误消息国际化,配置国际化模块,指定国际化文件的基本名(并进行配置这样显示的就是咱们自己设置的国际化提示信息)
在配置文件中配置
<!--配置国际化模块
只要国际化文件中有错误消息的代码对应的值,取出错误消息就是按照国际化文件制定的值
注意:id一定要是messageSource
-->
<bean id="messageSource" class="org.springframework.context.support.ResourceBundleMessageSource">
<!-- 指定国际化文件的基本名 -->
<property name="basename" value="i18n"></property>
</bean>
编写国际化文件(这两个文件要放在src目录下)
国际化文件中消息的key,
格式 : 验证规则-bean名称-属性名=错误提示
i18n_en_US.properties
NotEmpty.employee.lastName=lastName must not Empty
NotEmpty.employee.email=email must not Empty
NotEmpty.employee.birth=birth must not Empty
Past.employee.birth=birth Must Be a PastTime
typeMismatch.employee.birth=typeMismatch
i18n_zh_CN.properties
NotEmpty.employee.lastName=\u59D3\u540D\u4E0D\u80FD\u4E3A\u7A7A
NotEmpty.employee.email=\u90AE\u7BB1\u4E0D\u80FD\u4E3A\u7A7A
Email.employee.email=\u90AE\u7BB1\u683C\u5F0F\u4E0D\u6B63\u786E
Past.employee.birth=\u751F\u65E5\u5FC5\u987B\u662F\u4E00\u4E2A\u8FC7\u53BB\u7684\u65F6\u95F4
typeMismatch.employee.birth=\u522B\u4E71\u5199
表单:
<form:form action="${pageContext.request.contextPath }/save" modelAttribute="employee" method="POST">
员工姓名:<form:input path="lastName"/>
<!--获取设置验证规则的属性错误信息-->
<form:errors path="lastName"></form:errors><br/>
员工邮箱:<form:input path="email"/>
<!-- 当邮箱格式错误时显示邮箱错误(使用这个表单在页面获取错误信息) -->
<form:errors path="email"></form:errors><br/>
员工性别:
女:<form:radiobutton path="gender" value="0"/>
男:<form:radiobutton path="gender" value="1"/><br/>
所在部门:
<form:select path="department.id" items="${depts }" itemLabel="departmentName" itemValue="id"></form:select>
<!-- 测试格式化问题,日期之间用/表示不会报错,用-会报错
可以在实体类处使用@DateFormt指定日期格式
-->
<br/>员工生日:<form:input path="birth"/>
<!-- 直接使用这个属性就可以将错误信息显示在页面 -->
<form:errors path="birth"></form:errors>
<br/><br/>
<input type="submit" value="保存"/>
</form:form>
若要上边的表单可以动态获取部门信息,需要配置一个@ModelAttribute注解修饰的方法,提前获取部门信息。
@ModelAttribute
public Employee employeeModel(Map<String, Object> map) {
// 1、查出所有的部门,去页面要显示成下拉列表
Collection<Department> collection = departmentDao.getDepartments();/**/
// 2、将查出的部门信息放在隐含模型中。自动放在request域中
map.put("depts", collection);
return new Employee();
}
处理请求的handle:
@RequestMapping(value="/save",method=RequestMethod.POST)
public String save(@Valid Employee employee, BindingResult result) {
System.out.println(employee);
System.out.println(result.getAllErrors());
return "input";
}
处理json
①导包并准备一个SpringMVC框架运行环境(web.xml配置,配置文件)
jackson-annotations-2.1.5.jar
jackson-core-2.1.5.jar
jackson-databind-2.1.5.jar
处理json并不需要对配置文件做其他额外配置
springmvc的基本配置
<?xml version="1.0" encoding="UTF-8"?>
<beans xmlns="http://www.springframework.org/schema/beans"
xmlns:xsi="http://www.w3.org/2001/XMLSchema-instance"
xmlns:context="http://www.springframework.org/schema/context"
xmlns:mvc="http://www.springframework.org/schema/mvc"
xsi:schemaLocation="http://www.springframework.org/schema/mvc http://www.springframework.org/schema/mvc/spring-mvc-4.0.xsd
http://www.springframework.org/schema/beans http://www.springframework.org/schema/beans/spring-beans.xsd
http://www.springframework.org/schema/context http://www.springframework.org/schema/context/spring-context-4.0.xsd">
<context:component-scan base-package="com.atguigu"></context:component-scan>
<bean id="viewResolver" class="org.springframework.web.servlet.view.InternalResourceViewResolver">
<property name="prefix" value="/"></property>
<property name="suffix" value=".jsp"></property>
</bean>
<!-- 标配 -->
<mvc:annotation-driven/>
<mvc:default-servlet-handler/>
</beans>
②编写一个index.jsp接收json
<%@ page language="java" contentType="text/html; charset=UTF-8"
pageEncoding="UTF-8"%>
<!DOCTYPE html PUBLIC "-//W3C//DTD HTML 4.01 Transitional//EN" "http://www.w3.org/TR/html4/loose.dtd">
<html>
<head>
<meta http-equiv="Content-Type" content="text/html; charset=UTF-8">
<title>Insert title here</title>
<script type="text/javascript" src="scripts/jquery-1.9.1.min.js"></script>
<script type="text/javascript">
$(function() {
$("a:first").click(function() {
$.get("${pageContext.request.contextPath }/getjson",function(data){
alert(data[0].lastName);
},"json");
return false;
});
});
</script>
</head>
<body>
<!-- json实现,直接使用@ResponseBody,然后将需要转为json的数据返回就行,导入json的三个jar包 -->
<a href="${pageContext.request.contextPath }/getjson">获取json</a>
</body>
</html>
③写一个handle
这里直接利用上边的实体类
@Autowired
private EmployeeDao employeeDao;
@ResponseBody
@RequestMapping("/getjson")
public Collection<Employee> getJson() {
Collection<Employee> all = employeeDao.getAll();
return all;
}
这样就好了,就可以在页面拿到json了
文件下载
①导包
commons-fileupload-1.2.1.jar
commons-io-2.0.jar
②同样,配置好框架运行环境编写一个jsp页面
<a href="download">下载</a>
③处理文件下载的handle
/**
* 使用SpringMVC实现下载
* @return
*/
@RequestMapping("/download")
public ResponseEntity<byte[]> download() {
//下载的东西D:\一会看的东西.txt
HttpHeaders headers = new HttpHeaders();
//添加响应头
headers.add("Content-Disposition", "attachment;filename=abc.txt");
byte[] byteArray = null;
try {
byteArray = IOUtils.toByteArray(new FileInputStream("D:/一会看的东西.txt"));
} catch (Exception e) {
e.printStackTrace();
}
//body响应体,headers响应头,status响应状态码
ResponseEntity<byte[]> responseEntity = new ResponseEntity<byte[]>(byteArray, headers, HttpStatus.OK);
return responseEntity;
}
然后就可以使用下载了
文件上传
①导包
commons-fileupload-1.2.1.jar
commons-io-2.0.jar
②配置文件上传的解析器
<!-- 配置一个文件上传的解析器 -->
<bean id="multipartResolver" class="org.springframework.web.multipart.commons.CommonsMultipartResolver">
<!-- 可以指定一些配置信息 -->
<property name="defaultEncoding" value="utf-8"></property>
<property name="maxUploadSize" value="#{1024*1024*20}"></property>
</bean>
③处理文件上传请求
@RequestMapping("/upload")
public String upload(MultipartFile file) {
System.out.println("获取到请求");
//上传到D:/upload
try {
file.transferTo(new File("D:/upload/" + file.getOriginalFilename()));
} catch (IllegalStateException | IOException e) {
// TODO Auto-generated catch block
e.printStackTrace();
}
return "index";
}
④扩展-多文件上传
/**
* 多文件上传要指定file
* @param file
* @return
*/
@RequestMapping("/upload")
public String upload(@RequestParam("file") MultipartFile[] file) {
System.out.println("获取到请求");
//上传到D:/upload
try {
for (MultipartFile multipartFile : file) {
multipartFile.transferTo(new File("D:/upload/" + multipartFile.getOriginalFilename()));
}
} catch (IllegalStateException | IOException e) {
// TODO Auto-generated catch block
e.printStackTrace();
}
return "index";
}
补充:
@InitBinder
由 @InitBinder 标识的方法,可以对 WebDataBinder 对象进行初始化。WebDataBinder 是 DataBinder 的子类,用于完成由表单字段到 JavaBean 属性的绑定
@InitBinder方法不能有返回值,它必须声明为void。
@InitBinder方法的参数通常是是 WebDataBinder
例如:设置一下不允许绑定的字段
/**
* 在绑定器执行执行可以给绑定器指定一些规则,例如设置某些属性不需要绑定
*/
@InitBinder
public void initBinder(WebDataBinder binder) {
//设置不允许绑定的字段
binder.setDisallowedFields("lastName");
}
拦截器
拦截器的作用:
在目标方法执行前后,进行一些预处理工作、进行一些扫尾工作
SpringMVC中拦截器的接口:
HandlerInterceptor
该接口主要方法:
preHandle
//在目标方法执行之前会被执行
boolean preHandle(HttpServletRequest request, HttpServletResponse response, Object handler) throws Exception;
postHandle
//在目标方法执行之后会执行
void postHandle(HttpServletRequest request, HttpServletResponse response, Object handler, ModelAndView modelAndView)throws Exception;
afterCompletion
//请求响应完成后执行
void afterCompletion(HttpServletRequest request, HttpServletResponse response, Object handler, Exception ex) throws Exception;
原理:
protected void doDispatch(HttpServletRequest request, HttpServletResponse response) throws Exception {
HttpServletRequest processedRequest = request;
HandlerExecutionChain mappedHandler = null;
boolean multipartRequestParsed = false;
WebAsyncManager asyncManager = WebAsyncUtils.getAsyncManager(request);
try {
ModelAndView mv = null;
Exception dispatchException = null;
try {
processedRequest = checkMultipart(request);
multipartRequestParsed = processedRequest != request;
//Determine handler for the current request.
//动态资源使用RequestMappingHandlerMapping处理映射
//静态资源 RequestMappingHandlerMapping是没有用的,
//SimpleUrlHandlerMapping来处理静态资源和处理器的映射
//所有的静态资源默认都是使用DefaultServletHttpRequestHandler来处理
mappedHandler = getHandler(processedRequest);
if (mappedHandler == null || mappedHandler.getHandler() == null) {
noHandlerFound(processedRequest, response);
return;
}
// Determine handler adapter for the current request.
HandlerAdapter ha = getHandlerAdapter(mappedHandler.getHandler());
// Process last-modified header, if supported by the handler.
String method = request.getMethod();
boolean isGet = "GET".equals(method);
if (isGet || "HEAD".equals(method)) {
long lastModified = ha.getLastModified(request, mappedHandler.getHandler());
if (logger.isDebugEnabled()) {
String requestUri = urlPathHelper.getRequestUri(request);
logger.debug("Last-Modified value for [" + requestUri + "] is: " + lastModified);
}
if (new ServletWebRequest(request, response).checkNotModified(lastModified) && isGet) {
return;
}
}
//执行拦截器的preHandle方法
if (!mappedHandler.applyPreHandle(processedRequest, response)) {
return;
}
try {
// Actually invoke the handler.
//适配器执行目标方法
mv = ha.handle(processedRequest, response, mappedHandler.getHandler());
}
finally {
if (asyncManager.isConcurrentHandlingStarted()) {
return;
}
}
applyDefaultViewName(request, mv);
//执行postHandle方法
mappedHandler.applyPostHandle(processedRequest, response, mv);
}
catch (Exception ex) {
dispatchException = ex;
}
//渲染模型
processDispatchResult(processedRequest, response, mappedHandler, mv, dispatchException);
}
catch (Exception ex) {
//如果出现异常触发AfterCompletion
triggerAfterCompletion(processedRequest, response, mappedHandler, ex);
}
catch (Error err) {
triggerAfterCompletionWithError(processedRequest, response, mappedHandler, err);
}
finally {
if (asyncManager.isConcurrentHandlingStarted()) {
// Instead of postHandle and afterCompletion
mappedHandler.applyAfterConcurrentHandlingStarted(processedRequest, response);
return;
}
// Clean up any resources used by a multipart request.
if (multipartRequestParsed) {
cleanupMultipart(processedRequest);
}
}
}
①获取Handler的时候拿到的是Handler的执行链
mappedHandler = getHandler(processedRequest);
protected HandlerExecutionChain getHandler(HttpServletRequest request) throws Exception {
for (HandlerMapping hm : this.handlerMappings) {
if (logger.isTraceEnabled()) {
logger.trace(
"Testing handler map [" + hm + "] in DispatcherServlet with name '" + getServletName() + "'");
}
HandlerExecutionChain handler = hm.getHandler(request);
if (handler != null) {
return handler;
}
}
return null;
}
applyPreHandle:按照拦截器定义的顺序正序执行
boolean applyPreHandle(HttpServletRequest request, HttpServletResponse response) throws Exception {
if (getInterceptors() != null) {
//正序遍历
for (int i = 0; i < getInterceptors().length; i++) {
HandlerInterceptor interceptor = getInterceptors()[i];
if (!interceptor.preHandle(request, response, this.handler)) {
triggerAfterCompletion(request, response, null);
return false;
}
this.interceptorIndex = i;
}
}
return true;
}
postHandle--postHandle是按照拦截器的配置顺序倒序执行
void applyPostHandle(HttpServletRequest request, HttpServletResponse response, ModelAndView mv) throws Exception {
if (getInterceptors() == null) {
return;
}
for (int i = getInterceptors().length - 1; i >= 0; i--) {
HandlerInterceptor interceptor = getInterceptors()[i];
interceptor.postHandle(request, response, this.handler, mv);
}
}
拦截器的执行过程:
拦截器...preHandle(正序执行)
目标方法...
拦截器...postHandle(逆序执行)
jsp页面--页面渲染完成
拦截器...afterCompletion
拦截器收尾工作算法:
for (int i = this.interceptorIndex; i >= 0; i--) {
HandlerInterceptor interceptor = getInterceptors()[i];
try {
interceptor.afterCompletion(request, response, this.handler, ex);
}
catch (Throwable ex2) {
logger.error("HandlerInterceptor.afterCompletion threw exception", ex2);
}
}
多拦截器:处理流程
流程分析(当前置发生异常):
①前置处理一但返回false后面都不会被执行
②当第二个拦截器异常的时候
执行过程
拦截器...preHandle
SecondInterceptor...preHandle
拦截器...afterCompletion
总结:
1)执行成功(preHandle -->true)的拦截器会执行最终的清理工作afterCompletion
2)执行失败(preHandle -->false)的拦截器不会执行他自己的清理工作afterCompletion
3)不管任何一个拦截器执行失败。整个拦截器的前置执行就失败了,目标方法就不会执行
if (!mappedHandler.applyPreHandle(processedRequest, response)) {
return;
}
出现异常源码分析:
三个拦截器-前置返回true还是false的时候
1、第一个(默认)执行成功-this.interceptorIndex = 0;
2、第二个(First)执行成功-this.interceptorIndex = 1;
3、第三个(Seconde)执行失败
进入清理方法
清理方法在执行的时候也是逆序执行
for (int i = this.interceptorIndex; i >= 0; i--) {
//第一次进来 1 拿到第二个(First)拦截器 执行清理方法
//第二次进来 0 拿到第一个(默认)拦截器 执行清理方法
//第三个执行失败的拦截器的清理方法就被跳过了
HandlerInterceptor interceptor = getInterceptors()[i];
try {
interceptor.afterCompletion(request, response, this.handler, ex);
}
catch (Throwable ex2) {
logger.error("HandlerInterceptor.afterCompletion threw exception", ex2);
}
}
当后置方法发生异常:
1)后置的方法postHandle,前置执行失败是不会被执行的
2)目标方法执行出现异常,后置postHandle不会被执行
3)一切都正常的情况下渲染时候完成后才会执行清理工作
processDispatchResult-->视图渲染完成后-->
mappedHandler.triggerAfterCompletion(request, response, null);
4)出现异常
①目标方法出异常-后置不执行
②目标方法出异常-还是会最终执行processDispatchResult渲染异常视图
③无论何处发生异常都会执行最终的清理工作
主方法中的try-catch代码
try {
// Actually invoke the handler.
mv = ha.handle(processedRequest, response, mappedHandler.getHandler());
}
finally {
if (asyncManager.isConcurrentHandlingStarted()) {
return;
}
}
applyDefaultViewName(request, mv);
mappedHandler.applyPostHandle(processedRequest, response, mv);
}
catch (Exception ex) {
dispatchException = ex;
}
processDispatchResult(processedRequest, response, mappedHandler, mv, dispatchException);
protected void doDispatch(HttpServletRequest request, HttpServletResponse response) throws Exception {
HttpServletRequest processedRequest = request;
HandlerExecutionChain mappedHandler = null;
boolean multipartRequestParsed = false;
WebAsyncManager asyncManager = WebAsyncUtils.getAsyncManager(request);
try {
ModelAndView mv = null;
Exception dispatchException = null;
try {
processedRequest = checkMultipart(request);
multipartRequestParsed = processedRequest != request;
// Determine handler for the current request.
mappedHandler = getHandler(processedRequest);
if (mappedHandler == null || mappedHandler.getHandler() == null) {
noHandlerFound(processedRequest, response);
return;
}
// Determine handler adapter for the current request.
HandlerAdapter ha = getHandlerAdapter(mappedHandler.getHandler());
// Process last-modified header, if supported by the handler.
String method = request.getMethod();
boolean isGet = "GET".equals(method);
if (isGet || "HEAD".equals(method)) {
long lastModified = ha.getLastModified(request, mappedHandler.getHandler());
if (logger.isDebugEnabled()) {
String requestUri = urlPathHelper.getRequestUri(request);
logger.debug("Last-Modified value for [" + requestUri + "] is: " + lastModified);
}
if (new ServletWebRequest(request, response).checkNotModified(lastModified) && isGet) {
return;
}
}
if (!mappedHandler.applyPreHandle(processedRequest, response)) {
return;
}
try {
// Actually invoke the handler.
mv = ha.handle(processedRequest, response, mappedHandler.getHandler());
}
finally {
if (asyncManager.isConcurrentHandlingStarted()) {
return;
}
}
applyDefaultViewName(request, mv);
mappedHandler.applyPostHandle(processedRequest, response, mv);
}
catch (Exception ex) {
dispatchException = ex;
}
processDispatchResult(processedRequest, response, mappedHandler, mv, dispatchException);
}
catch (Exception ex) {
triggerAfterCompletion(processedRequest, response, mappedHandler, ex);
}
catch (Error err) {
triggerAfterCompletionWithError(processedRequest, response, mappedHandler, err);
}
finally {
if (asyncManager.isConcurrentHandlingStarted()) {
// Instead of postHandle and afterCompletion
mappedHandler.applyAfterConcurrentHandlingStarted(processedRequest, response);
return;
}
// Clean up any resources used by a multipart request.
if (multipartRequestParsed) {
cleanupMultipart(processedRequest);
}
}
}
自定义拦截器
Spring MVC也可以使用拦截器对请求进行拦截处理,用户可以自定义拦截器来实现特定的功能。
①自定义的拦截器必须实现HandlerInterceptor接口 preHandle():这个方法在业务处理器处理请求之前被调用,在该方法中对用户请求 request 进行处理。如果程序员决定该拦截器对请求进行拦截处理后还要调用其他的拦截器,或者是业务处理器去进行处理,则返回true;如果程序员决定不需要再调用其他的组件去处理请求,则返回false。
postHandle():这个方法在业务处理器处理完请求后,但是DispatcherServlet 向客户端返回响应前被调用,在该方法中对用户请求request进行处理。 afterCompletion():这个方法在 DispatcherServlet 完全处理完请求后被调用,可以在该方法中进行一些资源清理的操作。
异常
异常解析的三个类
ExceptionHandlerExceptionResolver在异常发生后,在handler里面获取全局配置
@ExceptionHandler注解的方法,去运行。
@ExceptionHandler(value= {Exception.class})
public ModelAndView gtError2(Exception ex) {
System.out.println("刚才的异常:"+ex);
ModelAndView mv = new ModelAndView("error");
mv.addObject("ex", ex);
return mv;
}
ResponseStatusExceptionResolver将异常处理为错误的响应状态码,发给浏览器。浏览器就能收到请求错误
使用@ResponseStatus注解
标注在类上:
@ResponseStatus(reason="发生了我的异常..haha",value=HttpStatus.FORBIDDEN)
public class MyException extends RuntimeException{
}
在方法上标注,这个方法运行完成后总会返回一个错误页面,一般不标注在处理方法上
@ResponseStatus(value=HttpStatus.BAD_REQUEST,reason="错误的请求")
@RequestMapping(value="/testException")
public String testException(@RequestParam("a")int a) {
try {
System.out.println("计算结果+"+(10/a));
} catch (Exception e) {
// TODO Auto-generated catch block
throw new MyException();
}
return "index";
}
DefaultHandlerExceptionResolver 处理SpringMVC发生的自己定义的异常,是使用它处理
HTTP Status 405 - Request method 'GET' not supported
默认的异常-MVC自己定义的异常不会受ExceptionHandlerExceptionResolver的影响
异常处理源码位置
DispatcherServlet--->processDispatchResult--->
出现异常进行处理--->
mv = processHandlerException(request, response, handler, exception);
挨个处理器尝试解析异常,如果能解析,就会返回一个ModelAndView对象
默认的异常谁都没法拦截和处理,只有Tomcat自己能处理。
要想转发到一个异常页面。去web.xml中配置
<error-page>
<error-code>405</error-code>
<location>/error2.jsp</location>
</error-page>
统一的异常处理器
所有异常定义一个统一的处理规则
SimpleMappingExceptionResolver解析异常
1、不仅返回的ModelAndView有要去的异常页面
2、Model里面还有异常的值 key="exception" value="异常对象"
配置一个统一的异常处理器
<bean id="handlerExceptionResolver" class="org.springframework.web.servlet.handler.SimpleMappingExceptionResolver">
<!-- 告诉SPringMVC这个解析器能解析哪些异常 -->
<property name="exceptionMappings">
<props>
<!-- key:指定异常 value:指定异常发生后转向的视图 -->
<prop key="java.lang.Exception">error2</prop>
</props>
</property>
</bean>
在页面上获取异常信息使用${exception}
国际化
原理分析:
1、请求过来,doDispatch
AcceptHeaderLocaleResolver
区域信息的获取,如果是SpringMVC处理的,他是使用区域信息解析器去拿区域信息
区域信息的获取,如果是原始的,就是request域带来的。
fmt:message这个标签的作用,就是从域中拿出取出信息,按照指定的区域信息从i18n配置文件中获取值
如果域中没有指定区域信息,就是使用操作系统默认的区域 request.getLocale();
原生: javaWeb是直接就是使用系统默认的。
i18n:fmt:setLocale重新设置
①在渲染页面的时候,先获取locale信息
Locale locale = this.localeResolver.resolveLocale(request);
response.setLocale(locale);
默认使用AcceptHeaderLocaleResolver去解析locale,就是从请求中直接获取locale信息
return request.getLocale();
②来到页面取值
就可以看到,不同区域的浏览器就是按照不同语言显示的消息
③使用默认的国际化模式,效果就是浏览器是哪个区域,国际化就会显示哪个区域信息
LocaleChangeInterceptor
作用:从请求带来的某个参数中获取指定的区域信息,如果和SessionLocaleResolver配合
效果:
①LocaleChangeInterceptor从请求参数中拿到区域信息,参数的名就是locale
②获取当前区域信息解析器LocaleResolver,调用这个解析的重新设置locale的方法
默认的AcceptHeaderLocaleResolvere是不支持设置locale信息的,而SessionLocaleResolver是支持的
public boolean preHandle(HttpServletRequest request, HttpServletResponse response, Object handler)
throws ServletException {
String newLocale = request.getParameter(this.paramName);
if (newLocale != null) {
LocaleResolver localeResolver = RequestContextUtils.getLocaleResolver(request);
if (localeResolver == null) {
throw new IllegalStateException("No LocaleResolver found: not in a DispatcherServlet request?");
}
localeResolver.setLocale(request, response, StringUtils.parseLocaleString(newLocale));
}
// Proceed in any case.
return true;
}
③页面就是按照重新设置的locale信息。fmt标签来进行解析。
国际化测试:
环境搭建,导包,设置前端控制器
springMVC配置:
<?xml version="1.0" encoding="UTF-8"?>
<beans xmlns="http://www.springframework.org/schema/beans"
xmlns:xsi="http://www.w3.org/2001/XMLSchema-instance"
xmlns:context="http://www.springframework.org/schema/context"
xmlns:mvc="http://www.springframework.org/schema/mvc"
xsi:schemaLocation="http://www.springframework.org/schema/mvc http://www.springframework.org/schema/mvc/spring-mvc-4.0.xsd
http://www.springframework.org/schema/beans http://www.springframework.org/schema/beans/spring-beans.xsd
http://www.springframework.org/schema/context http://www.springframework.org/schema/context/spring-context-4.0.xsd">
<!-- 在发请求的时候路径一定到对,否则找不到文件 -->
<!-- 自动扫描 -->
<context:component-scan base-package="com.atguigu"></context:component-scan>
<!--
标配
开启基于注解自动模式 -->
<mvc:annotation-driven></mvc:annotation-driven>
<!-- 当DispatherServlet解析不了的时候交给默认的servlet解析 -->
<mvc:default-servlet-handler/>
<!-- 配置视图解析器,这里的视图解析器得配置成viewResolver -->
<bean id="viewResolver" class="org.springframework.web.servlet.view.InternalResourceViewResolver">
<!-- 前缀 -->
<property name="prefix" value="/WEB-INF/pages/"></property>
<!-- 后缀 -->
<property name="suffix" value=".jsp"></property>
</bean>
<!-- 配置国际化处理的bean -->
<bean id="messageSource" class="org.springframework.context.support.ResourceBundleMessageSource">
<property value="i18n" name="basename"></property>
</bean>
<!-- 使用穿越火线,不过handle直接到指定页面
直接使用SpringMVC渲染视图
path,请求路径,view-name视图名字
-->
<mvc:view-controller view-name="i18n" path="/i18n"/>
<!-- 配置一个SessionLocaleResover替代默认的区域信息解析器 -->
<bean id="localeResolver" class="org.springframework.web.servlet.i18n.SessionLocaleResolver"></bean>
<!-- 配置一个拦截器将我们从request中获取到的locale值传递到页面 -->
<mvc:interceptors>
<bean id="LocaleChangeInterceptor" class="org.springframework.web.servlet.i18n.LocaleChangeInterceptor"></bean>
</mvc:interceptors>
</beans>
国际化文件:
i18n_en_US.properties
i18n.username=username
i18n.password=password
i18n_zh_CN.properties
i18n.username=\u7528\u6237\u540D
i18n.password=\u5BC6\u7801
访问国际化页面
<h1 align="center"><a href="i18n">去国际化页面</a></h1>
i18n.jsp
<%@ page language="java" contentType="text/html; charset=UTF-8"
pageEncoding="UTF-8"%>
<%@ taglib uri="http://java.sun.com/jsp/jstl/fmt" prefix="fmt" %>
<!DOCTYPE html PUBLIC "-//W3C//DTD HTML 4.01 Transitional//EN" "http://www.w3.org/TR/html4/loose.dtd">
<html>
<head>
<meta http-equiv="Content-Type" content="text/html; charset=UTF-8">
<title>Insert title here</title>
</head>
<body>
<!-- 使用fmt:message标签从properties文件获取用户名和密码 -->
<h1 align="center"><fmt:message key="i18n.username"></fmt:message></h1>
<h1 align="center"><fmt:message key="i18n.password"></fmt:message></h1>
<h1 align="center"><a href="i18n?locale=zh_CN">中文</a>||<a href="i18n?locale=en_US">英文</a></h1>
</body>
</html>
处理国际化的handle
package com.atguigu.handle;
import java.util.Locale;
import org.springframework.beans.factory.annotation.Autowired;
import org.springframework.context.support.ResourceBundleMessageSource;
import org.springframework.stereotype.Controller;
import org.springframework.web.bind.annotation.RequestMapping;
@Controller
public class TestHandlei18n {
//在程序中获取locale
@Autowired
private ResourceBundleMessageSource rbms;
/**
* 在程序中取出国际化文件的值
* @param locale
* @return
*/
@RequestMapping("/test")
public String testi18n(Locale locale) {
System.out.println(rbms.getMessage("i18n.username", null, locale));
return "success";
}
}