上篇(https://blog.csdn.net/Jeeson_Z/article/details/82591625)介绍了Scrapy的原理流程和结构,现在就来通过案例介绍编写流程,项目选用我们的老朋友:豆瓣电影Top250
创建spider
命令创建:scrapy genspider douban https://www.douban.com (douban是自己命名的爬虫, 后面是允许爬取的域名,这里我们爬取豆瓣,则允许它在整个豆瓣爬取)
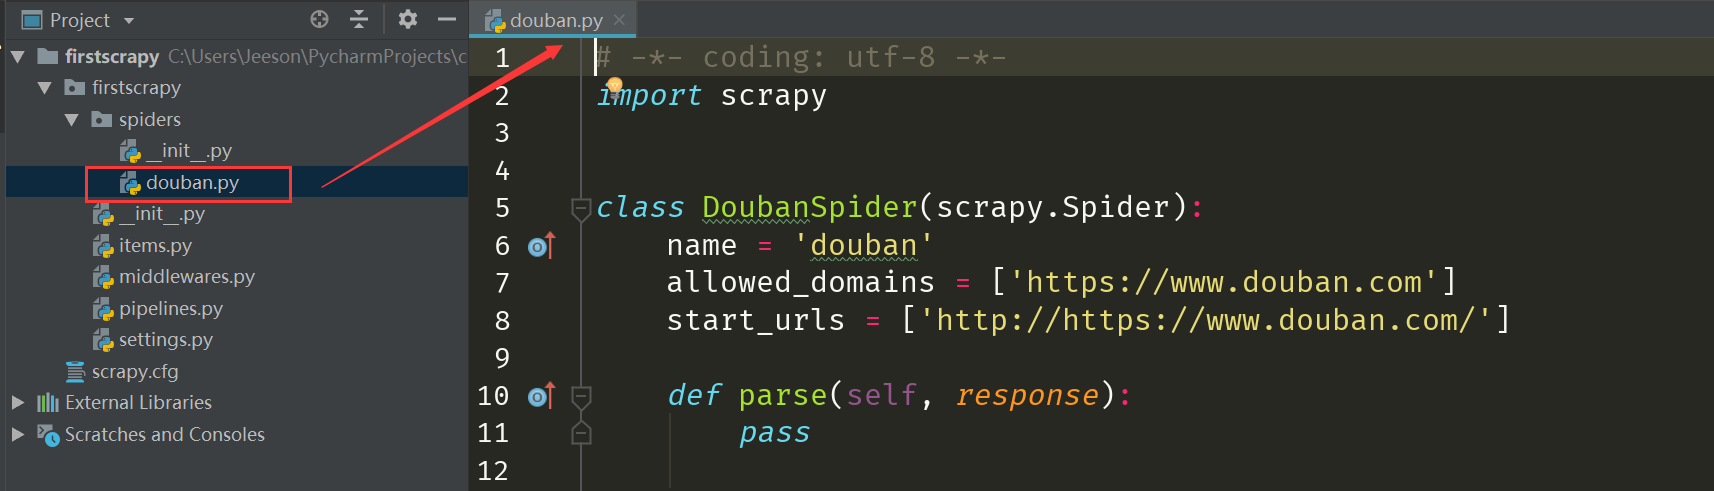
创建之后会发现爬虫项目下的spider目录下自动生成了刚刚创建的douban.py文件
打开后可以看到已经自动生成了很多代码,这就是命令创建的好处:自动生成

除了命令创建,也可以手动在spider目录下创建douban.py文件,但这样得到的是空文件,需要自己编写上面的信息
编写items.py
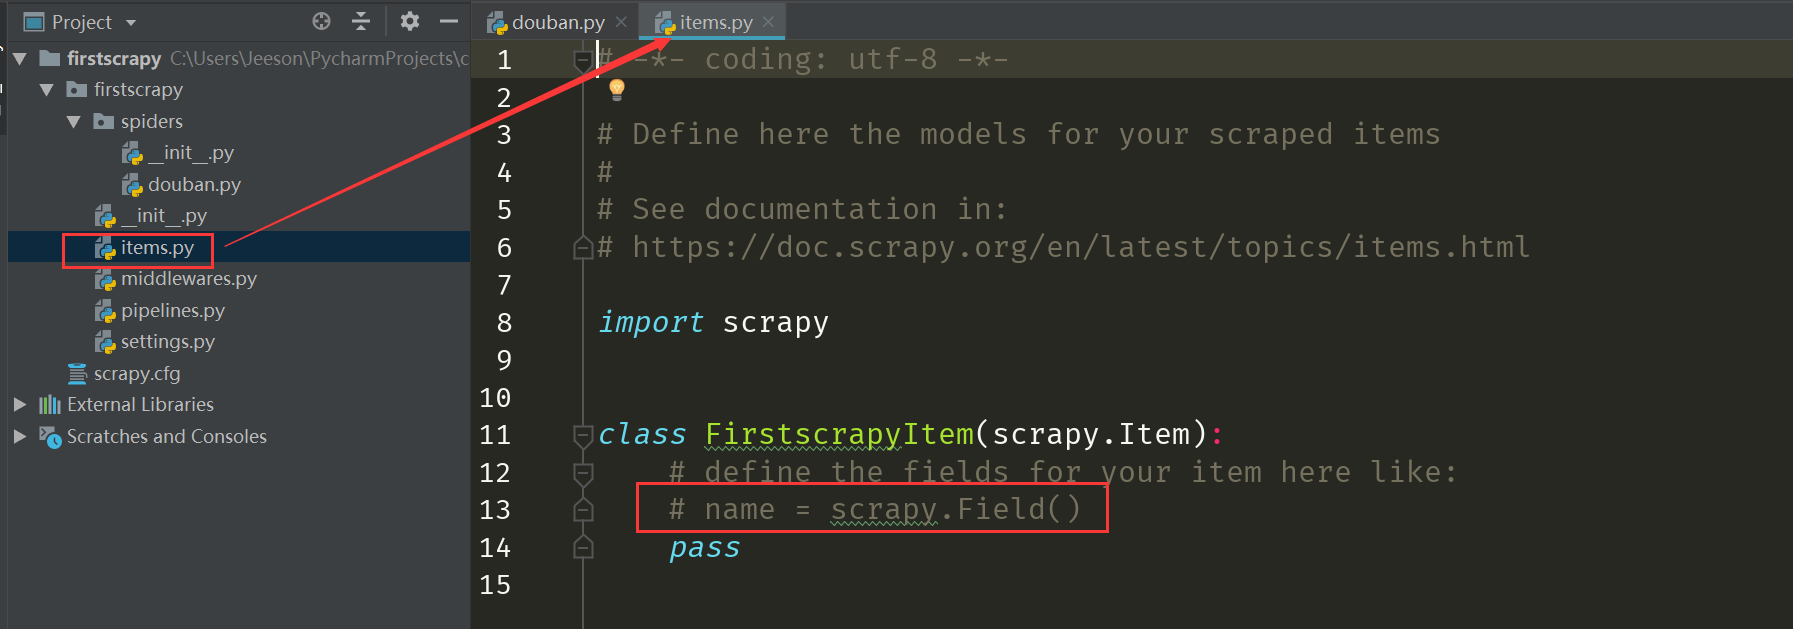
创建完爬虫后,我们要先定义一下要提取的数据格式,在items.py里面定义
打开items.py后,我们发现里面也有自动生成的代码,其中有个FirstscrapyItem类,就在这里面编写需要的数据,编写方式就如同它提示的,使用scrapy.Field()方法,此外把 pass 注释掉
items.py
# -*- coding: utf-8 -*-

# Define here the models for your scraped items
#
# See documentation in:
# https://doc.scrapy.org/en/latest/topics/items.html

import scrapy


class FirstscrapyItem(scrapy.Item):
    # define the fields for your item here like:
    # name = scrapy.Field()
    # pass
    img = scrapy.Field()
    name = scrapy.Field()
    intro = scrapy.Field()
    score = scrapy.Field()
    fans_num = scrapy.Field()
    quote = scrapy.Field()
编写spider
编写完items.py后,我们就可以写爬虫来提取出所需数据了
打开douban.py,这里面包含一个DoubanSpider类,他必须继承 scrapy.Spider,这样才可以实现自动流程
name:爬虫的名字,运行的时候指定该名字
allowed_domains:允许爬取的域名
strat_urls:第一个要爬取的页面的url,注意,填完url之后它自动生成了一个Request进行下载,结果Response自动传给下面的parse()
parse():编写解析页面的方法,response参数自动接受下载得到的Response
从items.py导入item,用于规范数据的格式
from firstscrapy.items import FirstscrapyItem填写strat_urls,爬取第一个页面
start_urls = ['https://movie.douban.com/top250']然后编写 parse() (提取方法选用BeautifulSoup,参看之前的 https://blog.csdn.net/Jeeson_Z/article/details/81279249)
douban.py
# -*- coding: utf-8 -*-
import scrapy
from firstscrapy.items import FirstscrapyItem
from bs4 import BeautifulSoup
import re


class DoubanSpider(scrapy.Spider):
    name = 'douban'
    allowed_domains = ['https://www.douban.com']
    start_urls = ['https://movie.douban.com/top250']

    def parse(self, response):
        # pass
        # 用BeautifulSoup()方法将源码内容生成能用BeautifulSoup解析的lxml格式文件
        BS = BeautifulSoup(response.text, 'lxml')
        # 用find_all()方法找到包含电影的所有标签
        movies = BS.find_all(name='div', attrs={'class': 'item'})
        # 遍历每一个电影信息
        for movie in movies:
            # 实例化一个item对象,用来存放数据
            item = FirstscrapyItem()
            # 提取图片的地址信息
            item['img'] = movie.find(name='img', attrs={'width': '100'}).attrs['src']
            # 提取电影名字信息
            item['name'] = movie.find(name='span', attrs={'class': 'title'}).string
            # 提取电影介绍信息
            # 注意:get_text()能提取包含有内嵌标签的信息
            intro = movie.find(name='p', attrs={'class': ''}).get_text()
            # 用正则提取所有的可见字符
            intro = re.findall('\S', intro, re.S)
            # 将列表转化为字符串
            item['intro'] = ''.join(intro)
            # 提取评价信息
            # 注意:评价信息分别在在多个<span>里面,所以用findall()方法
            star = movie.find(name='div', attrs={'class': 'star'}).find_all(name='span')
            # 获取评分
            item['score'] = star[1].string
            # 获取评价人数
            item['fans_num'] = star[3].string
            # 获取引语
            item['quote'] = movie.find(name='span', attrs={'class': 'inq'}).string
            # 生成一条item数据给自动传给pipeline处理
            yield item
其中,实例化了一个 FirstscrapyItem 对象用于格式化地储存数据,这样就把spider模块和items.py模块联系起来
item = FirstscrapyItem()最后用yield语句生成一个 item,自动传给pipelines.py处理,这样就把items.py、spider、pipelines.py三个模块联系了起来
编写pipelines.py
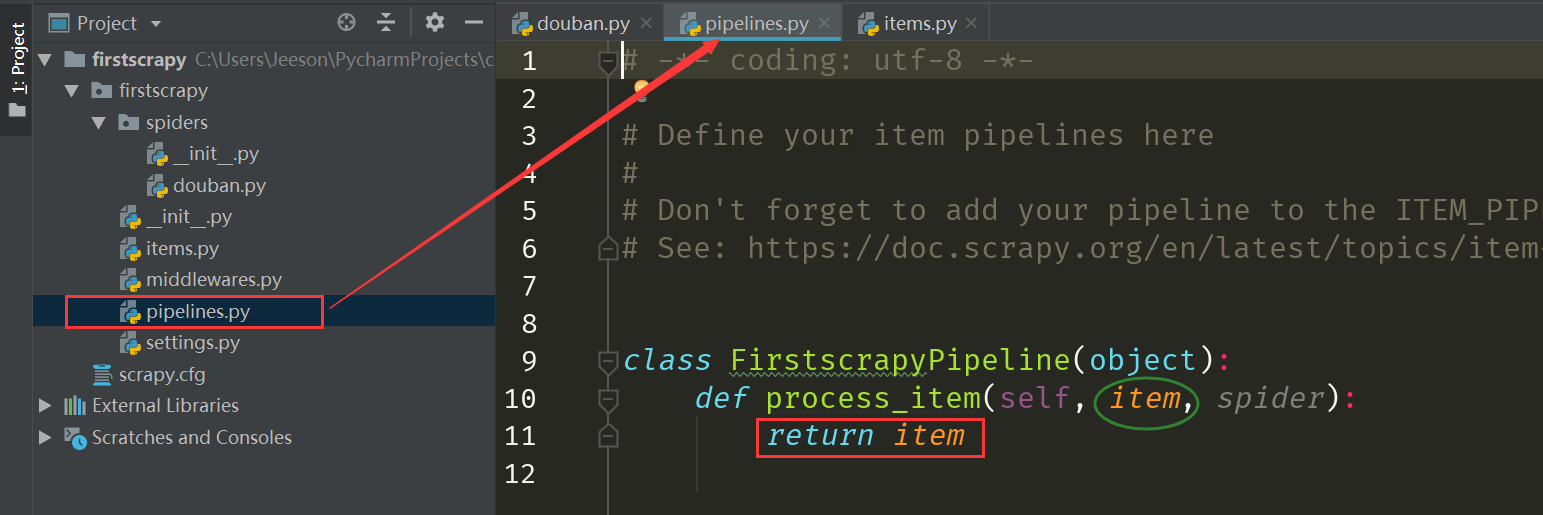
先打开pipelines.py看看里面有什么
可以看到,里面有一个FirstscrapyPipeline类,这个类里面默认有一个 process_item() 方法,这个方法的 item 参数就是自动接收 spider 里 yield 生成的 item,然后我们编写代码对 item 进行处理,注意:最后 return item 是必须有的,因为 process_item() 是处理 item 的,处理完当然要给个处理后的结果啦我们按照很久前的爬虫三大步:下载-->解析-->保存 来演示这个案例
既然 下载、解析 已经在spider里面就实现了,那pipelines.py里的数据处理我们就来实现保存吧(方法参考之前文章:https://blog.csdn.net/Jeeson_Z/article/details/81286219)
pipelines.py
# -*- coding: utf-8 -*-

# Define your item pipelines here
#
# Don't forget to add your pipeline to the ITEM_PIPELINES setting
# See: https://doc.scrapy.org/en/latest/topics/item-pipeline.html
import pymysql


class FirstscrapyPipeline(object):
    def process_item(self, item, spider):
        try:
            # 连接到数据库
            db = pymysql.connect(host='localhost',
                                 user='root',
                                 password='123456xun',
                                 db='csdn',
                                 charset='utf8mb4')
        except:
            print('连接失败')


        # 创建操作游标
        cursor = db.cursor()
        # 编写sql插入语句
        sql_insert = '''INSERT INTO top(img, name, intro, score, fans_num, quote) VALUES (%s, %s, %s, %s, %s, %s)'''


        # 用try尝试执行插入
        try:
            cursor.execute(sql_insert, (item['img'], item['name'], item['intro'], item['score'], item['fans_num'], item['quote']))
            db.commit()
        except:
            print('保存失败')
        return item
如此,我们就编写完 下载、解析、保存 的所有步骤了,不过,还需要去settings注释相关功能的内容
编写settings.py
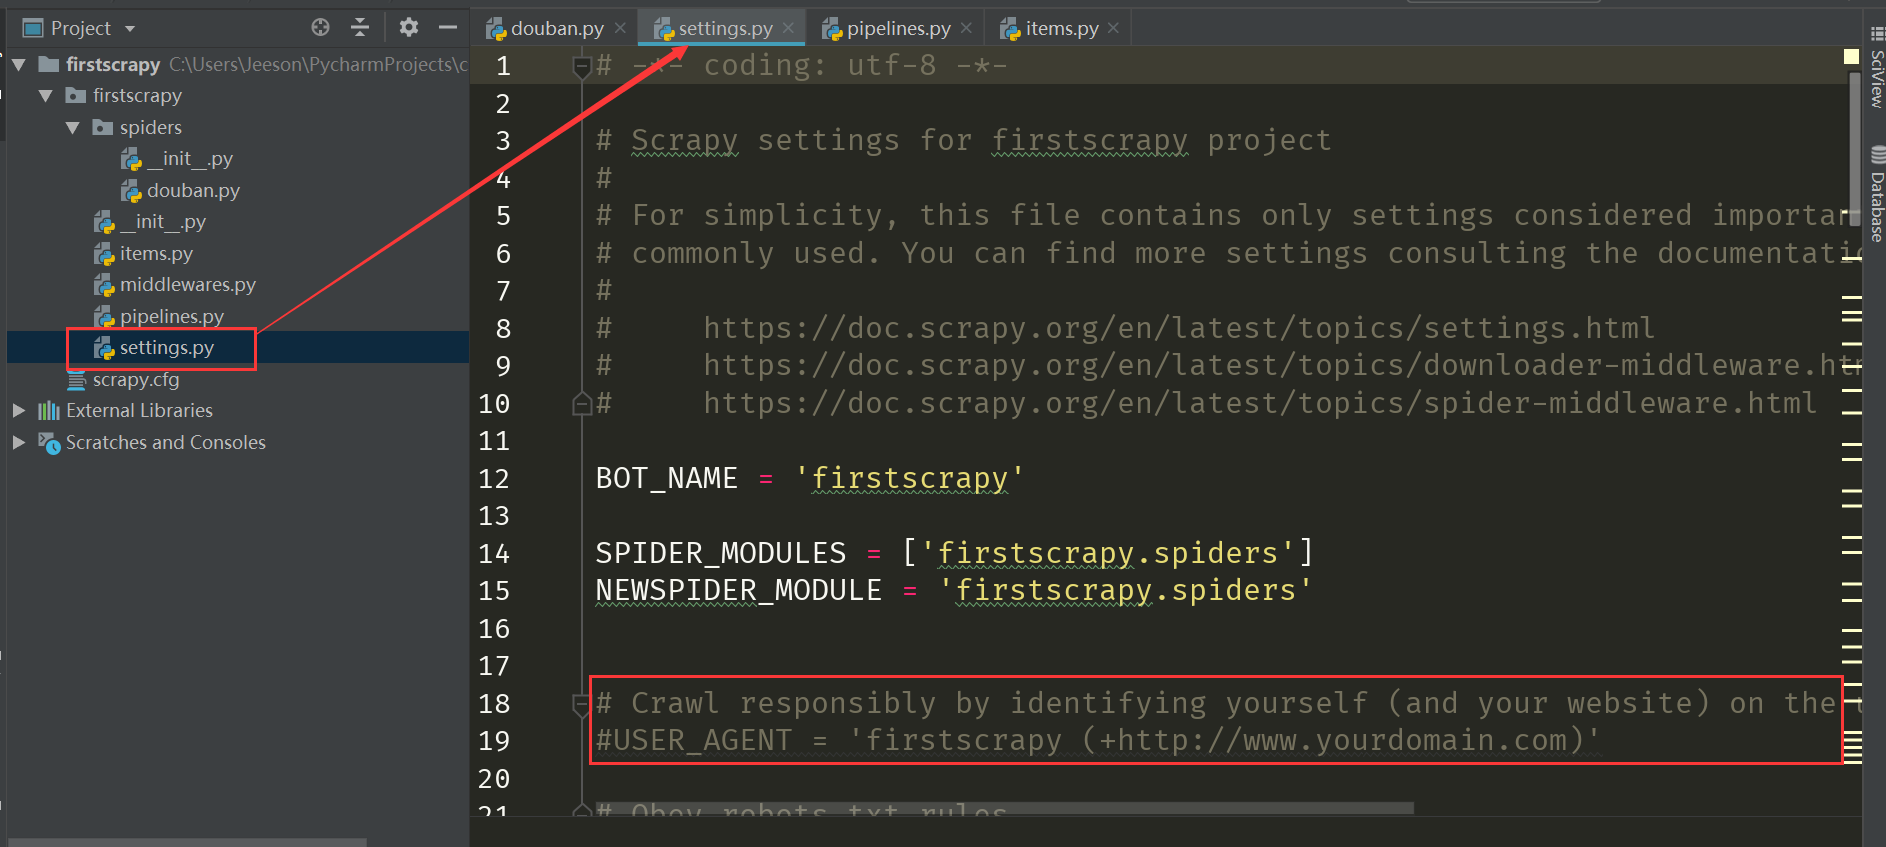
依旧,先打开settings.py,看看都有些什么
可以看到,里面内容很多,但是什么意思呢?其实文件当中都给了注释,阅读注释就能知道每一行什么意思了,以设置USER_AGENT(用户代理,参见https://blog.csdn.net/Jeeson_Z/article/details/81409730)功能为例
# Crawl responsibly by identifying yourself (and your website) on the user-agent
#USER_AGENT = 'firstscrapy (+http://www.yourdomain.com)'
上面的一行是英文说明,下面是功能代码,不过默认是注释掉的,如果你要修改,就去掉注释,加上自己的修改
# Crawl responsibly by identifying yourself (and your website) on the user-agent
USER_AGENT = 'Mozilla/5.0 (Windows NT 10.0; Win64; x64) AppleWebKit/537.36 (KHTML, like Gecko) Chrome/68.0.3440.106 Safari/537.36'
总的来说:settings.py 就是需要哪儿的功能就把哪儿注释去掉,然后修改
上面我们不是使用了 pipelines.py 功能吗,那就找到 pipelines ,然后去掉注释就行
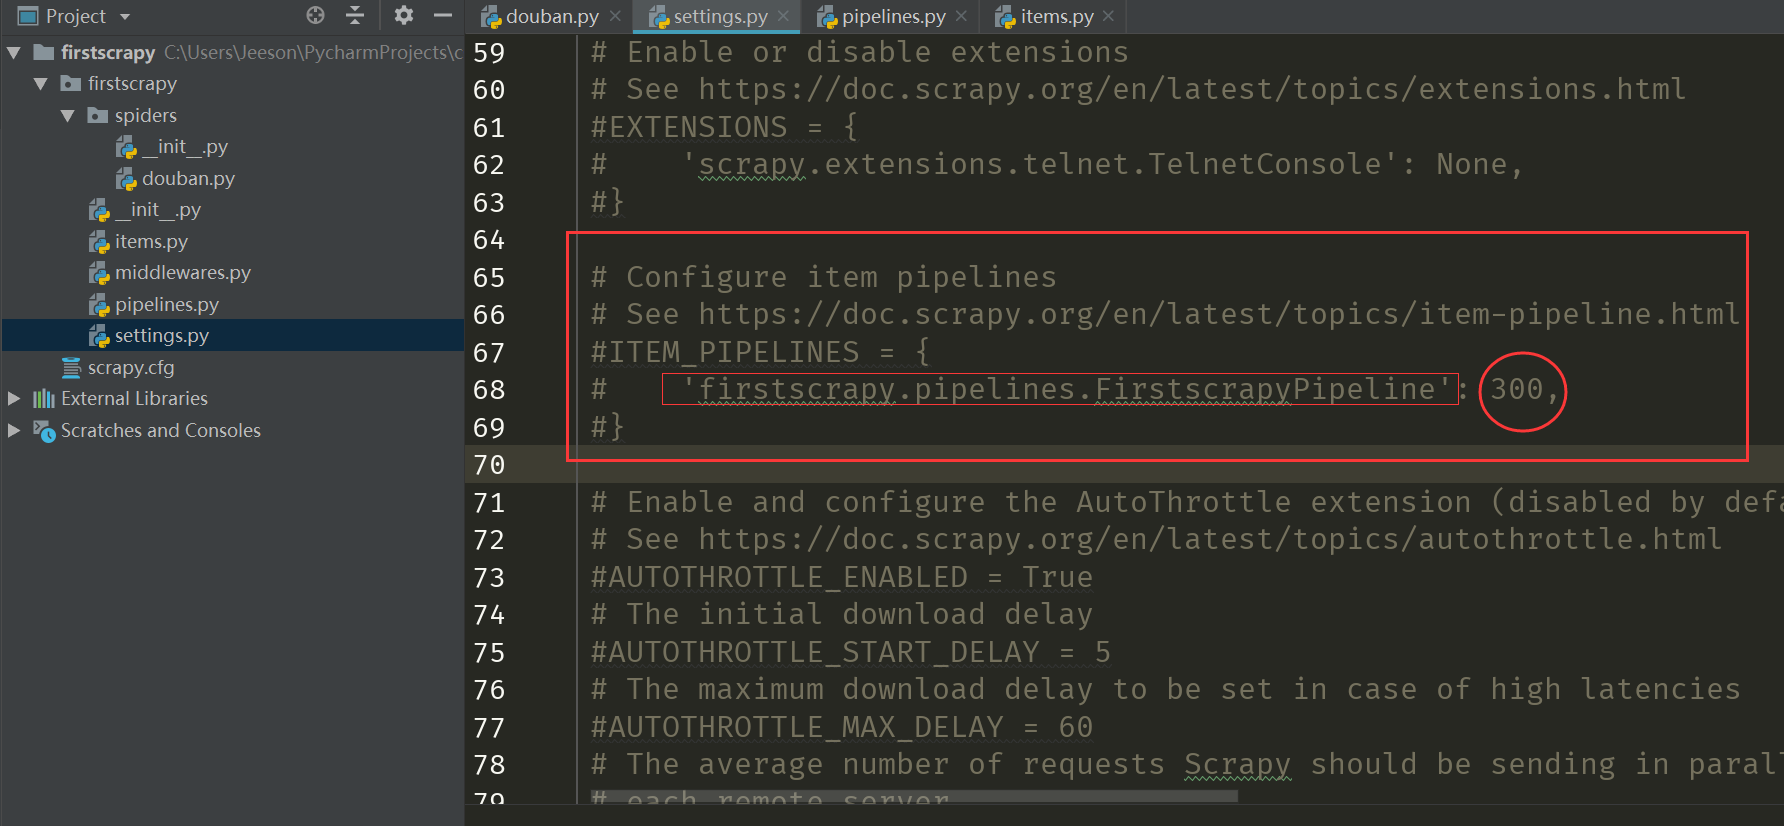
找到之后如上,上面两行依然是英文说明,下面的 ITEM_PIPELINES 是一个字典,第一个键代表启用的 pipeline,它的值是该 pipeline的优先级,因为可能不止一个pipeline,找到后我们注释掉就行了
settings.py
# -*- coding: utf-8 -*-

# Scrapy settings for firstscrapy project
#
# For simplicity, this file contains only settings considered important or
# commonly used. You can find more settings consulting the documentation:
#
#     https://doc.scrapy.org/en/latest/topics/settings.html
#     https://doc.scrapy.org/en/latest/topics/downloader-middleware.html
#     https://doc.scrapy.org/en/latest/topics/spider-middleware.html

BOT_NAME = 'firstscrapy'

SPIDER_MODULES = ['firstscrapy.spiders']
NEWSPIDER_MODULE = 'firstscrapy.spiders'


# Crawl responsibly by identifying yourself (and your website) on the user-agent
USER_AGENT = 'Mozilla/5.0 (Windows NT 10.0; Win64; x64) AppleWebKit/537.36 (KHTML, like Gecko) Chrome/68.0.3440.106 Safari/537.36'

# Obey robots.txt rules
ROBOTSTXT_OBEY = True

# Configure maximum concurrent requests performed by Scrapy (default: 16)
#CONCURRENT_REQUESTS = 32

# Configure a delay for requests for the same website (default: 0)
# See https://doc.scrapy.org/en/latest/topics/settings.html#download-delay
# See also autothrottle settings and docs
#DOWNLOAD_DELAY = 3
# The download delay setting will honor only one of:
#CONCURRENT_REQUESTS_PER_DOMAIN = 16
#CONCURRENT_REQUESTS_PER_IP = 16

# Disable cookies (enabled by default)
#COOKIES_ENABLED = False

# Disable Telnet Console (enabled by default)
#TELNETCONSOLE_ENABLED = False

# Override the default request headers:
#DEFAULT_REQUEST_HEADERS = {
#   'Accept': 'text/html,application/xhtml+xml,application/xml;q=0.9,*/*;q=0.8',
#   'Accept-Language': 'en',
#}

# Enable or disable spider middlewares
# See https://doc.scrapy.org/en/latest/topics/spider-middleware.html
#SPIDER_MIDDLEWARES = {
#    'firstscrapy.middlewares.FirstscrapySpiderMiddleware': 543,
#}

# Enable or disable downloader middlewares
# See https://doc.scrapy.org/en/latest/topics/downloader-middleware.html
#DOWNLOADER_MIDDLEWARES = {
#    'firstscrapy.middlewares.FirstscrapyDownloaderMiddleware': 543,
#}

# Enable or disable extensions
# See https://doc.scrapy.org/en/latest/topics/extensions.html
#EXTENSIONS = {
#    'scrapy.extensions.telnet.TelnetConsole': None,
#}

# Configure item pipelines
# See https://doc.scrapy.org/en/latest/topics/item-pipeline.html
ITEM_PIPELINES = {
   'firstscrapy.pipelines.FirstscrapyPipeline': 300,
}

# Enable and configure the AutoThrottle extension (disabled by default)
# See https://doc.scrapy.org/en/latest/topics/autothrottle.html
#AUTOTHROTTLE_ENABLED = True
# The initial download delay
#AUTOTHROTTLE_START_DELAY = 5
# The maximum download delay to be set in case of high latencies
#AUTOTHROTTLE_MAX_DELAY = 60
# The average number of requests Scrapy should be sending in parallel to
# each remote server
#AUTOTHROTTLE_TARGET_CONCURRENCY = 1.0
# Enable showing throttling stats for every response received:
#AUTOTHROTTLE_DEBUG = False

# Enable and configure HTTP caching (disabled by default)
# See https://doc.scrapy.org/en/latest/topics/downloader-middleware.html#httpcache-middleware-settings
#HTTPCACHE_ENABLED = True
#HTTPCACHE_EXPIRATION_SECS = 0
#HTTPCACHE_DIR = 'httpcache'
#HTTPCACHE_IGNORE_HTTP_CODES = []
#HTTPCACHE_STORAGE = 'scrapy.extensions.httpcache.FilesystemCacheStorage'
至此,一个简单的Scrapy框架爬虫就填坑完毕了
启动框架
启动方式有命令启动和配置启动两种,这里就介绍简单命令启动
命令:scrapy crawl douban (douban是爬虫的名字,就是spider/douban.py里的name的值)
结果展示:
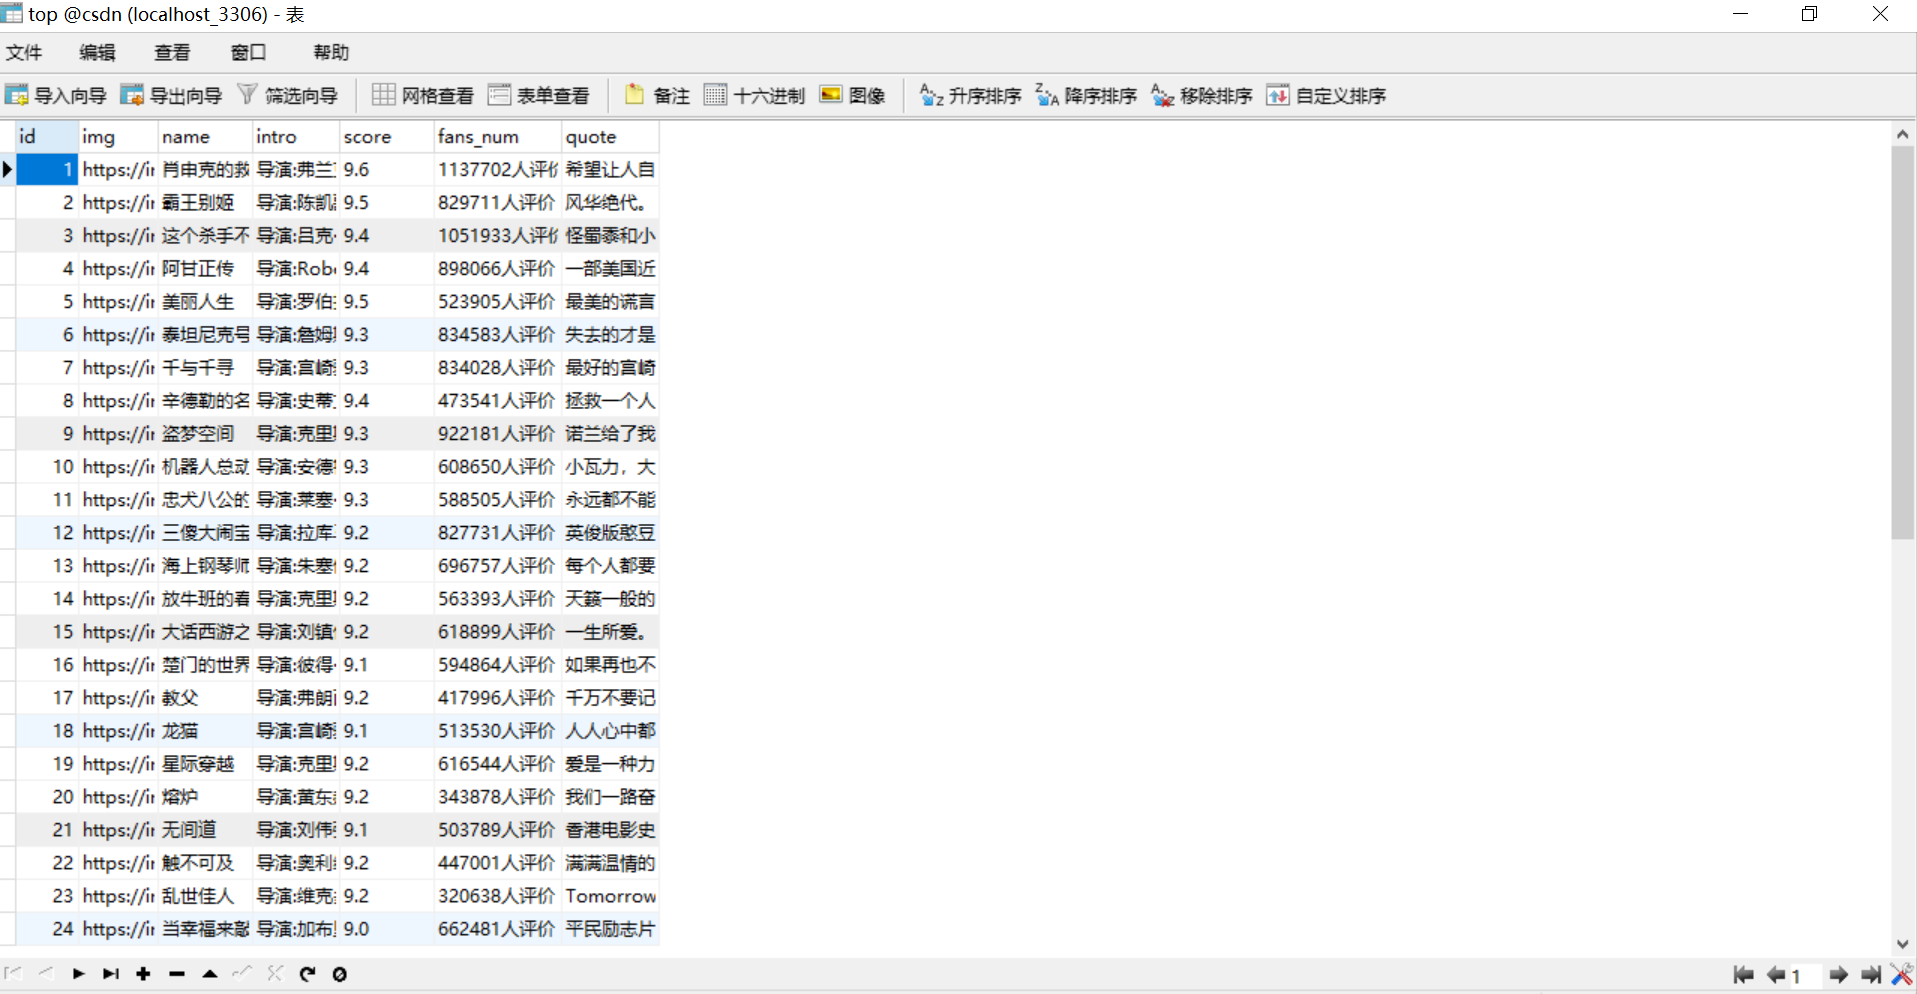
总结:要实现简单的 下载-->解析-->保存到数据库,我们只需要:
1. 编写 items.py 来统一数据格式
2. 编写 spider 来下载和解析
2. 编写 pipelines.py 来保存数据
4. 编写 settings.py 来配置功能
github:https://github.com/JeesonZhang/pythonspider/tree/master/firstscrapy